Let’s take a (short) break from vintage computers. As a consequence to the COVID-19 pandemics and lock-downs, home-office turned from an occasional to a day-to-day way of working. We had moved 3 years ago to a nice Haussmannian style apartment, right in the center of Lyon. At this time, we had planned turn one of the rooms into a study, but, alas, it just stayed the way it was. Lack of time and energy, I guess …
Even if my desk was sitting there, I barely used the room. Instead, it was mostly used for storing and piling up unused or unpacked stuff. It was gathering dust. It was dark, without any decoration. Not an enjoyable room to work in.
![]()
Home improvement
This room was – from far – the less nice of the house. Previous owners did not take care of it. Walls were covered with an unbearable dark gray color. They punched holes just about everywhere. There was one single shelf, badly fixed to a wall, about to fall. Some walls and corners had cracks. This room just had … a very sad atmosphere. I just could not work in it, at least not for long periods of time. And I tend to work a lot.
Then came lock-downs and mandatory (thus safe !) remote work. The pressure was on. A long overdue home improvement started. It was time to turn this unpleasant room into a nice study !
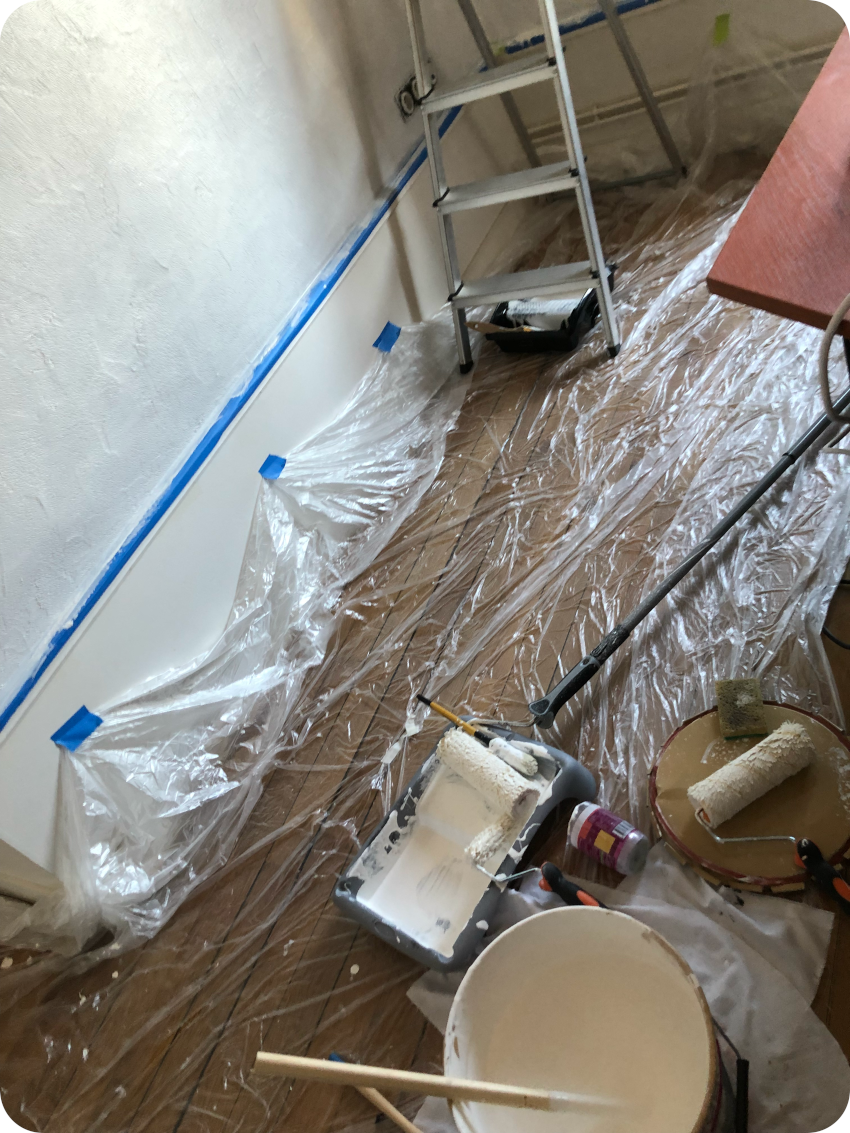
We cleaned everything, patched and repaired the walls, strengthened and straightened a few wall corners with wooden rails. We removed the bad ugly shelf. We chose bright light colors for the walls: plain white on one side, a very light yellow color for the other side of the study.
Even if we selected premium quality paint, we had to apply up to four layers to get rid of that ugly and sad gray color. We cleaned the hardwood floor, cleaned and put back the bookcases and the desk. But it was worth the pain ! It looked good. It smelled nice. It sends good vibes (whatever this actually means).
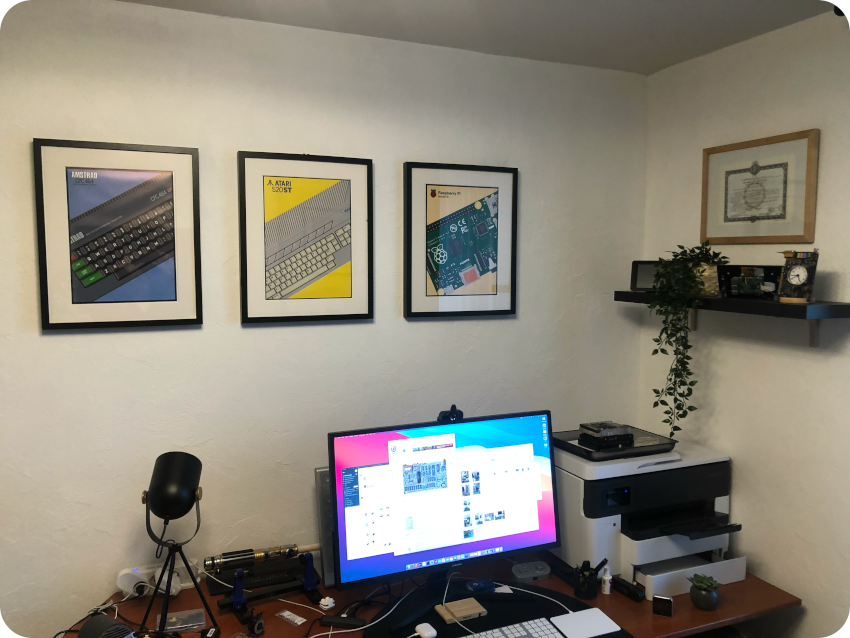
After the heavy work, it was time to create a “retro-computer style” decor, starting with a few home-made posters.
Retro-computer posters
I couldn’t find the right posters online. I almost set my mind on patent posters for retro-techs. But I wanted something more colorful. So … why not creating my own posters, dedicated to old 8-bit / 16-bit computers ?
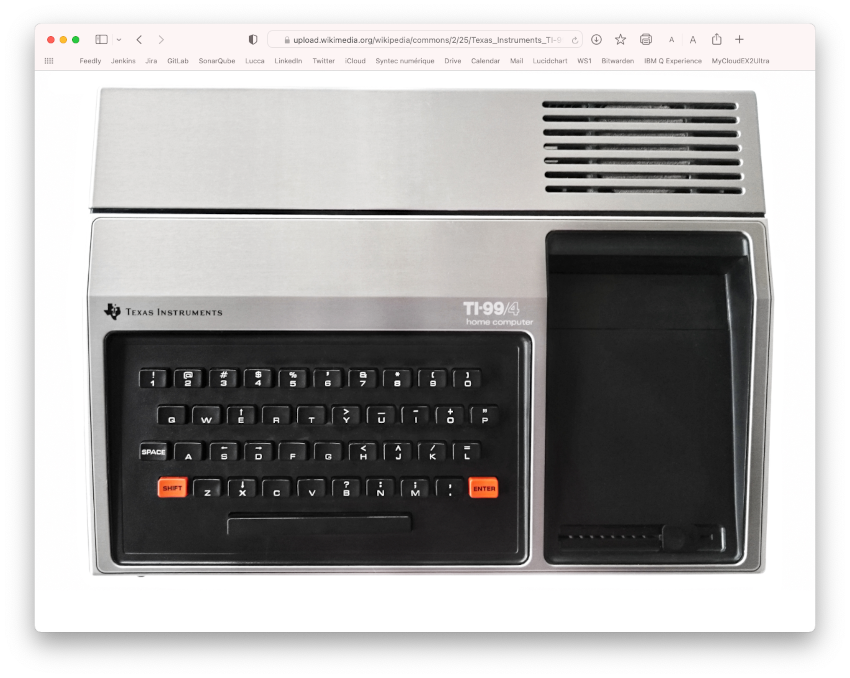
The first step was to find a good high resolution photo of a vintage computer, taken from the top (here, the picture of a TI-99/4A from Wikimedia):
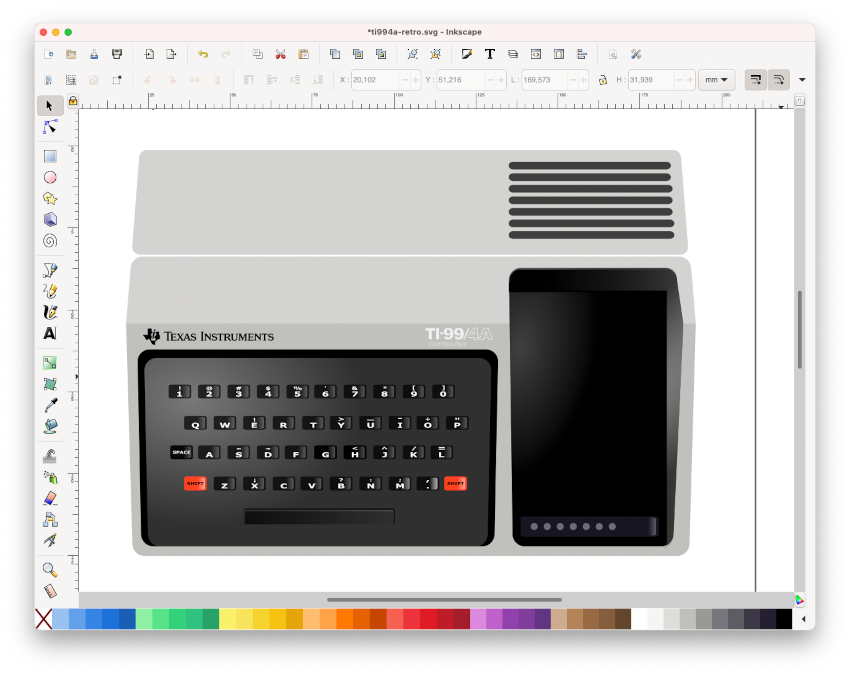
The next step was to import the picture into Inkscape (my favorite open source drawing software). Then I created a new layer on top of it, where one could start the drawing process. I didn’t use the vectorization tools provided by Inkscape. They give good results on simple vector-like images, but … not that good on real photos. I manually redrew on top of the image, with simple shapes at first, then added nodes to better fit each element of the computer, then added colors, gradients, effects, shadows and lights. It is a bit tedious, but it gives reasonably good results in a something like an hour of work:
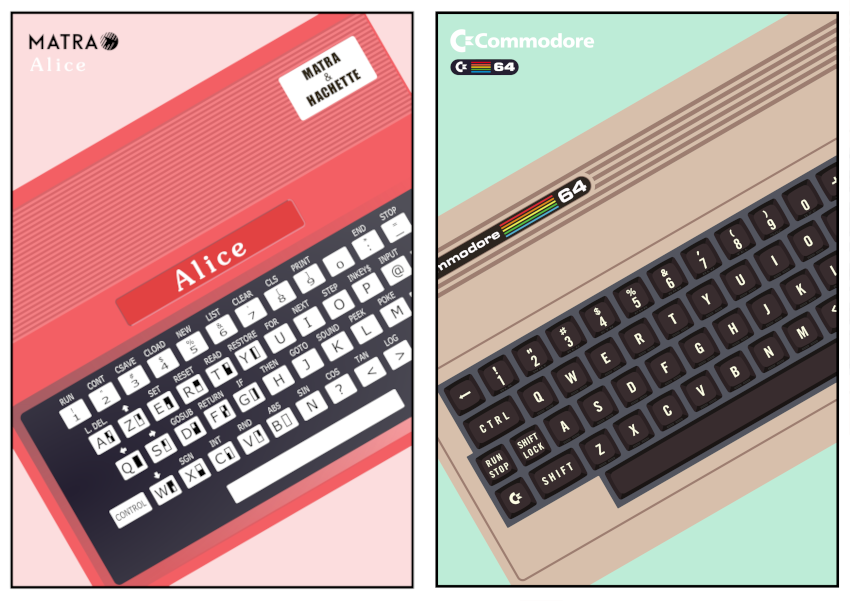
It had been a long time since I created digital artworks. I enjoyed it so much I iterated this process for a whole bunch of vintage computers:
- Texas Instruments TI-99/4A
- BBC Micro
- Apple ][
- Matra Alice 32
- Commodore 64
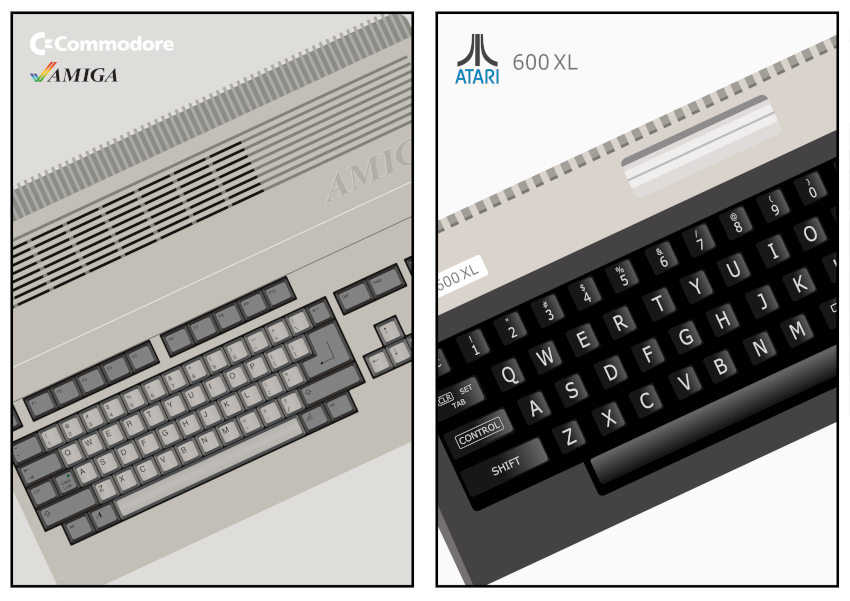
- Commodore Amiga
- Atari 600XL
- Atari 520ST
- Amstrad CPC 464
- Sinclair ZX Spectrum
- Apple Macintosh 128k
- NeXT Cube
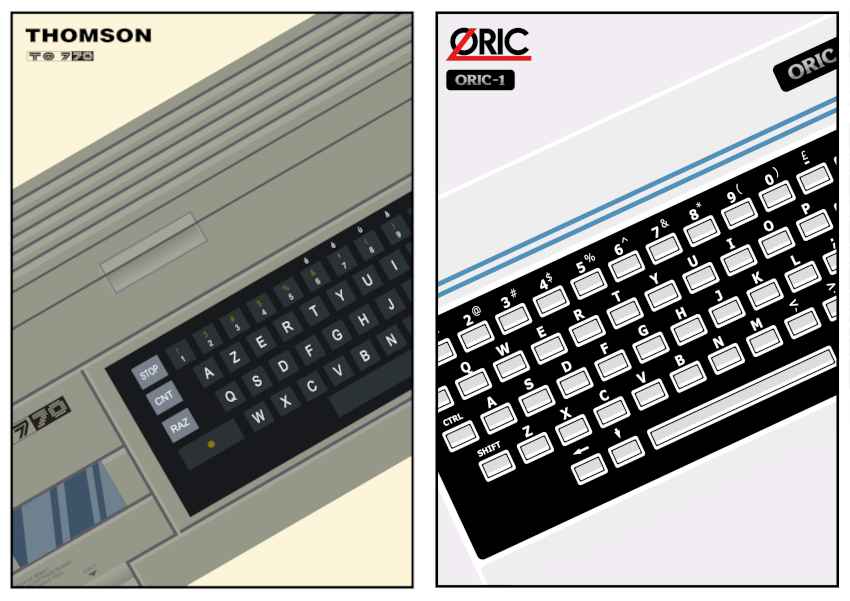
- Oric 1
- Thomson TO7-70
- IBM PC
I created one SVG file for each these models, then added colored backgrounds, logos & names. I slanted the computers to finalize each poster and giving it a nice look. The last one I created was dedicated to the beloved Raspberry Pi’s. This time, no re-drawing was needed: I directly used this SVG illustration from Wikipedia to create the poster.
Here are a few results (some don’t have the proper angle, it’s been fixed later on):

I selected the ones I liked the most, printed them out with a A4/A3 printer, then framed each of them:
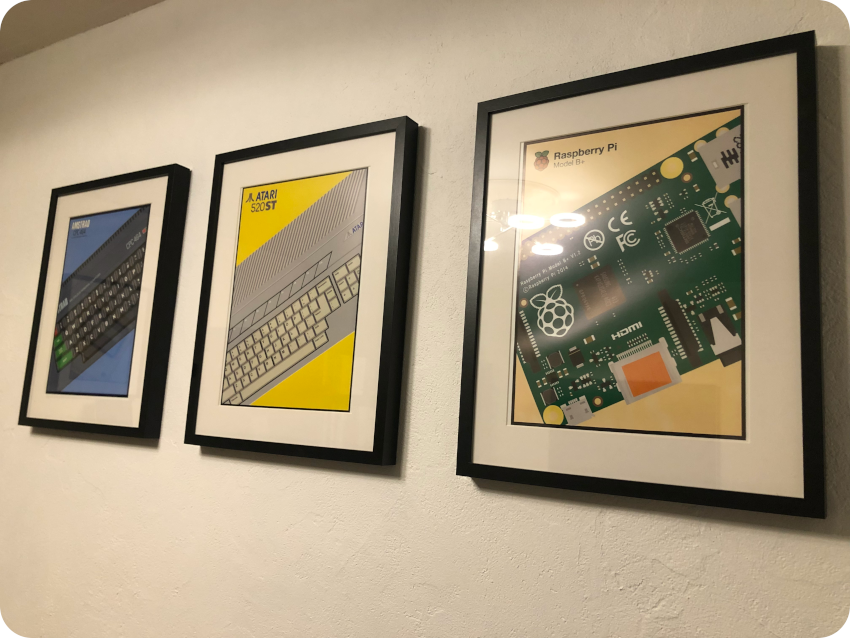
The result is not that bad !
Shelves for vintage devices
With this retro-computing fever going on, I need a little more space to store vintage devices, so I add a few shelves to the study. Here’s one shelf dedicated to Sinclair computers:
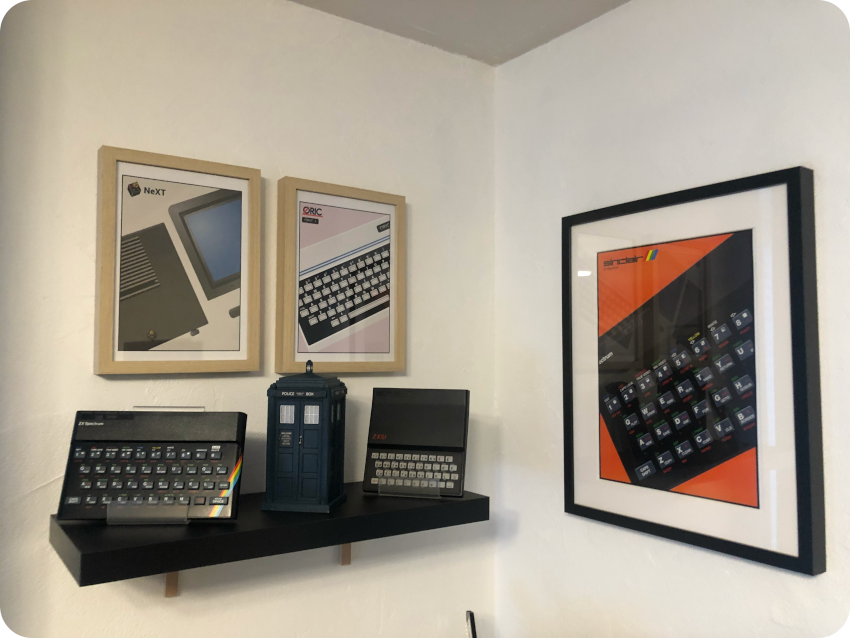
And here’s a little shrine for my old Apple devices:
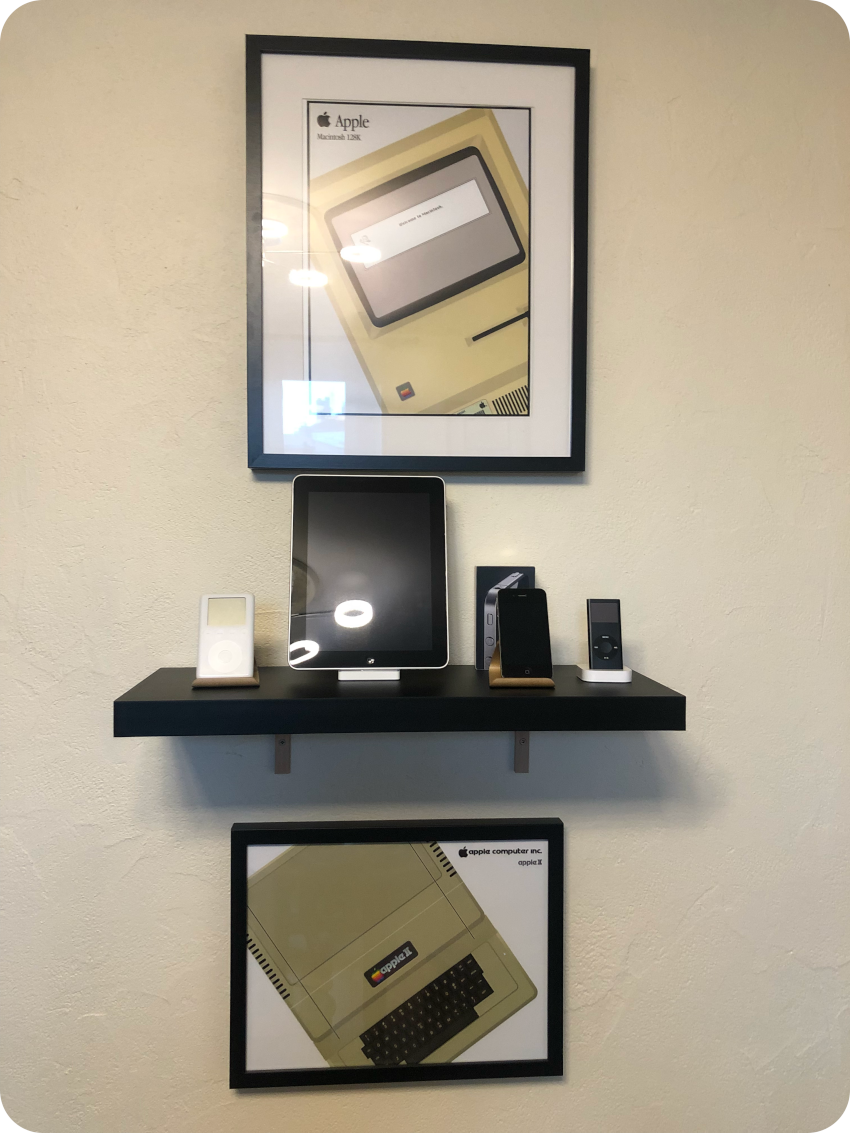
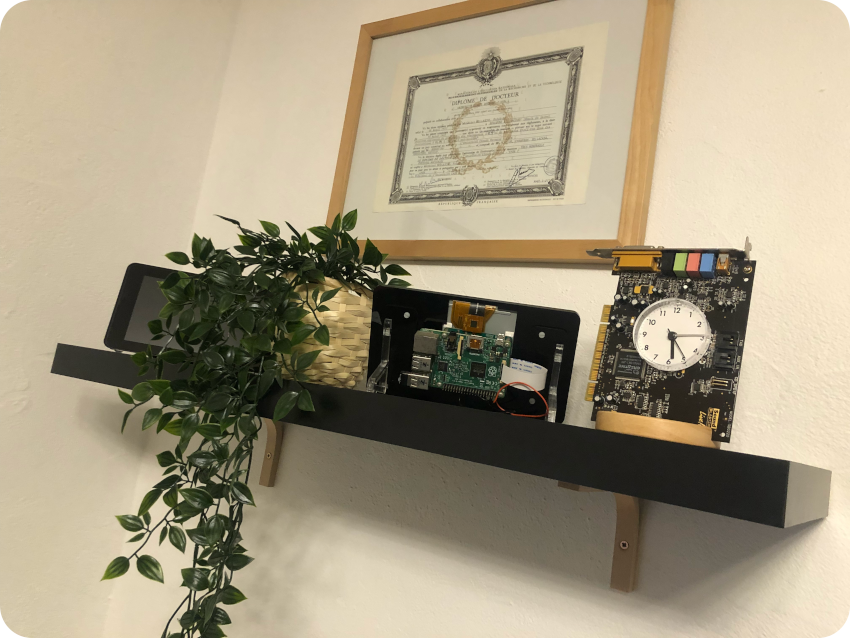
The last one is waiting for new … old devices. In the meantime, it stores a few Raspberry Pi-based projects and an homemade clock (more on this one in a few paragraphs):
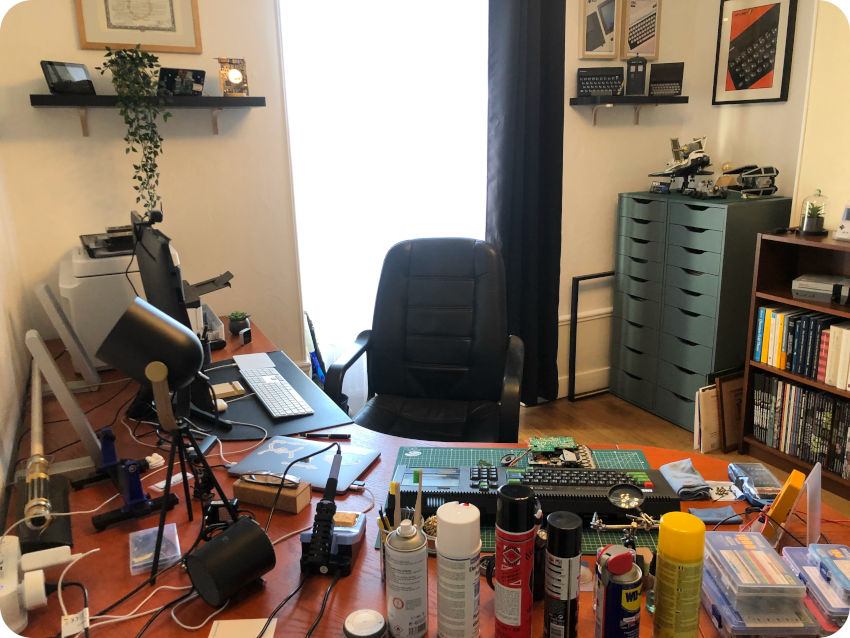
Creating a rudimentary bench
Since I wanted to play with more vintage devices, I needed to set up a bench to work on them. I am by no mean a professional, and I don’t want to spend too much on what is only one of my hobbies. I’ll be adding tools in time, but I don’t think I’ll go as far as buying a digital oscilloscope for example. So, there is my bench for now. It is rudimentary, but it fits my current needs:
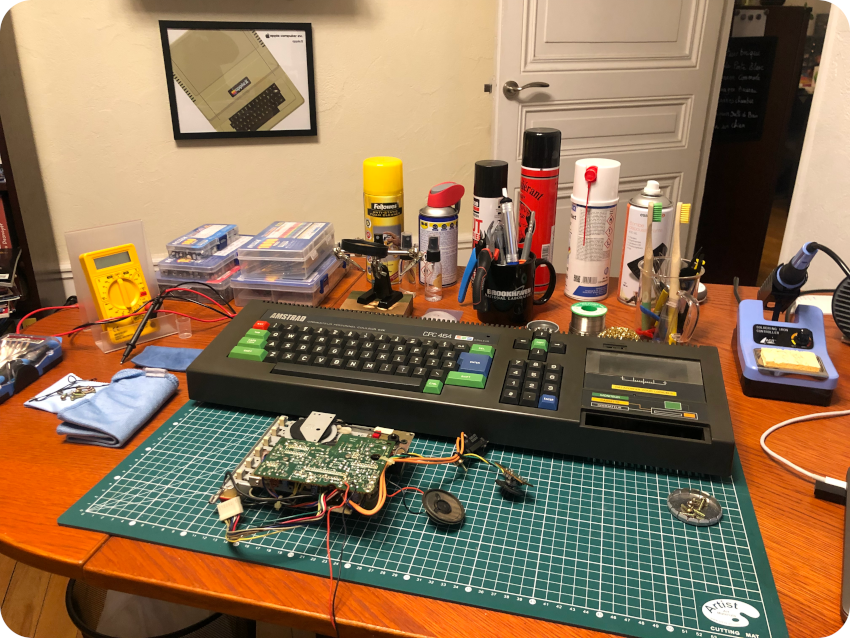
And, yes, I started working on an Amstrad CPC 464.
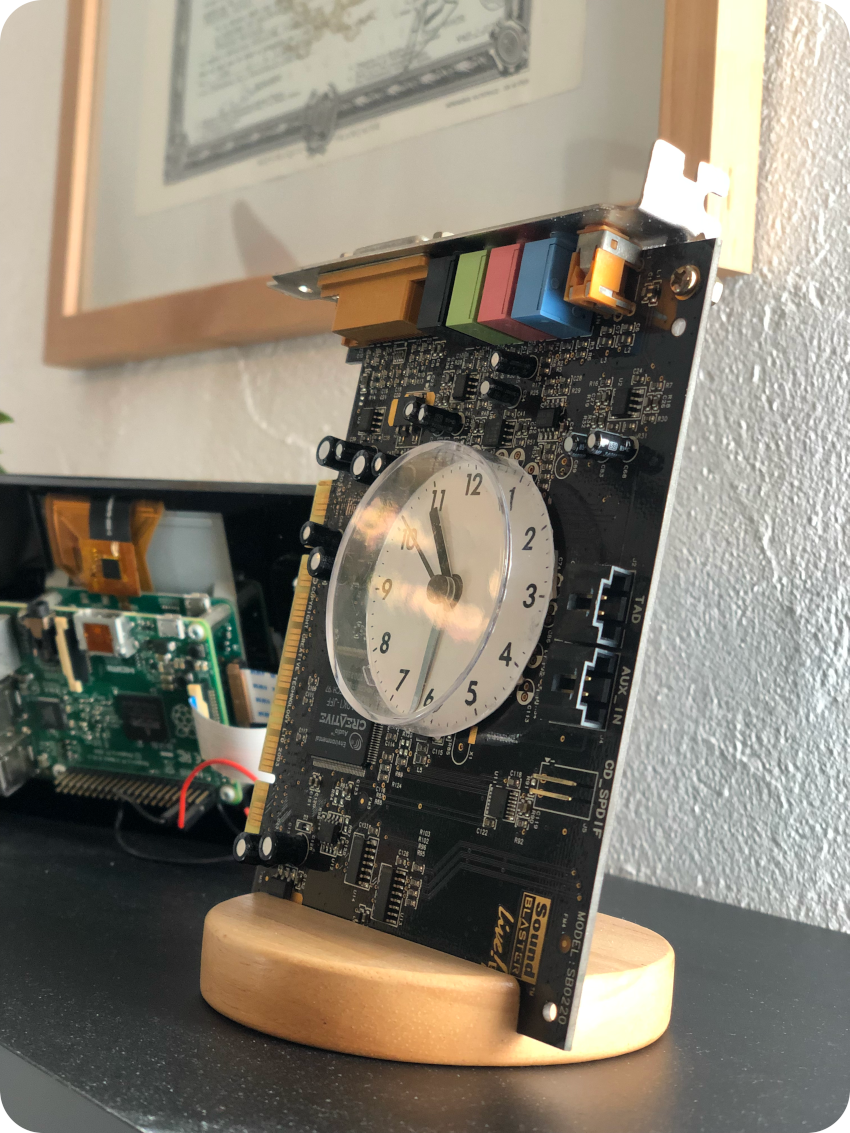
Retro-styled Clock
I wanted a few more decorating objects. I went online to shop for something I’d like, and found guys on Etsy building stuff out of old PCB and expansion cards. Based on that brilliant idea, I started building a digital clock out of an old Creative Labs Sound Blaster Live! card I had in stock for many years:
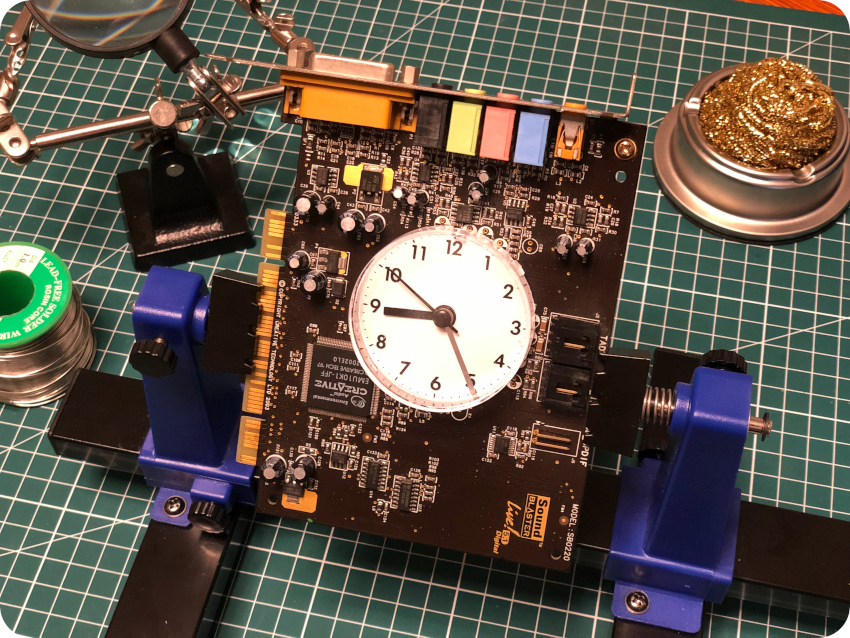
I bought a cheap clock just around the corner and took it apart. I grabbed the sound card, cleaned it with IPA. I de-soldered a few components to make room for the clock. I drilled a hole into the card, then glued the back of the clock to the back of the PCB. I put back the clock face with double-sided tape, then re-attached the hands to the pivot that was sticking out of the hole. I glued back the transparent cover to the front of the board, found a wooden stand and … there we go, not too bad looking either !
Final touch
The study looked now so much nicer !
As a final touch, I
- Put new curtains
- Shopped at Ikea’s for a set of two green cupboards for storage purposes
- Cleaned the bookcases and put back books in it (in a proper order)
- Added vases and a few (plastic, but good looking) plants
- Put new lightnings : LED-based for the ceiling, plus two Ikea homekit-connected lamp bulbs (one on the desk, the other one for the new “dual” cupboard)
- Added a homekit-connected thermostat to the radiator (just like in the all other rooms).
Maybe I’ll add an HomePod mini (one of the new colored ones) later on.
I hanged my good old 42″ Samsung LED TV to one of the freshly repainted wall, gathered the cables (power + HDMI + SCART + antenna + composite) inside a plastic sheath. I connected my newly built RecalBox-based retro-console to it.

Finally, I made room for a few Lego sets and MOCs.
But … more on this new hobby in a next post !
Hi Fred,
I really enjoy your blog, but this particular entry triggered a very practical question on my side about Inkscape. I’m not a designer and I have used Inkscape only for vectorizing very simple, usually monochromatic, icon images, but never high resolution pictures with lots of colors like you did. I’m really amazed about the results you got for your posters, they look fantastic!
Do you have any video or are you planning to write a blog entry about vectorizing images with Inkscape?
Best regards,
Hi Federico,
Thanks you for your comment ! Actually, I don’t use Inkscape vectorizing tool because, indeed, results are not that good for highly detailed, colorful images. I load the source picture into Inkscape, then redraw manually on layers on top of the picture. I will try to make a video or a small tutorial.
Best regards !