Last year, right on time for MARCHintosh 2022, I acquired my very first classic Macintosh, that I have been enjoying ever since. But the vintage-computing fever troubled my mind, pushing me into other arms and having fun with Atari‘s, Matra-Hachette‘s and Oric‘s delightful 8-bit machines. But … even if I didn’t buy any new hardware for classic Macintosh for over a year, I am still an insufferable Apple fanboy ! 
So, this year’s contributions for MARCHintosh will be about running Macintosh software on non-Machintosh hardware !
![]()
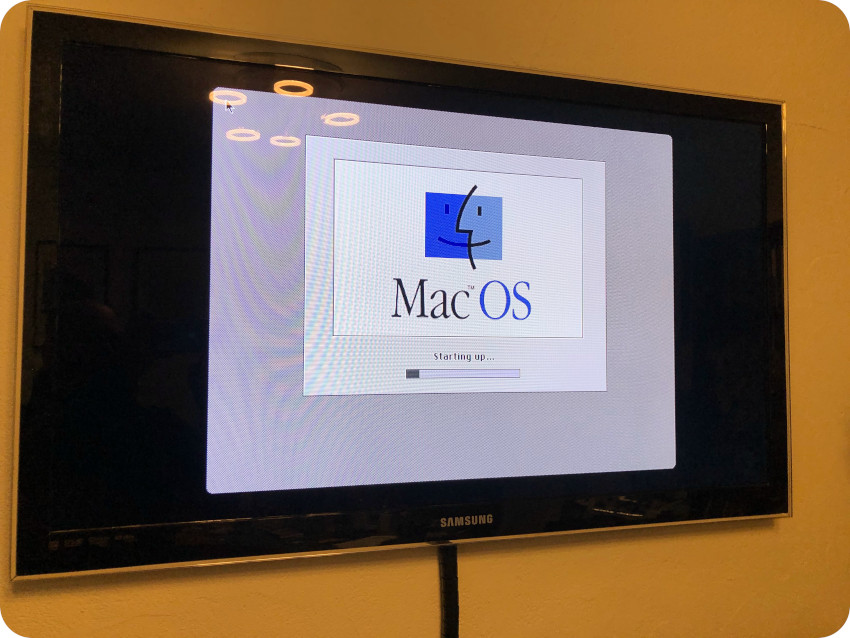
Classic Macintosh on Recalbox 9
Recalbox is my favorite all-in-one retro-gaming console. I have already mentioning it a few times in this blog, and I have built a few projects with it. It is the platform that got me into retro-gaming, and, later on, into vintage computer hardware.
At each release, Recalbox adds bug-fixes, performance improvements and new features. Recalbox 9.0 was released on 24 Feb 2023, and I promptly upgraded my Nes4Pi console the following week-end:
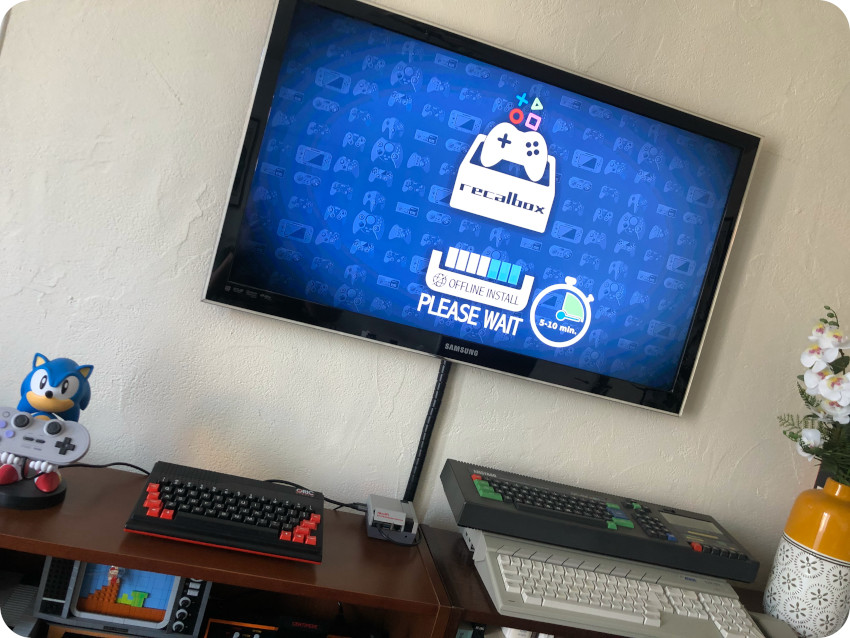
Among its new features, one of them particularly caught my intention (yes, the 5″1/4 disquette by the side of the Macintosh is really weird):
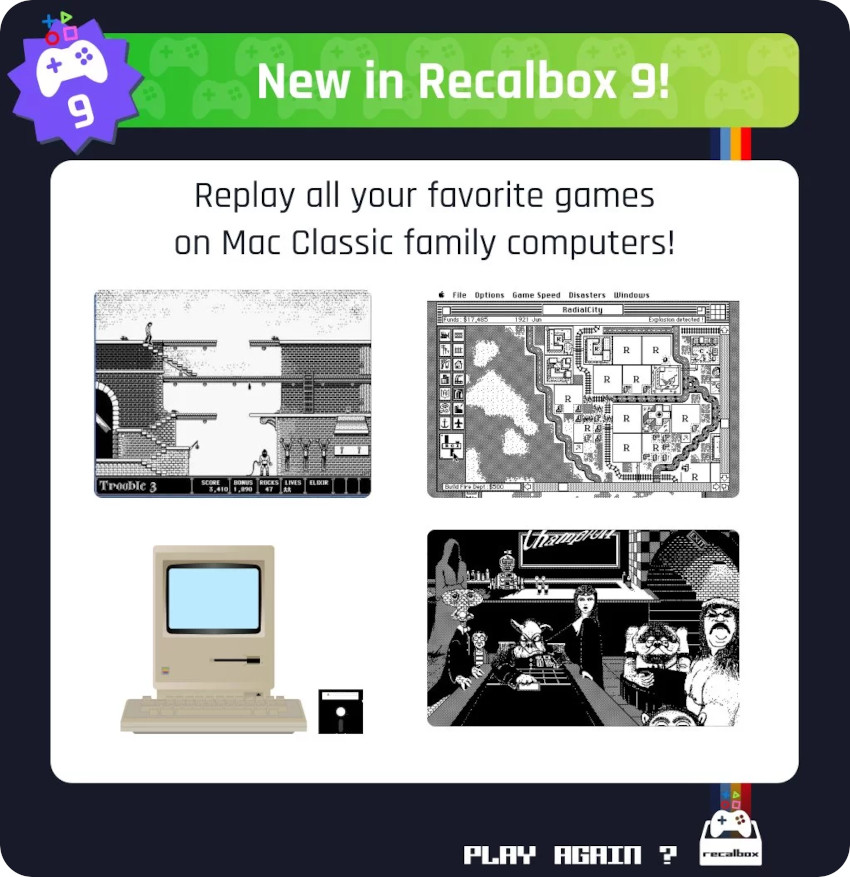
Recalbox 9 added new emulation systems, such as the Philips VG5000 or the Z-Machine for Infocom‘s text adventure games., and … the Macintosh Classic family of computer !
Libretro and Mini vMac
How did they achieve this ?
Recalbox is a set of different independent emulation systems (called “cores”), united within the graphical frontend EmulationStation. Many of these cores are based on the Libretro API, like libretro-cap32 for Amstrad CPC‘s, or libretro-hatari for Atari ST‘s. Themselves are based on the Caprice32 and the Hatari emulators codebase.
For Classic Macintosh emulation, Recalbox relies on libretro-minivmac, which is the Libretro port of the Mini vMac emulator. I was already familiar with Mini vMac, that I tried and quickly presented in an old post. Mini vMac is the spinoff of vMac, an opensource emulator that has been discontinued. Mini vMac is developed by Paul C. Pratt. Unfortunately, Paul hasn’t been seen online for over a year and the community is very worried about him.
There are three variations of Mini vMac
- Standard version (emulating a Macintosh Plus)
- Macintosh II version (built with the -m II option)
- Macintosh 128K version (built with the -m 128 K option)
Here is a shot of the BIOS checking screen from Recalbox:
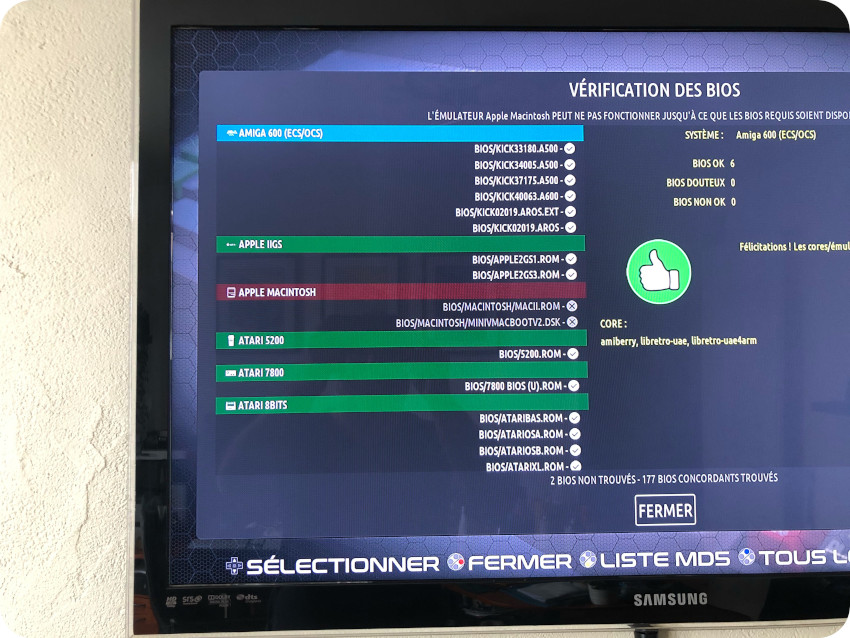
According to the screen, for the Macintosh emulator to work, two “BIOS” files are required:
- MACII.ROM: this a ROM dump from a Macintosh II (available here for example: https://github.com/nyteshade/mini-vmac-setup/blob/master/MacII.ROM). It means that the Mini vMac variation used is the second one and that Recalbox will emulate a Macintosh II
- : this a System 7.5.5 Boot disk, which is also including Norton Utilities, Disinfectant, ResEdit, Stuffit, Tex-Edit, HyperCard Player and Disk Copy (MD5: a249565f03b98d004ee7f019570069cd). It is available here for example: https://sites.google.com/site/minivmacapplicationsv6/systems-os.
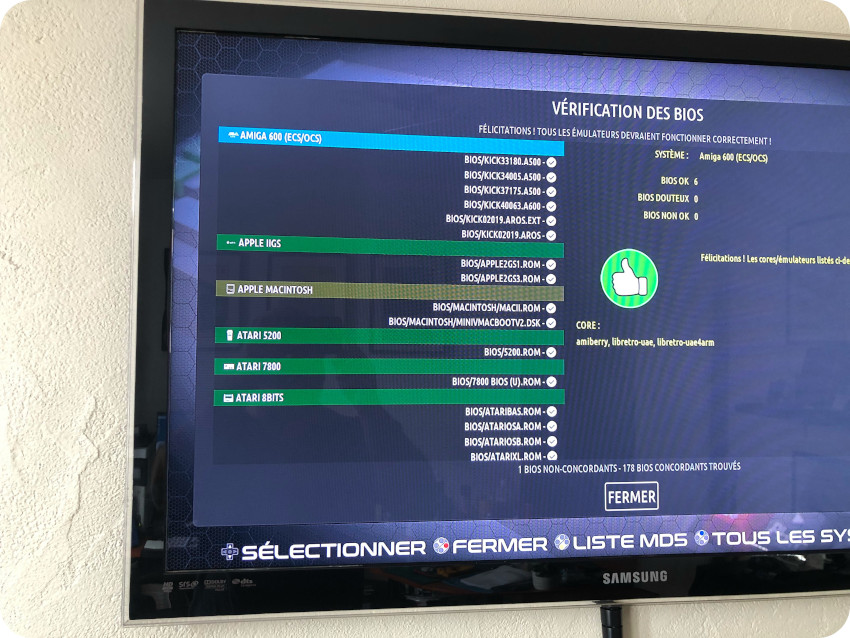
Note: the green color of the “APPLE MACINTOSH” section is slightly off (but still green) because my “
Theme customization
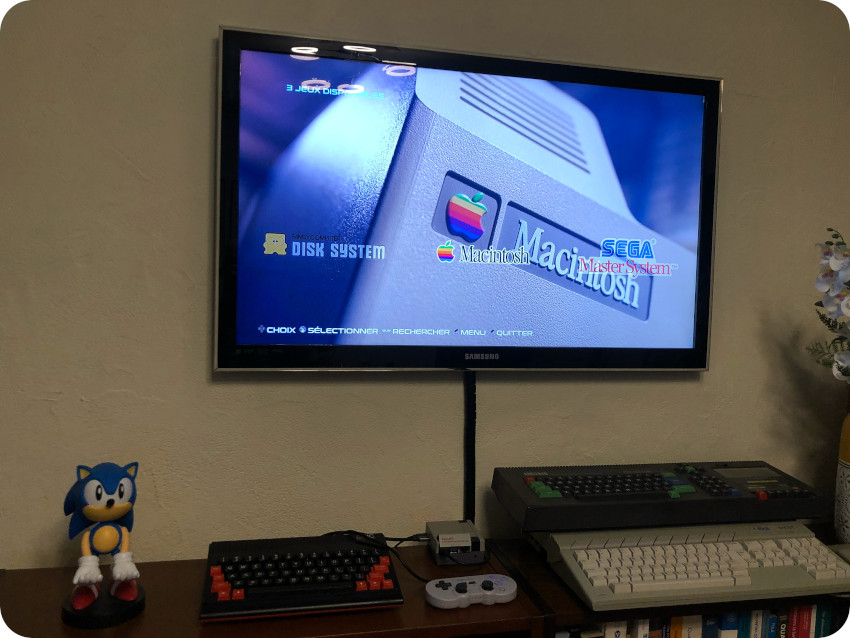
The first thing I did was to create and add Macintosh artworks to the personalized Recalbox theme I use on my Nes4Pi console Here is how it looks:
- Using the joypad, you can slide between supported systems (only the ones with at least one game appear):
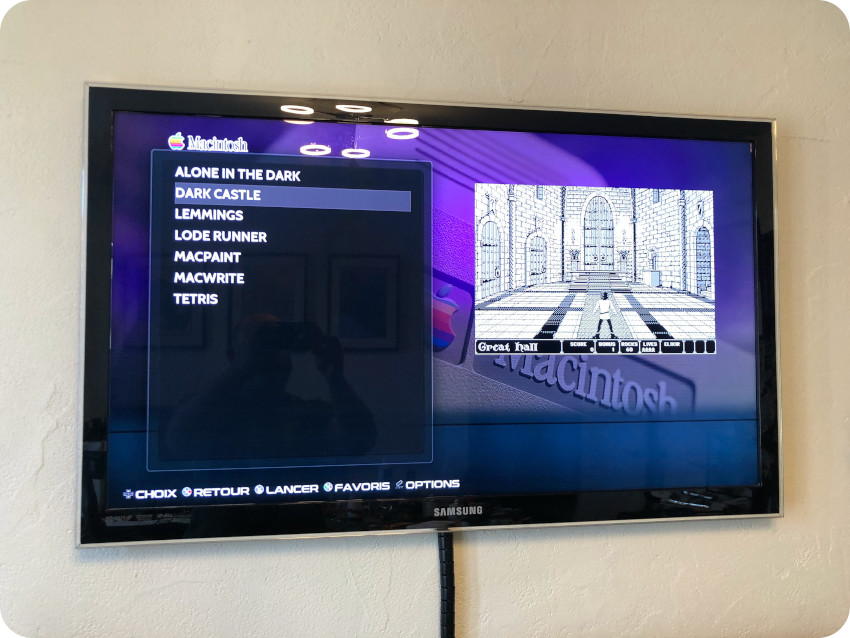
- Once a system is selected, a list of game / software titles is displayed. Each title can have an optional preview screenshot, description, or even a small video clip. From the list, one can select a title, then press “launch”:
Adding software (ROMs)
The easiest way to add new software (called ROMs) is to use the Recalbox web interface: once connected, on the left panel, select “ROMs”, then select the desired system from the list (here “Apple Macintosh” was selected).
From this interface, pressing the “Upload ROMs” button, allows to drag / drop new ROMs. Information can later be edited / customized. Here the “Dark Castle” entry was modified to add a preview screenshot:

Recalbox accepts the following formats for Macintosh software package:
- *.cmd
- *.dsk
- *.hvf
- *.img
- *.zip
I had already collected and created a few .dsk files while working on my Macintosh Plus. But, since Recalbox works on a “title by title basis”, I wanted to created one .dsk file for each software I wanted to try.
For this, my workflow has been the following;
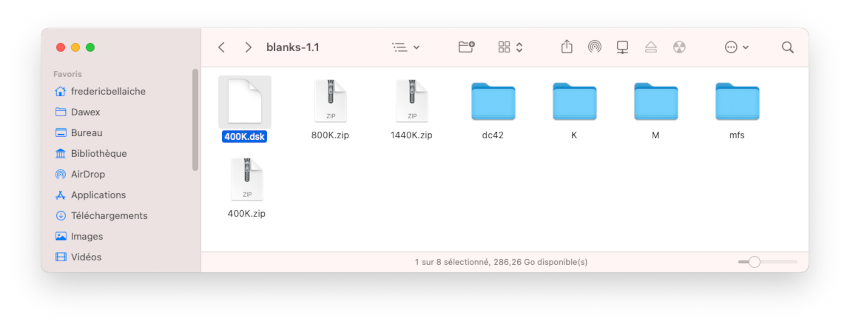
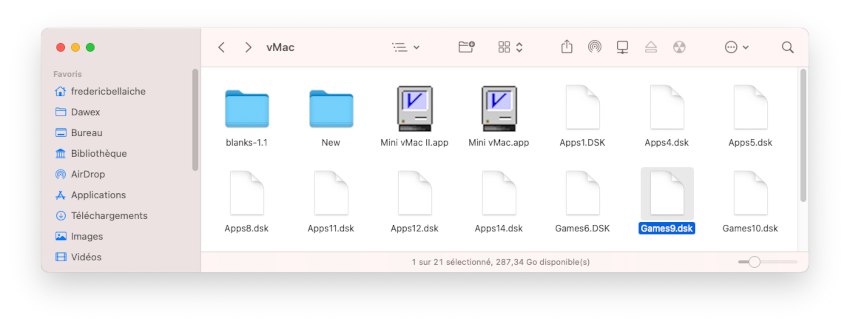
- Select a blank .dsk file of the appropriate size:
- Select a .dsk file with a collection a games (here, “Games9.dsk”):
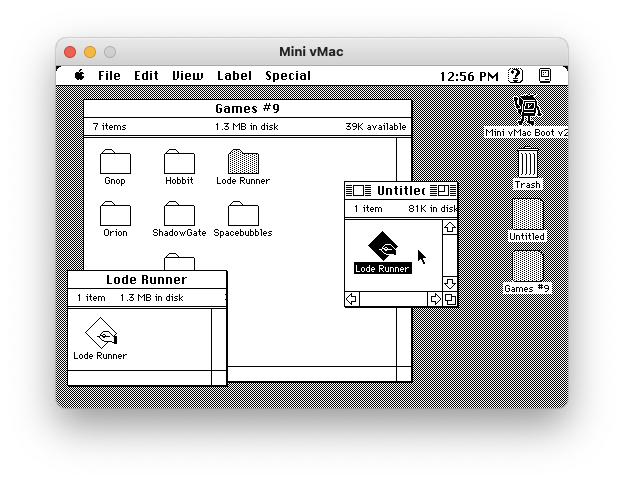
- Launch Mini vMac from my MacBook Pro, drag / drop both .dsk files to mount them, choose a game (“Lode Runner” for example) to be copied into the blank disk, renaming the blank disk (“Lode Runner.dsk” here), then unmount both disks and quit:
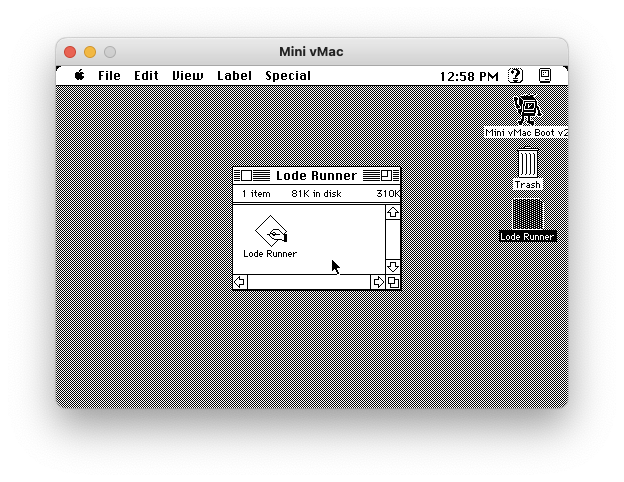
- Launch Mini vMac, drag / drop “Lode Runner.dsk” to mount the disk:
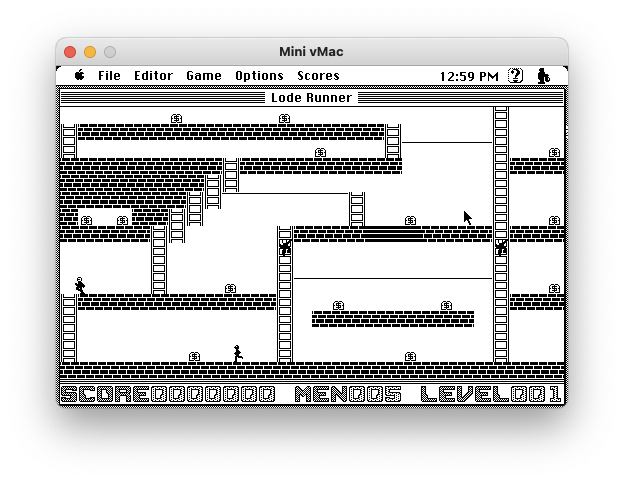
- Test the game:
Once tested, I added the .dsk file to Recalbox. I repeated the process for a few classic B&W games:
- “Dark Castle”
- “Tetris”
- “Lemmings”
- “MacPaint” and “MacWrite” (which are not exactly games, I know)
First try
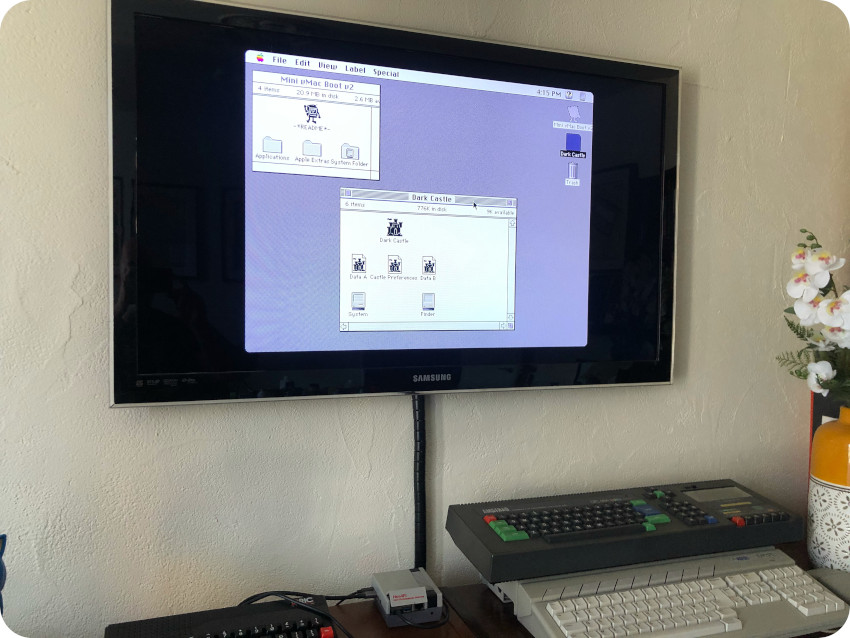
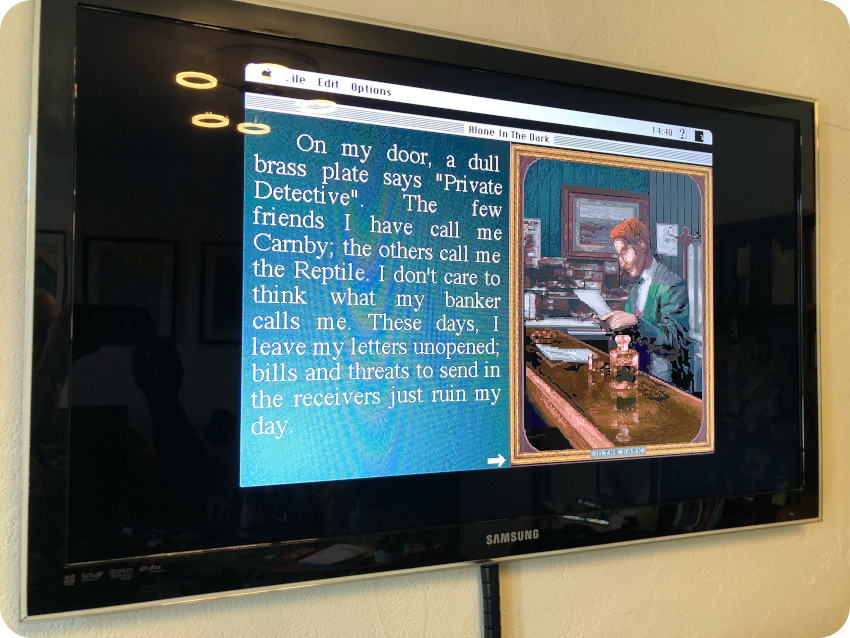
I selected “Dark Castle” and pressed “Launch”. It booted Mac OS right away. The rendering is actually perfect, much, much better than what it looks in the photo I took (I am terrible at taking pictures of TV’s, sorry for the Moiré patterns):
A few seconds later, I was greeted by the Mac OS Finder, the “Dark Castle” disk being already mounted. Nice !
By default, this system boots into 256 colors mode. Alas, “Dark Castle” only runs on a two colors monitors:
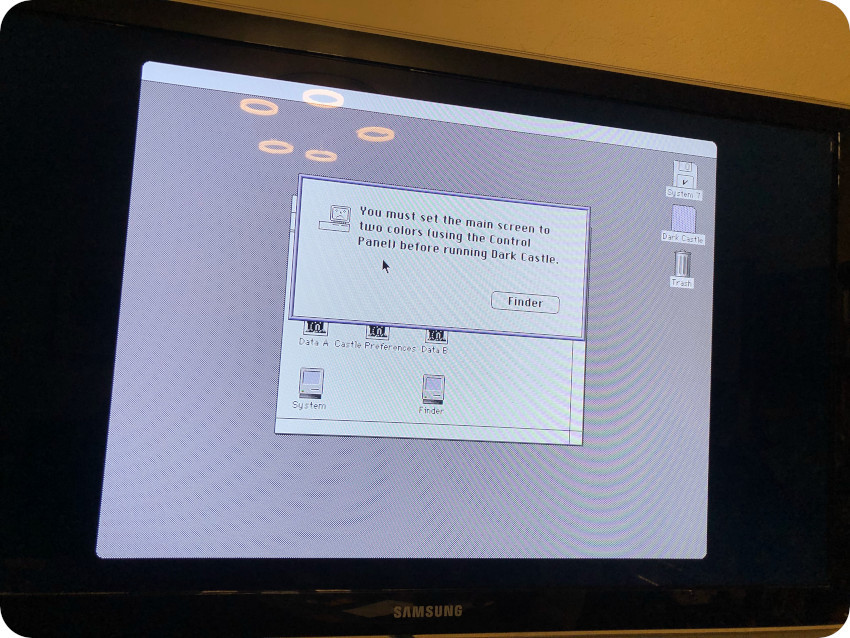
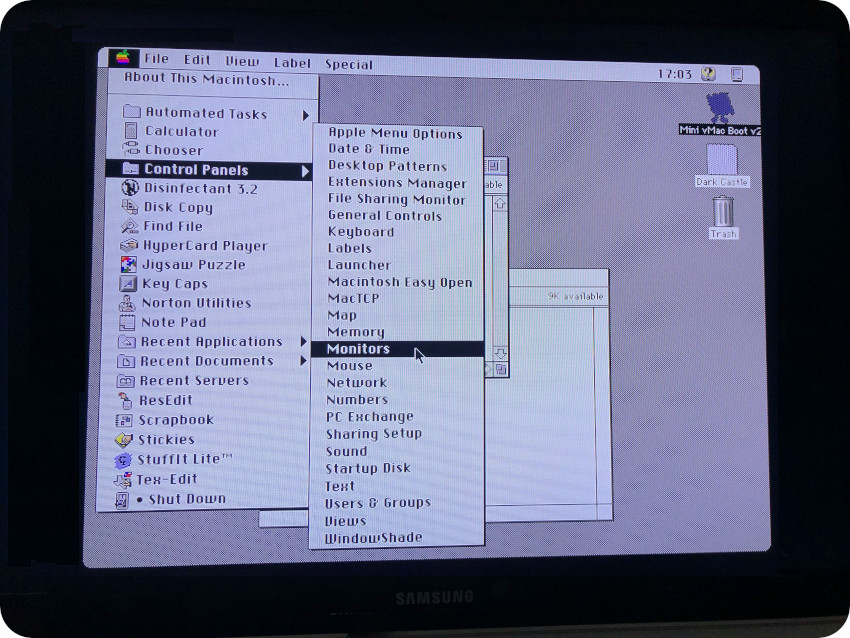
So, I reached for the Control Panels … but …
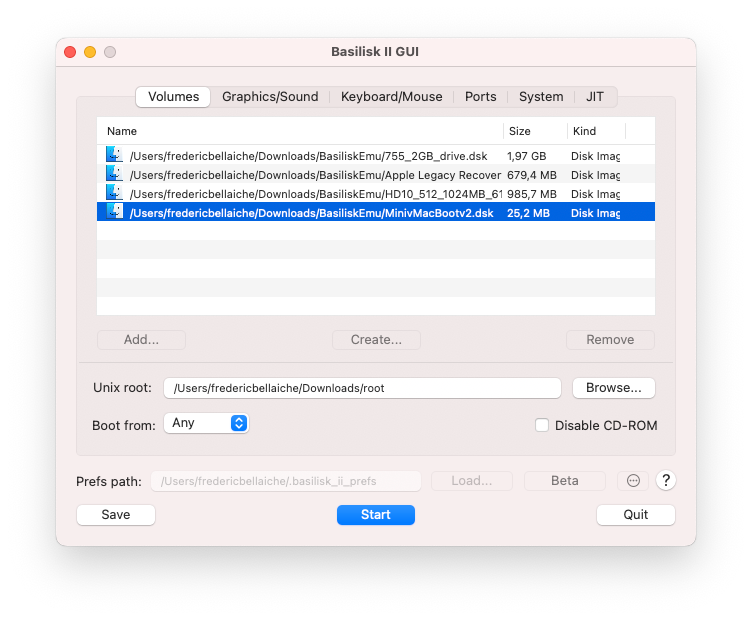
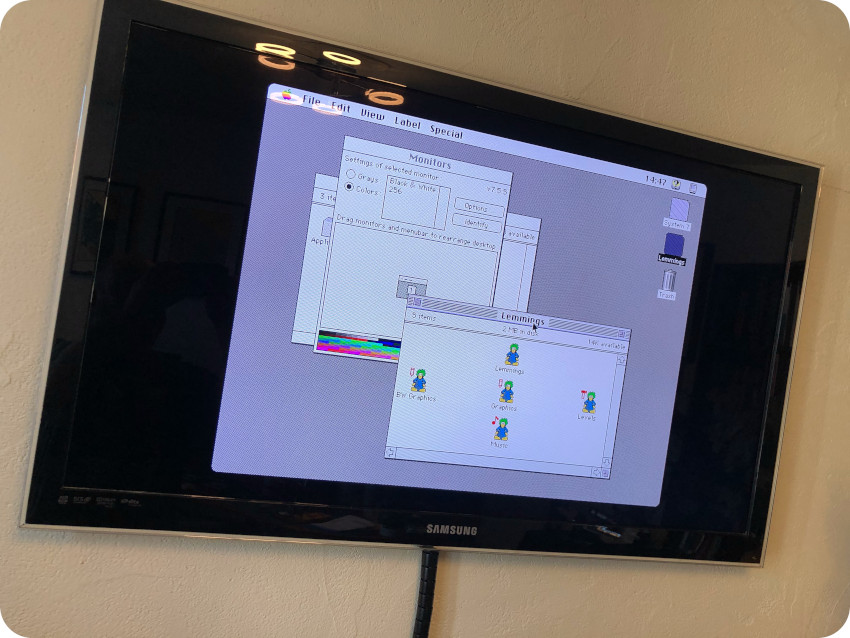
Fortunately, I had already built a full 7.5.5 2GB image and had it handy as a Basilisk II configuration. So, I fired up the emulator, attaching as a volume, so that I could add the missing Control Panel to it:
It was just a matter of dragging the “Monitors” Control Panel from the running System 7.5.5 and dropping it to the Control Panels folder of Mini vMac Boot v2:

Easy peasy ! I uploaded the customized version of
From there, I could change the “Monitors” settings and switch to a good old Black & White monitor :
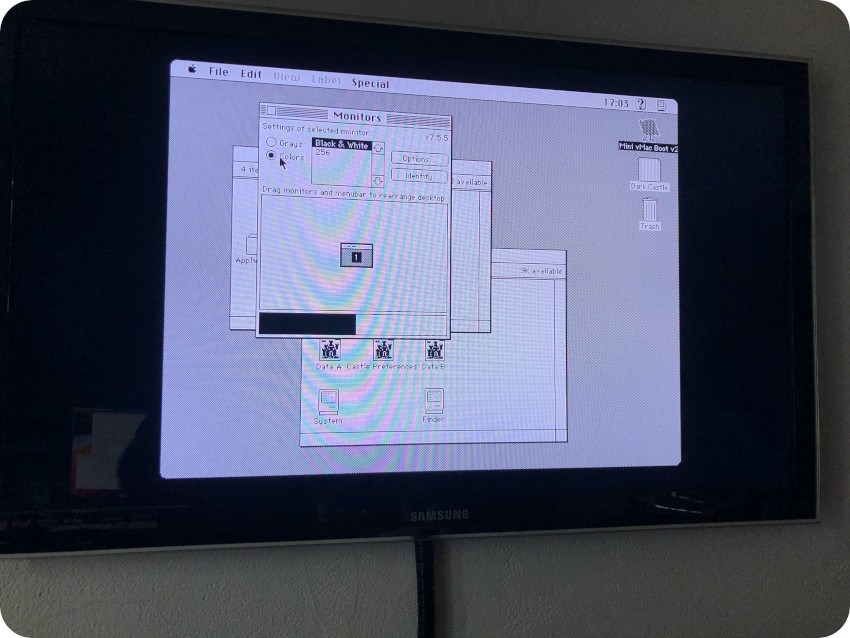
Let’s try again !
Once configured and once the settings were saved, I could play “Dark Castle“:

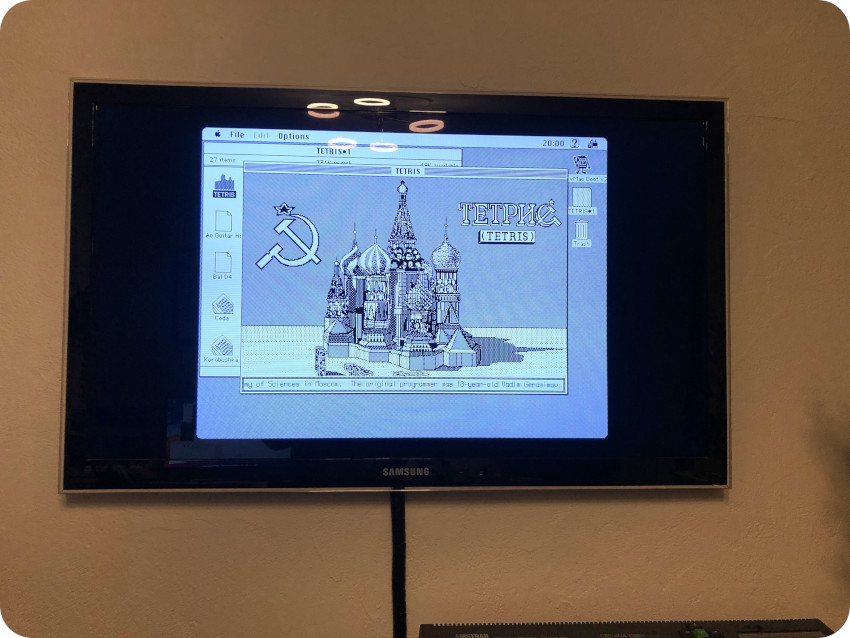
… and “Tetris“:
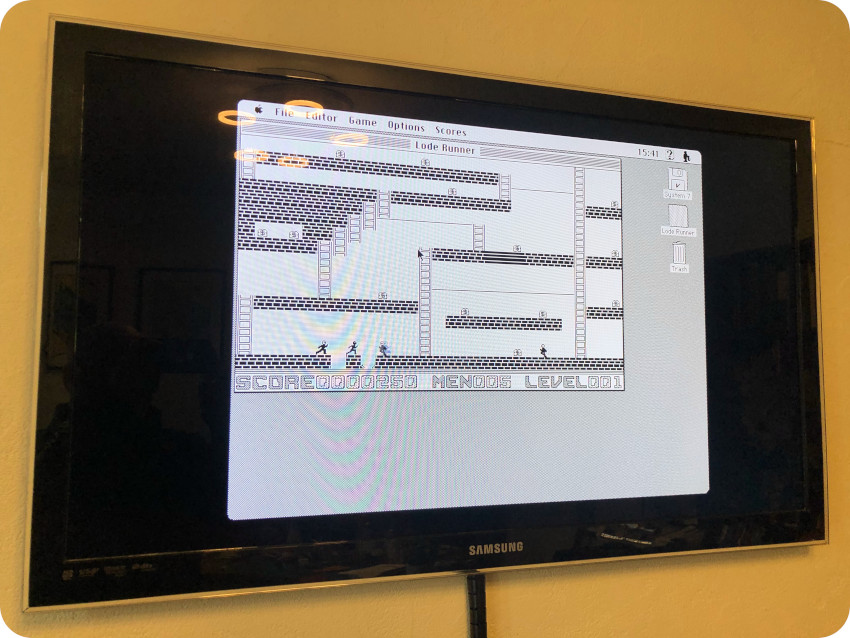
— and “Lode Runner“:
… and “Lemmings“:
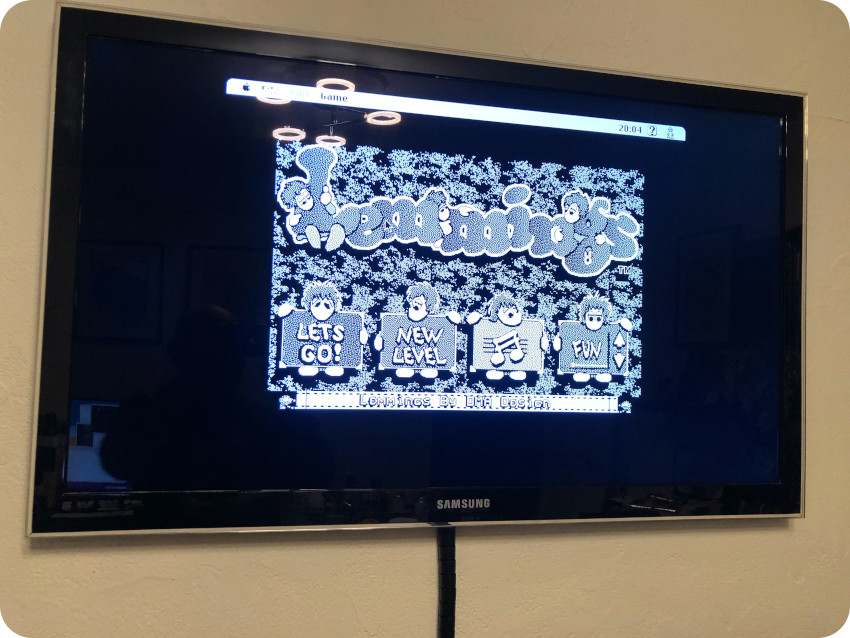
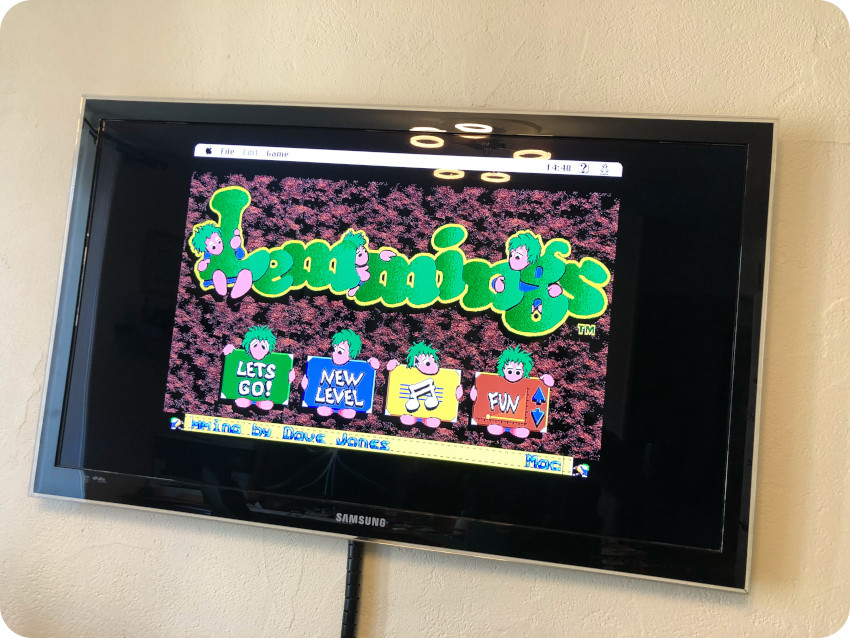
Oh, what the hell, “Lemmings” does look better on a color monitor. I switched back to the 256 colors mode:
Yes, much better looking !
Then I did a bit of optimization to the MinivMacBootv2 image disk, removing unnecessary (for me) extensions, removing the funky looking icon of the disk, renaming it “System 7”, switched back to Black & White, etc.
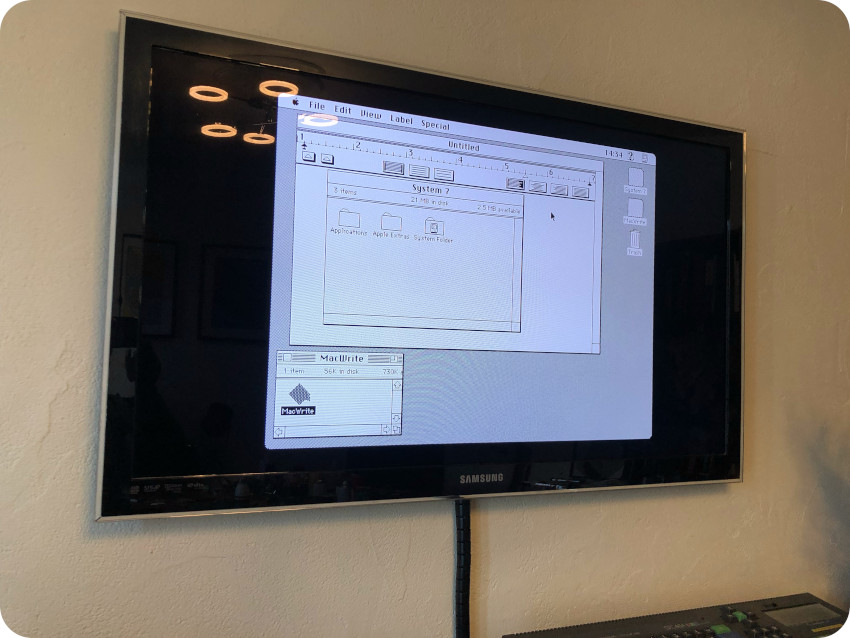
With this customization, it really feels like Recalbox is running a plain vanilla MacOS 7 system. So “serious” looking that I launched MacWrite:
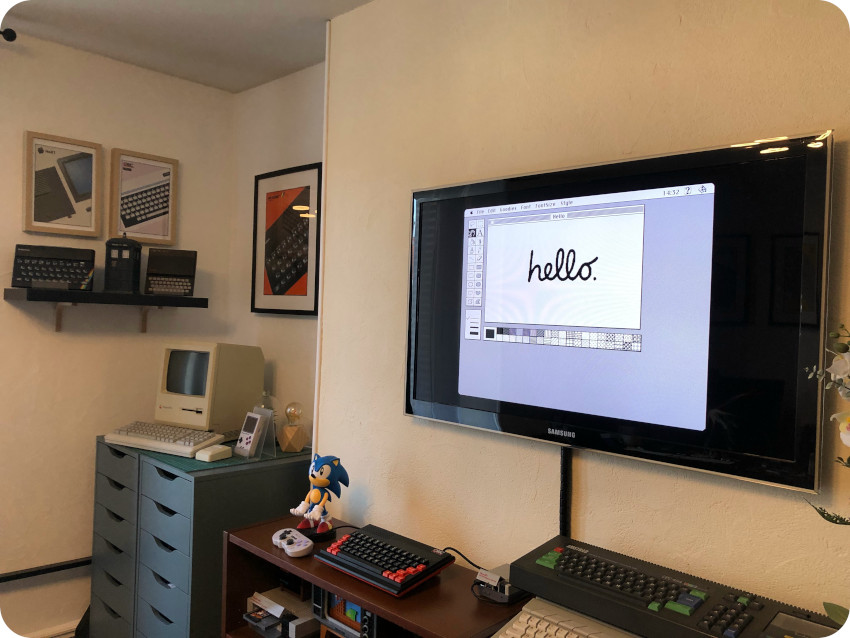
And, of course, I tried MacPaint, with the iconic “Hello” picture:
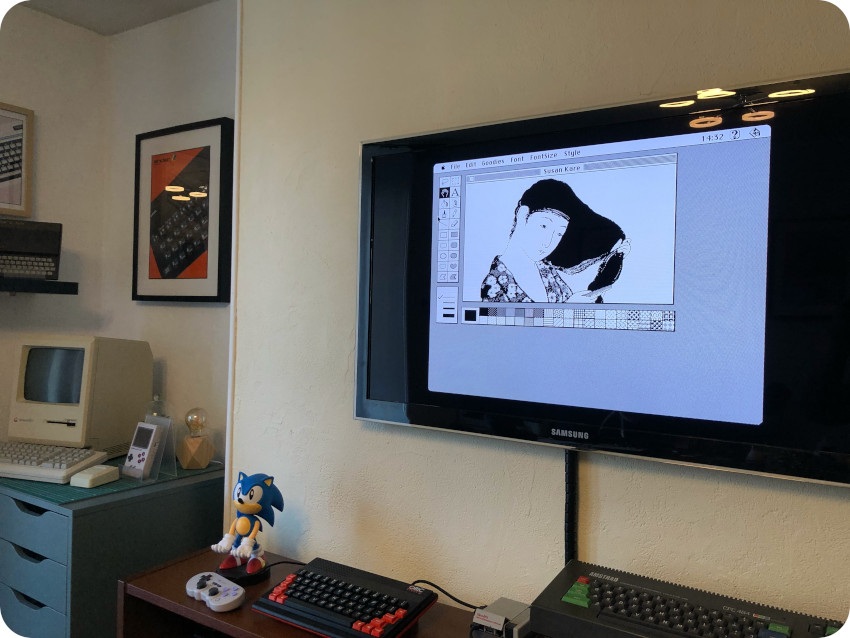
… and the fabulous artwork from Susan Kare:
Alone in (256) Colors
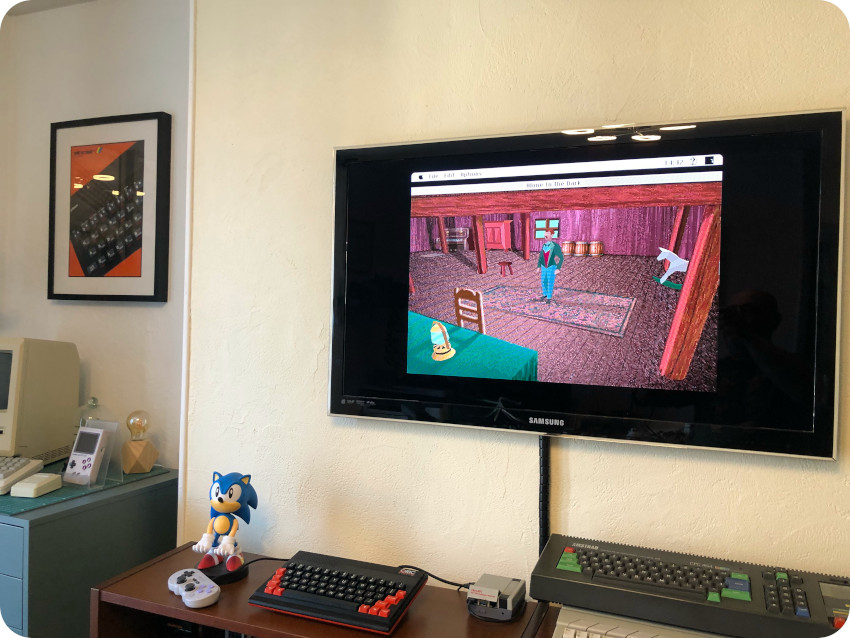
Let’s go a little further, taking advantage of the fact that Recalbox uses a Macintosh II emulator, to run a game that would not run on my Macintosh Plus: “Alone In The Dark“.
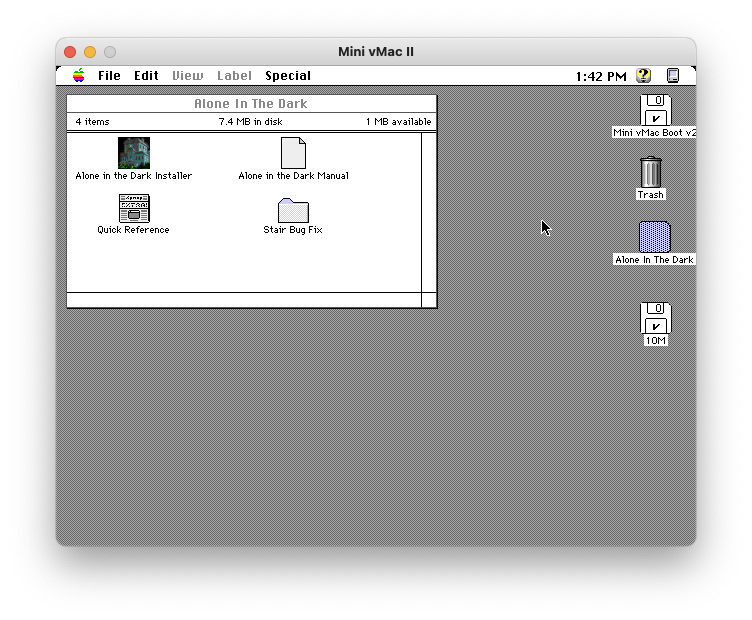
So, I grabbed a .sit compressed image of “Alone In The Dark” (floppy disk edition) at the Macintosh Garden. Since it requires an installation, I took a blank 10MB .disk image, and mounted it into Mini vMac II, along with the “Alone In the Dark” .img file:
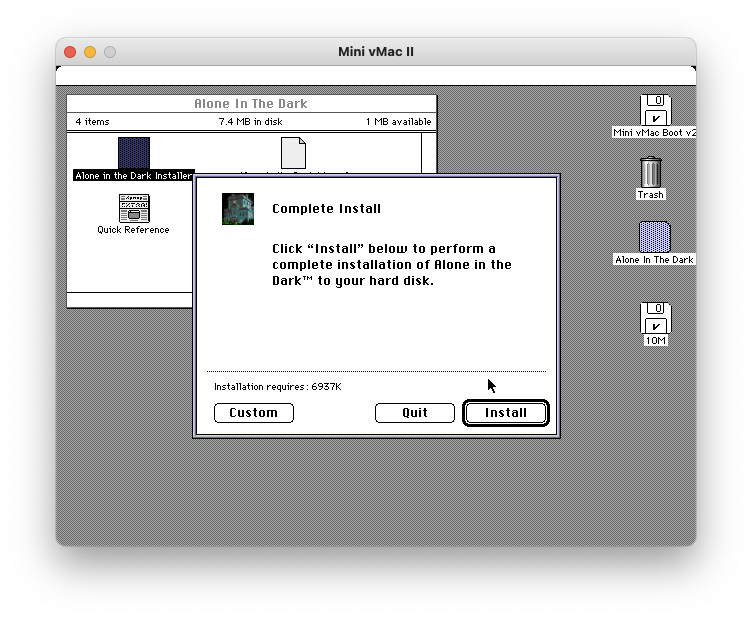
I proceeded to the installation, targeting the “10M” disk:

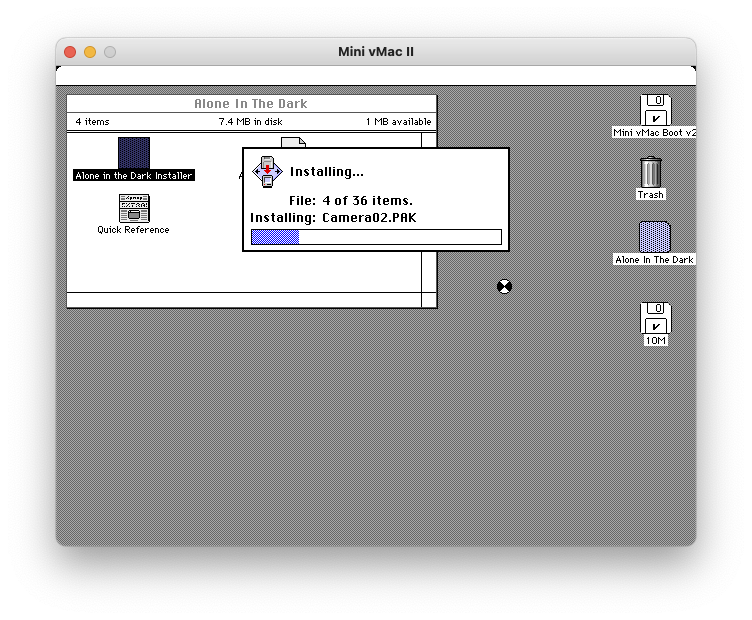
A few minutes later, I had a “Alone In The Dark.dsk” image to be uploaded to Recalbox via its web interface: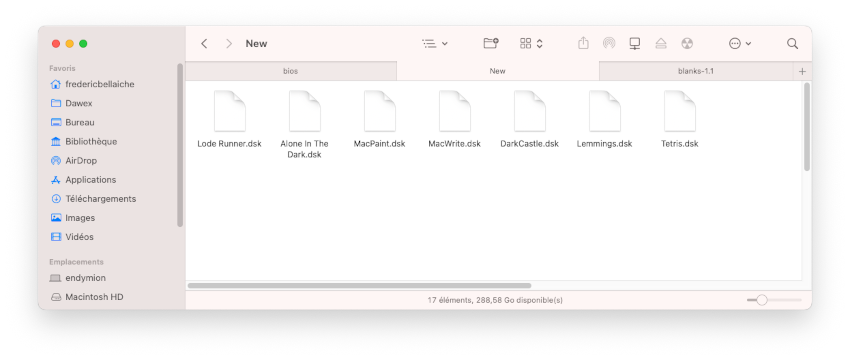
I switched (yet again) to 256 colors mode, and … it worked right away !
There you go, right on time for the first day of MARCHintosh 2023, I have now a brand new Recalbox 9 on a Raspberry Pi 4, running smoothly MacOS 7.5.5 and old school games (and MacWrite / MacPaint) :
How cool is that ?!
A few links
MARCHintosh:
- Site: https://marchintosh.com/
- Mastodon: https://bitbang.social/@MARCHintosh
Recalbox:
- Site: https://www.recalbox.com/
- Sources: https://github.com/recalbox
- Libretro: https://github.com/libretro/RetroArch
- Libretro-MinivMac: https://github.com/libretro/libretro-minivmac
Emulation:
- Basilisk II: https://basilisk.cebix.net/, https://www.emaculation.com/doku.php/basilisk_ii
- Mini vMac: https://www.gryphel.com/index.html
Software repositories:
- Macintosh Garden: https://macintoshgarden.org/
- Macintosh Repository: https://www.macintoshrepository.org/
- Mini vMac Application: https://sites.google.com/site/minivmacapplicationsv6/home
- E-maculation: https://www.emaculation.com/doku.php/system_6_hell
hi, where i can download MinivMacBootv2.zip¿
It used to be available here: https://sites.google.com/site/minivmacapplicationsv6. But it seem to be down unfortunately…