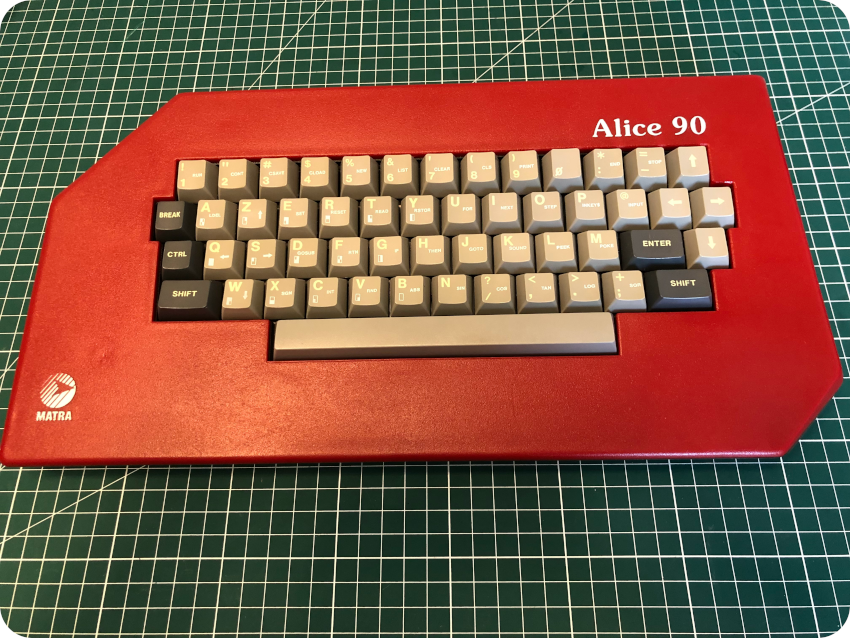
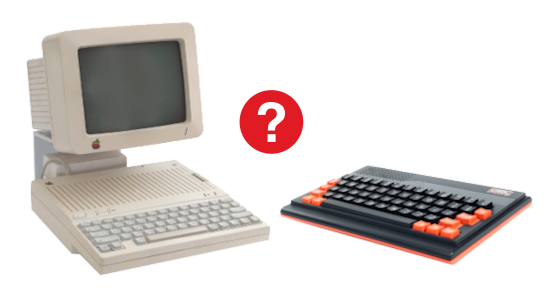
After the short LEGO break from last post, let’s go back to vintage computers. I had explored a few 16-bit computers (Atari ST and Mac Plus), so I decided to change. This time, I went for an usual 8-bit machine: the Matra-Hachette Alice 90.
This little red corvette device is actually … a derivative of the Tandy TRS-80 MC-10, built in France by Matra in collaboration with Hachette. I acquired it at the very end of September, and it arrived home the first week of October. Since it usually takes me about a month to explore and restore a vintage computer, I missed #septandy 2022 I was originally aiming to … by quite a lot !
![]()
The Matra-Hachette Alice series
The Matra-Hachette Alice series of 8-bit machines is a line of computers … I technically know very little about. Of course, these computers were well known among French geek kids in the 80’s. But they were famous … for not being great computers. To be frank, there were not utterly bad machines. But they came too late and overpriced in a market already crowed with Apple, Commodore, Sinclair, Oric, Thomson, MSX and Amstrad 8-bit computers.
I knew no one that had an Alice computer. I had never touched one before nor had I even seen one in real life before. Neither at friend’s, computer stores nor school. I only knew them from magazines, their reputation and their very distinctive red look.
The first Alice (sometime named Alice 4K) was a clone of the Tandy TRS-80 MC-10, with a red casing, a French AZERTY keyboard, and a SCART connector replacing the RF modulator:
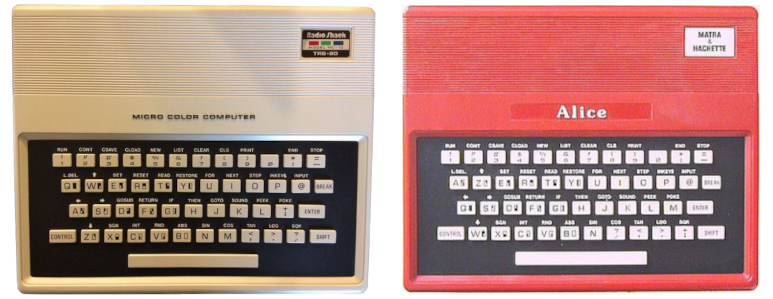
The collaboration between Tandy and Matra wasn’t surprising, since Matra was building MC-10’s under Tandy’s license in its Wintzenheim factory.
The first Alice was released in 1983 and priced around 1200F (approx. 180€ at the time, 382€ today). It shipped with 4 kilobytes of RAM and 4 kilobytes of ROM (including MS BASIC). Hachette, which was responsible for documentation and software, asked genius artist Mœbius (Jean Giraud) to draw illustrations:

To be blunt, nowadays, Mœbius’ artwork and the funky red look are the major drivers for collecting Alice computers. But, at the time, this was clearly not enough to buy one. The Alice was marketed as a Sinclair ZX-81 challenger, when … the ZX-81 itself was considered outdated and was already replaced by the much more capable Sinclair ZX Spectrum. Needless to say that the Alice 4K wasn’t a huge success.
One year later, in 1984, Matra launched the Alice 32. It looked almost identical as the old Alice, apart …
- from the “Alice” logo, which changed from a sliver color to a white color
- from the front sticker, which came with a protective plastic cover with some kind of greenish hue
- from a change in the serial number (sticker on the bottom)
- from a change on the contacts of the expansion connector
There were a few upgrades in terms of technical characteristics:
- The video chip was changed, from a Motorola 6847 video generator to a SGS-Thomson Microelectronics EF9345 video chip
- The main RAM was bumped to 8 kilobytes
- 8 kilobytes of dedicated video RAM were added
- The ROM was expanded to16 kilobytes (incorporating also an assembler)
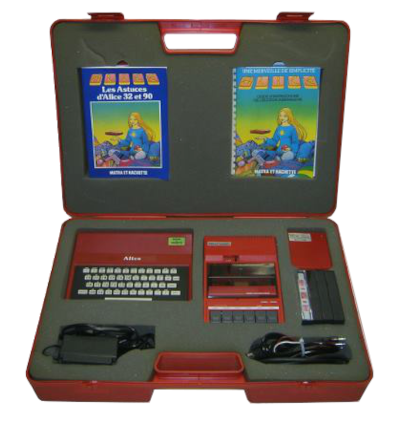
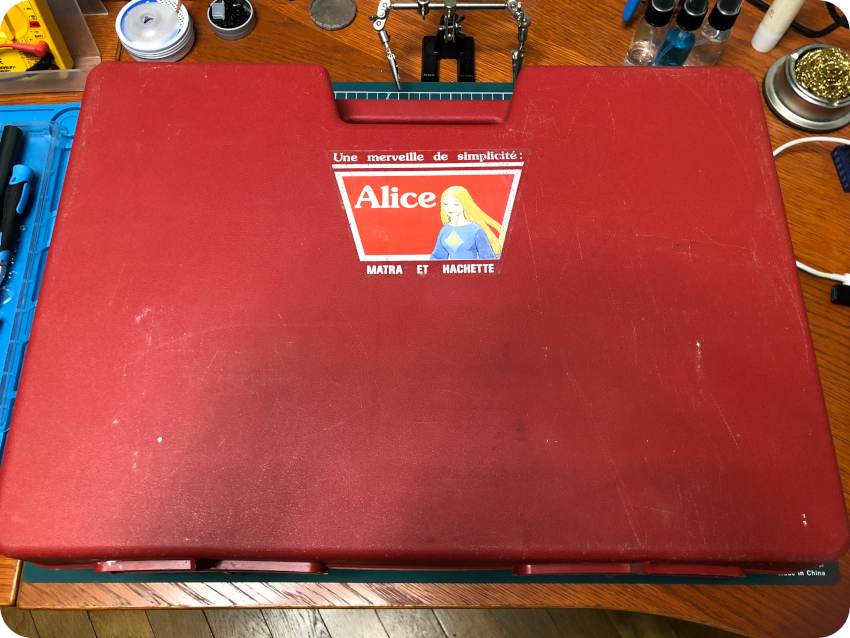
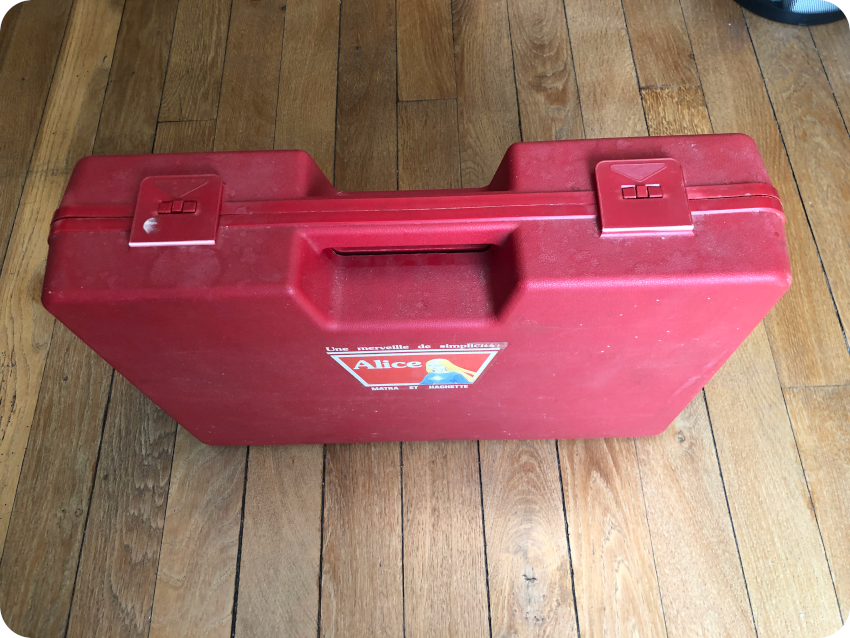
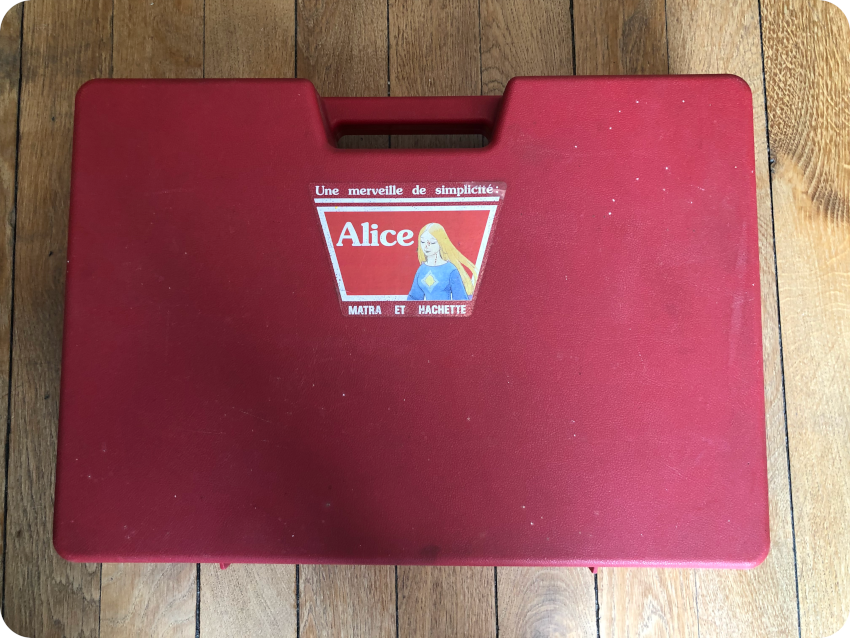
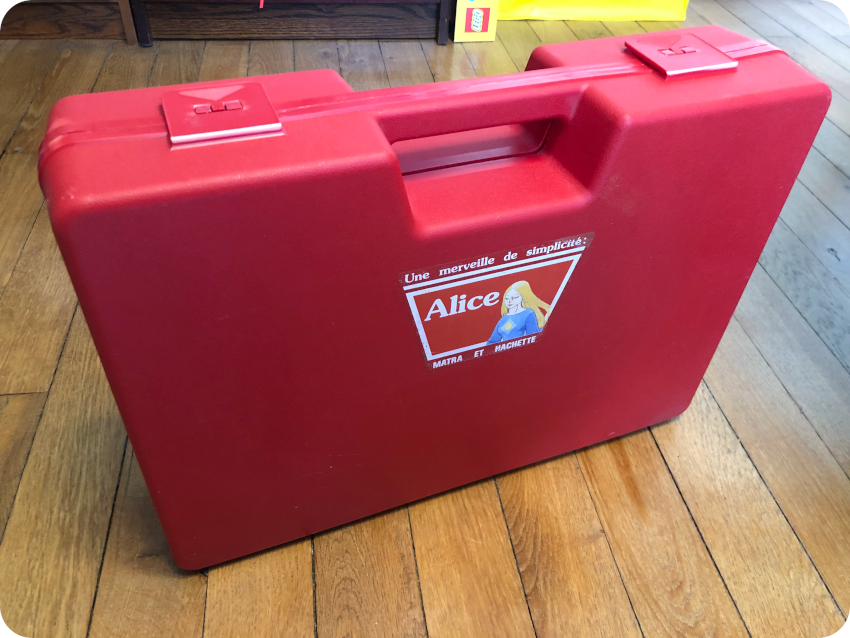
The Alice 32 name comes from 8 kB RAM + 8 kB vRAM + 16 kB ROM = 32. Yes, it is stupid marketing and this is misleading. It was sold around 1100F (approx. 168€ at the time, 326€ today) when bundled with a red datacorder unit, a set of software, manuals, cables, all packed within a red plastic suitcase:
With its red plastic casing, the Alice 32 was more considered an expansive toy rather than the educative computer it was designed to be. Needless to say that the market response was less than lukewarm: it bombed.
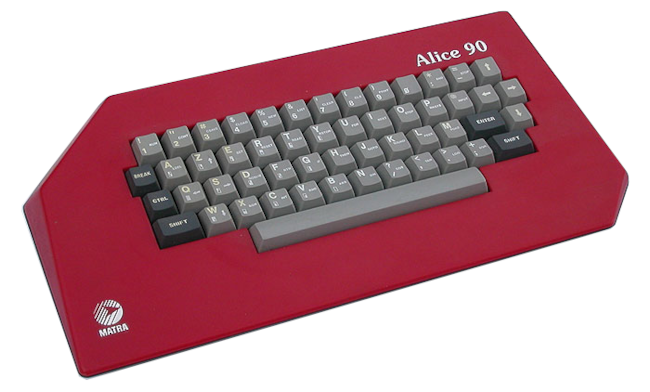
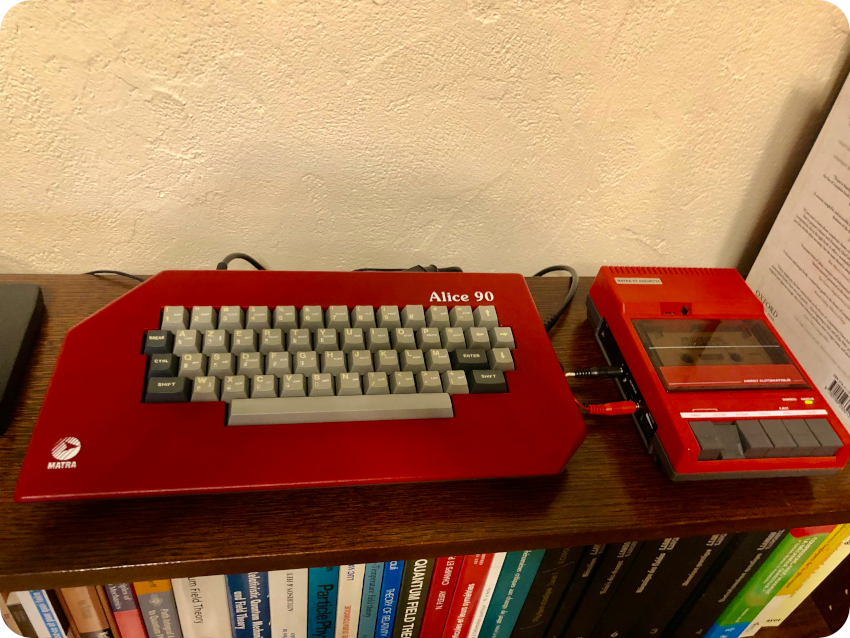
In 1985, Matra released the Alice 90 as an upgrade from the Alice 32. It featured 32 kilobytes of RAM, an oddly-shaped red casing and a full-sized mechanical keyboard. I guess it should have been called Alice 56, but somebody at the marketing department must have thought that Alice 90 sounded cooler, even though it is probably meaningless. Who knows ? Its video cable included video-in, so the EF9345 graphics could do video overlay. Which was nice, but software for video overlay came too late. It was planned to be used on a French TV show … that never aired. Unlike the Amiga Genlock features which were a major hit, I doubt that the video overlay capabilities of the Alice 90 were ever professionally used…
Bundled with with manuals, cables, the red datacorder, a few cassettes and a red suitcase, this 1MHz 8-bit dinosaur-like computer was sold for around 1600F (244 € at the time, 449 € today) at a time when 8-bit computers like the Amstrad CPC6128 were massively better, and when 16-bit computers (Atari ST, Amiga, …) were entering the market. It failed miserably.
In the beginning of the 80’s, I was avidly reading Hebdogiciel computer magazine. I still remember the headline from the March 1985 edition of the satirical newspaper: “Alice 90: TOUT FAUX !” (“Alice 90: ALL WRONG !”):

I couldn’t find a solid estimate of the number of Alice 90 computers that were actually produced and sold, but I’d bet no more than a few 10 000’s. Maybe less.
Around 1985, biding on the “Plan Informatique pour Tous” (“Computing for All”) tender, Matra built a prototype named Alice 8000 (nobody seems to know why it was called “8000”):
Thomson won most parts of the tender, and the Alice 8000 never saw the market. It is said that most of the 250 produced machines were destroyed. But there are actually a few videos of these machines and topics on forums. This marked the end of the Matra-Hachette Alice tragedy.
Emulating an ALICE 90
Since I have no technical nor practical knowledge of the Alice line of computers (nor Tandy’s I must say), before getting my hands on one, I tried it on an emulator:

DCAlice is an amazing emulator for Tandy MC-10, Matra-Alice 4K, 32 and 90. It’s installation is absolutely straightforward. It runs on MS Windows. I only have MacOS or GNU/Linux devices, so I had to create a Virtual Machine with VirtualBox beforehand. To keep things “oldish”, I installed a Windows XP image on the virtual machine to run the DCAlice emulator. Because … why not.
I took a look at a PDF version of the Alice Manuals. I loaded a few programs and got familiar with the system, its commands and functionalities:


At least, now I know enough to test the system and load programs from cassette tapes.
Sourcing an Alice 90
I followed my usual sourcing process, hunting for Matra-Hachette Alice devices on LeBonCoin web site. I looked either for an Alice 32 or for an Alice 90, bundled with the Moebius documentations and the red suitcase along with its accessories (cables and tape deck). In the end, I narrowed it down to only 3 offerings (2 Alice 32 offerings, 1 Alice 90 offering). One of the Alice 32 offerings looked fishy (actually sold by a store with somewhat bad reputation, despite saying it was an offering from an individual).
So, it was a matter of choosing between the remaining Alice 32 and 90 offerings. It was easy:
- The Alice 90 was packed with additional software,
- Its price went down to a more reasonable price after a few weeks,
- The Alice 90 is so odd looking, it is almost impossible not to choose it !
So, I settled for the Alice 90, which arrived about a week later:
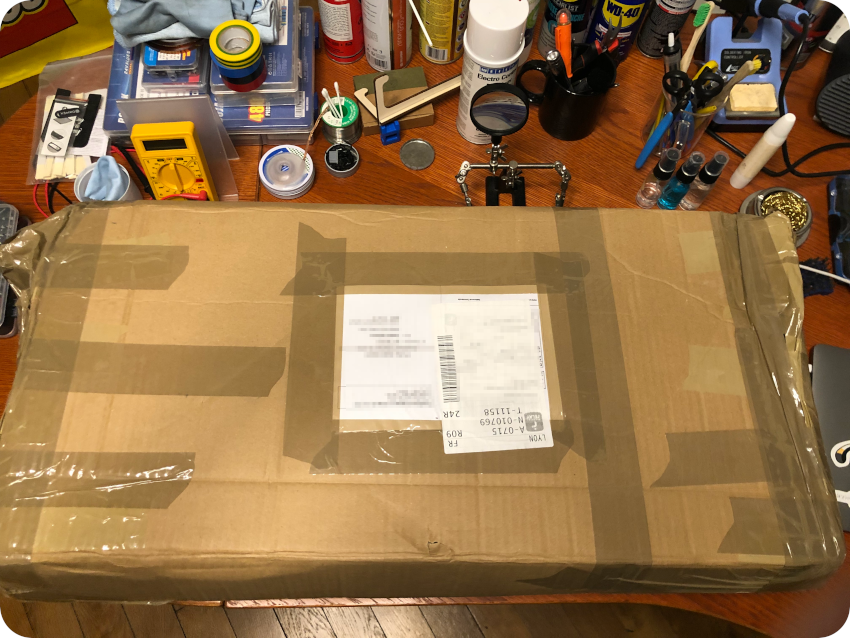
The red suitcase was bigger than I expected (around 50 cm x 35 cm). Let’s open it !
I was welcome by … that not so nice smell of things left for many years in a garage. Yucky !
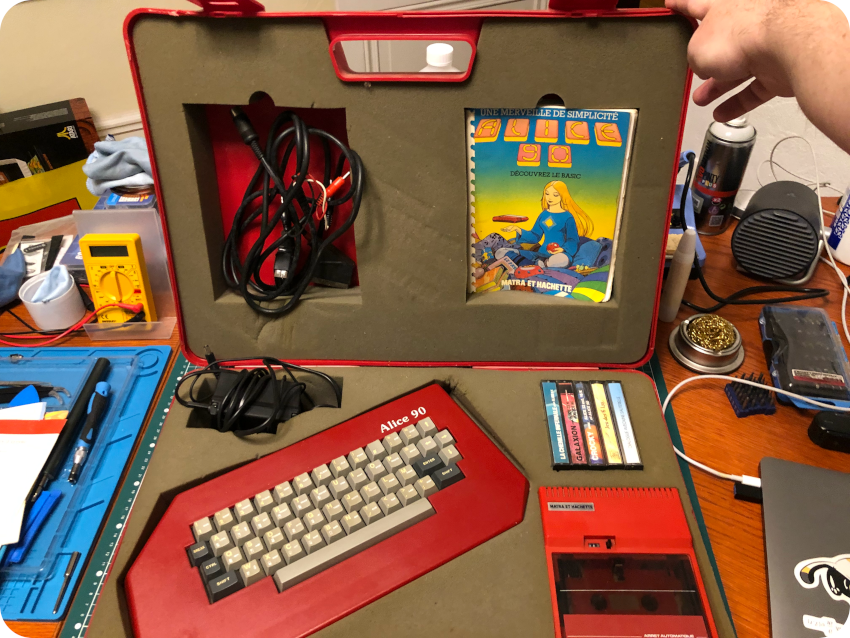
Apart from the smell and a lot of dirt, everything seemed to be in reasonable conditions for an almost 40 years old computer. The foam inside the suitcase seems a little moldy. The main manual (“Discover BASIC”) with Mœbius’ artwork has unfortunately seen better days. I will have to work on that. The other one (“Assembler Guide”) is almost in mint conditions.
In addition to the red suitcase and its accessories, the package included 14 software, some of them in their original boxes:
OPENING UP
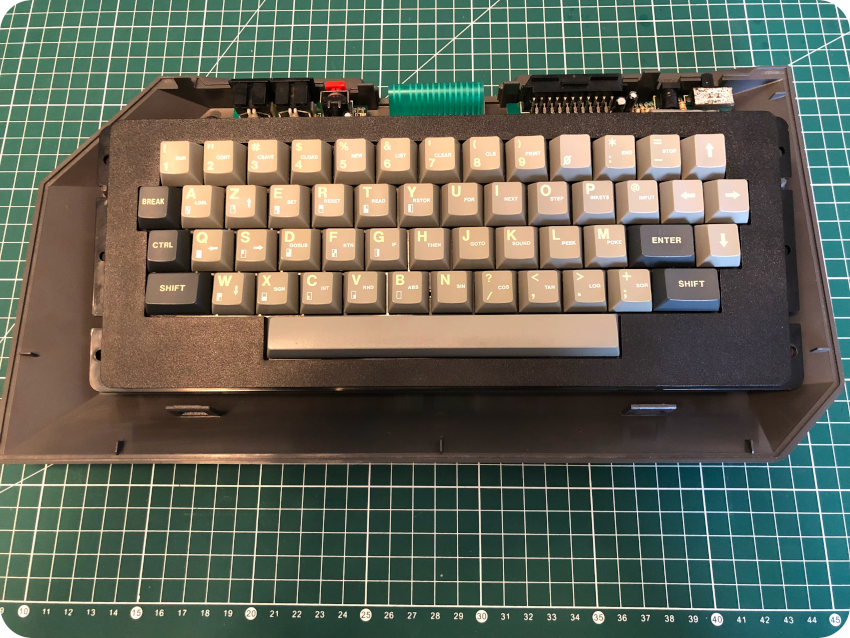
Before opening up the Alice 90, let’s take a look at the case. It is in good conditions, nothing broken, no scratches, but extremely filthy, especially the keyboard:
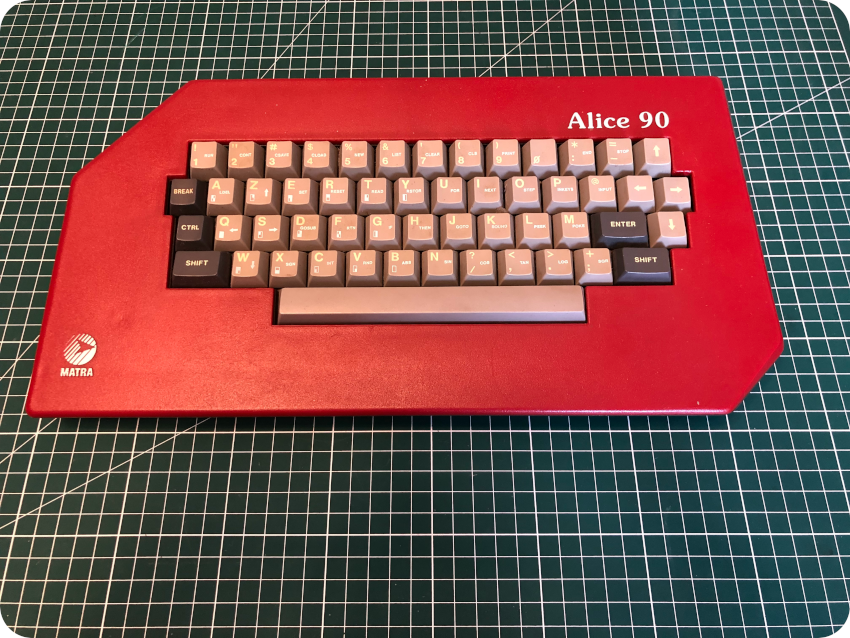
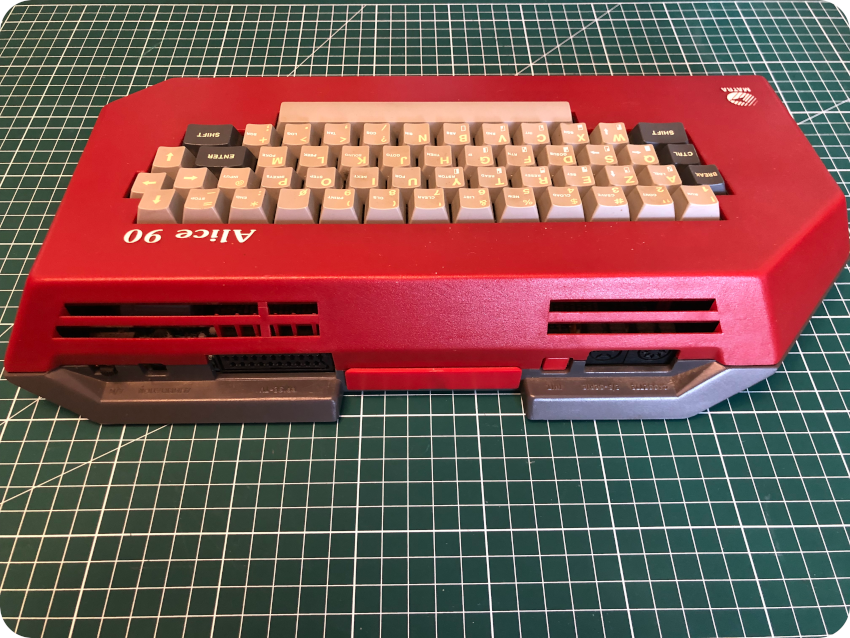
Here is a picture of the back of the machine, with its connectors. The extension connector is hidden under a red plastic cover. One of the nicest things about this design is that each connector label can be seen from the top, which helps when one has to plug cables in:
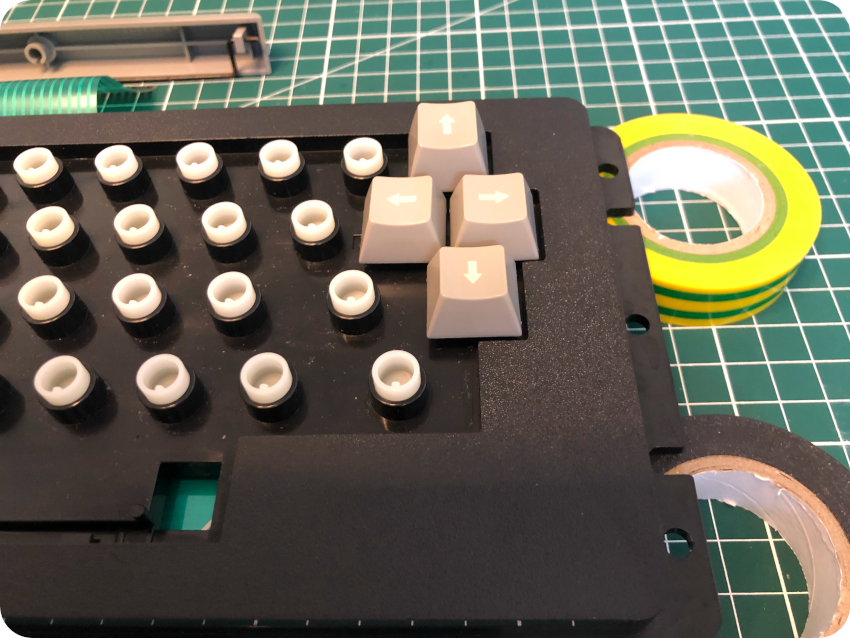
The keyboard is very, very crunchy and a slightly yellowed. I may try to sunbright the keys. One of the arrow keys is actually stuck:
![]()
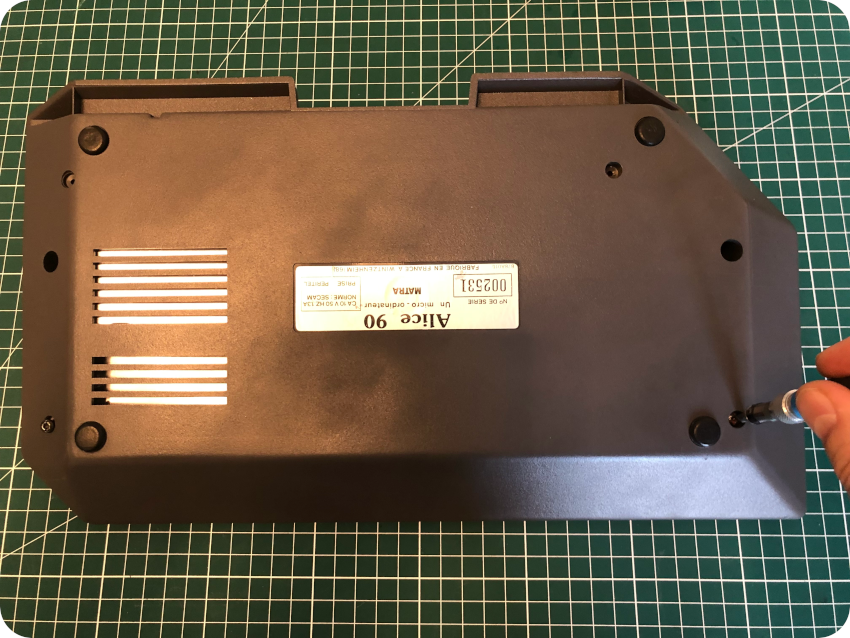
Let’s flip the case upside-down:
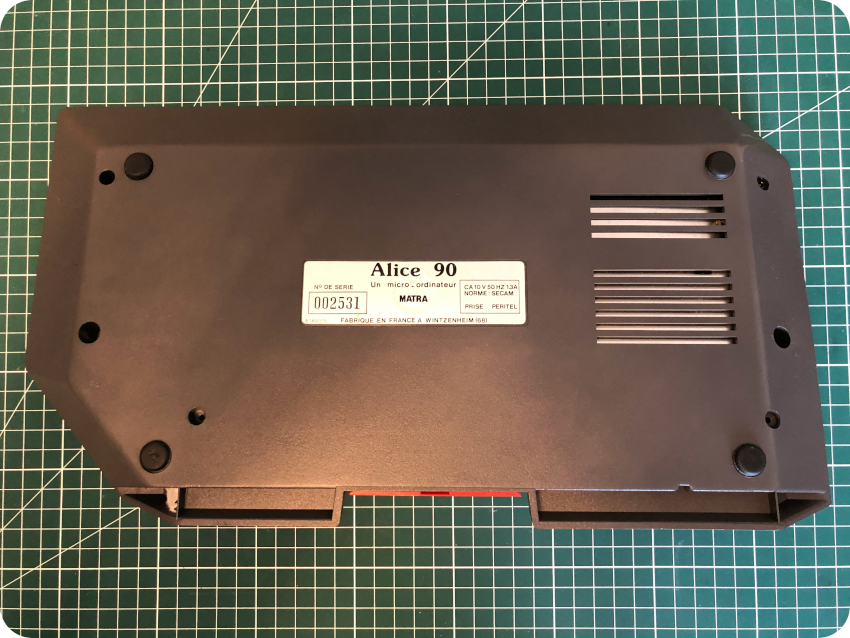
This Alice 90 was built in Matra’s Wintzenheim factory, just like the other computers of the Alice line of products. The serial number reads 002531, which is really low. Somehow, it is a reminder how little of these machines were built and sold.
The back of the case is in pretty good conditions, just like the front. Unfortunately, there are traces of mold and some kind of insect webs or cocoons:
![]()
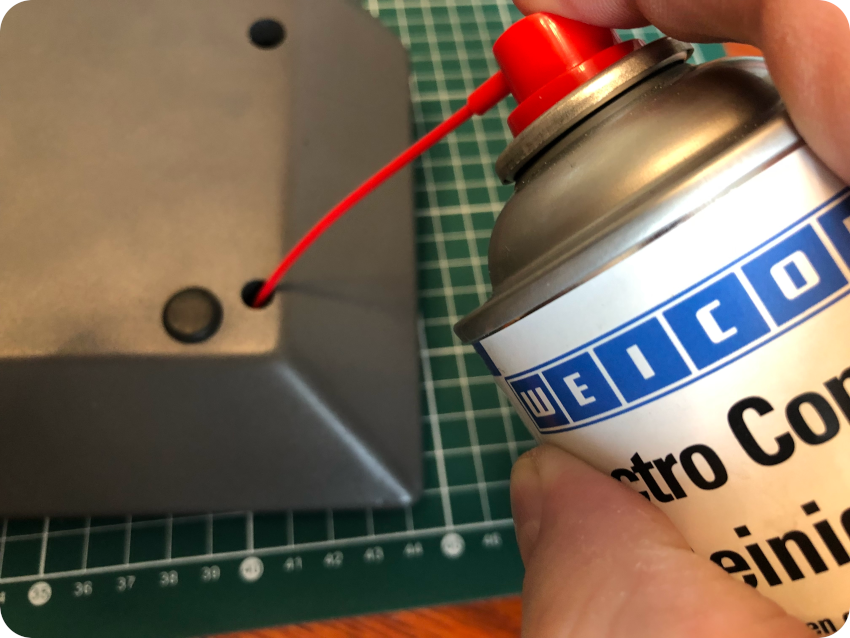
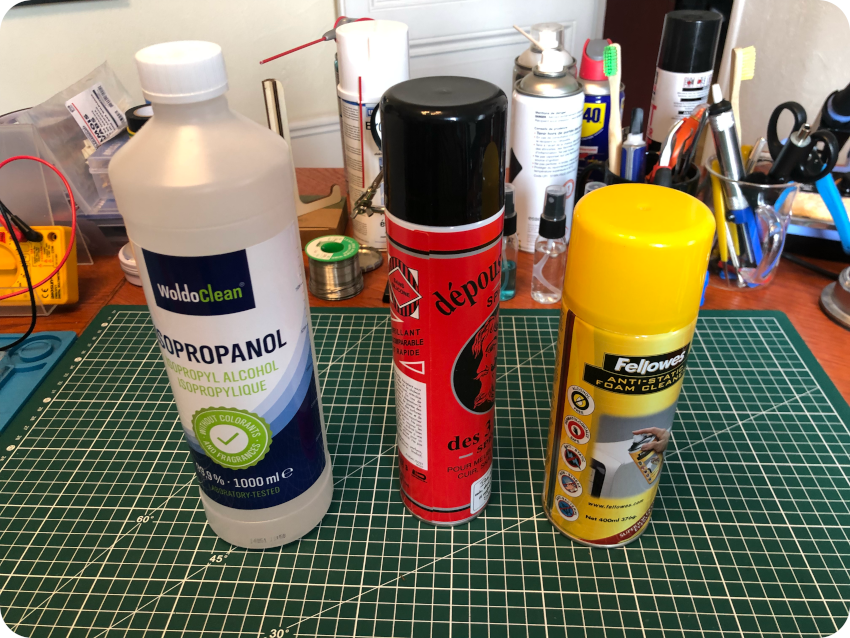
Hopefully, the mold has not reach the electronics… Anyways, before getting inside, I sprayed Isopropyl Alcohol on the case and removed these “cocoons”.
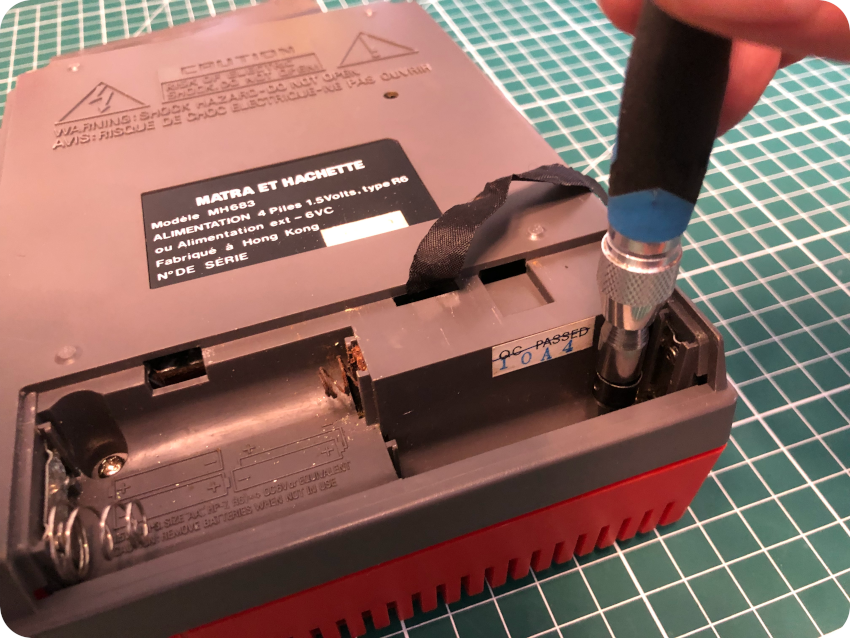
Opening up the enclosure is just a matter of removing the two screws on the back of the bottom case, close to the rubber feet. Since they were a little rusty, I sprayed a bit of contact cleaner on them before (should have used WD-40, I guess, but it worked):
Once the screws were removed, I flipped back the enclosure on its rubber feet, and opened it with a plastic prying tool:
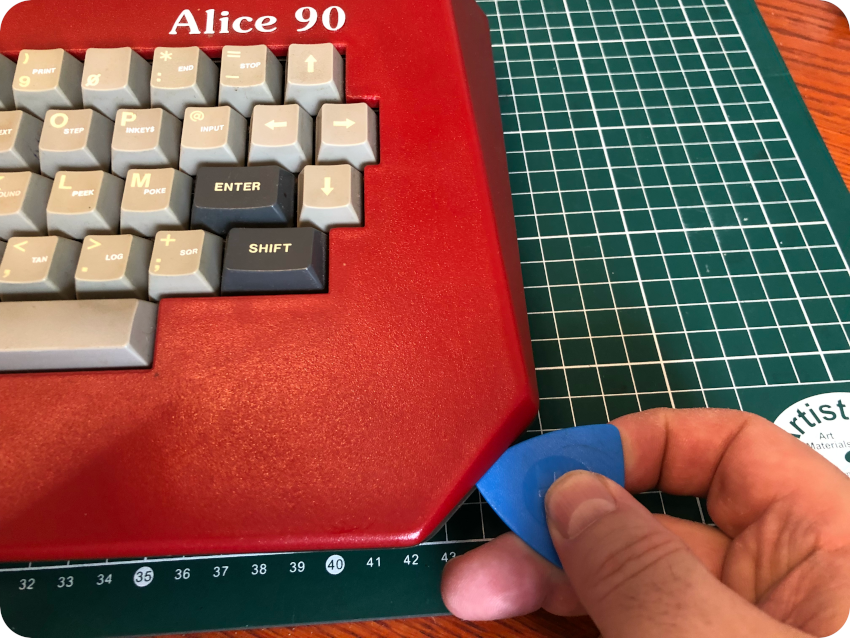
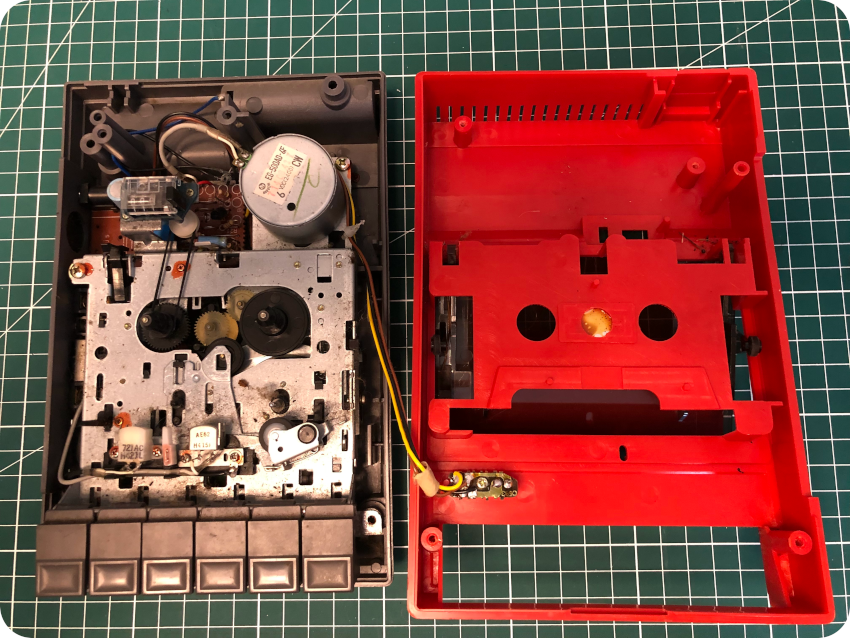
I opened up the enclosure very slowly, since I didn’t know what I would find in there. The mechanical keyboard just sits on top on the PCB, and removing the top case was in fact very easy:
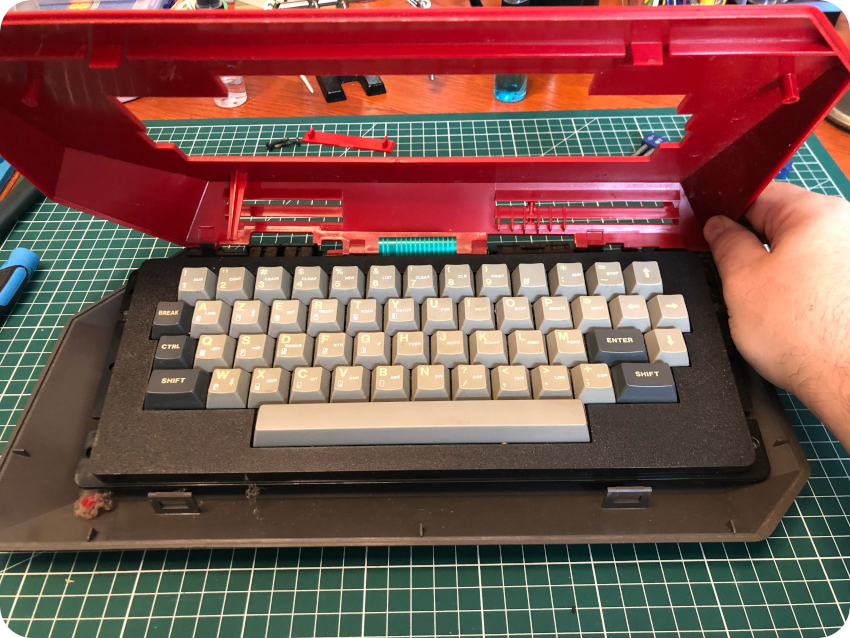
As I expected, the inside was full of dust, including … some kind little red ball of wood. I guess everything has to be red with the Alice ! I vacuumed the case before getting any further:
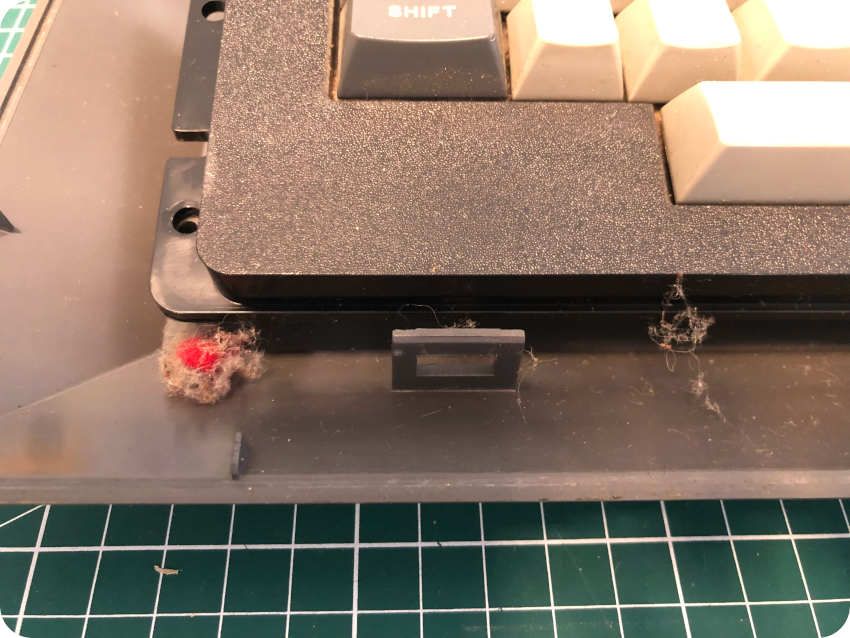

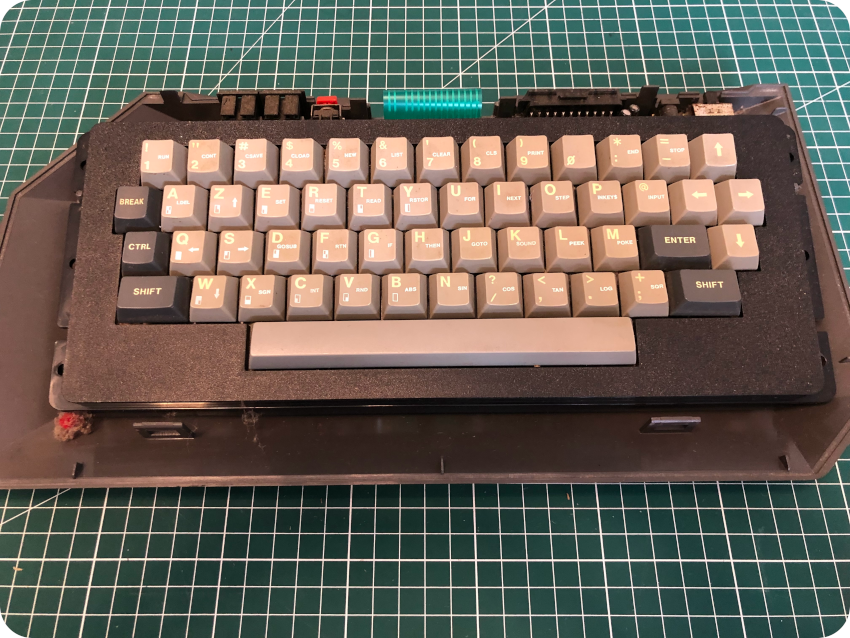
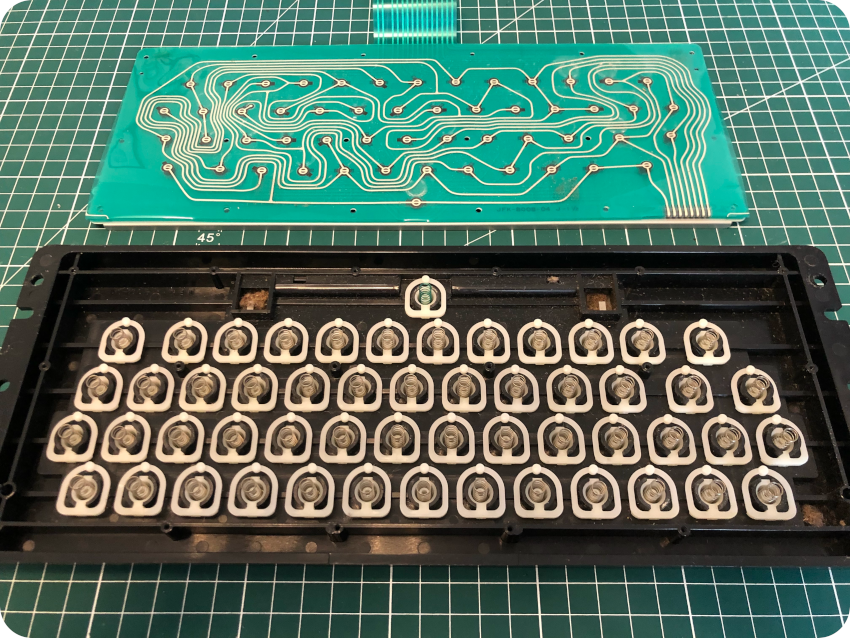
Just like many computers of this generation (ZX 81, ZX Spectrum, …), the keyboard is connected to the PCB via a flat ribbon, which can become very brittle as time goes. So you have to be very gentle while handling it:
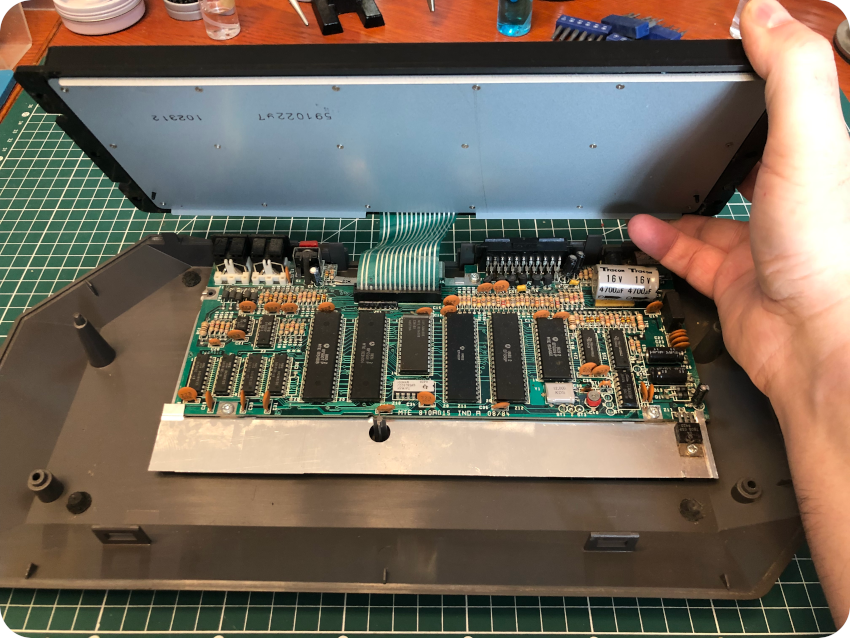
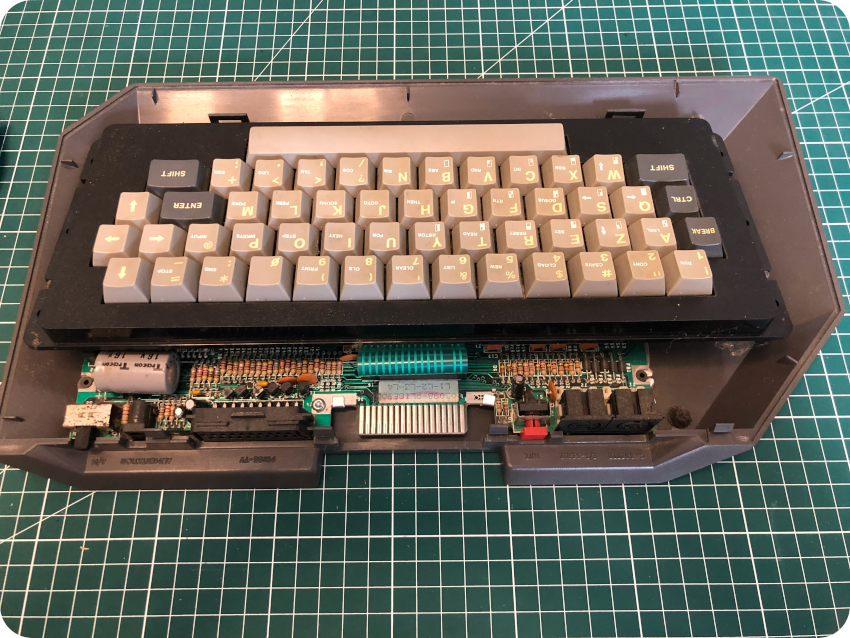
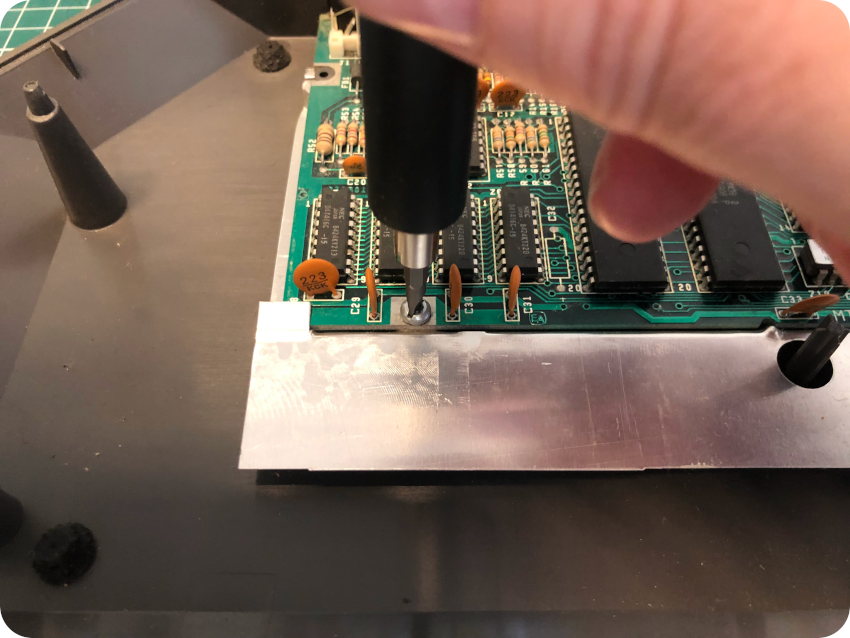
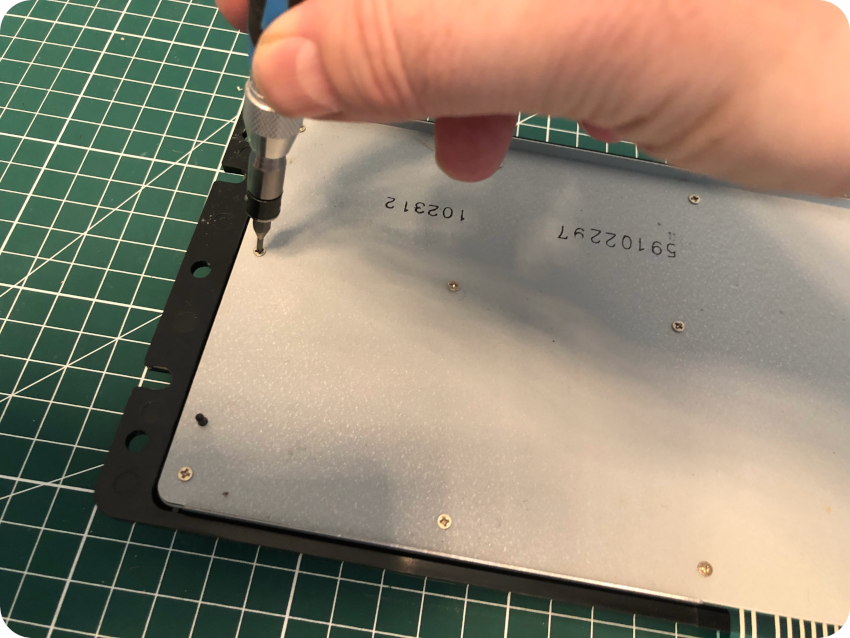
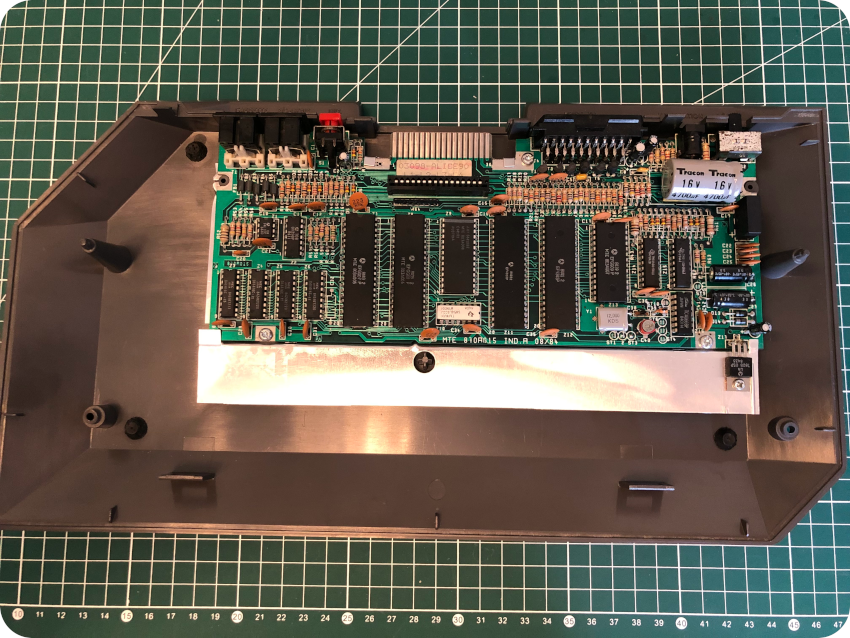
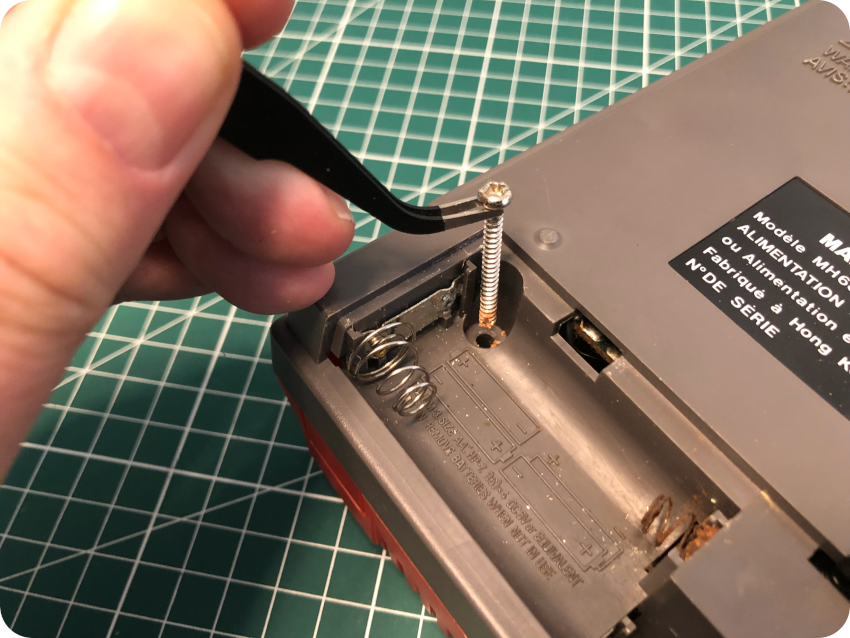
The next step is to unscrew the PCB from the bottom case. There are only three screws: two on the front (close to the metal shield) and one on the back (close to the SCART interface):
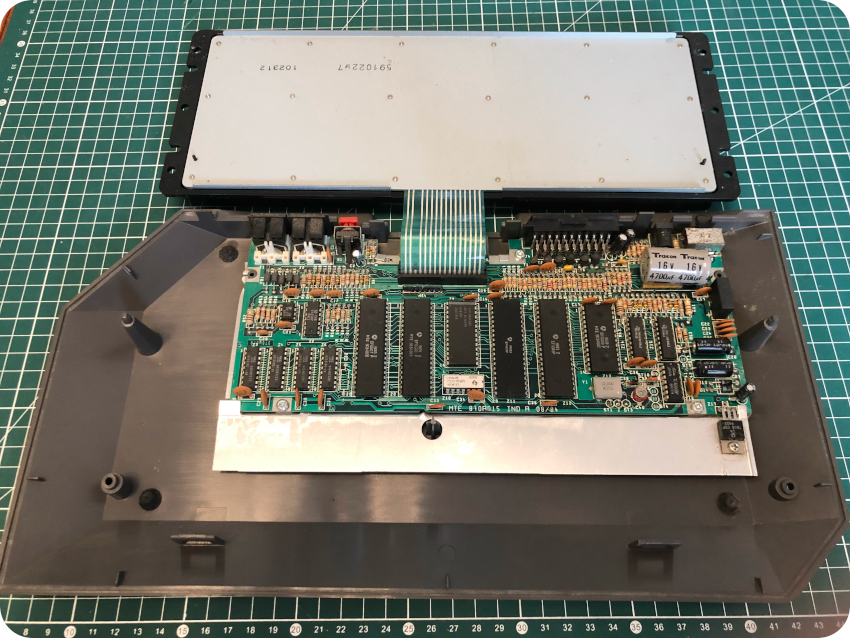
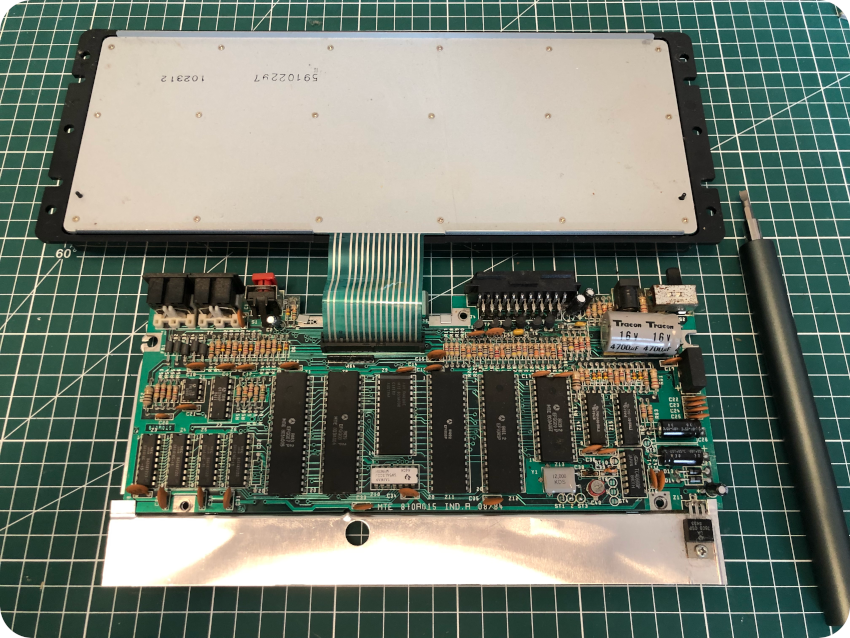
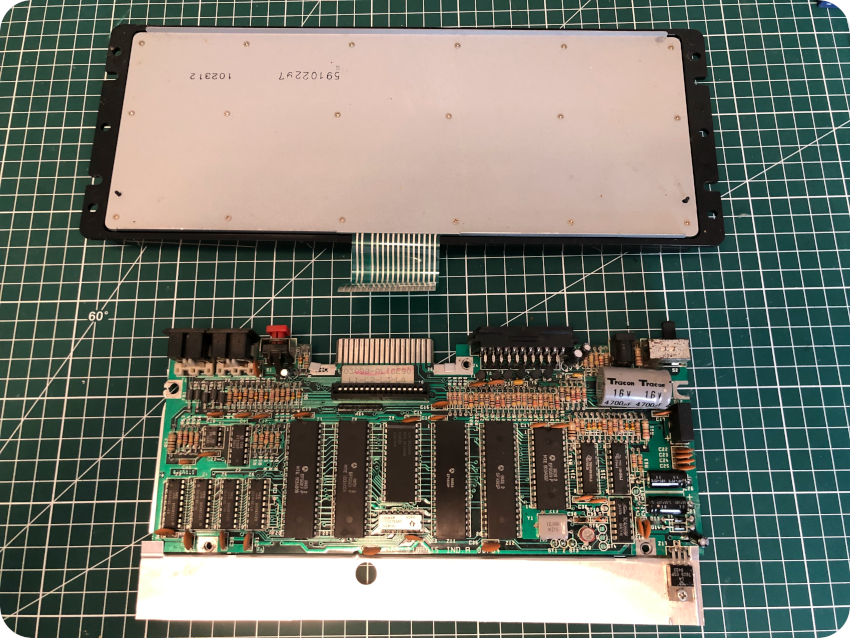
Once the screws were removed, the PCB and the keyboard were free from the enclosure:
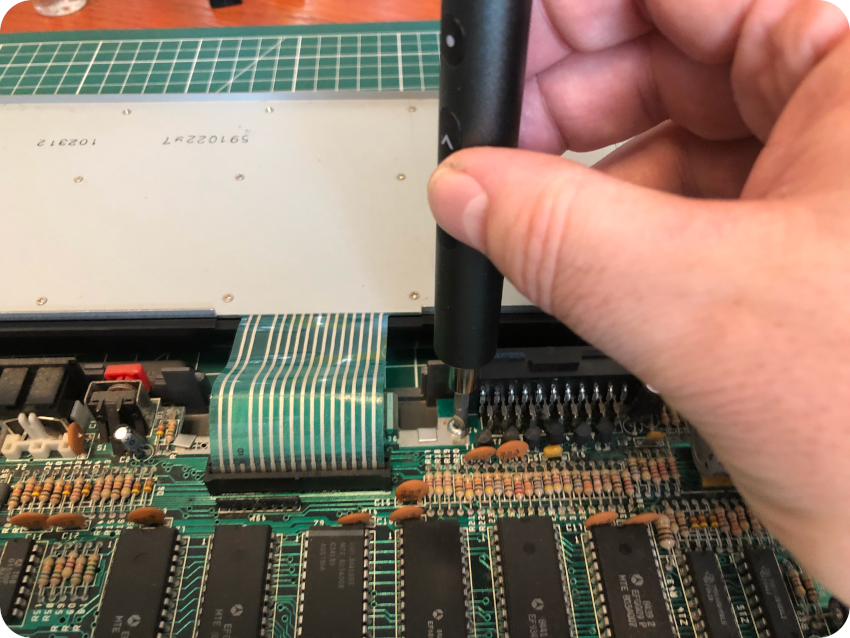
The last step is to disconnect the keyboard from the PCB, pulling off the ribbon cable from the internal connector very slowly:
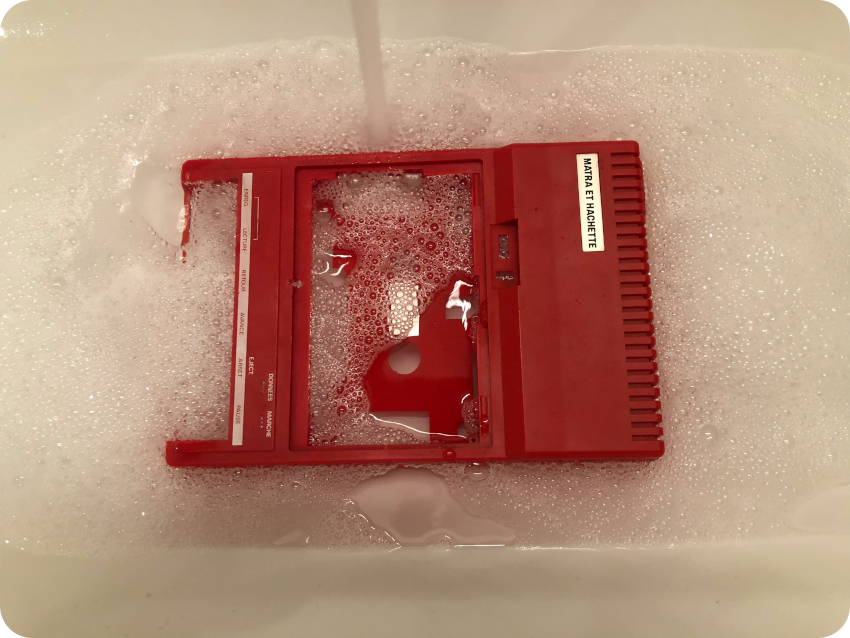
Cleaning up the enclosure
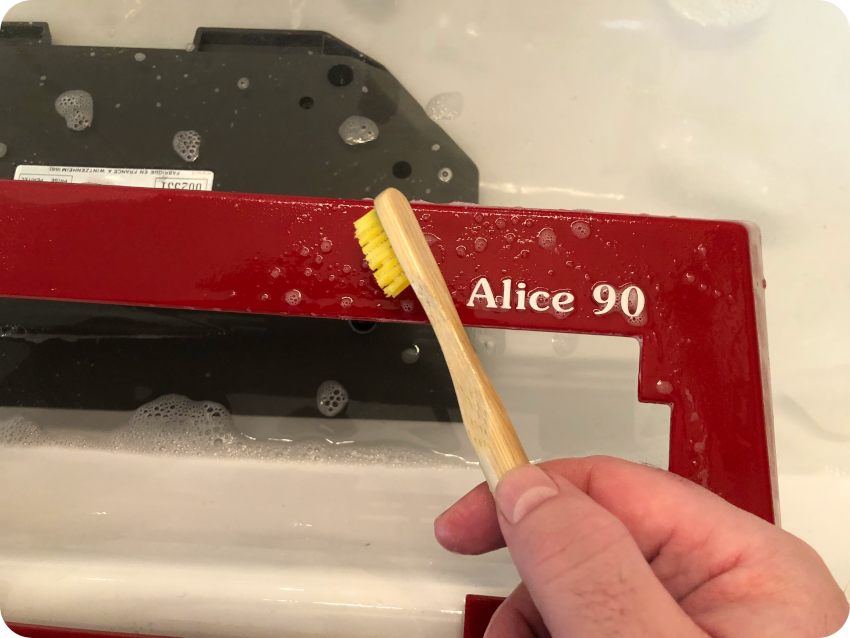
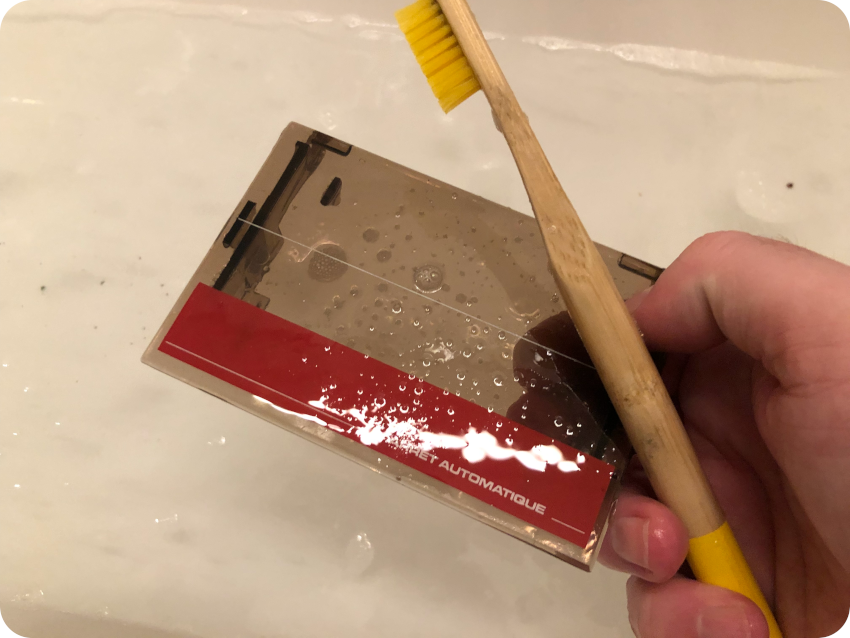
Let’s take care of the enclosure ! Both top and bottom parts were up to a good soapy bath:

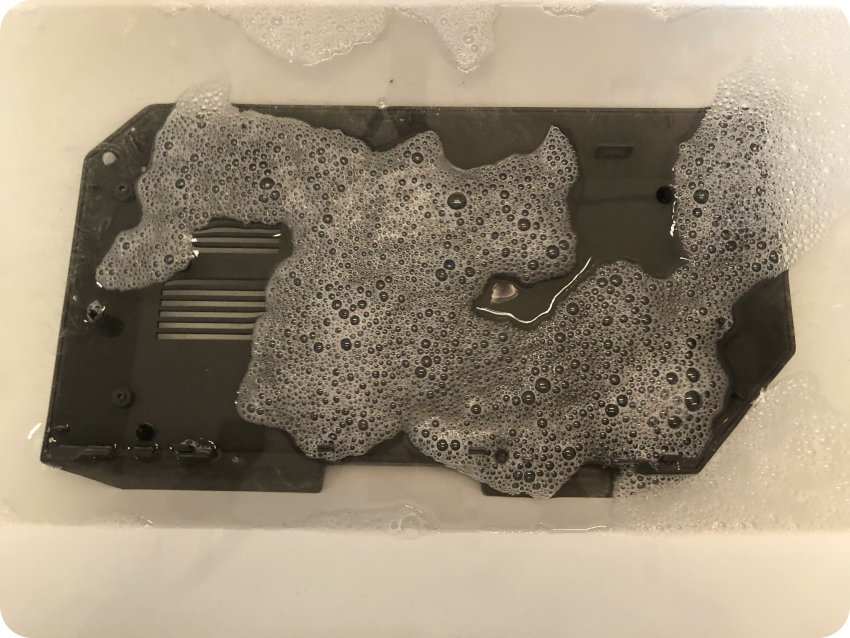
The bath was followed by a good scrub with a toothbrush:
Once dried, I spayed an anti-static foam cleaner and used a micro-fiber cloth as a finishing touch:
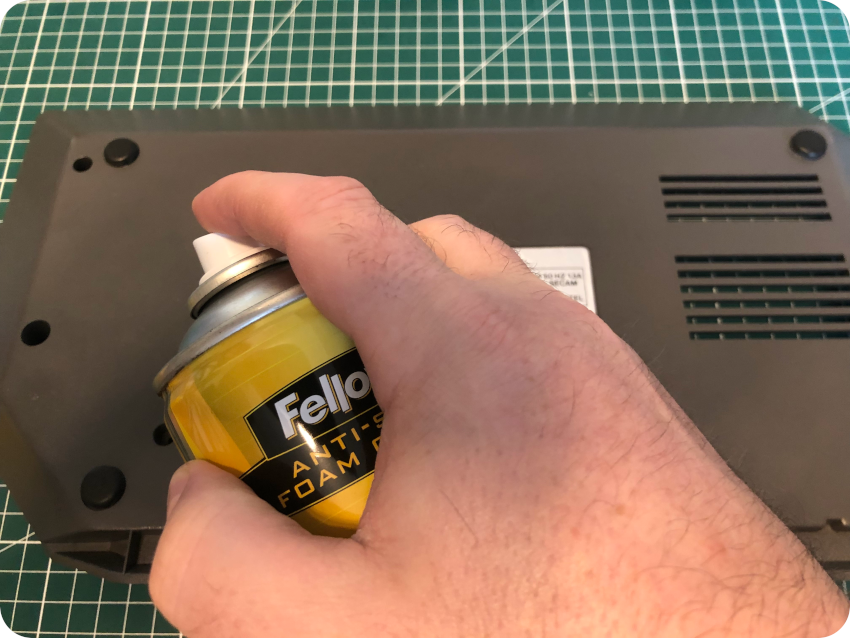
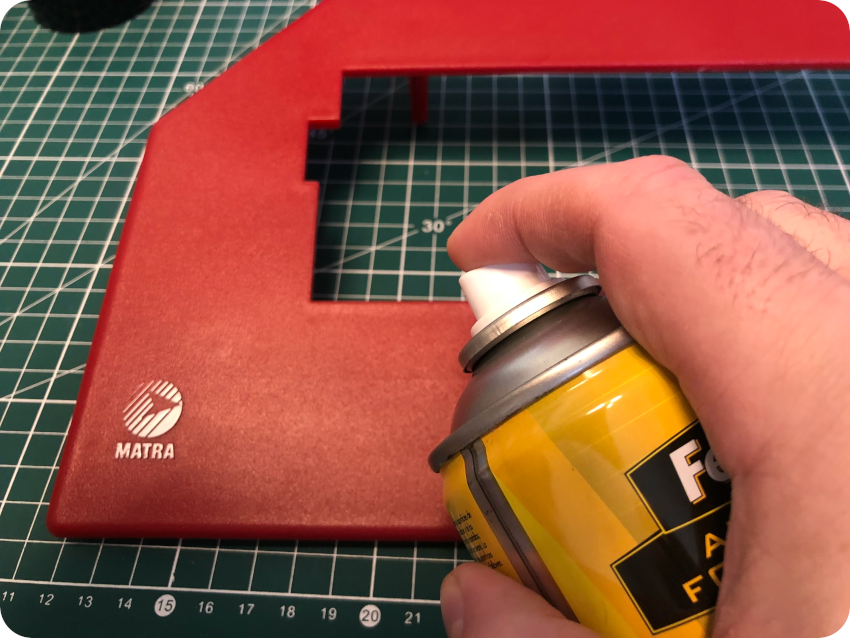
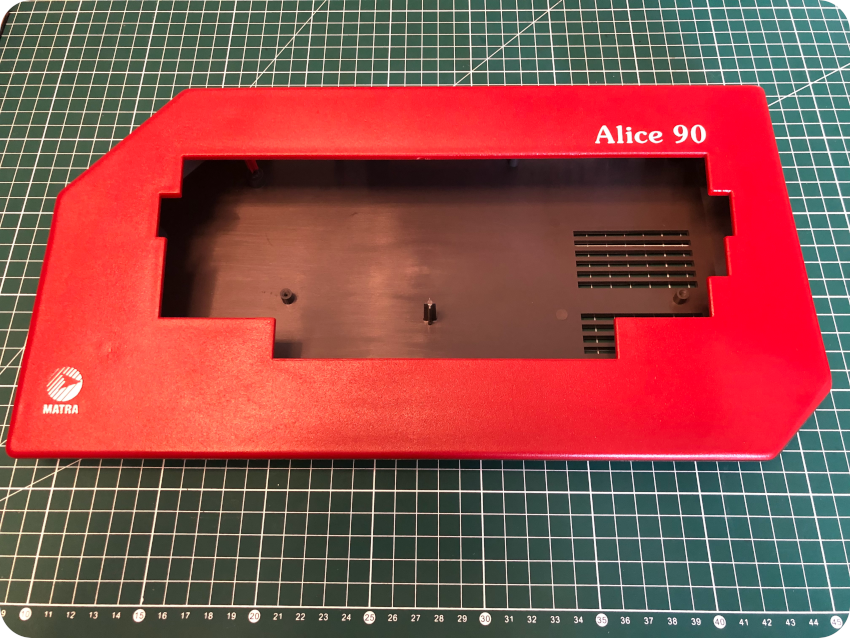
There goes a clean, shiny and daisy-fresh enclosure for our Alice 90 !
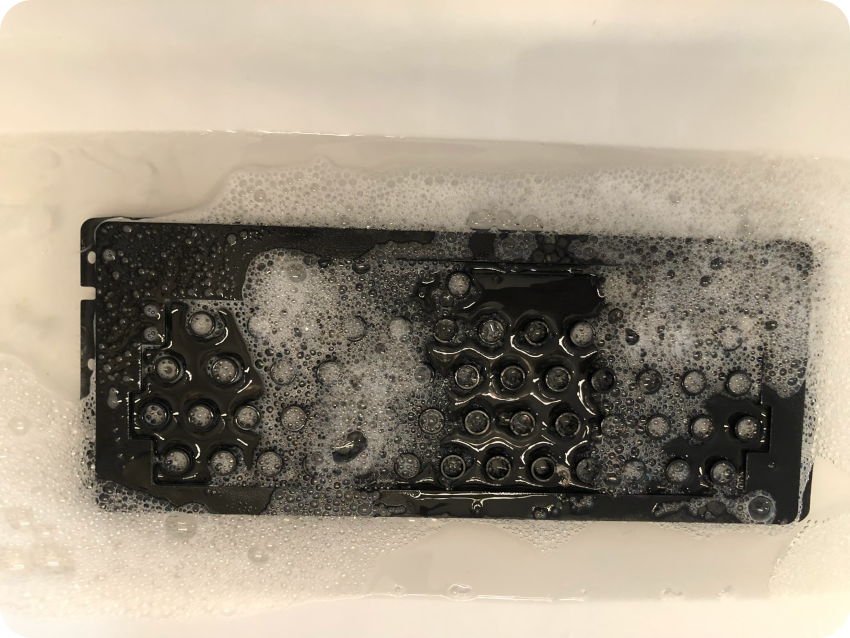
Taking care of the keyboard
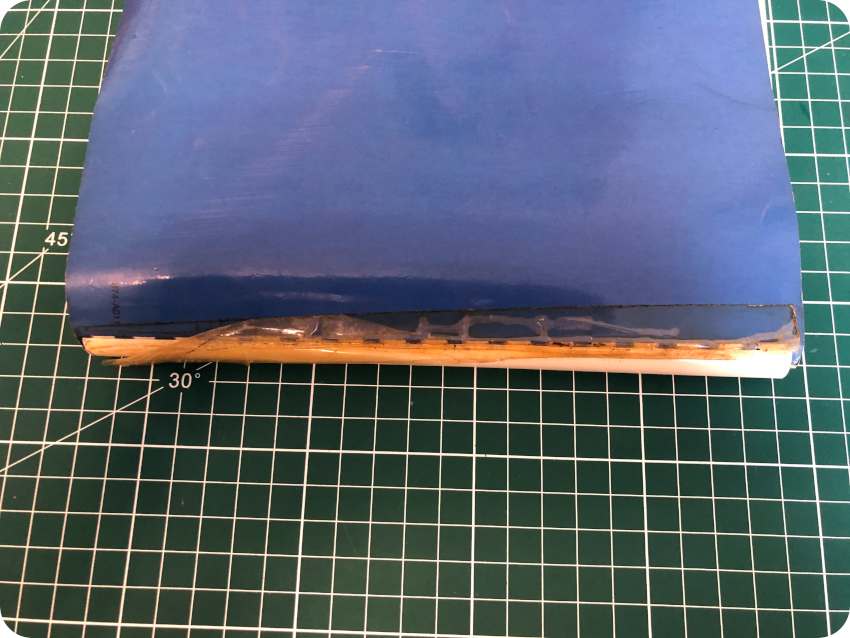
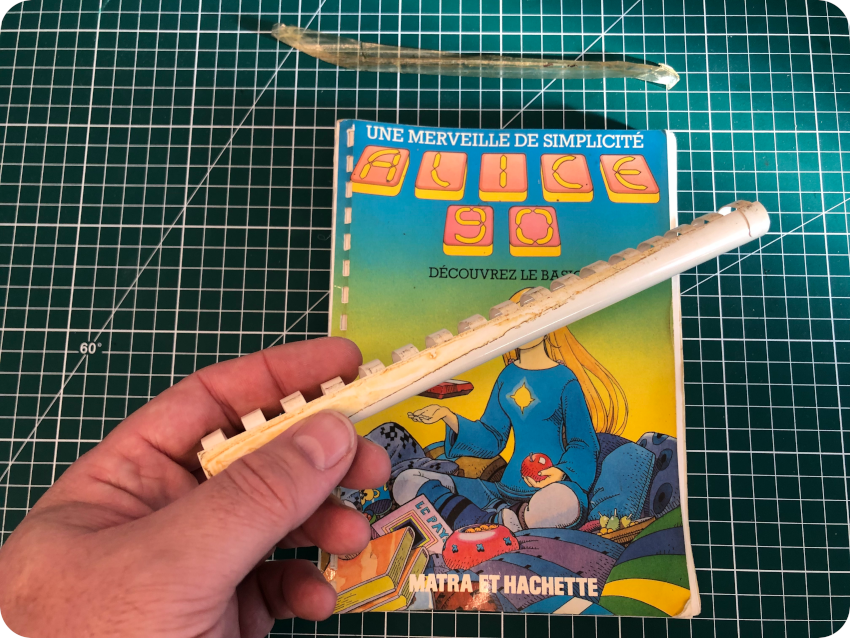
The enclosure was an easy task. Now let’s take care of the mechanical keyboard ! To open the keyboard, one has first to remove these … 18 (!) tiny screws:
On the top part of this picture, you can see the keyboard membrane. On the bottom is the keyboard itself. By looking how grimy it is, you can now understand why it felt so crunchy and why one of the keys was stuck !
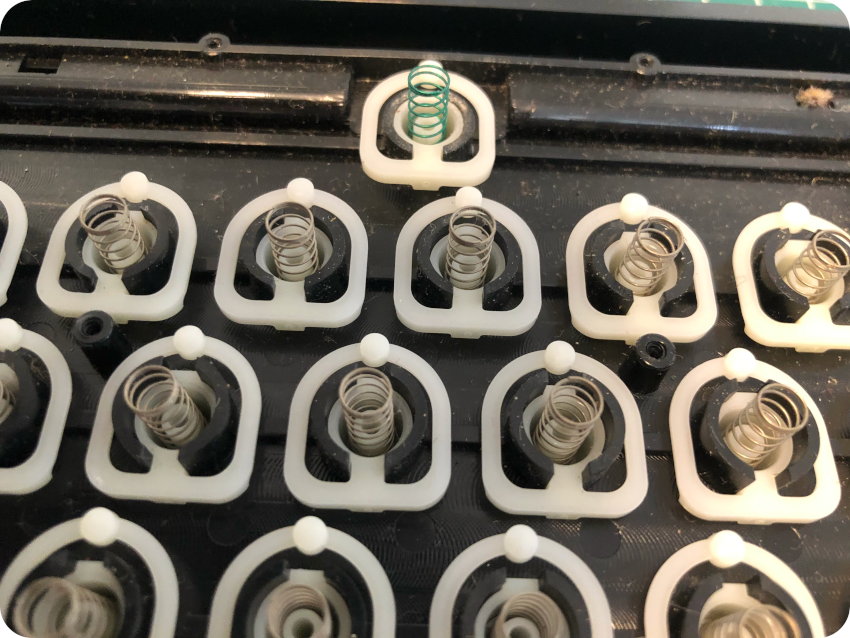
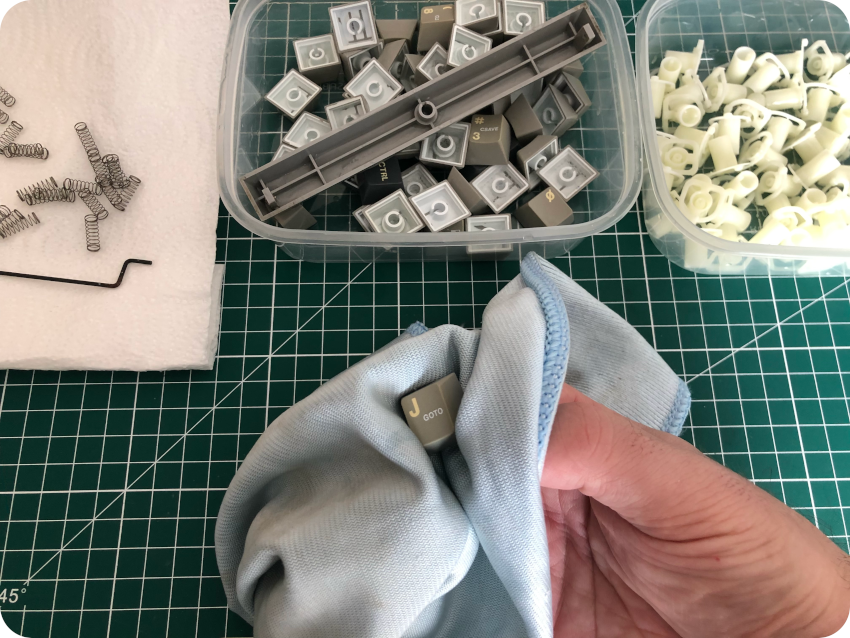
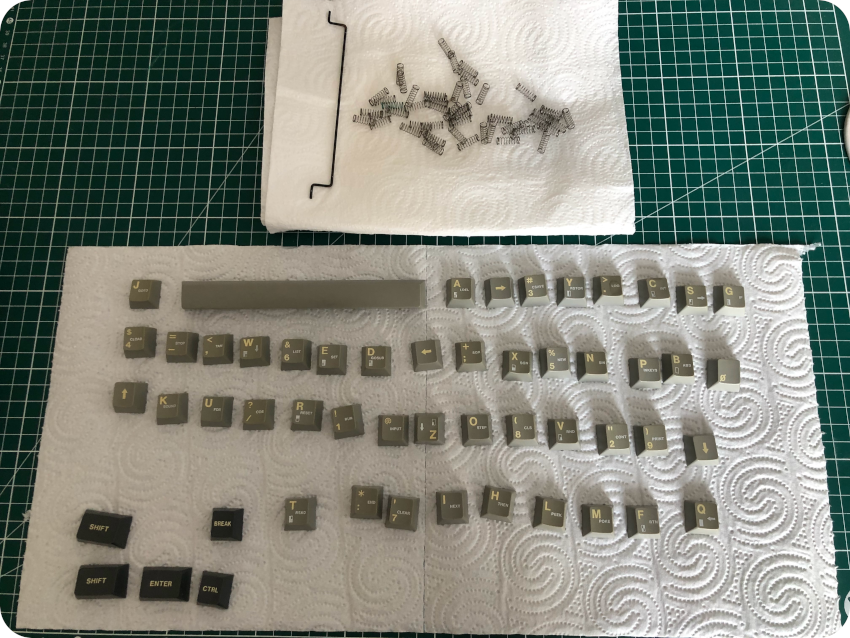
I started by removing each spring, and let them soak into WD40 for a few hours. For some reasons, the spring of the space bar is green:
Then I flipped back the keyboard and started to remove each key with a key cap puller. The keys seem to be a little yellowed. The lettering (A, Z, E, R, T, Y …) are slightly yellow, whereas the functions (RUN, CONT, CSAVE, …) and symbols are white. I am not sure if these were the original colors or if this is due to aging …
Nevertheless, as you can see, there is a lot of filth underneath the keys:
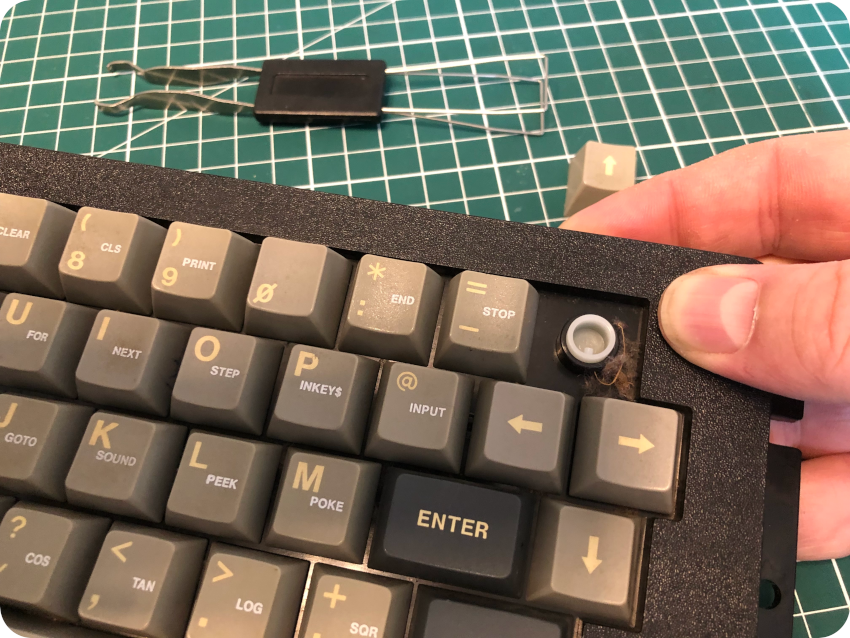
Each time I pulled off a key, I removed its plunger and kept them into plastic boxes:
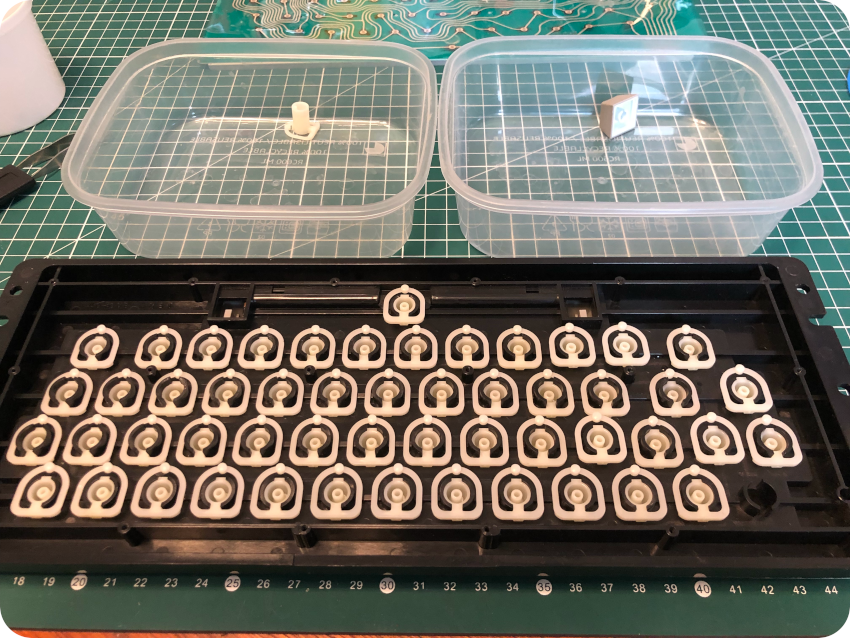
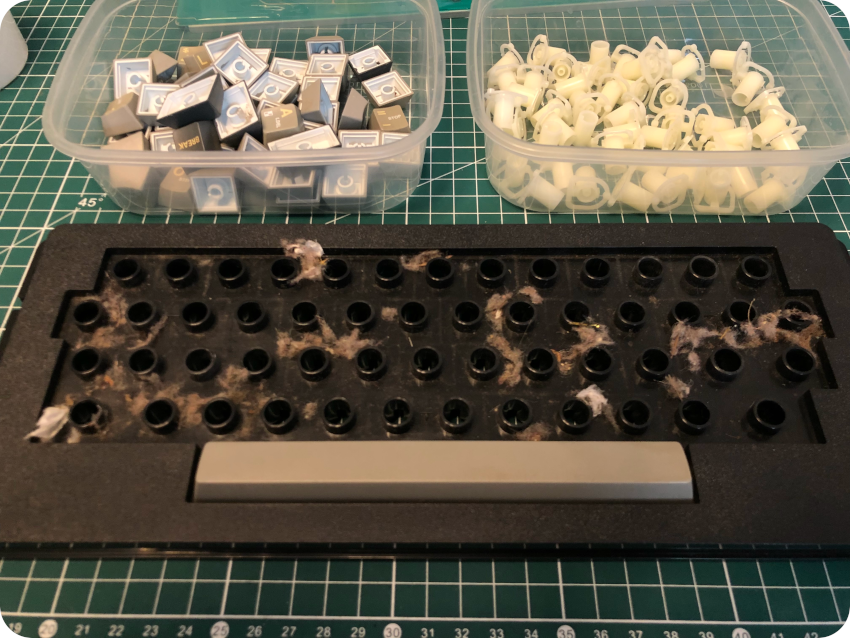
Here is the final result. I don’t know what happened to this poor keyboard. I had never seen a keyboard with so much dust bunnies and some kind of fibers everywhere … and these moldy white things, sort of mix of insect cocoon and mold. Yuck !
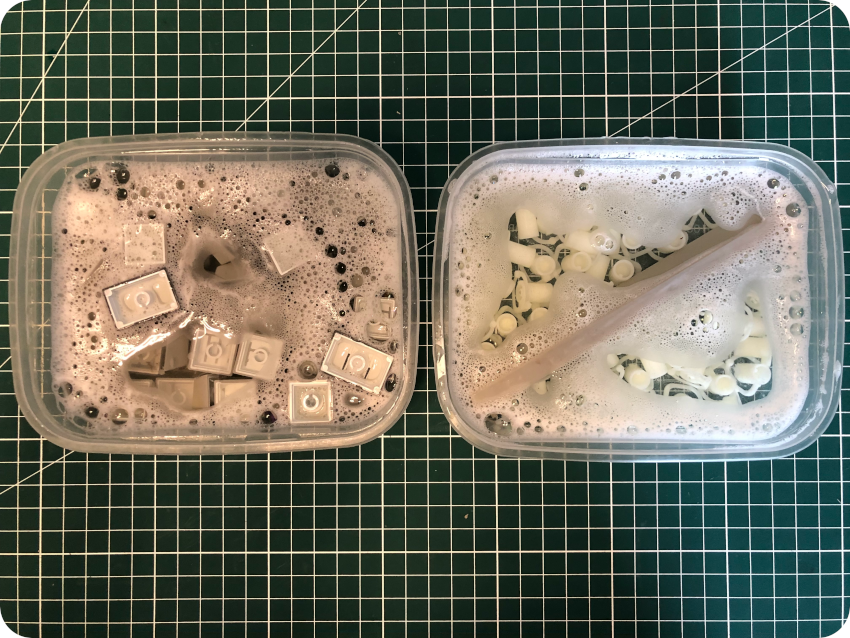
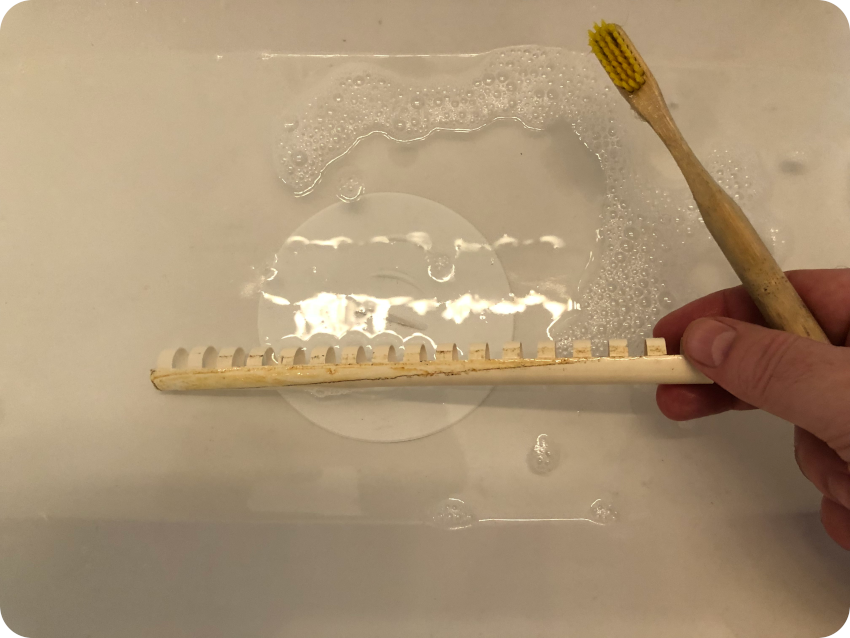
It is time for some serious cleaning ! I let the keys and plunger soak into soapy water overnight:
Meanwhile, the keyboard plastic holder was cleaned in hot water, scrubbed with soap and a toothbrush, then sprayed with IPA. I finished the cleaning process with a cotton swab:
The next day, I finished cleaning each key and plunger with a micro-fiber cloth:
I let the springs, keys and plungers dry:
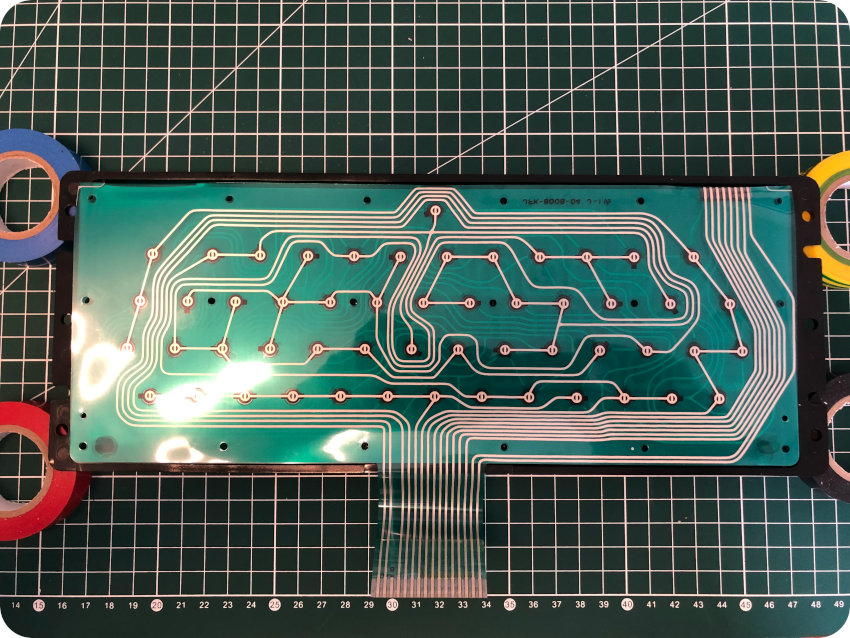
Finally, I took care of the keyboard membrane itself, very carefully, with a soft cloth and window cleaner:
The main board
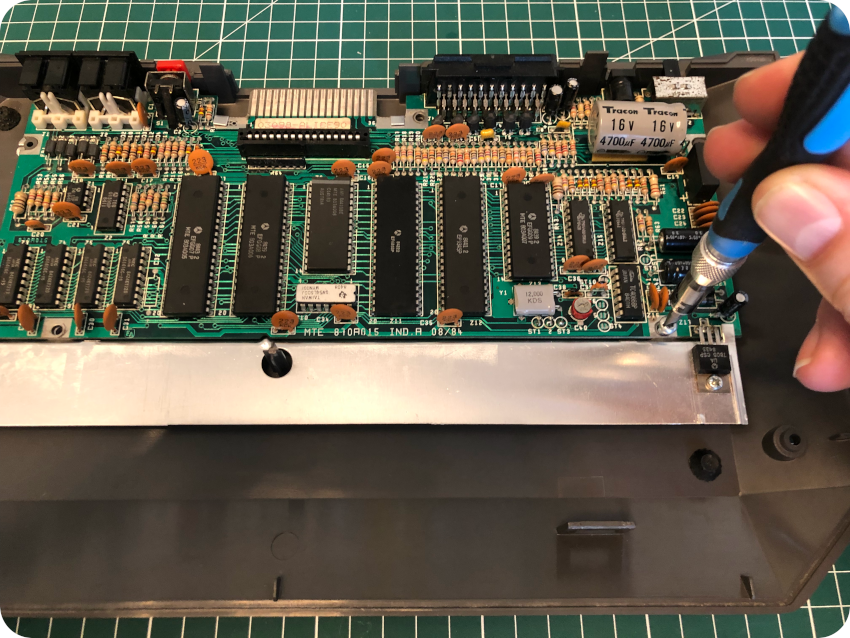
Now it is time to service the main board. I removed the metal shielding, that is also used as a heat sink. To do that, I unscrewed the voltage regulator (held by a nut, a washer and a bolt):

In order to remove the shielding, the two metal tabs sitting on left and right sides of the expansion port have to be bent:
There you go, the metal shielding is removed (and later cleaned with WD-40):
As usual, I did a visual inspection of the board, looking for cracks, bad solder joints or electrolytic capacitor leakage. It looked good, including this huge capacitor near the on/off switch. And no signs of mold or rust (apart a bit on the on/off switch):
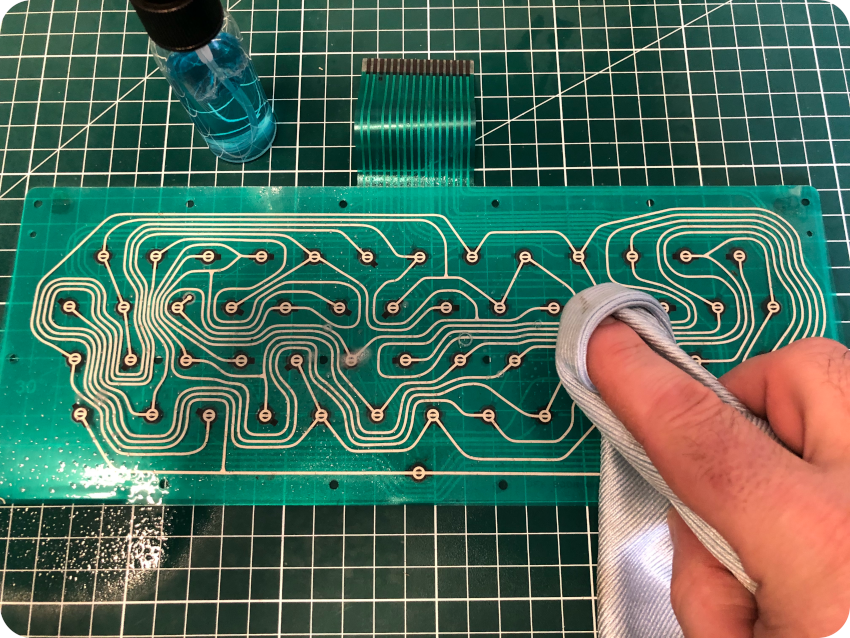
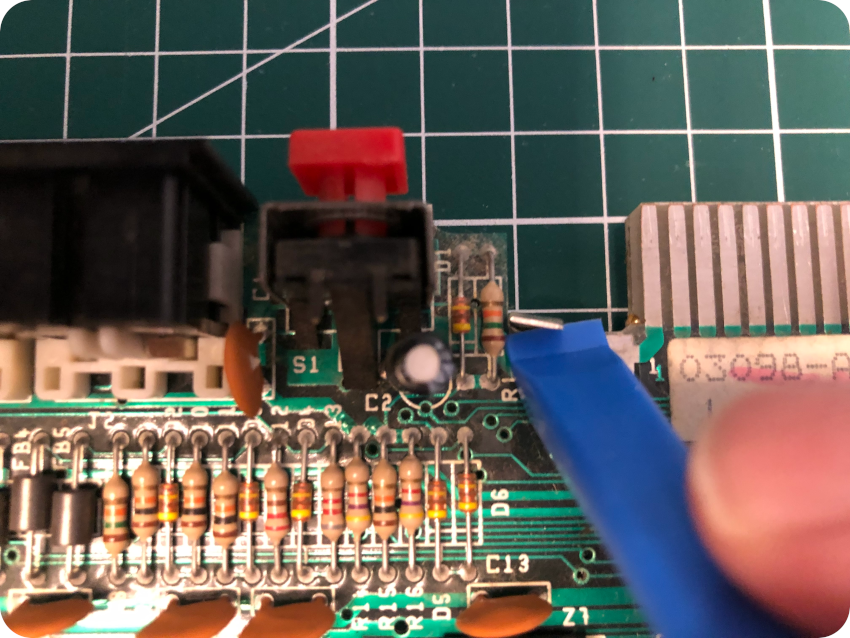
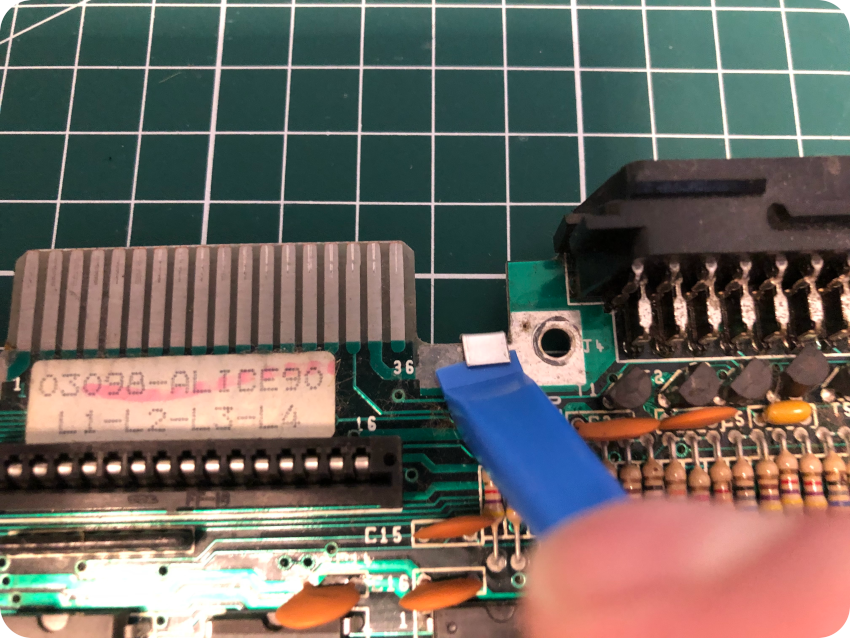
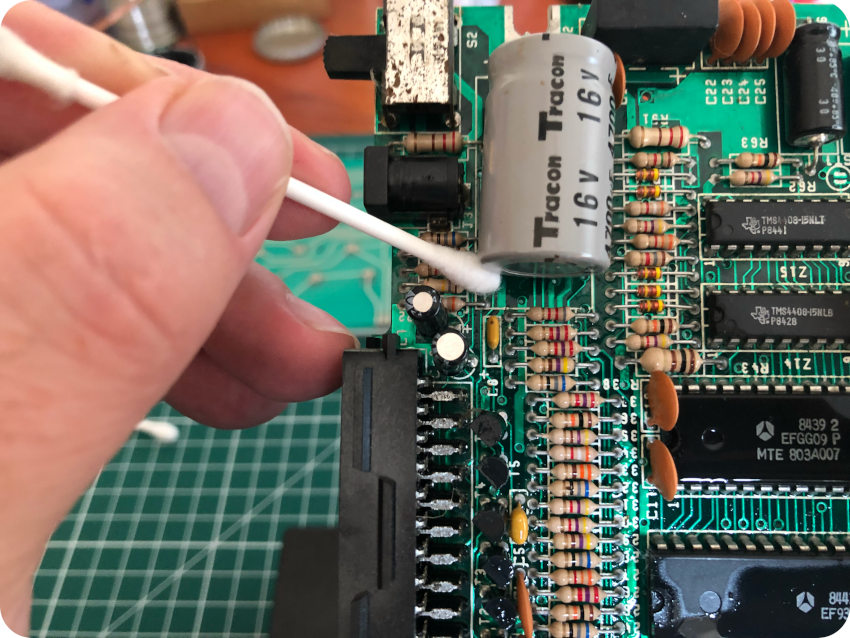
Then it was time for a good cleaning of both sides of the PCB:
I followed my routine, using IPA and cotton swabs:
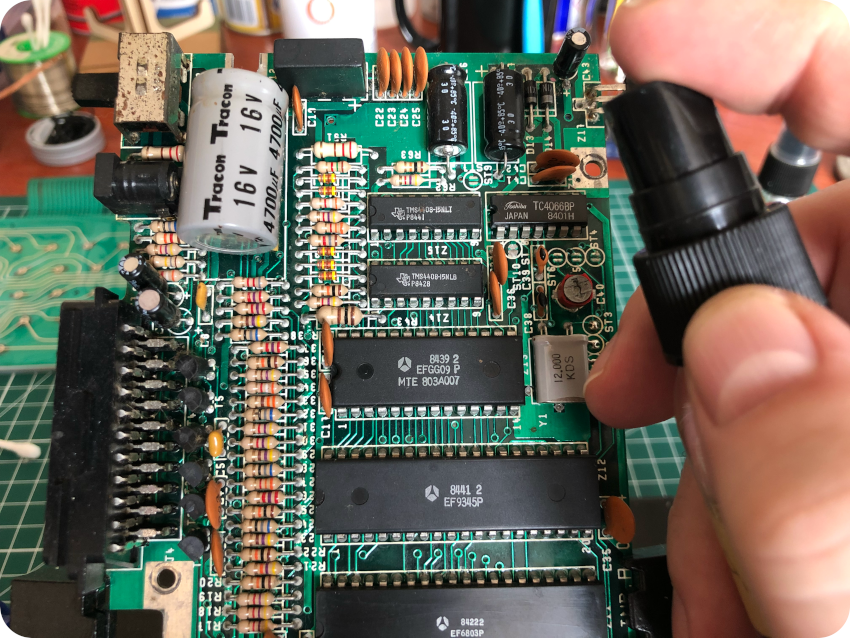
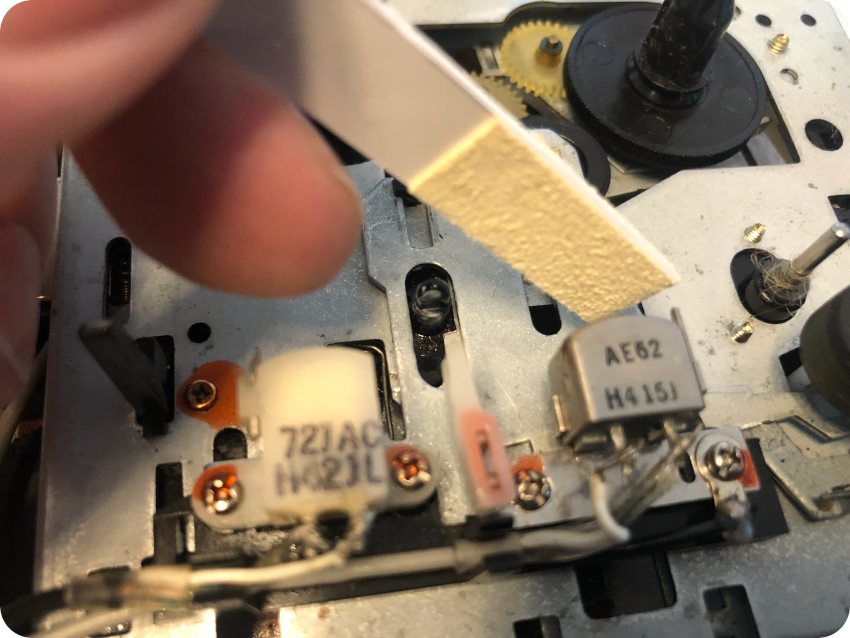
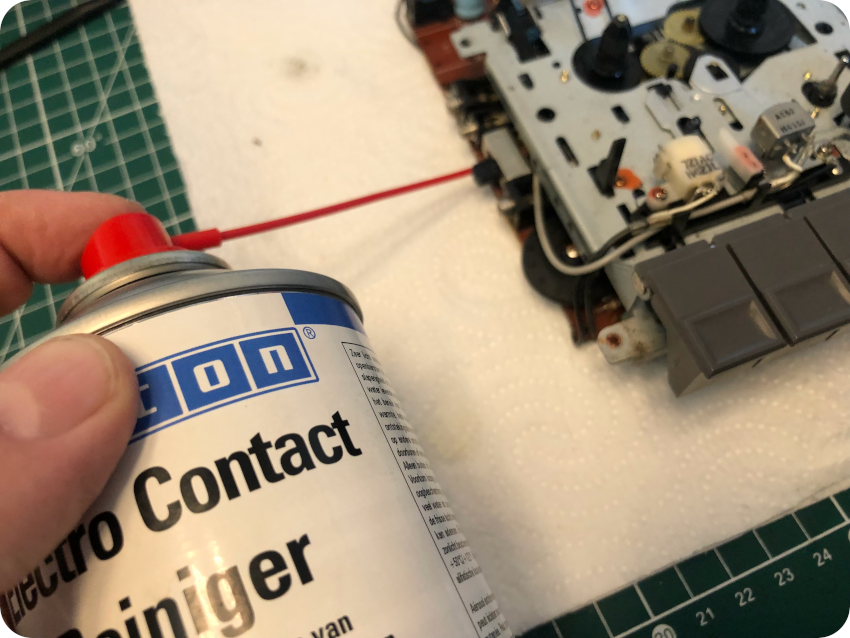
I took care of all connectors with contact cleaner:
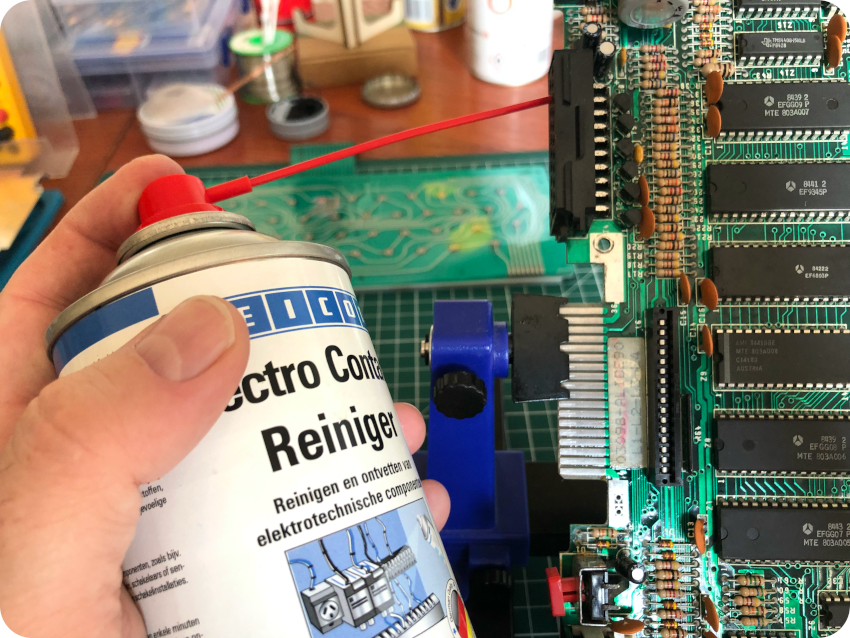
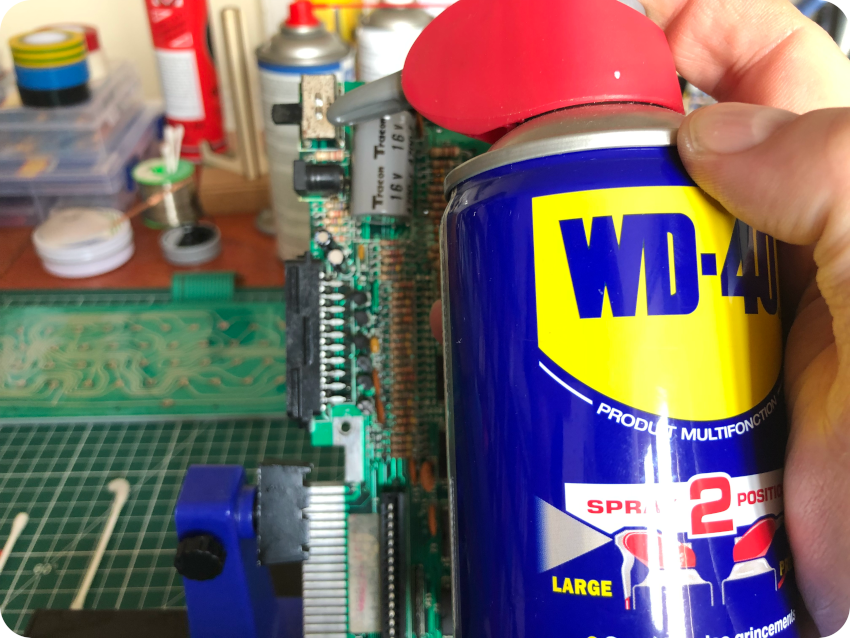
Then I sprayed a dash of WD-40 on top of the power switch which was a bit rusty:
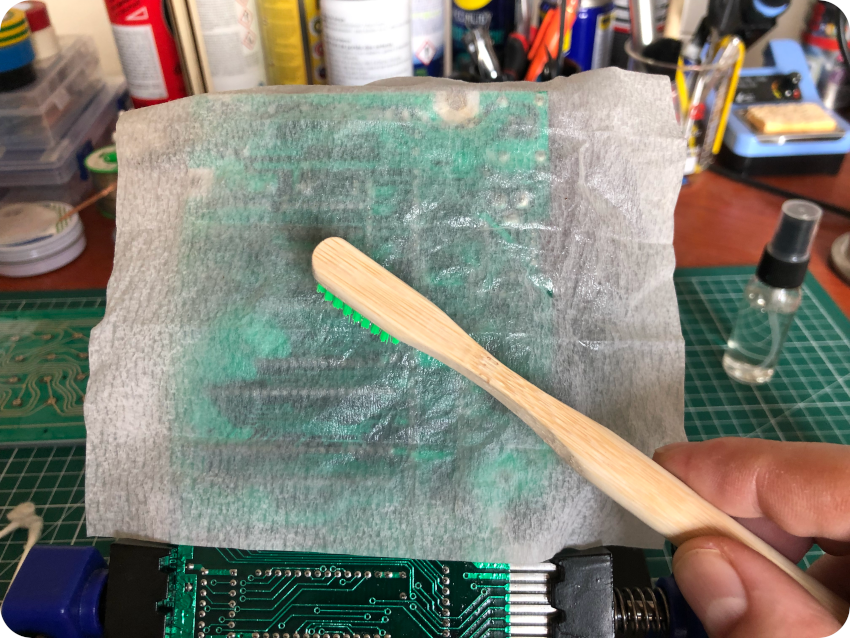
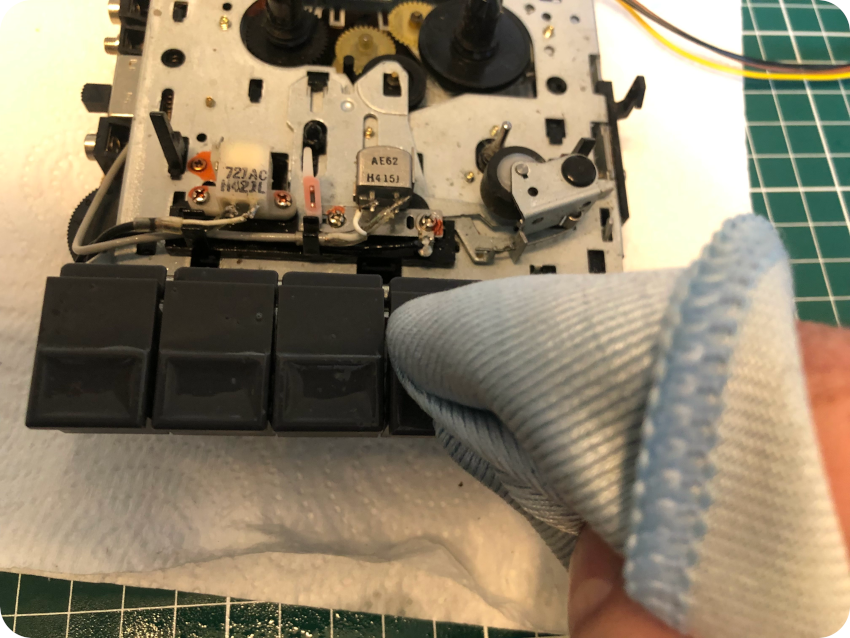
Finally, I took care of the back of the PCB, with glass cleaning towels soaked into IPA and a soft toothbrush:
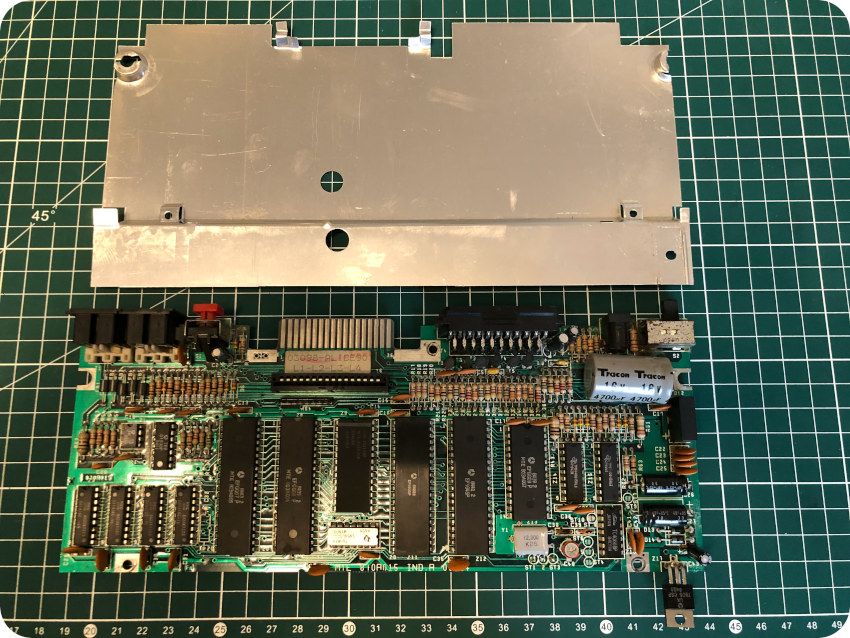
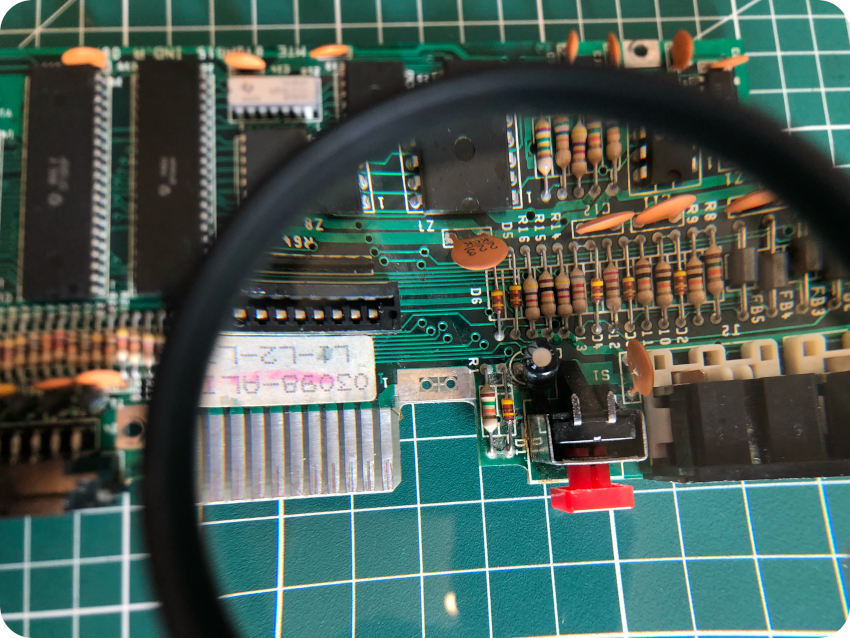
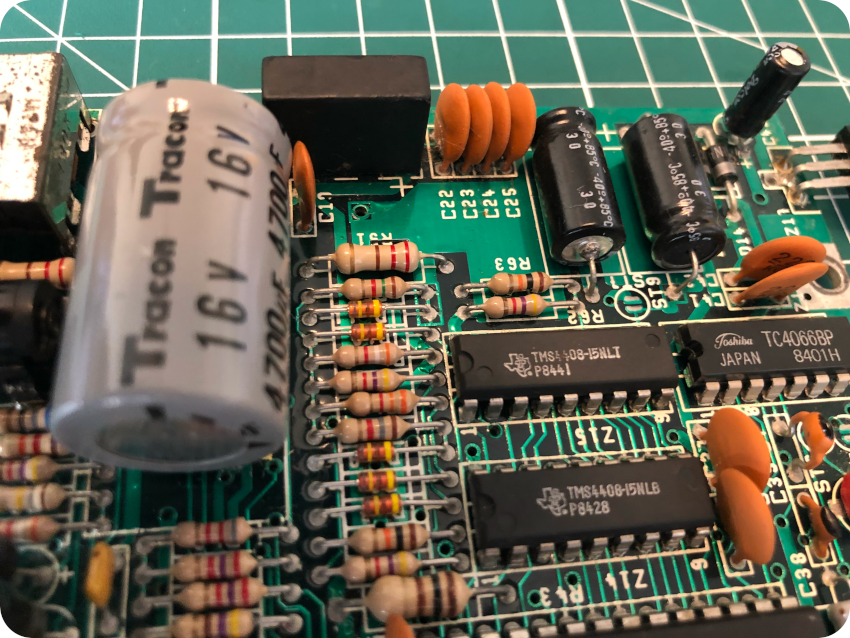
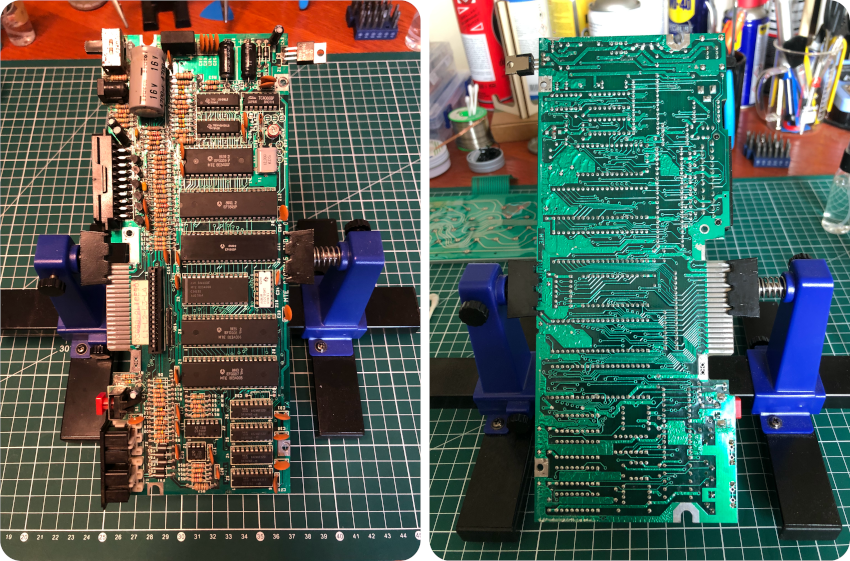
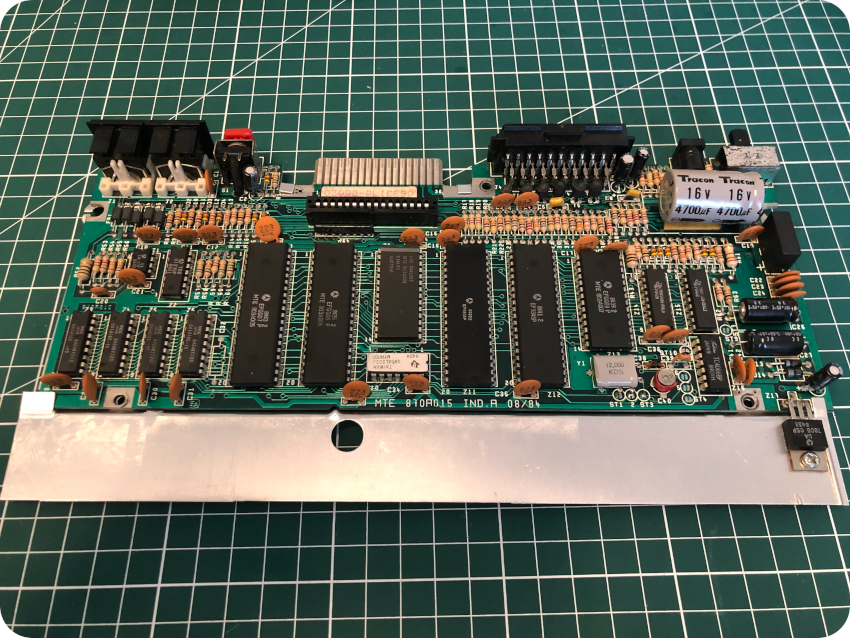
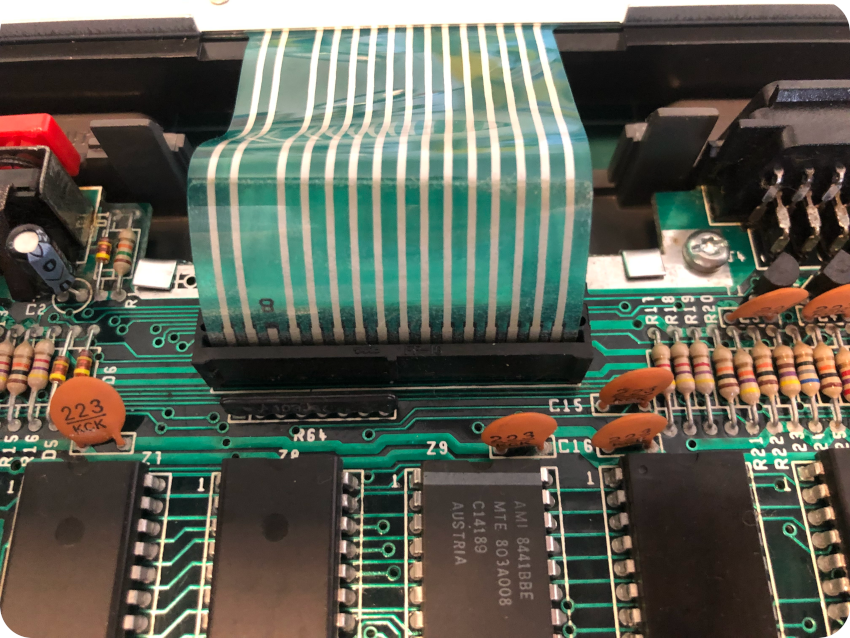
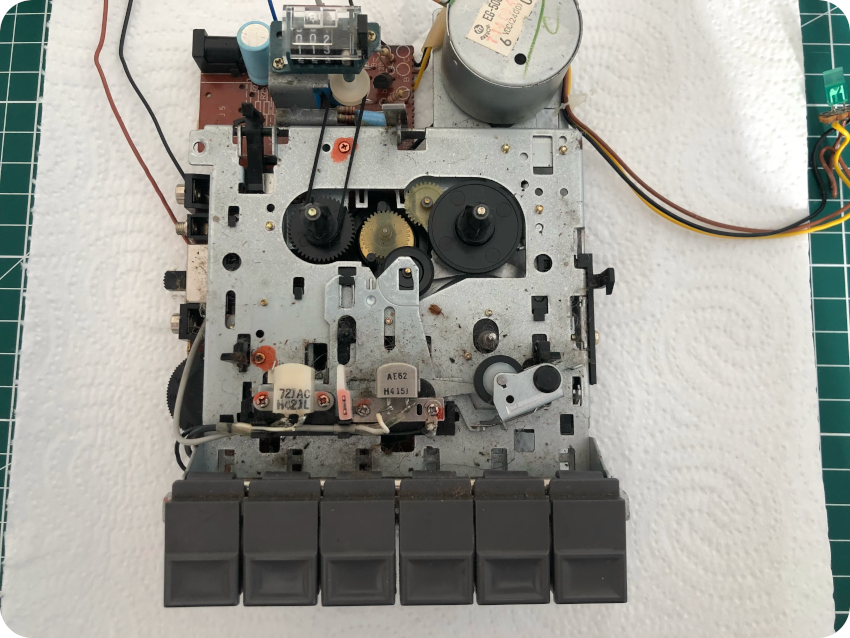
Everything is cleaned. Let’s now take a detailed look at this motherboard:
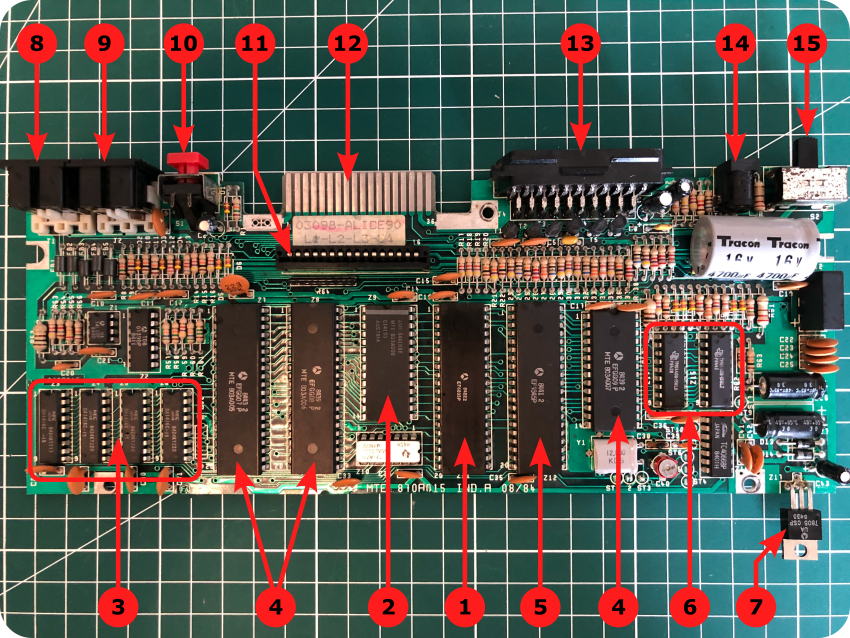
Here are the main components:
- Microprocessor: the Alice 90 is powered by a 8-bit Motorola MC6803P, manufactured by Thomson and running at a 1MHz. The 6903P is a MCU (MicroController Unit) incorporating a 6802 CPU with 128 bytes of RAM, a timer, programmable parallel I/O lines, and a serial port. The 6803P is also used by the Alice for sound generation.
- ROM: the Alice 90 has 16 kilobytes of ROM onboard, embedding MS BASIC 1.0 and an assembler.
- RAM: this motherboard is equipped with 4 x 8 kilobytes of DRAM chips (NEC 41416, equivalent to Texas Instruments TMS4416)
- Gate Arrays: the Alice 90 is based on 3 Gate Arrays (EFGGG07P, EFGGG08P, and EFGGG09P), manufactured by Thomson. The first one manages RAM, the second one handles key inputs and the last one manages vRAM.
- Video chips: a Thomson EF9345 is used as a semigraphic microprocessor for video image control. The EF3945 is capable of displaying 8 colors, 128 alphanumeric characters and 128 semigraphic characters. It has one semigraphic mode and 32-, 40- and 80-column text modes.
- vRAM and video overlay: the video chips is able to address 16KB of dedicated video RAM (2 x 8 kilobytes of DRAM Texas Instruments TMS4408). The TC4066BP chip, manufactured by Toshiba, next to the vRAM, is used for video overlay synchronization.
- Voltage Regulator: the 7805 voltage regulator, manufactured by Thomson, is screwed to a large metal heat sink.
- I/O: Cassette interface (DIN5)
- I/O: RS-232C serial interface (DIN 4)
- Reset Button
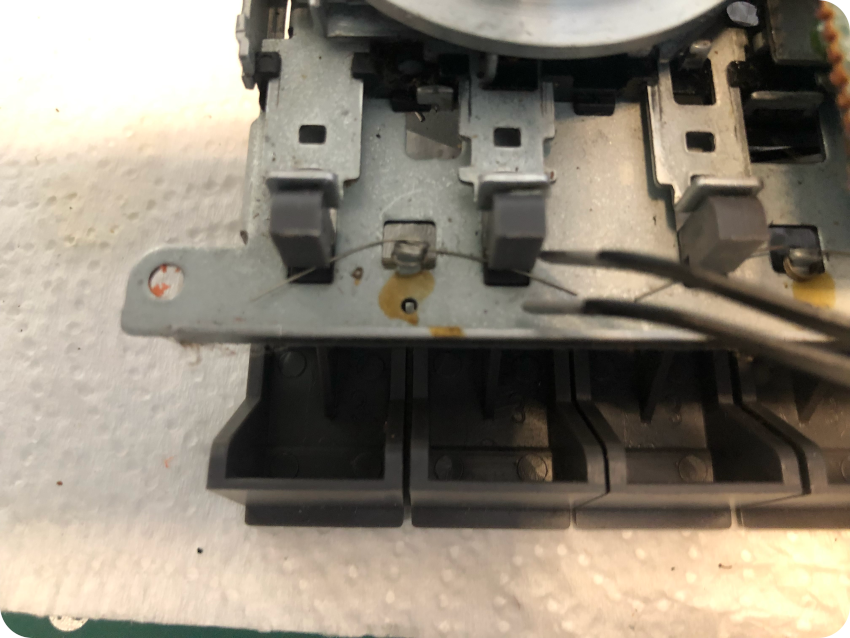
- Keyboard Connector: connector for the flat ribbon cable of the keyboard.
- Extension slot: 18 pin extension slot (used for 8 kilobytes memory expansion, 1200 baud modem, or a DB9/Atari compatible joystick expansion)
- Video out: SCART (Péritel) connector.
- AC Power: 10V / 1.3A power jack.
- Power switch: On / off button.
Putting things back together
Let’s start with the keyboard. First, inserting the plungers:
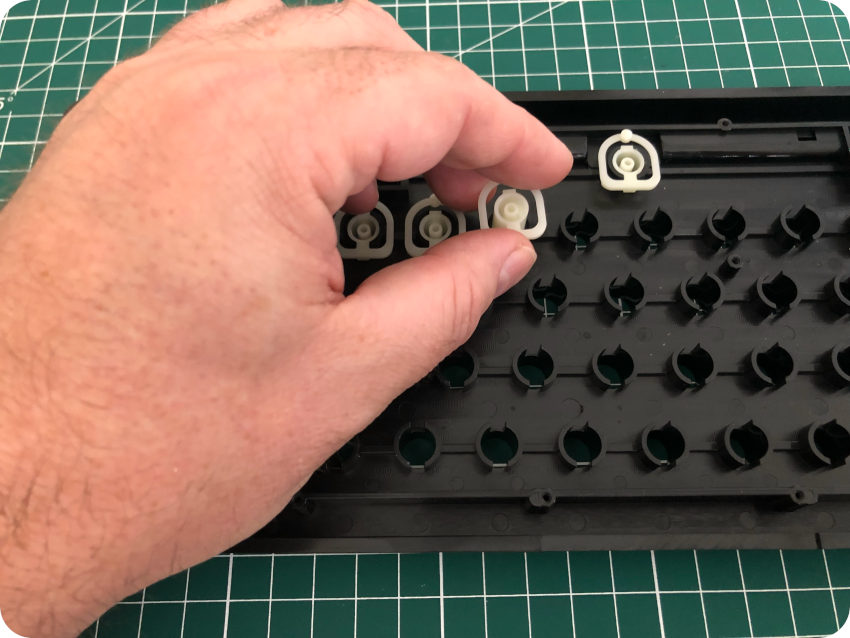
Then, putting back the springs into each plunger:
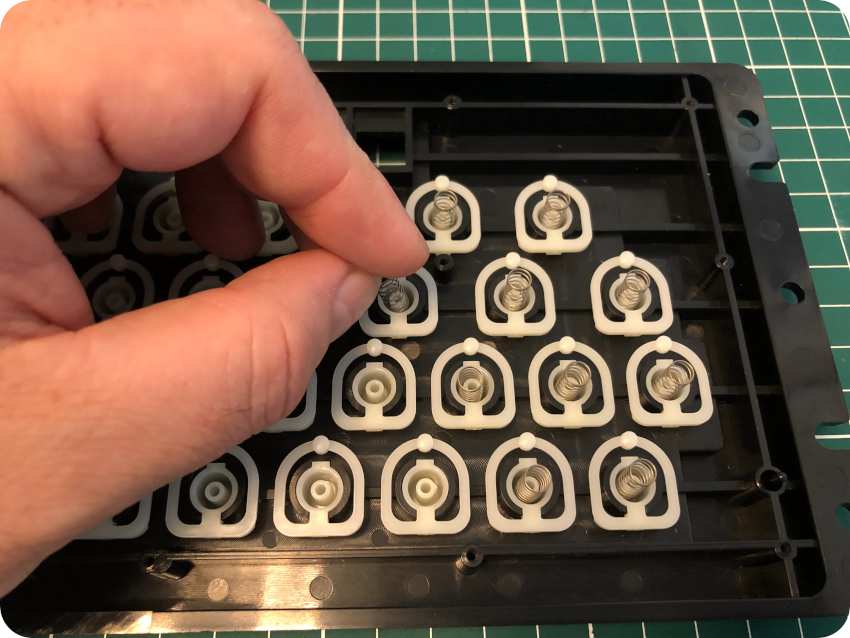
Then the keyboard membrane on top:
Let’s put back the metal cover. It is easily aligned, thanks to these two plastics pins on each side of the keyboard holder:
![]()
Time to screw back these 18 tiny screws:
And let’s put back the keys:
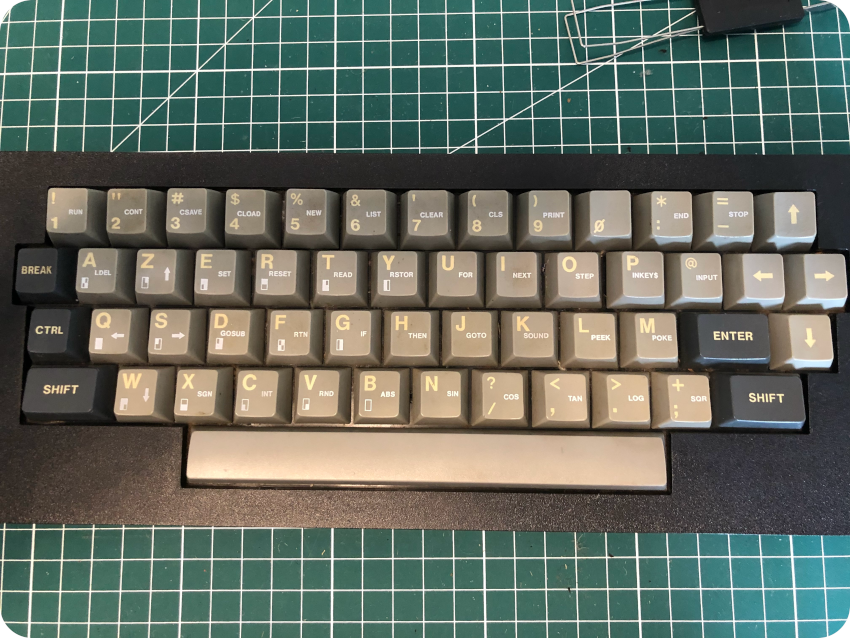
The keyboard is fully reassembled. Now that I got rid of all the grime underneath, It is in a much better shape than it was originally. It maybe a little too soft, but it is really not a bad keyboard at all !

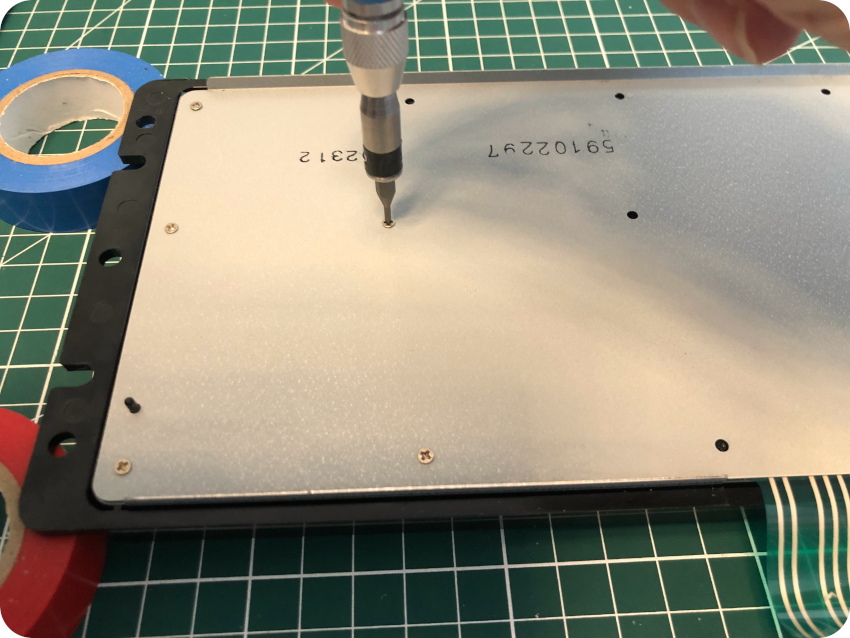
Now, let’s put back the PCB. First, screwing back the metal shielding:
Then screwing back the PCB to the bottom case:
Then, very carefully, connecting back the keyboard ribbon:
Now, let’s screw back the top and bottom covers:
There we go: a cleaned up Alice 90, ready to be tested !
The Power supply
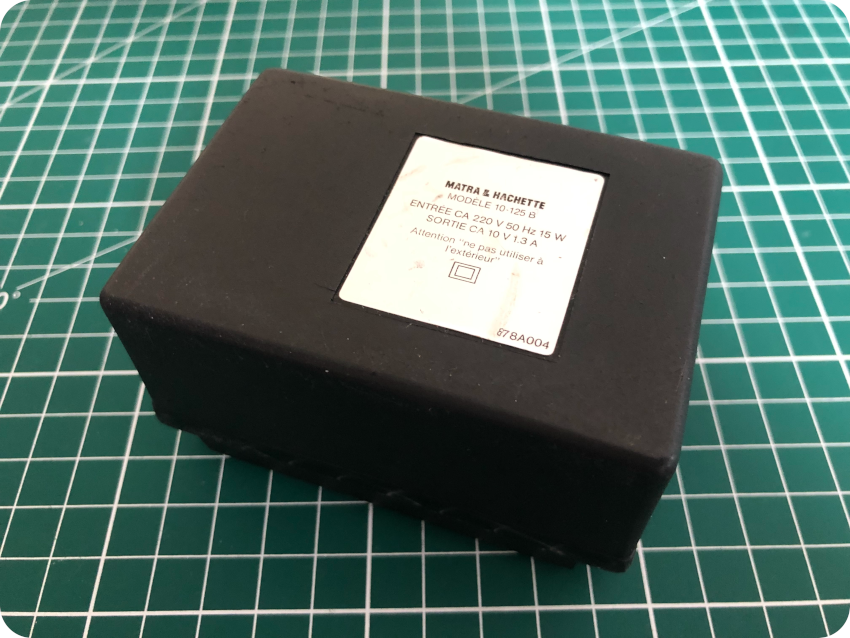
Before turning on the Alice 90, let’s take a look at the Power Supply:
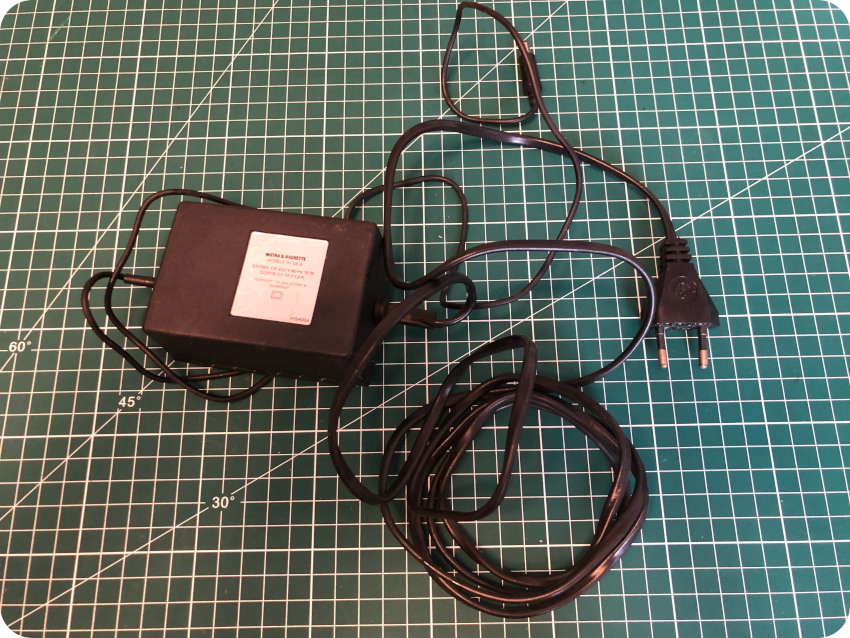
It is a very basic 15W transformer, 220V / 50 Hz AC input, 10V / 1.3 A AC out. Let’s open it !
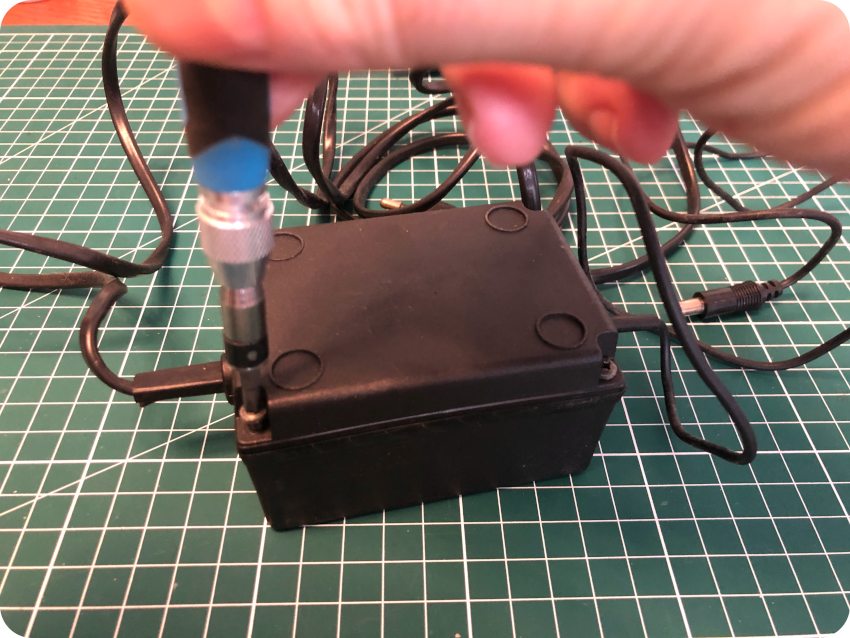

I let the bottom and top parts of the transformer casing soak into warm soapy water:
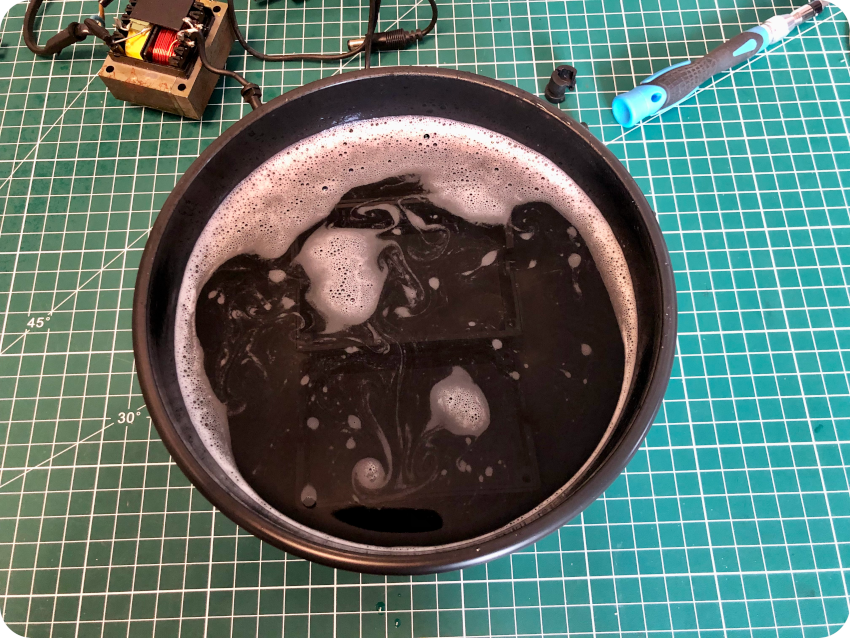
Once cleaned and dried, I sprayed IPA, sprayed plastic rejuvenator, then applied anti-static foam with a soft cloth:
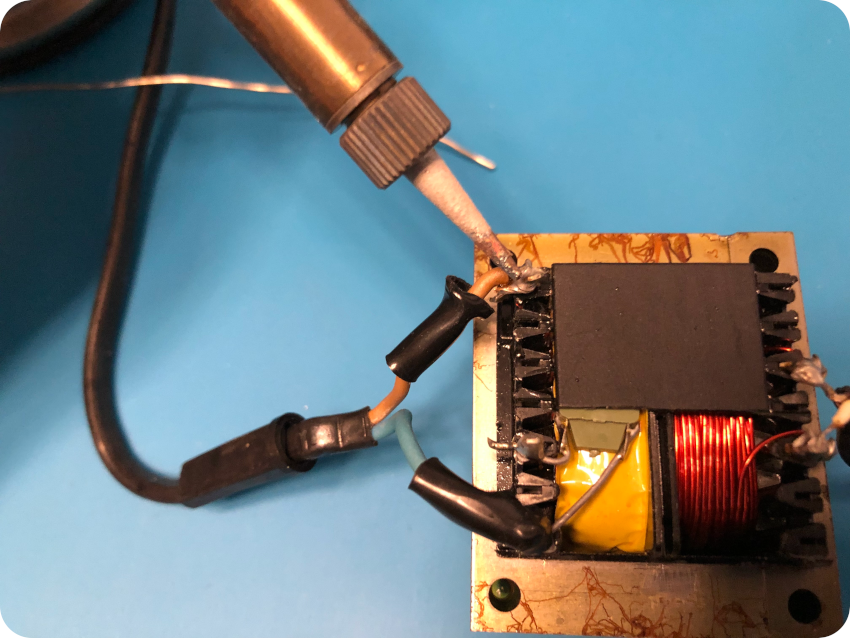
Meanwhile, I took a look at the wiring and the solder joints, which were not in the most perfect conditions:
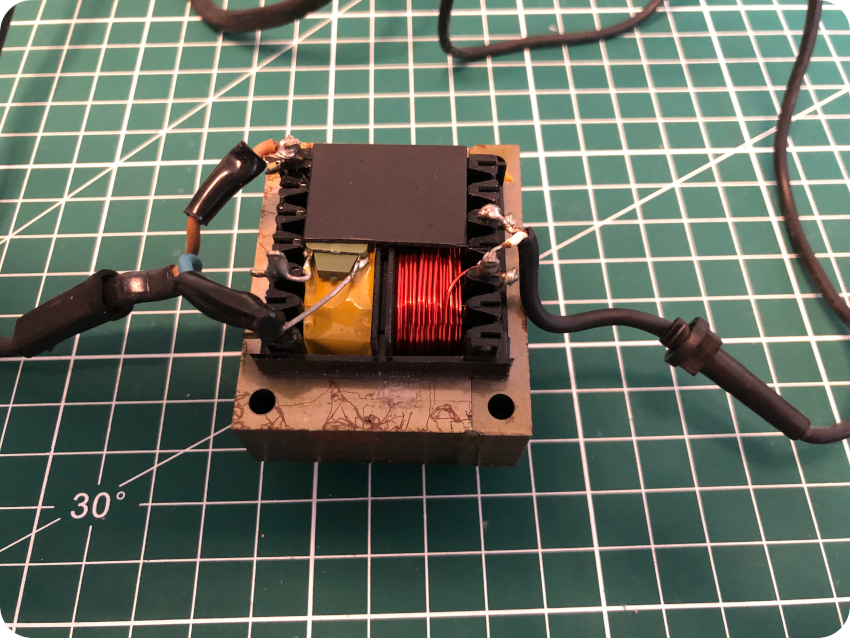
So I re-flowed fresh solder on each connection:
I put the Power Supply back together and wrapped a bit of black electrical tape around one of the cable restrainers which was in bad shape (on the left of the picture):
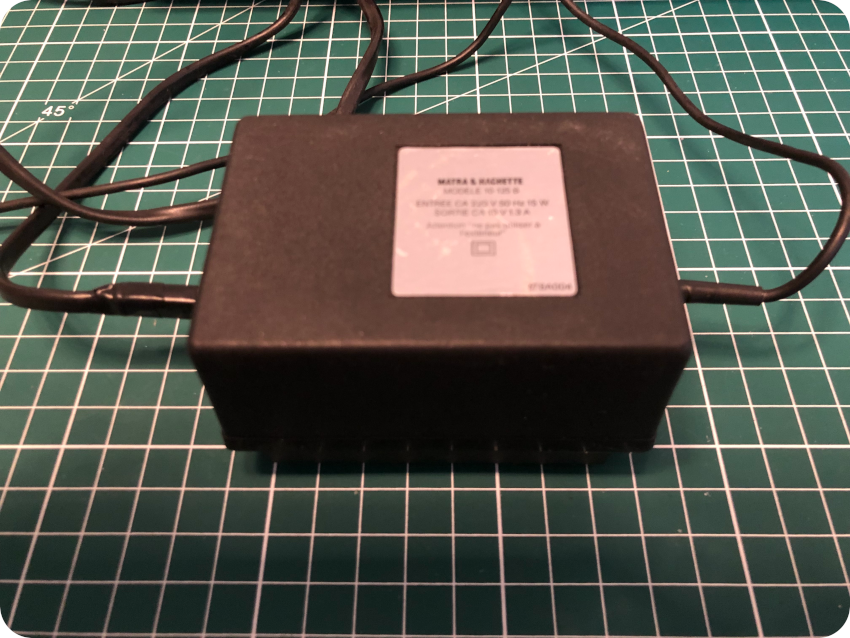
The plugged in the Power Supply and tested the output with a multi-meter, with surprisingly good results. Nice !
The SCART cable
Now, let’s take care of the SCART cable. It has seen better days, being a little rusty and a bit grimy:
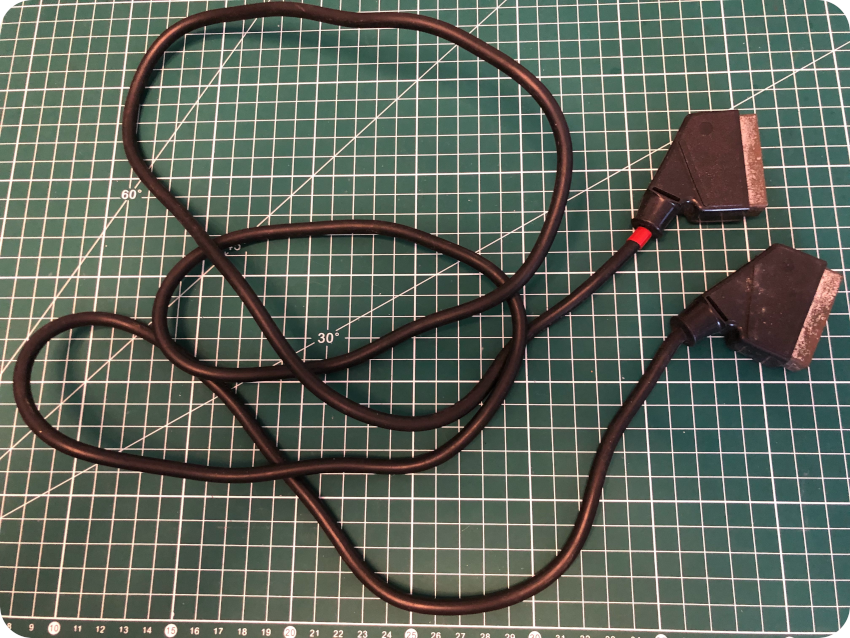
I cleaned up the cable, then took care of the rust with WD-40:
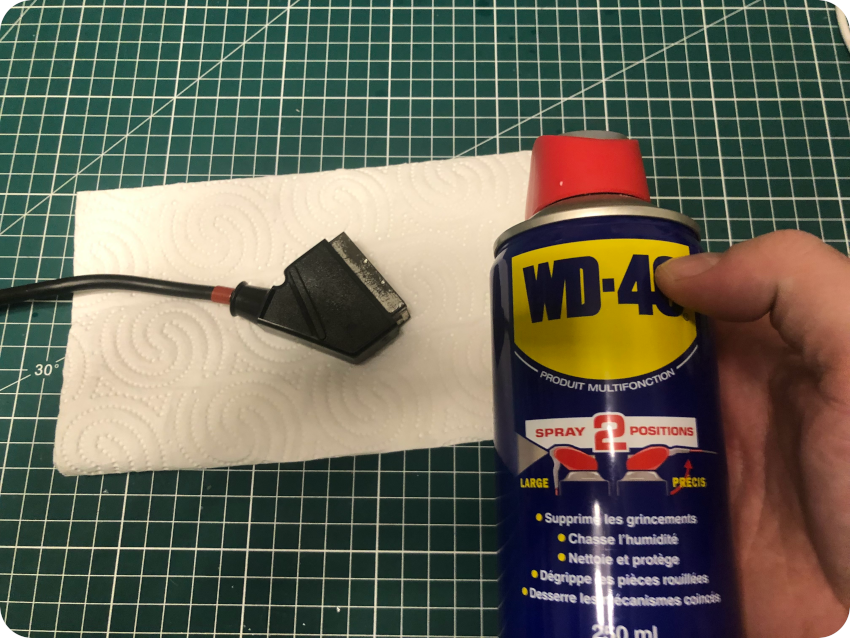
Then I sprayed contact cleaner:
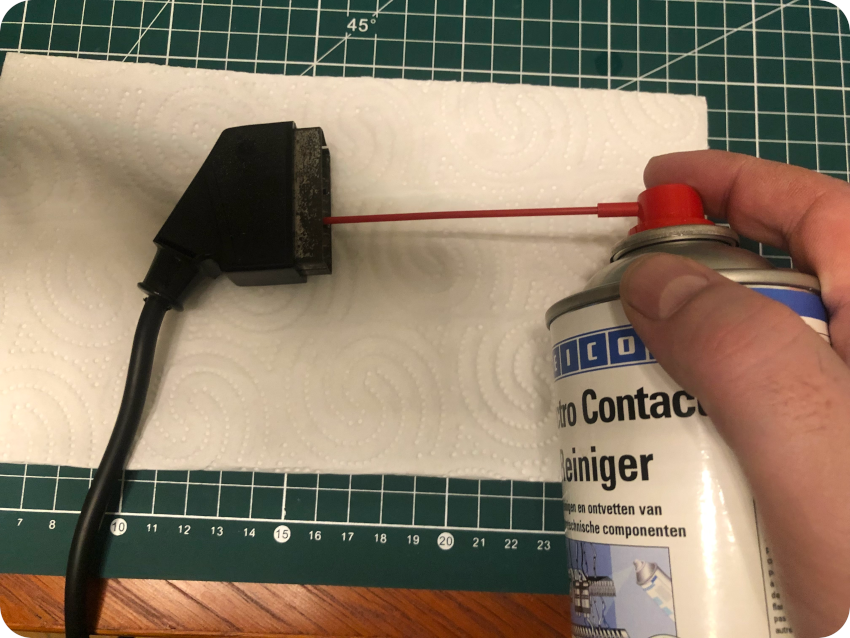
Here are the results:
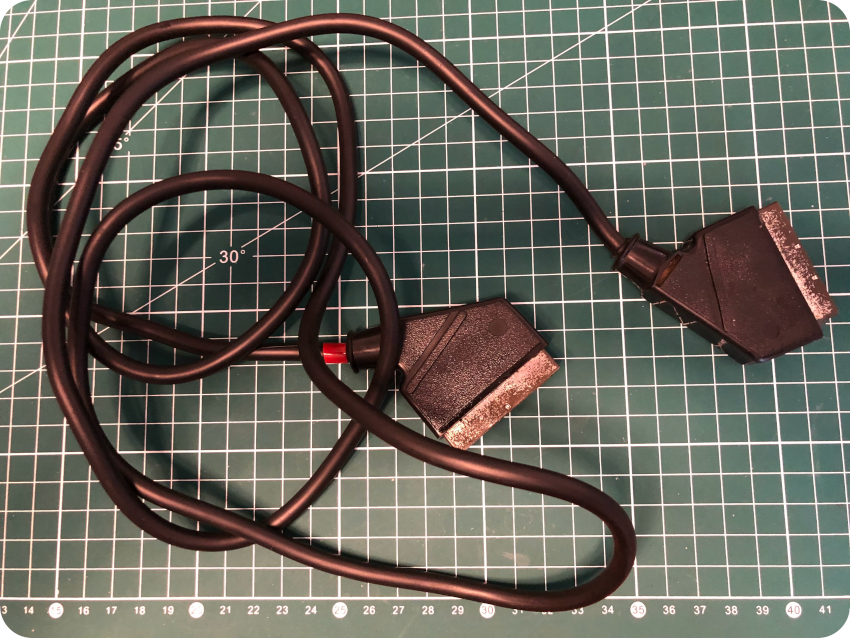
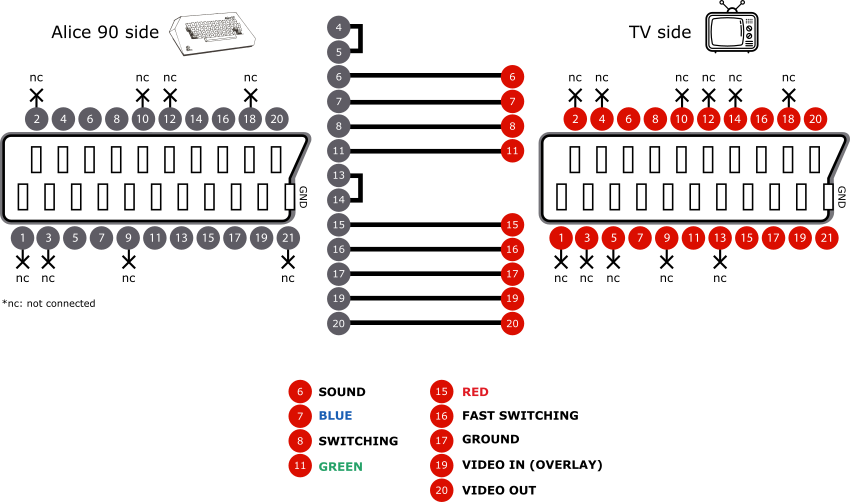
This SCART cable is definitely not in perfect conditions with many battle scars. But I will have to do with it for now, because, from what I read, Alice 90 machines cannot use standard SCART cables. Indeed the Alice 90 uses a peculiar SCART wiring (source: https://alice.system-cfg.com/hardware.php#connect)
If this cable were to be bad, I may have to buy a new one and rewire-it accordingly.
Note:
- The connector with a red ring goes to the TV side, the other one (black) goes to the Alice 90,
- According to the “IVA Incrustation Vidéo Alice” (“Alice Video Overlay”) manual, page 3, connectors have to be swapped (connector with the red ring on the Alice side, the other one the TV side) in order to use video overlay features:
First tests
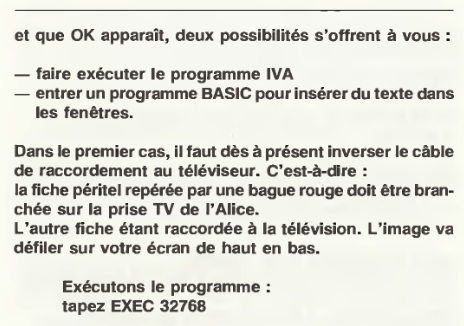
Time to take the Alice 90 for a spin ! I plugged in the Power Supply and connected the SCART cable to my trusty Samsung TV. I turned on the power switch, holding my breath and crossing fingers:
Yeah ! It worked right away !
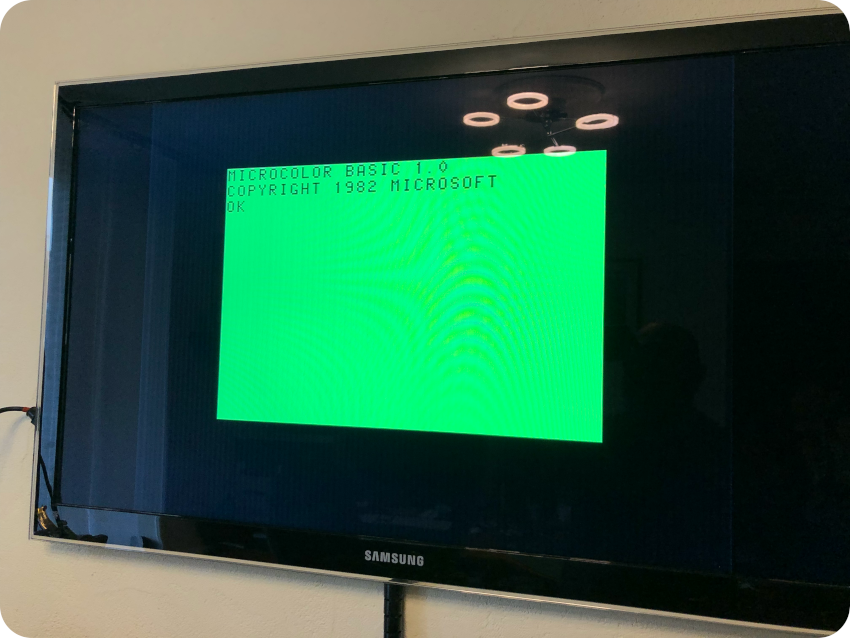
Unsurprisingly, the SCART connector is a bit shaky. Output goes on and off whenever I wiggle a bit the connector on the Alice side. I sprayed more contact cleaner on the Alice port and the SCART connectors, and it actually made things much better. Here is another picture I took (in the meantime, I fiddled with the TV’s zoom parameters to get a better video output):
Not bad at all ! To get any further, I will have take care of the software side, starting with the cassette tape player.
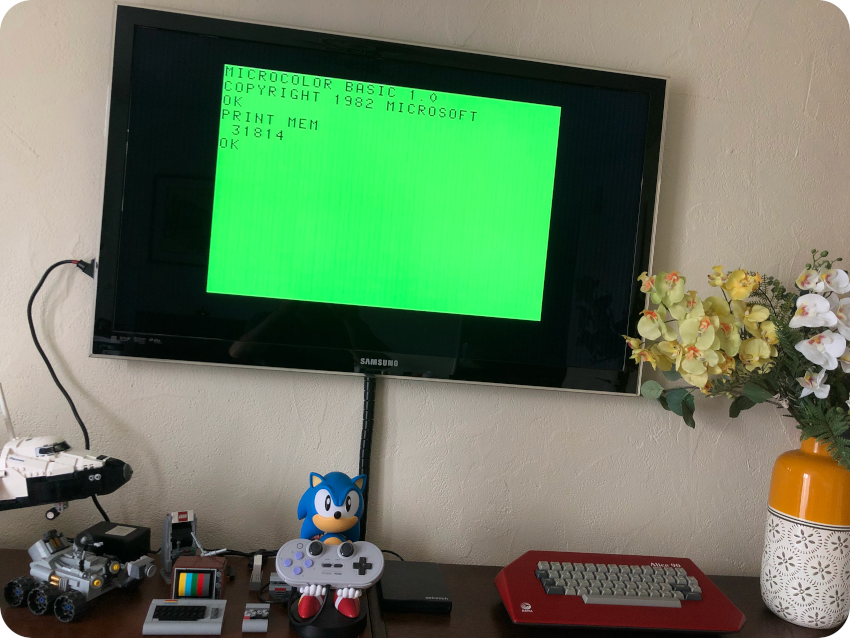
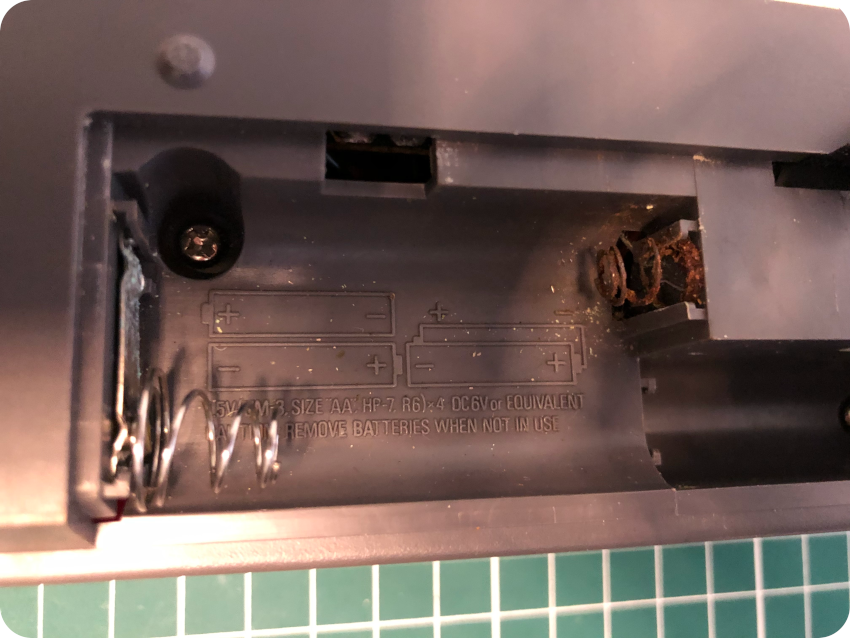
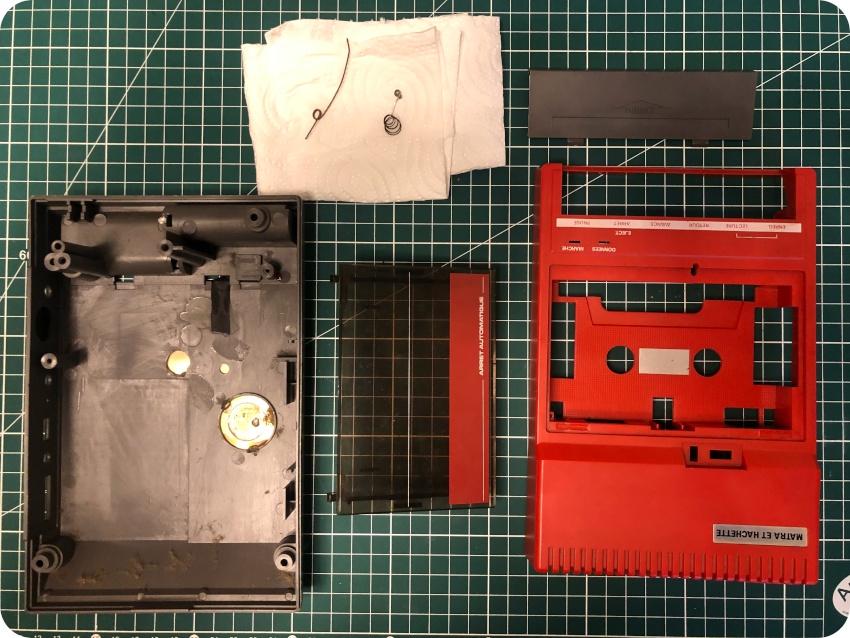
Servicing the DATACORDER
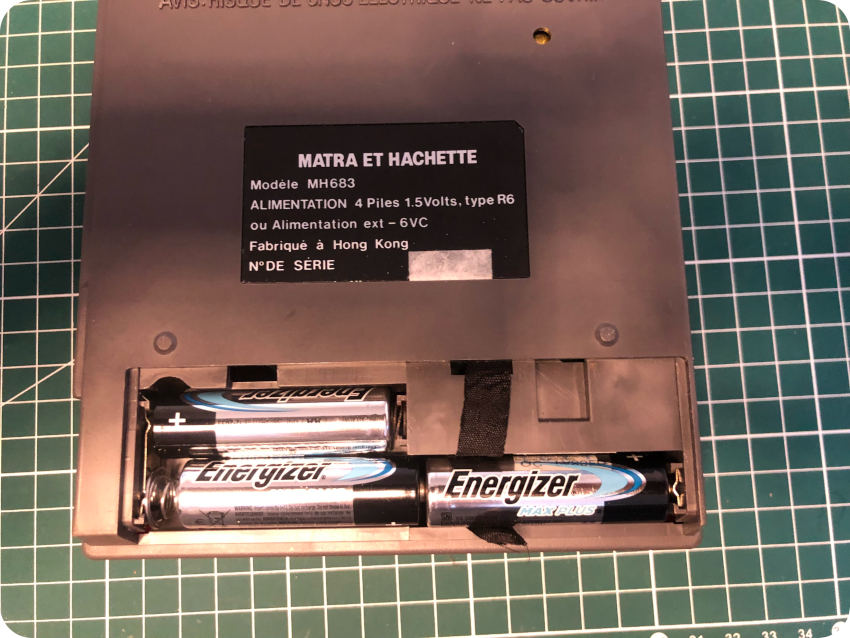
It is time to take care of the cassette tape player. It either uses a 6V DC Power Supply (that wasn’t bundled with the suitcase) or runs on 4 x AA batteries. I loaded 4 fresh batteries … but the player would not properly work, going on and off (mostly off), showing evidence of bad contacts:
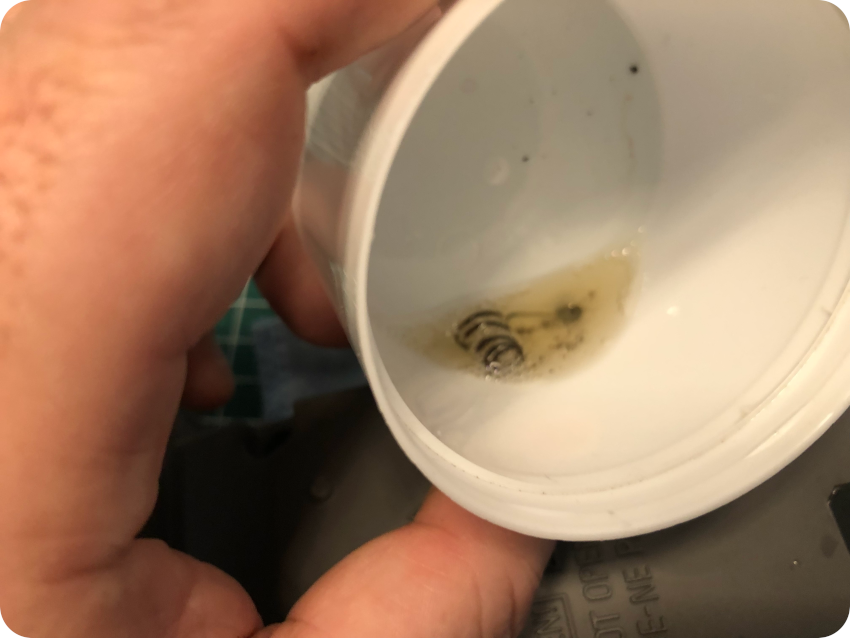
Let’s take a look. Well, I actually saw the first evidence while inserting batteries: one of the connectors was badly corroded:
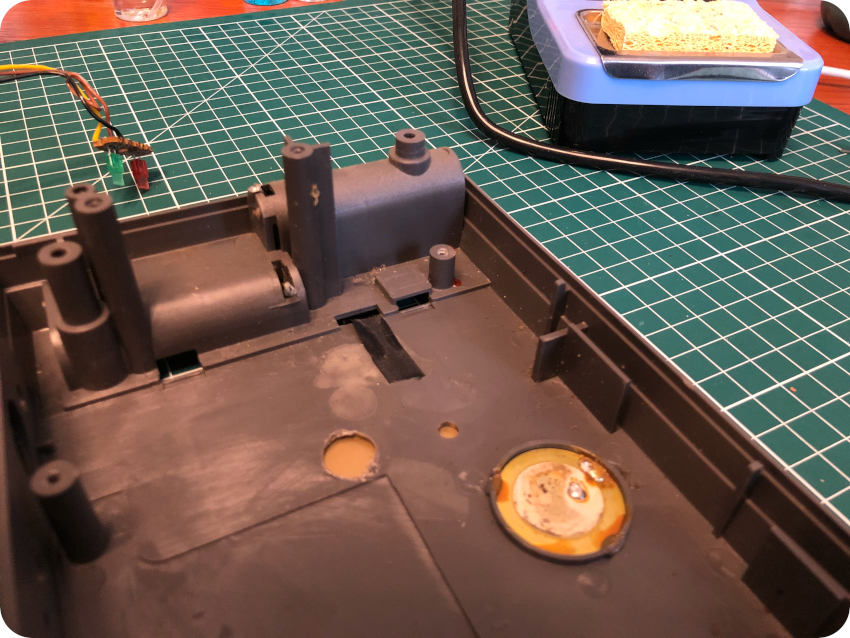
Let’s dig in and unscrew the bottom cover:
Here is the inside, once the four screws were removed:
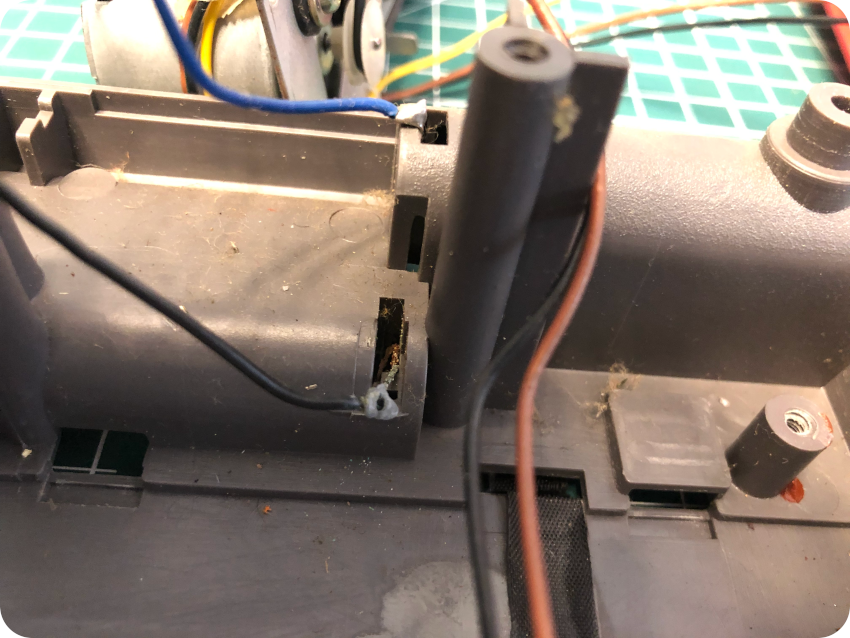
The mechanical parts definitely needs a good cleaning ! I kept on digging, removing the two screws holding the player to the bottom casing:
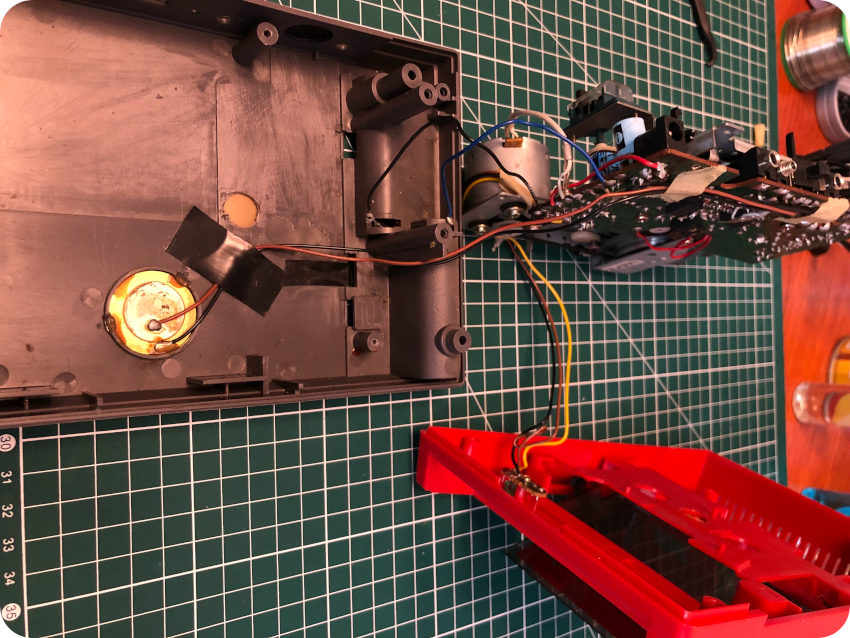
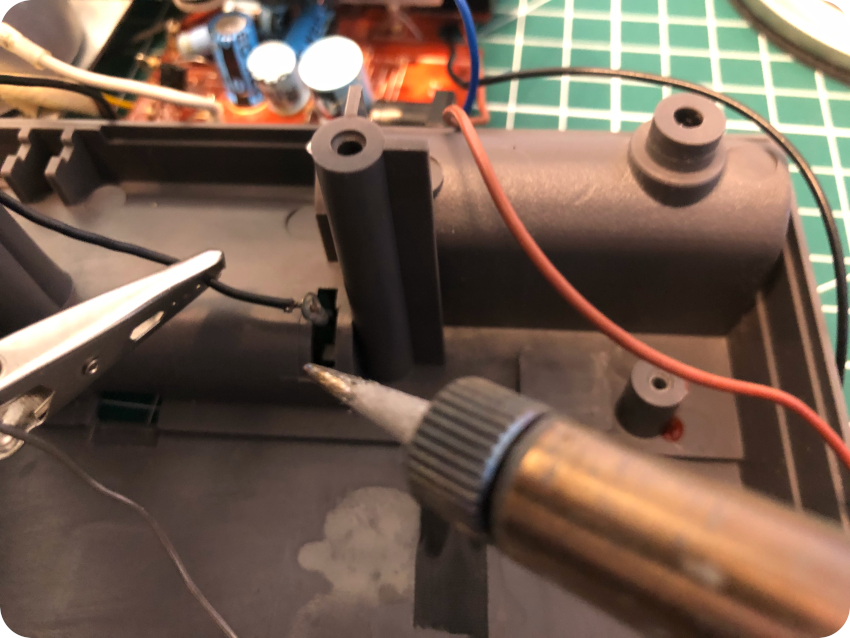
To get any further, one has to unscrew the LEDs from the top red casing, and de-solder the blue and black power wires, as well as the speaker wires from the bottom black casing:

Let’s start the cleaning process. I removed the rusty connector and let it soak into WD40 for a few hours, then a good scrubbing, an let it dry on a paper towel:
I did the same for the cassette cover spring:
Then I followed the steps of my cleaning process: warm soapy water, toothbrush, let the parts dry, then anti–static foam cleaner:

While the casing was drying, I started cleaning the mechanical parts:
First, let’s take a look at the belts. The one from the counter was in good shape, though I had to put it back into tracks:
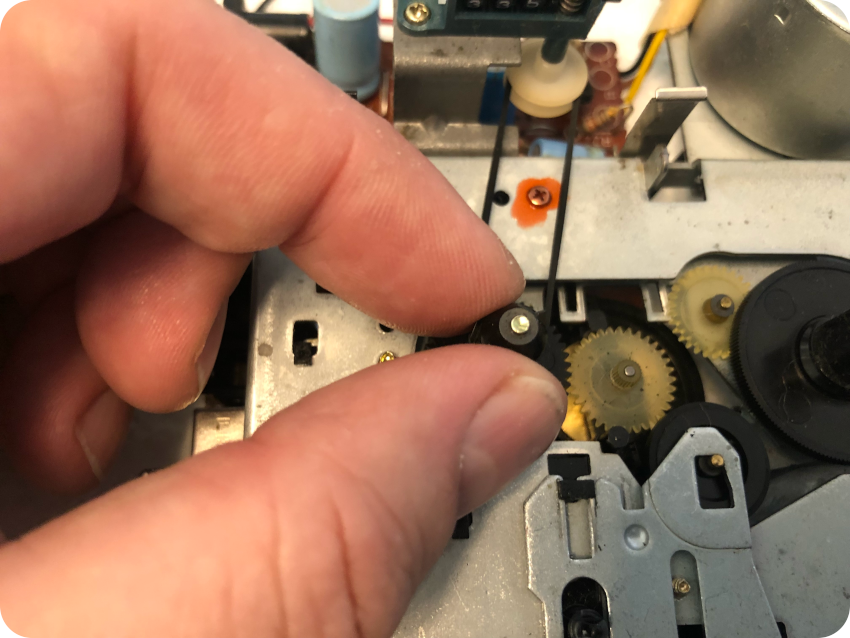
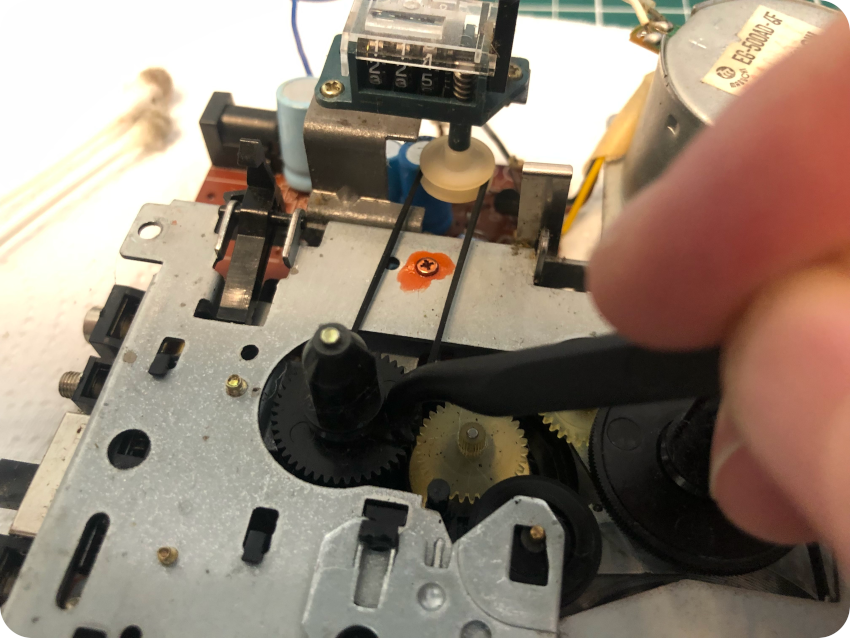
The counter itself works perfectly. Good. The main belt is in perfect condition. Nice, there is no need to disassemble all the mechanical parts to replace it, which can be a pain !
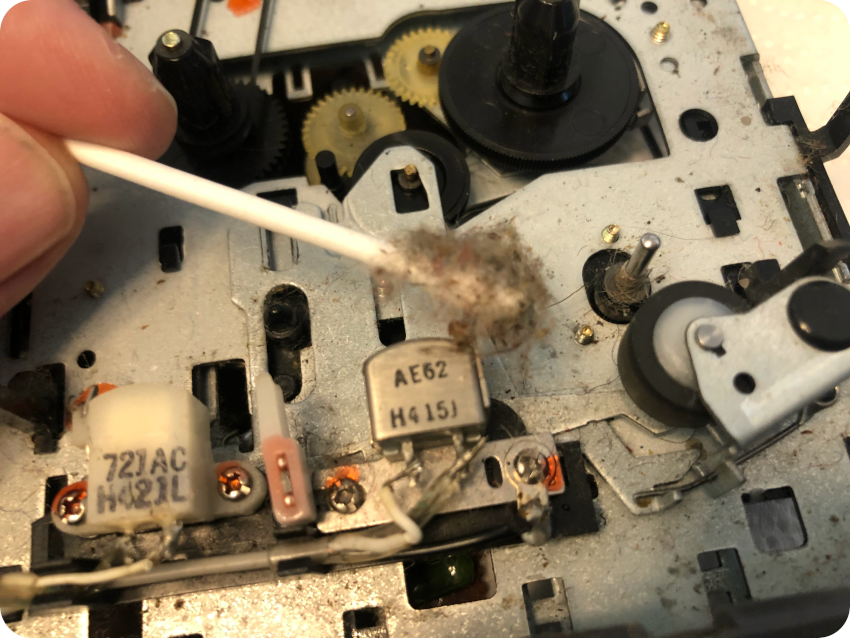
Just like the keyboard, the mechanical parts of the cassette player are filthy. I started a long and tedious cleaning process, with compressed air, cotton swabs, WD–40, then white lithium grease for the cogs:
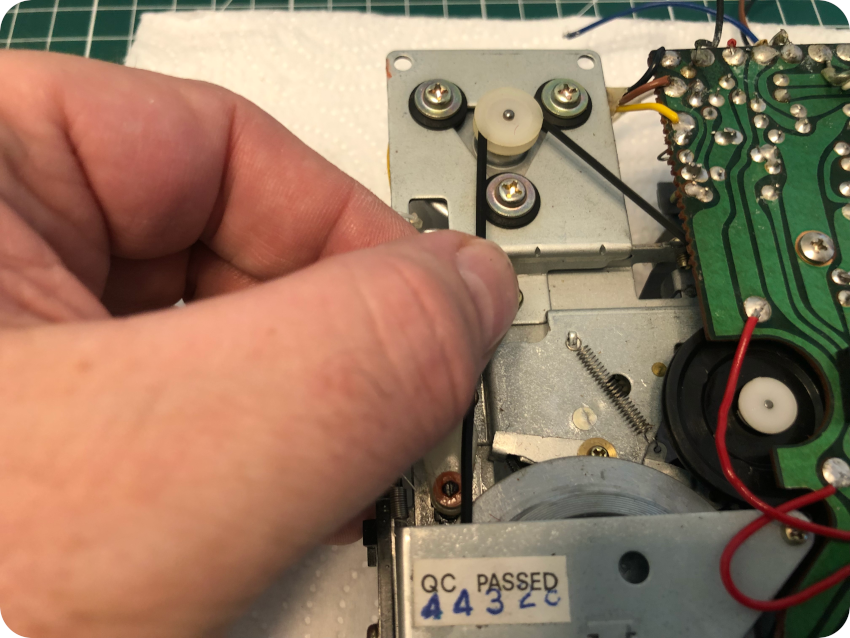
Then I cleaned the heads with IPA on a chamois swab:
I took care of the keys and put back into place a loose spring:
The maintenance process ended with contact cleaner on each connector:
The next day, I took care of the electronics. First, cleaning the PCB with a glass cleaning towel soaked in IPA and a toothbrush:
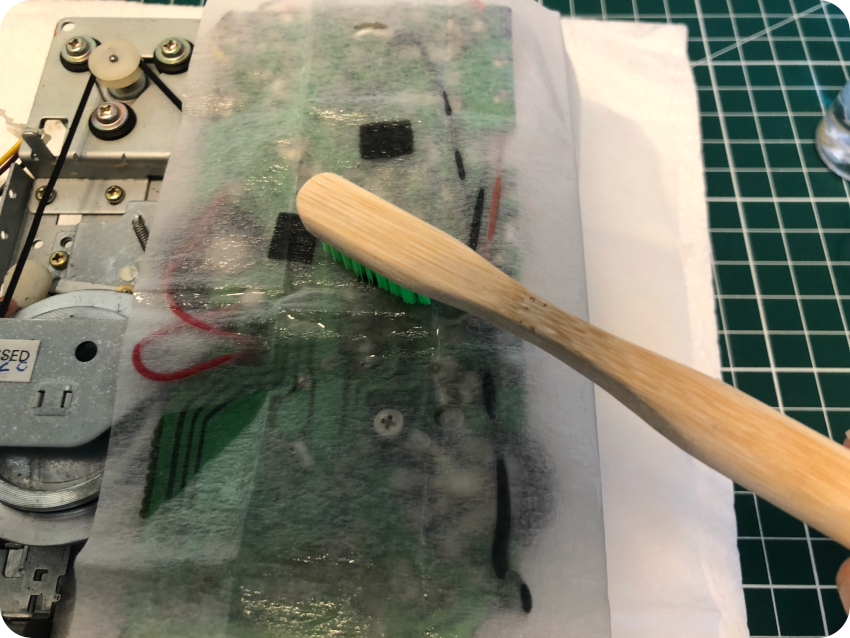
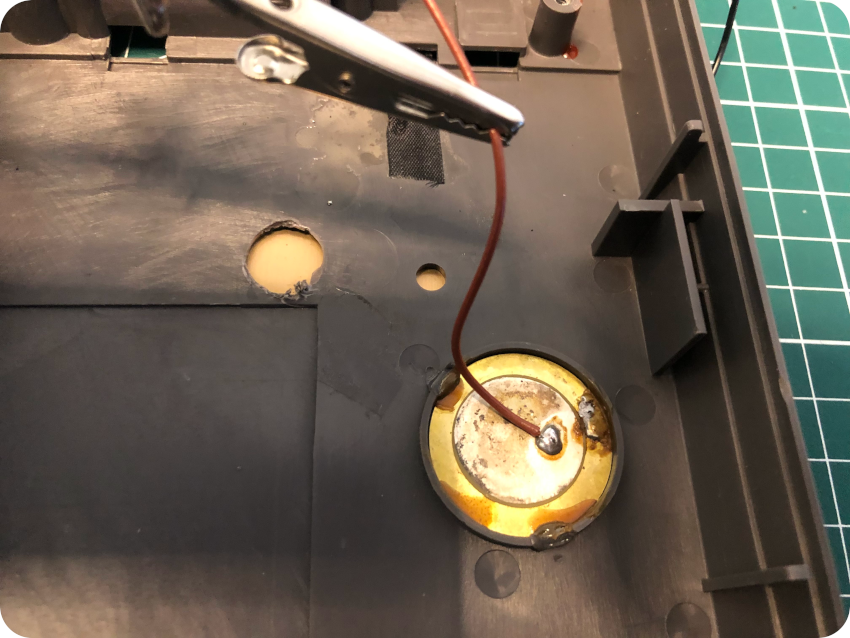
Then I visually inspected the PCB, looking at capacitors and solder joints. As expected, solder joints were pretty bad. A few wires were also in very bad shape. So, I changed the corroded wires and re-flowed fresh solder almost everywhere:
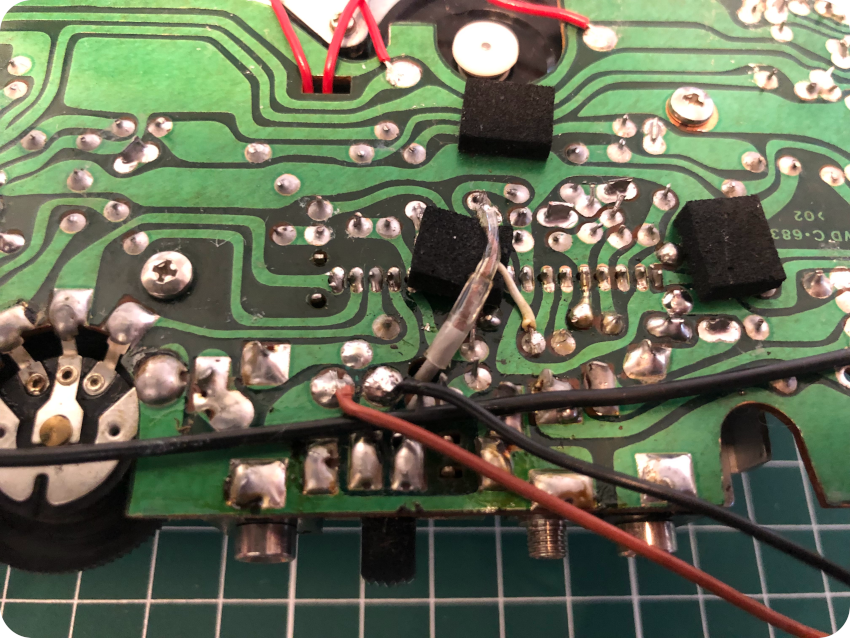
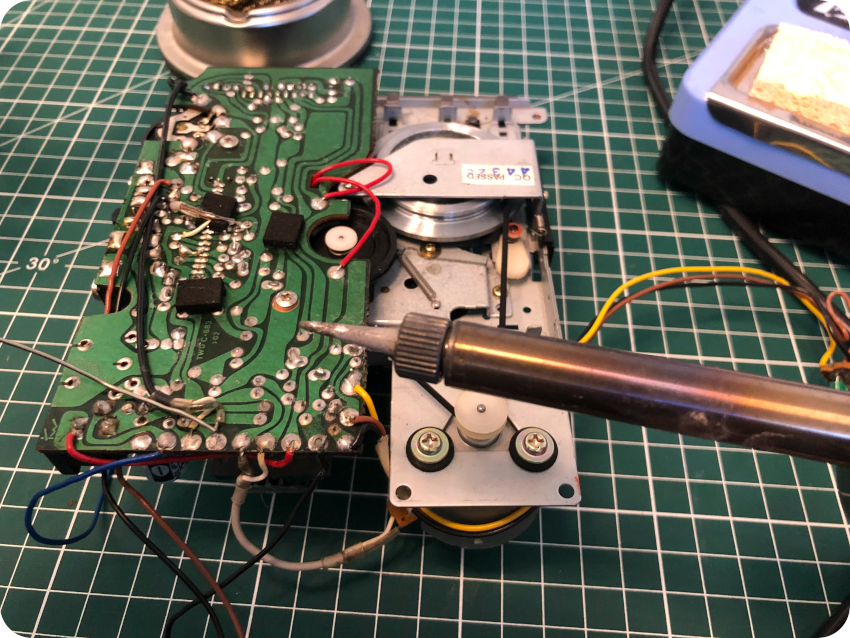
Once done, I tested continuity, and started putting things back together. I soldered back the power wires and the speaker:
Once everything was reassembled, I loaded back the 4 x AA batteries and tested the cassette player:
It was cleaned, smelled nice and was back to life !
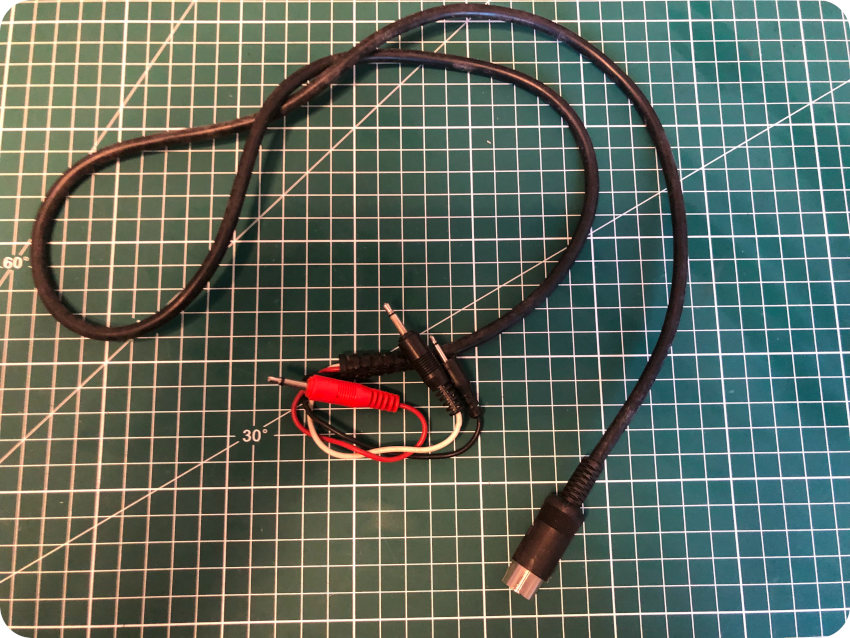
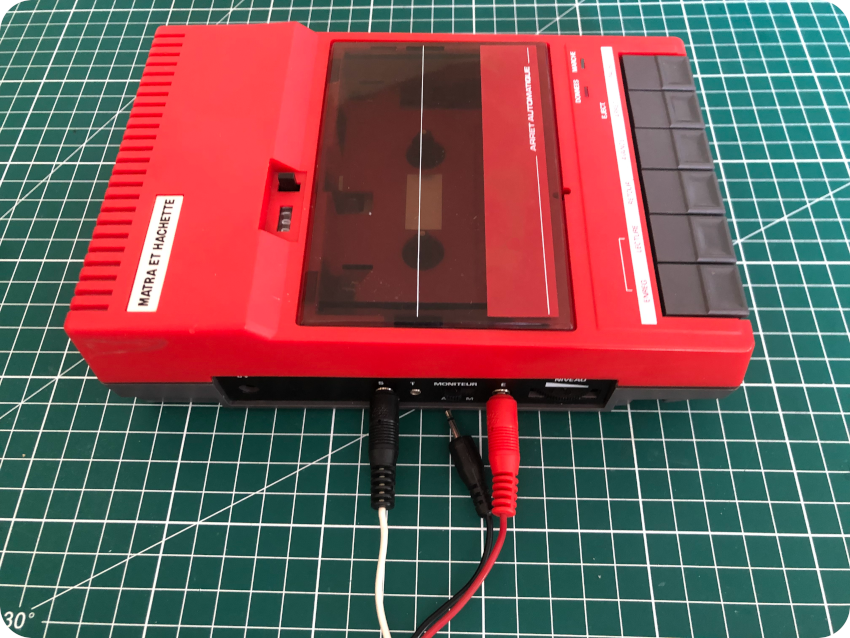
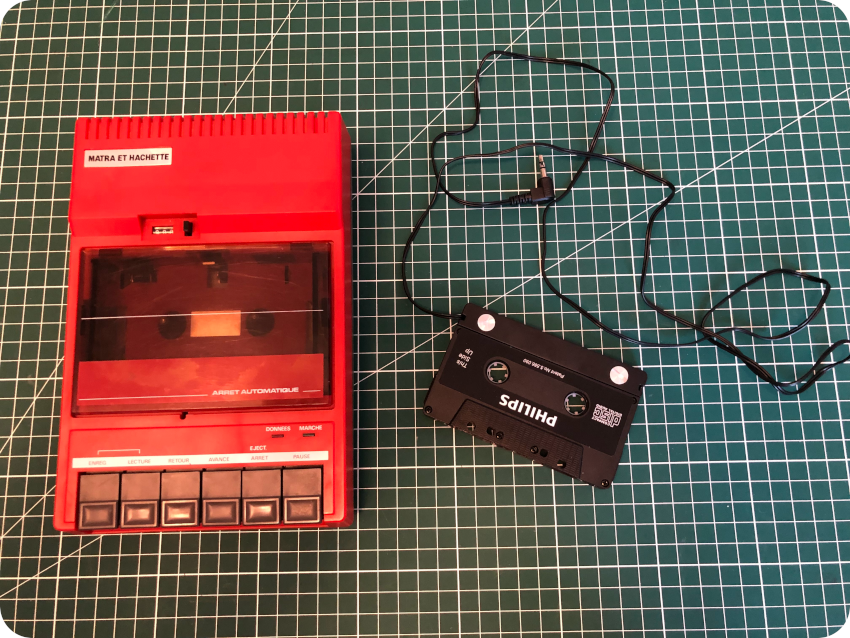
The datacorder CABLE
Unlike the SCART cable, it is in pretty good shape, though a bit dirty:
I gave it a good scrub and sprayed contact cleaner:

There goes a cleaned datacorder and its cable:
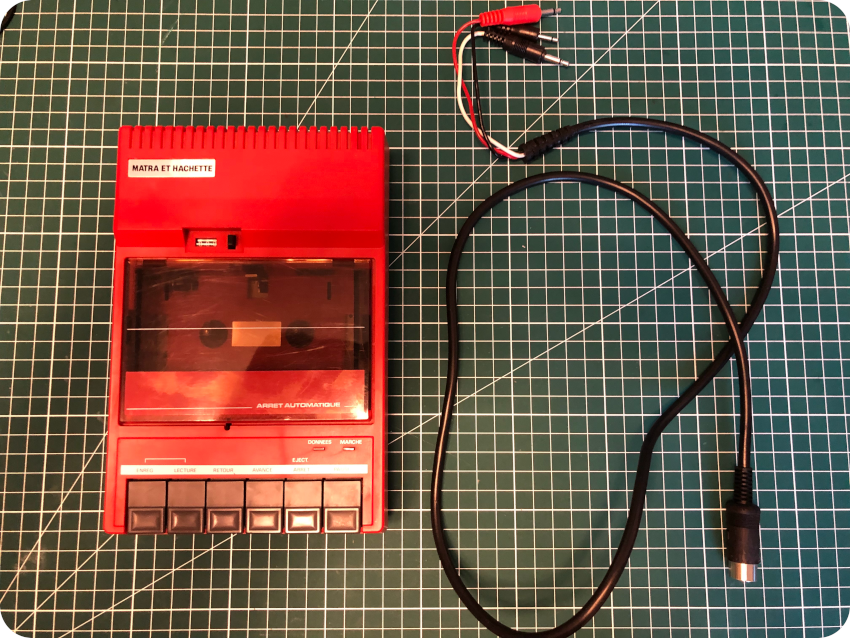
Now, let’s take a look a this cable:
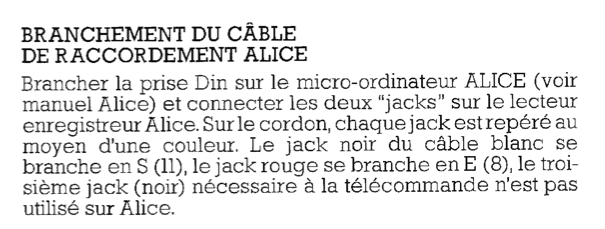
- On the Alice side: a DIN 5 male connector
- On the other side: 2 x 3.5 mm 2-contact mini-jack (red and white cables) + 1 x 2.5 mm 2-contact submini-jack (black cable)
Before connecting the cable, I did a continuity check to understand what goes where:
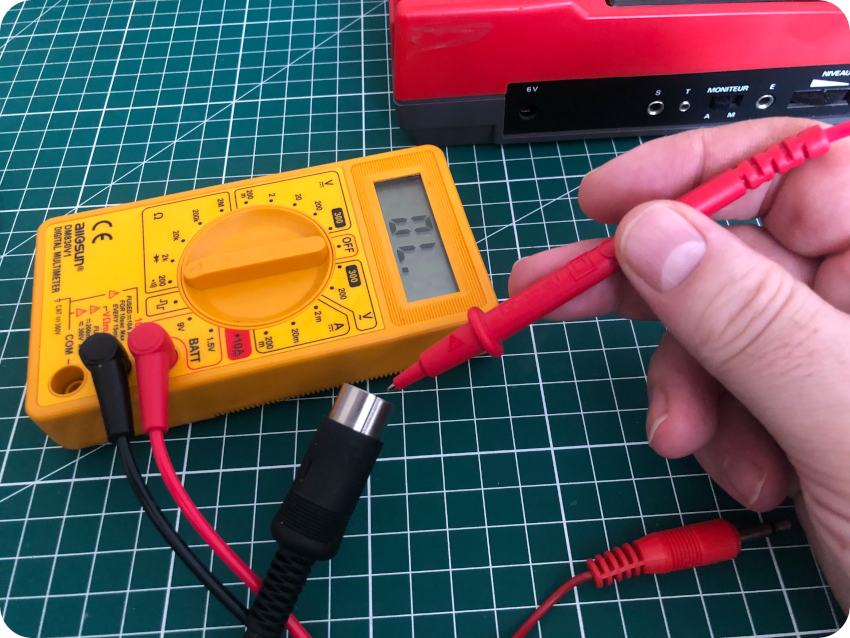
Here are the results:
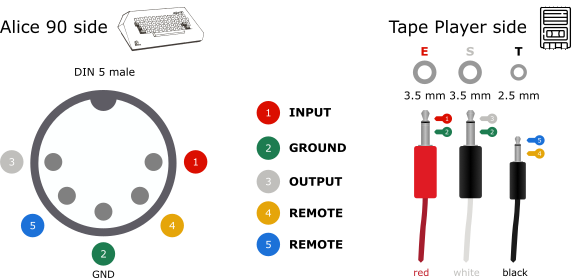
- The red mini-jack connector goes to E (Entrée = Input)
- The white mini-jack connector goes to S (Sortie = Output)
- The black submini-jack connector is for remote control (T= Télécommande = Remote Control). But, according to the documentation (“Lecteur enregisteur de programmes”), it is not used by the Alice (I guess the datacorder is actually a generic one, not specific to Alice):
So … I guess this is how to connect the cables to the datacorder:
testing Software
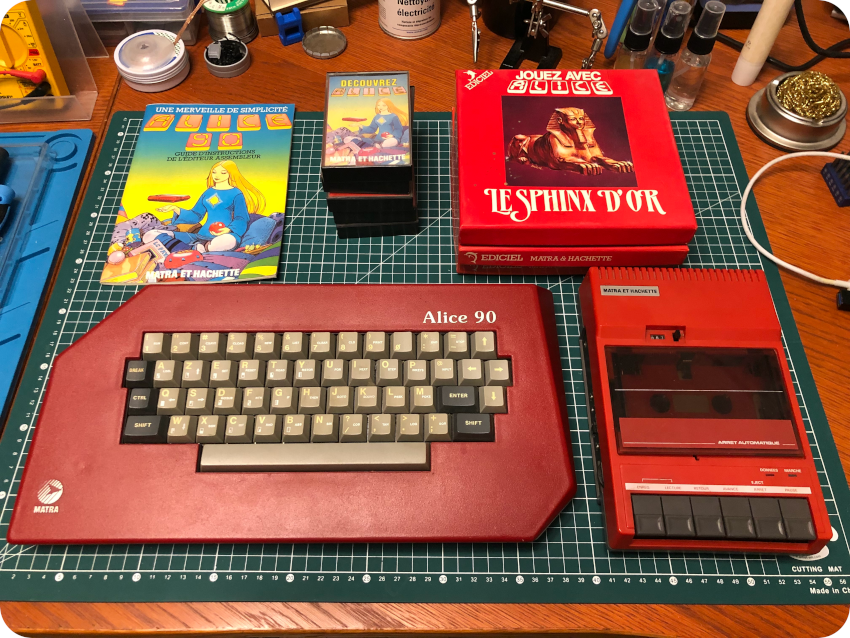
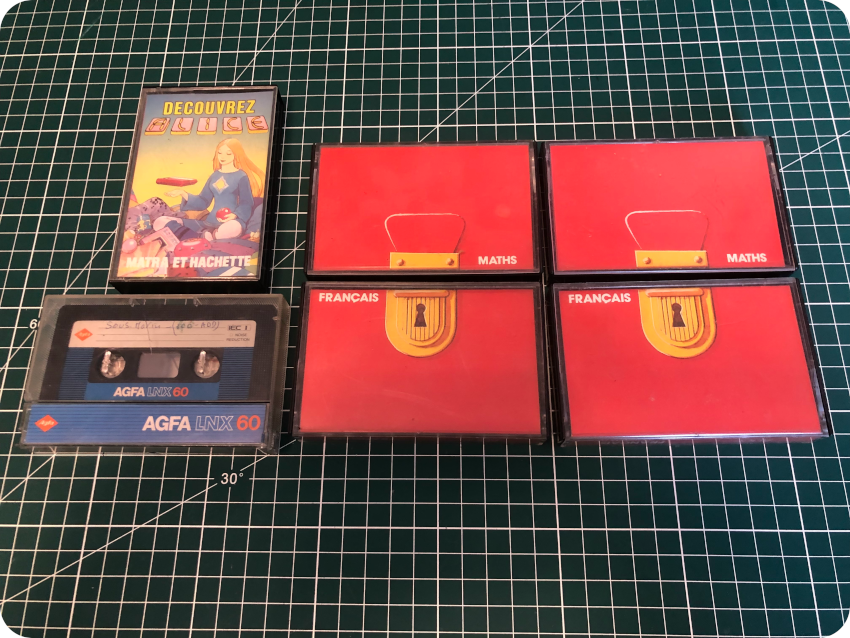
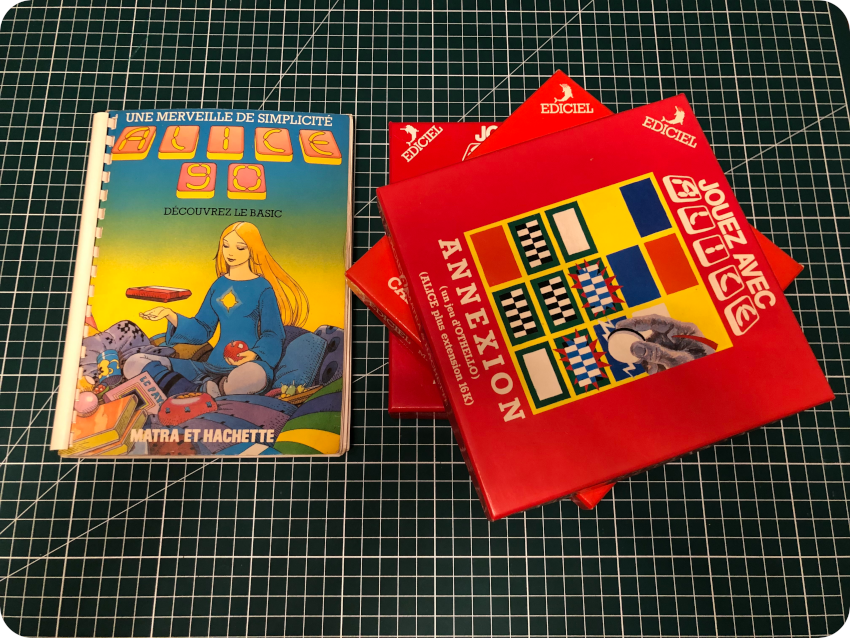
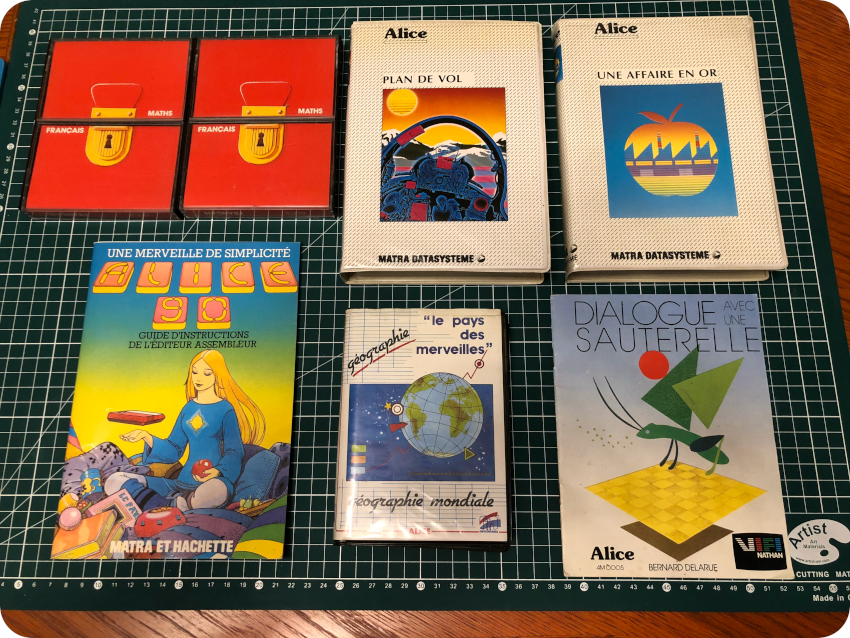
The Alice 90 I bought came with these software on cassette tapes:
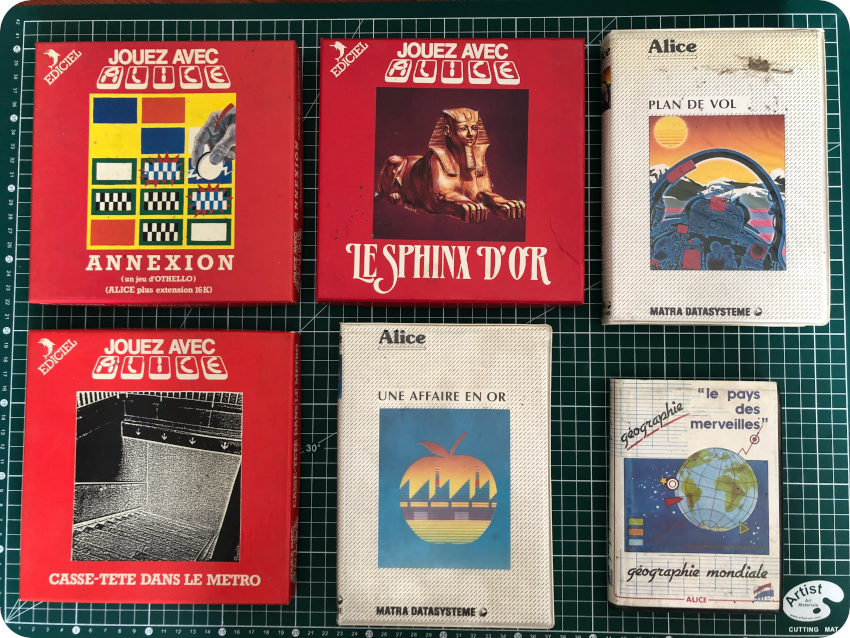
Here is a short description of these software (source: http://alice32.free.fr/programmes/annexion/index.html):
- “ANNEXION” (Annexation): This game is part of the “Jouez avec Alice” (“Play with Alice”) series of games by Ediciel. It is a two-players checkboard game.
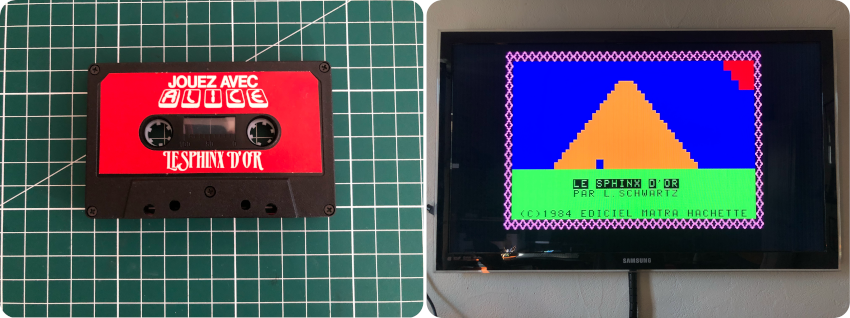
- “LE SPHINX D’OR” (The Golden Sphinx): It is also part of Ediciel’s “Jouez avec Alice” series. It is an semi-graphic adventure game, where the player has to solve logic puzzles to find the “Golden Sphinx”.
- “CASSE TETE DANS LE METRO” (Puzzle in the Metro): This semi-graphic adventure game is also part of Ediciel’s “Jouez avec Alice” series. A little less exotic than “LE SPHINX D’OR”, since it is taking place in the Metro.
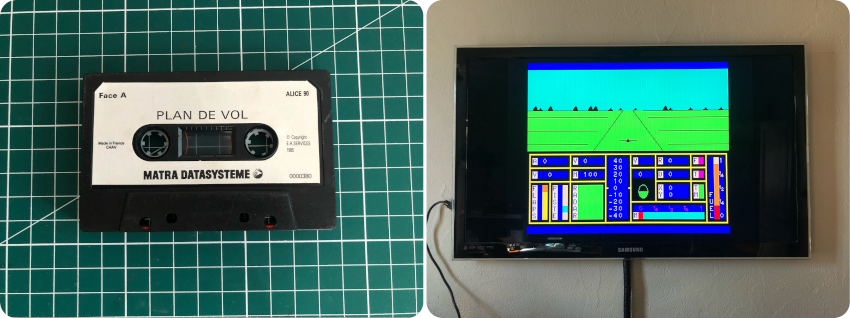
- “PLAN DE VOL” (Flight Plan) is a flight simulator game, edited by MATRA DATASYSTEM.
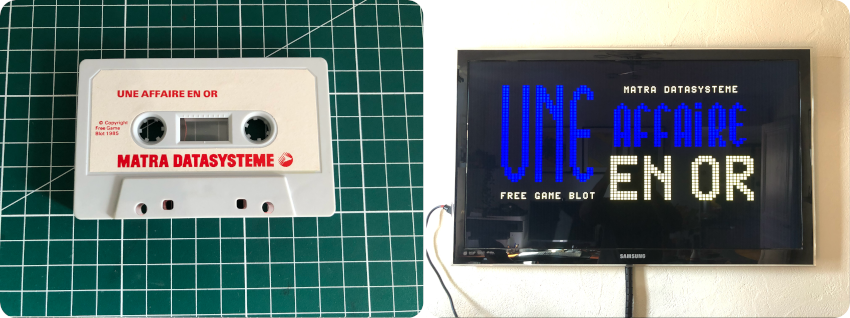
- “UNE AFFAIRE EN OR” (Golden Bargain) is business simulation game, also edited by MATRA DATASYSTEM.
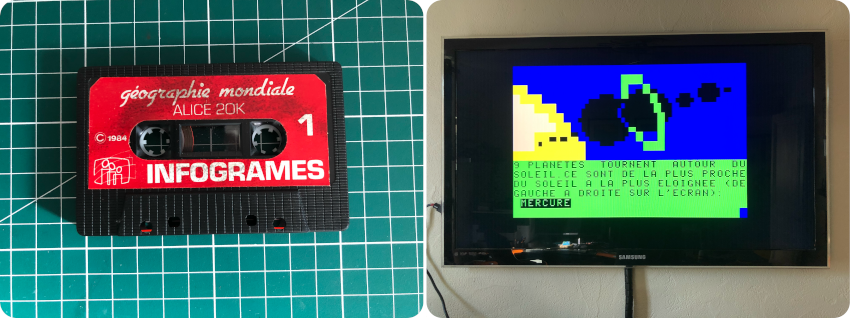
- “GEOGRAPHIE MONDIALE” (World Geography) is a geographical encyclopedia, published by French editor Infogrames (now Atari SA).
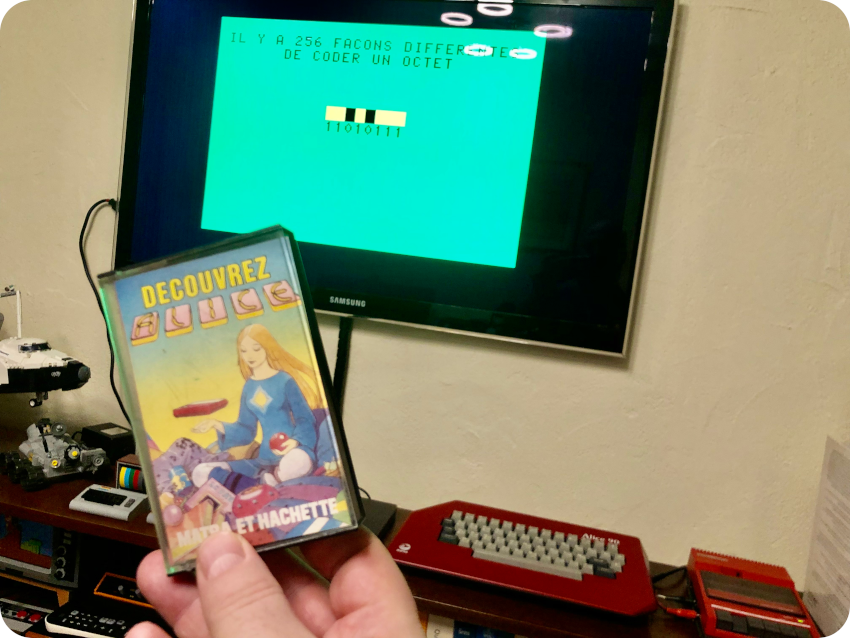
- “DECOUVREZ ALICE” (Discover Alice) is a welcome software, edited by Matra-Hachette.
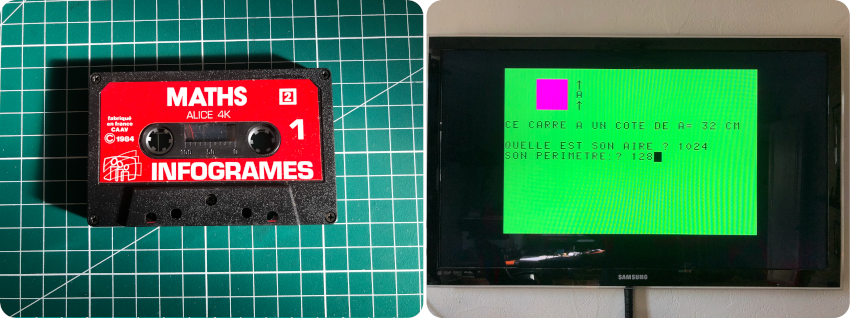
- The 4 educational games “Maths 1,2” and “Français 1,2” (French) were sold bundled as “LE CARTABLE D’ALICE” (Alice’s School Bag), edited by Infogrames.
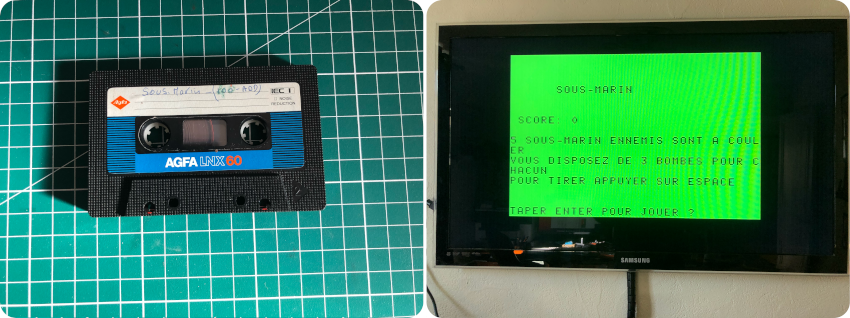
- A home-made copy of “SOUS-MARIN“, a submarine game, that was originally included in the “Jouez avec Alice N°1” pack of games, edited by Matra-Hachette (along with “MUR DE BRIQUES” (Breakout clone) and “COLOR-MIND” (Mastermind clone)
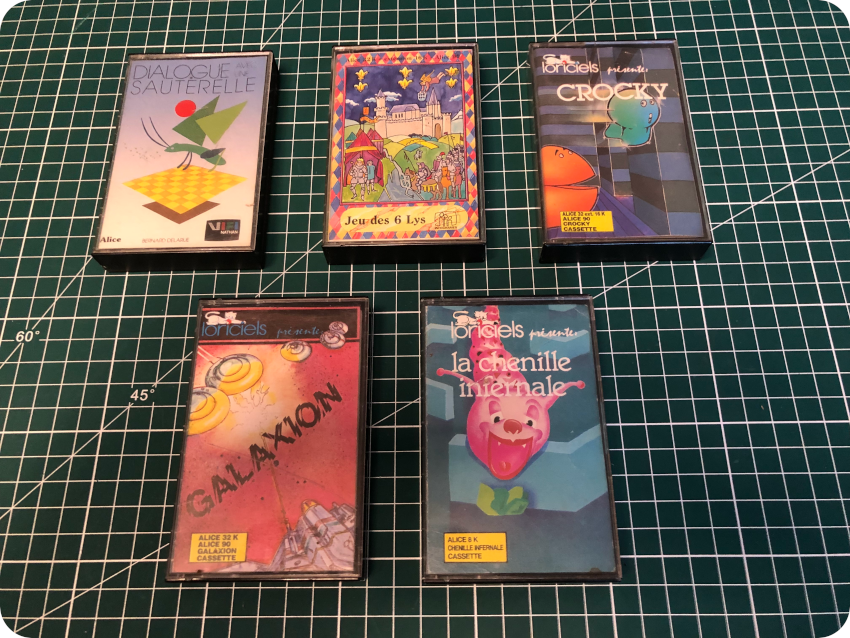
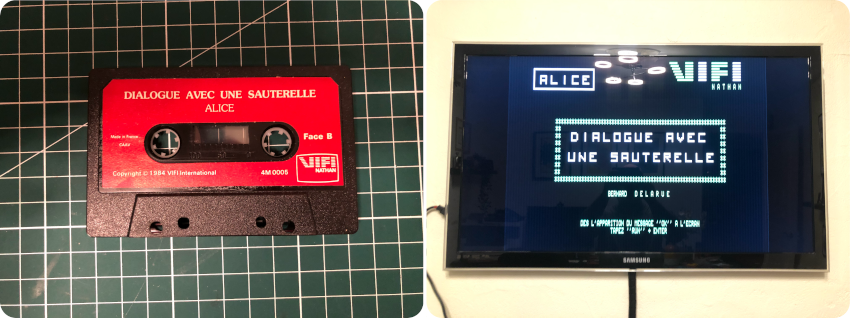
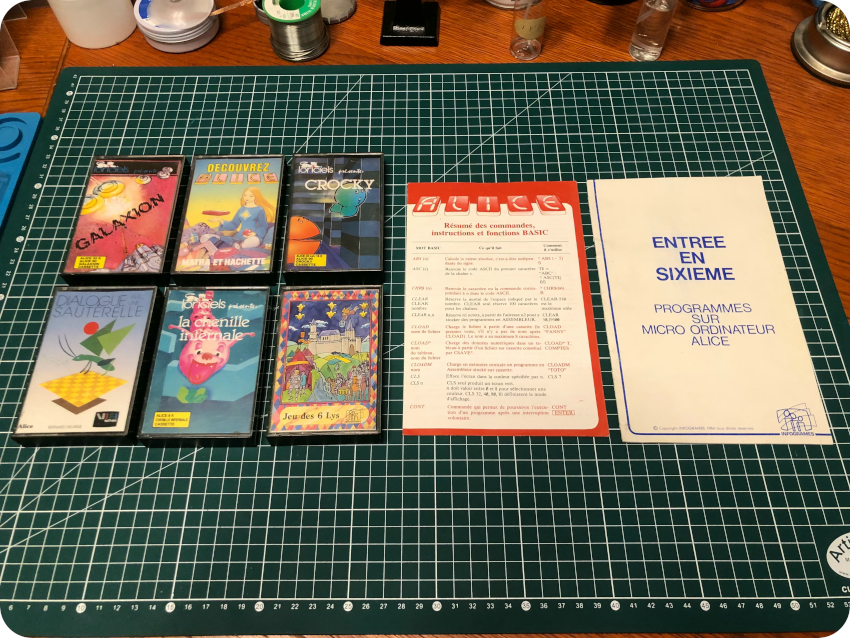
- “DIALOGUE AVEC UNE SAUTERELLE” (Converse with a Grasshopper): a logo-like programming language (with a grasshopper instead of a turtle), published by VIFI-Nathan.
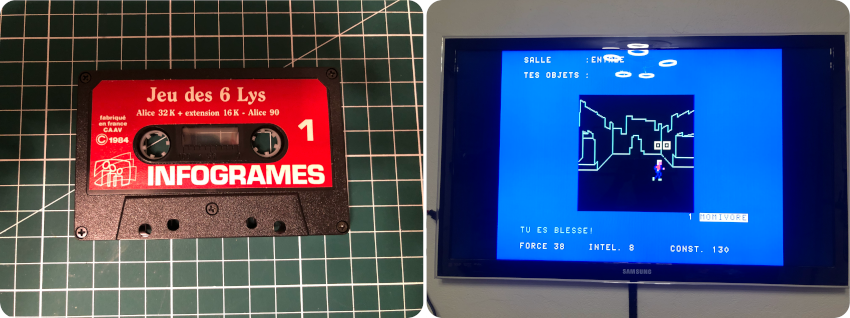
- “JEU DES 6 LYS” (Game of 6 Lilies): a 3D aventure / RPG, published by Infogrames.
- “CROCKY“: a Pac-Man clone, published by Loriciels
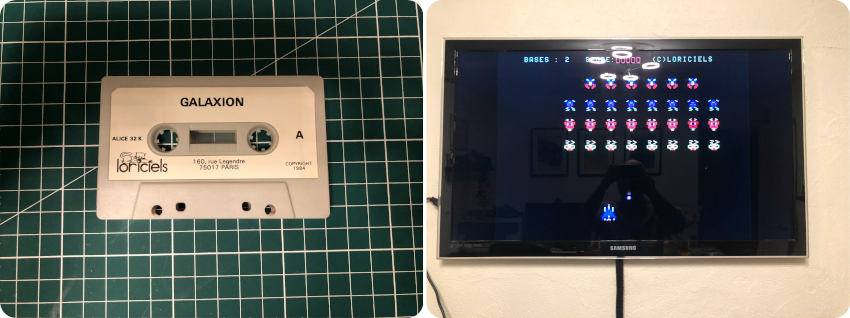
- “GALAXION“: a Galaxian clone, published by Loriciels
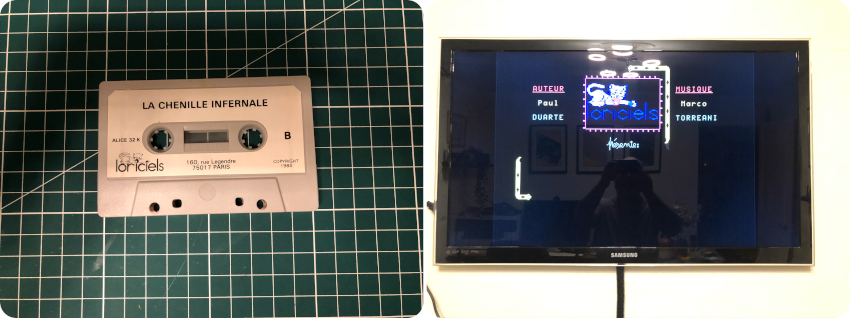
- “LA CHENILLE INFERNALE” (The Infernal Caterpillar): a Snake clone, also edited by Loriciels
Let’s start with “Découvrez Alice” !
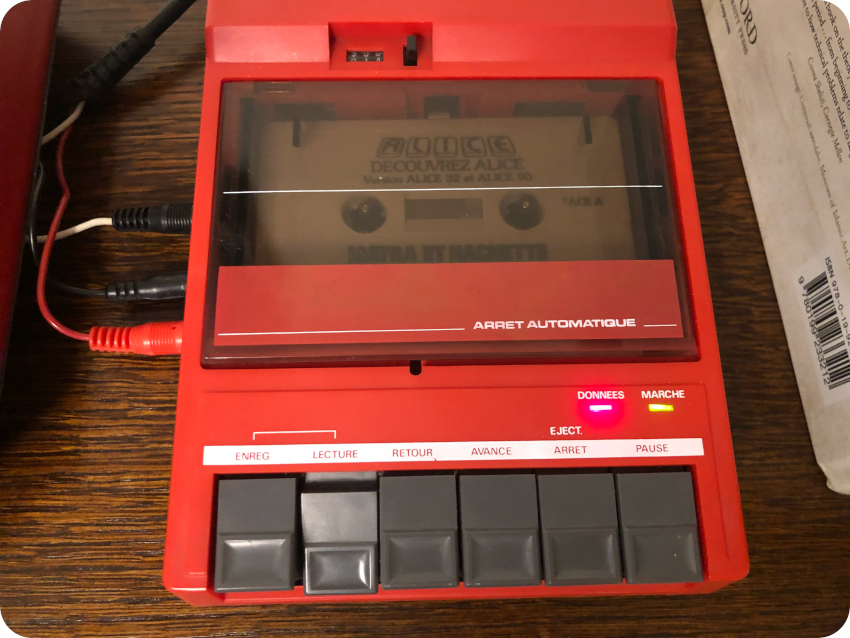
I loaded the tape into the cassette player, typed in “CLOAD” and pressed “LECTURE” (PLAY) on the tape deck:
After a few seconds, the “Données” (Data) LED went on. Yeah !
It loaded the first part of the welcome software. Cool ! It is so amazing that a nearly 40 year old cassette loads still works and loads so easily !
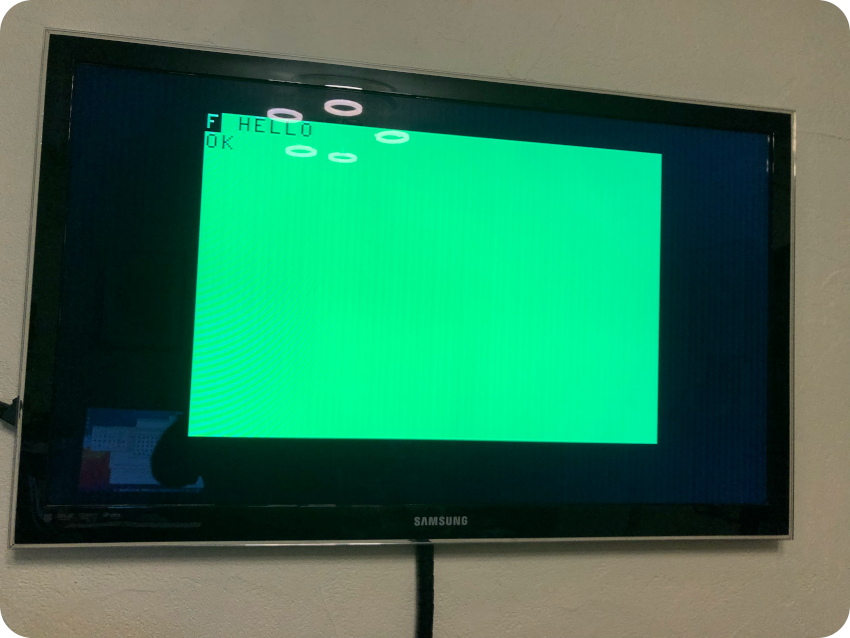
I typed in “RUN“, and with a bit of patience … it started:
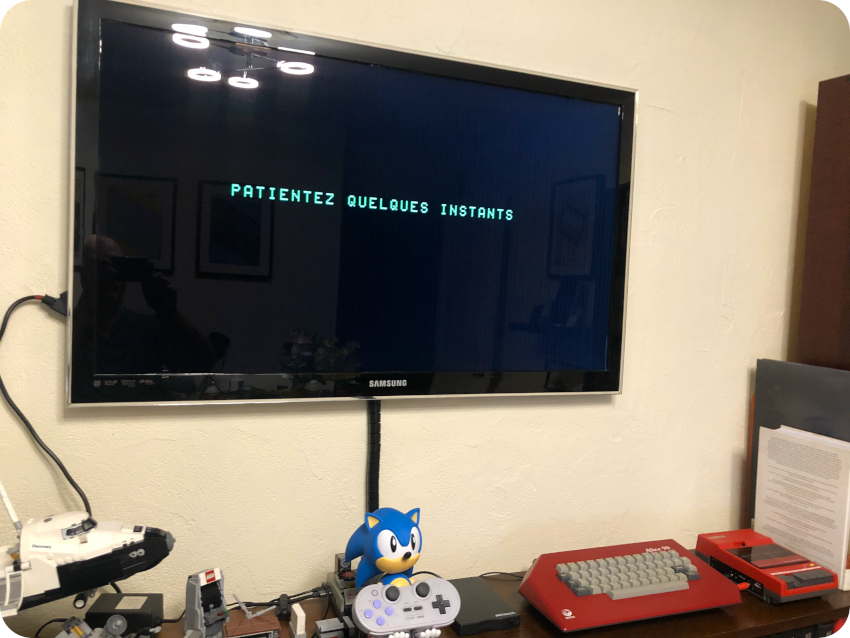
I thought “Découvrez Alice” was the same kind of demonstration tape that I tried on the DCAlice emulator. In fact, this is not a demo software, but a very pedagocial tutorial. After a short presentation of what a computer is, what CPUs, RAM, ROM are, a bit of BASIC, how the Alice and its peripherals work together, it details whats bits and bytes are, what logic gates, how to create an adder with logic gates and so on. It may not be super fun for kids, but I must say it is very nicely done:
Then I proceeded to a quick test of each cassette:
- “Le Sphinx d’Or”:
- “Annexion”:

- “Casse-tête dans le Métro”:

- “Plan de Vol”:
- “Une Affaire en Or”:
- “Géographie Mondiale”
- All 4 x cassettes of “Le Cartable d’Alice” (“Maths 1”, “Maths 2”, “Français 1”, “Français 2”):
- “Sous-Marin”:
- “Dialogue avec une sauterelle”:
- “Jeu des 6 Lys”:
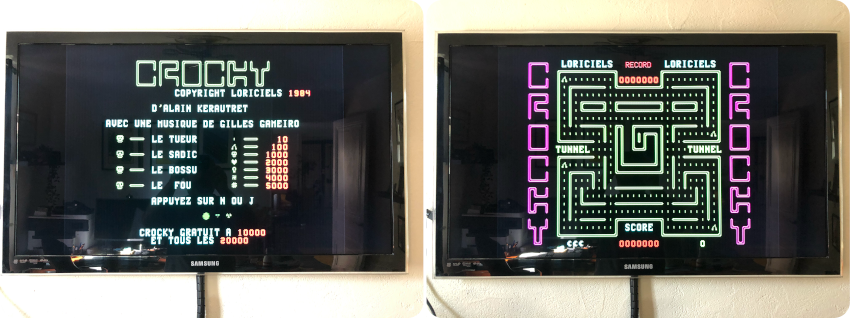
- “Crocky”: no matter how many times I tried, either on face A or face B, the second stage failed to load:

- “Galaxion”: it failed to load from face A, but I could load and start the game from face B (which holds the same information as face A)
- “La Chenille Infernale”:
Apart Galaxion which failed to load from one of the faces, and Crocky which completely failed, these cassette tapes are still working. This is incredible after all these years !
Getting more software
One of the reasons of the failure of the Alice line of computer – apart from being way too late to the market – was the lack of software. The Alice community has done an incredible job collecting and preserving these software. All in all, less than a hundred titles were published (around 60). On top of that, apart for a few titles like Crocky or Galaxion, I must say that they were seriously … lacking fun.
These preserved software are often using the K7 package format, that can be directly used by the DCAlice emulator. To load these packaged software on actual hardware (from a cassette tape player), the community published alk72wav. This Windows-only tool converts K7 packages into .wav sound files than can be played back. Of course, the community also published alwav2k7, that convert sounds from tapes into K7 packages.
For the fun of it, I installed alk72wav into my Windows XP Virtual Machine. I settled for Crocky, since I already downloaded the K7 package. And because it failed to load from cassette and I really wanted to try it on actual hardware. I converted the K7 file into a .wav sound file:
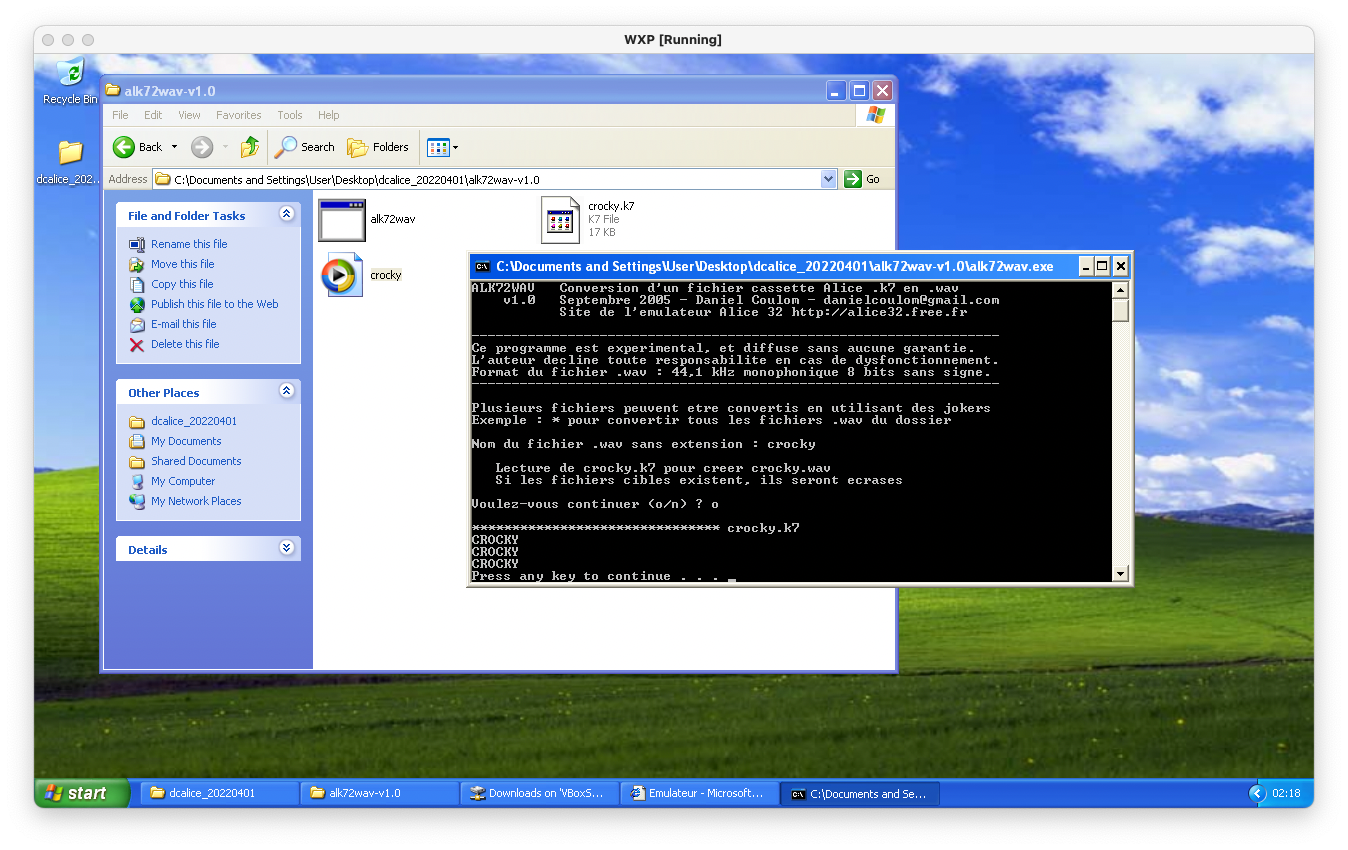
Once done, I transferred the .wav file from the VM to my host MacOS laptop. From there, it could be played back and output to a jack port:
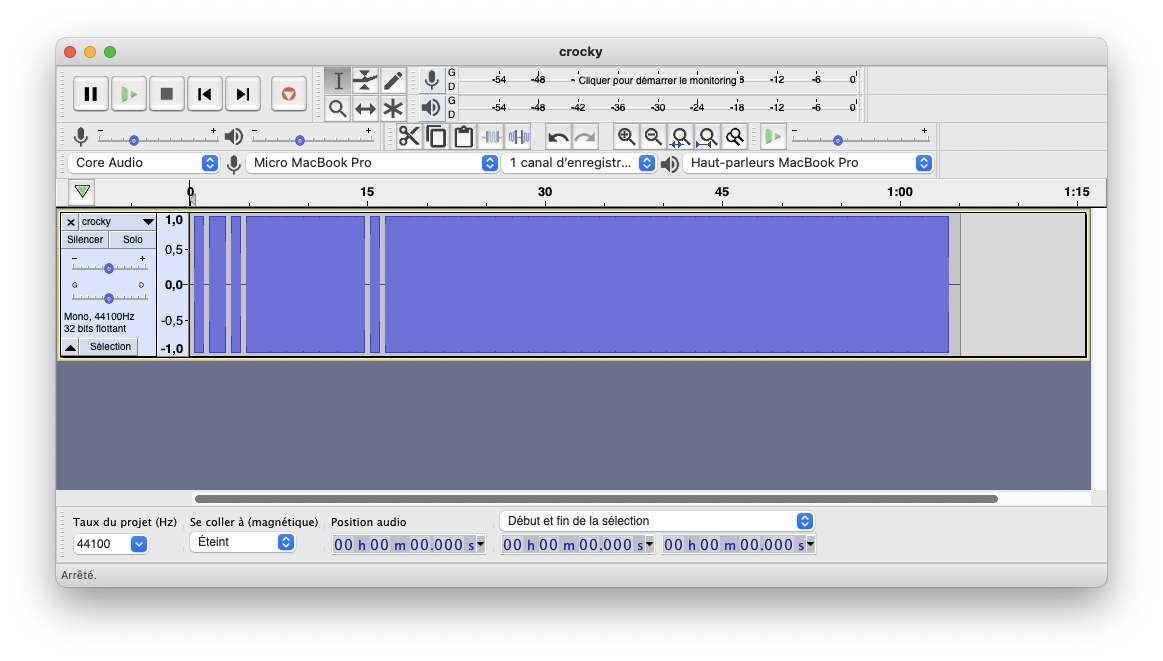
Then, I was just a matter of re-using the jack-to-cassette adapter I used to load games on my Amstrad CPC464:
And easy enough, it worked perfectly, I could test Croky on real hardware !
taking care of The suitcase
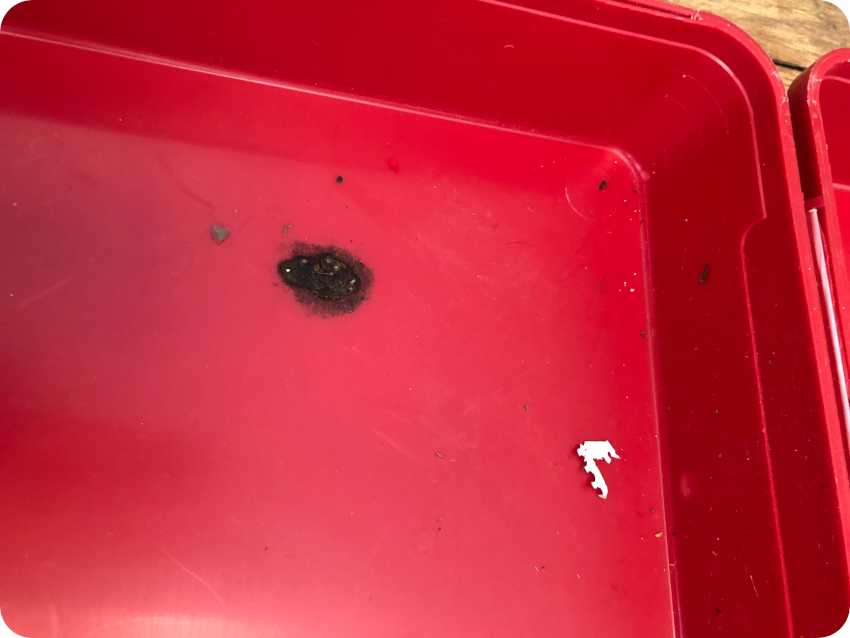
The suitcase is not in bad conditions per se: nothing broken, but it smells really bad and is utterly dirty. It’s got scratches here and there and a few stains that look like plaster. The corner of one of the Alice stickers is a bit peeled off:
The stench comes from the polymeric foam inside the suitcase. It is a bit moldy, very dirty, stained and a bit deformed here and there. But it is not decomposing, like sometimes these foams do after so many year spent in a garage and in an atmosphere that goes from dry to wet and from hot to cold:
I removed the foams and stored it a another room with an opened window. Indeed, after a short while breathing this foul air, I felt an itch developing in the back of my throat and caught a bad headache. Wear a mask (like I did after that) whenever you work on restoring this kind of moldy foams !
Once the foams removed, I discovered… all kinds of more or less living things underneath:
I don’t want to know what those are ! Let’s get rid of these: it is time for a very thorough cleaning in the bath tub:
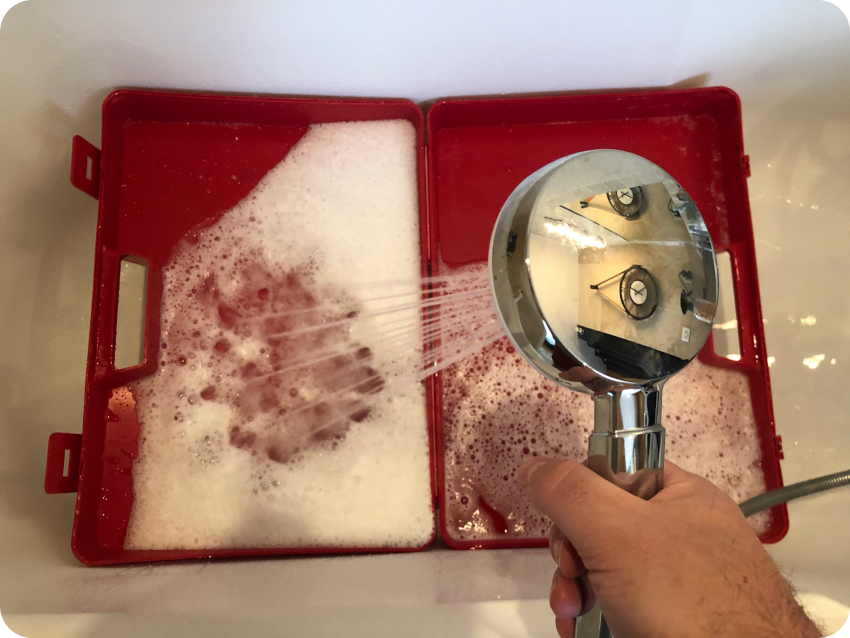
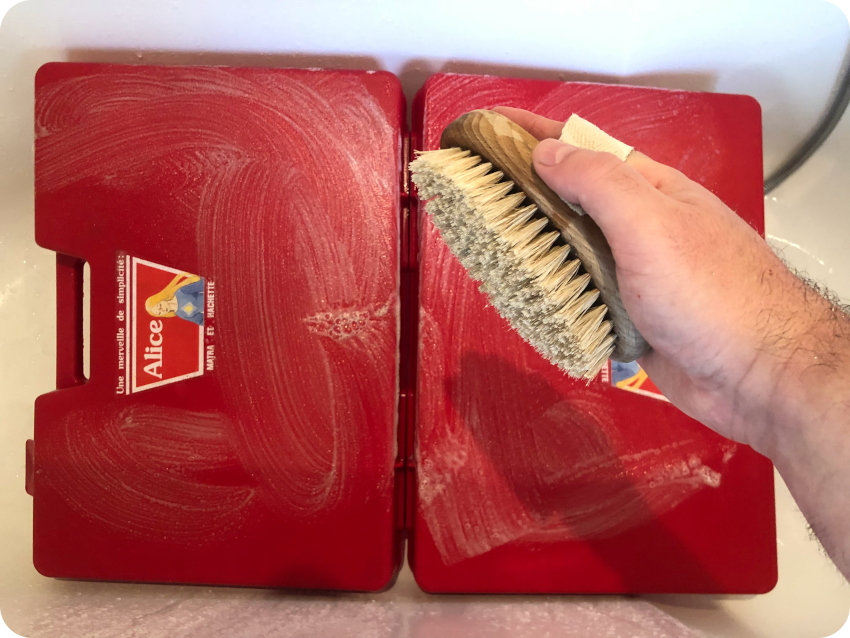
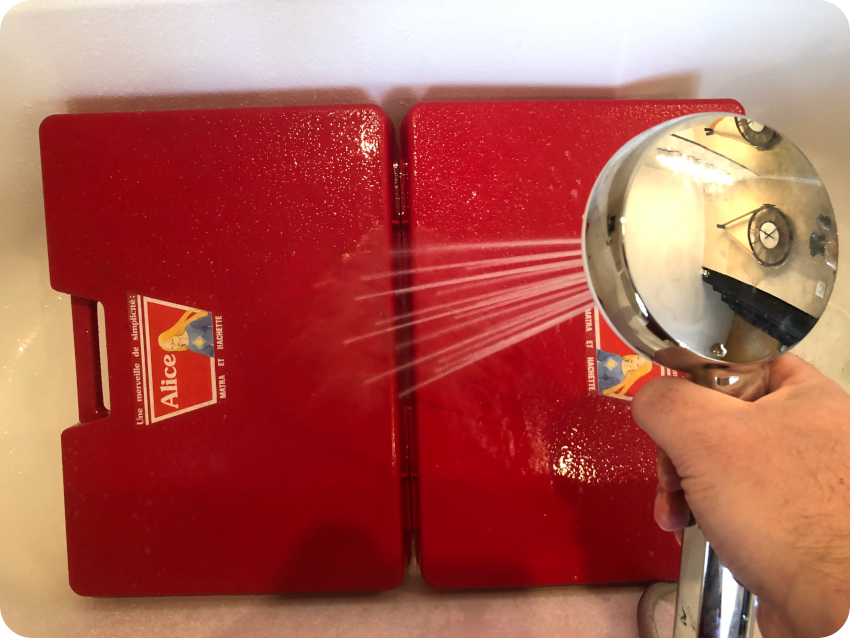
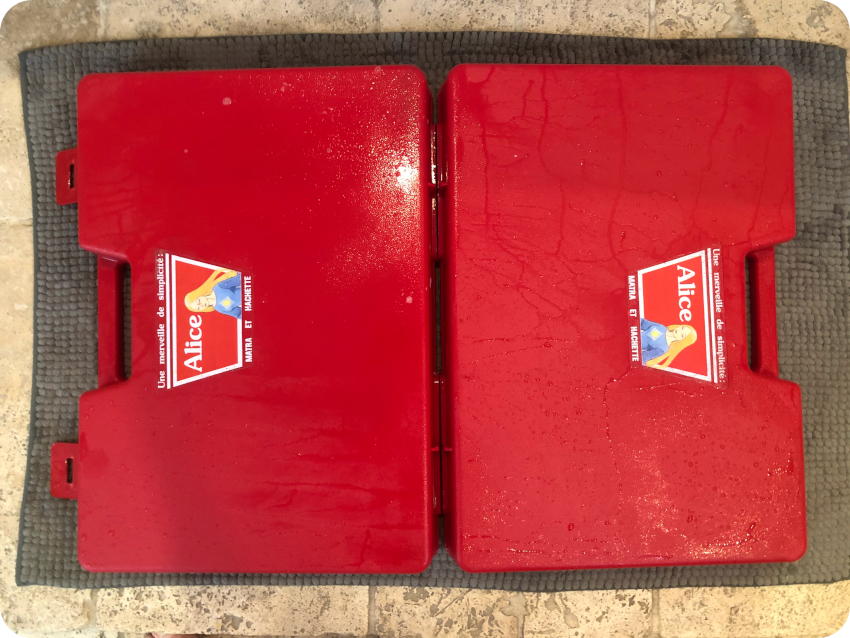
I re-glue the peeled off sticker. As a finishing touch, I spayed IPA in the inside and plastic rejuvenator and anti-static foam cleaner on the outside:
The red suitcase still wears a few battle scars, but it certainly looks and smells much better now !
Let’s take care of the polymeric foams ! Beforehand, I spent some times reading on how to clean these foams (based on advice on how to clean the different kinds of mattress foams).
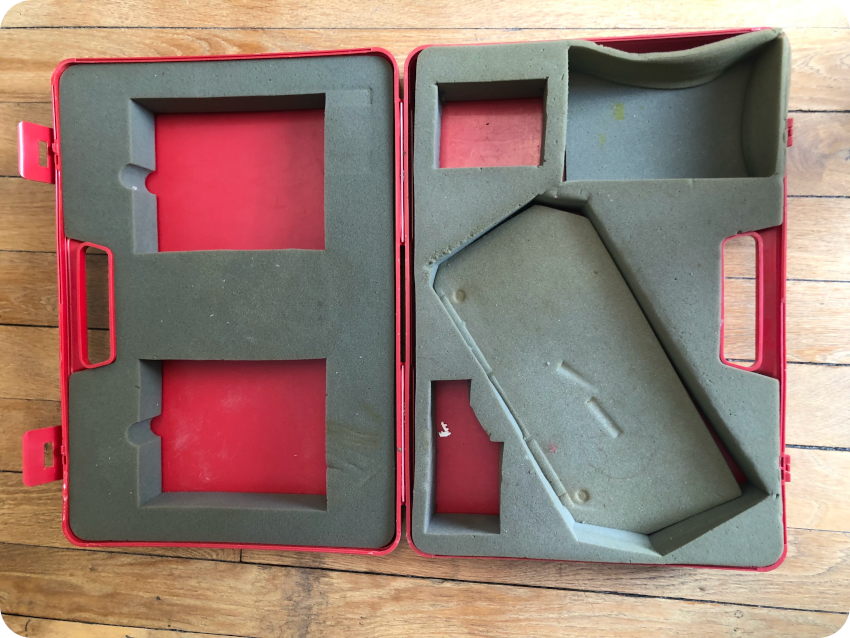
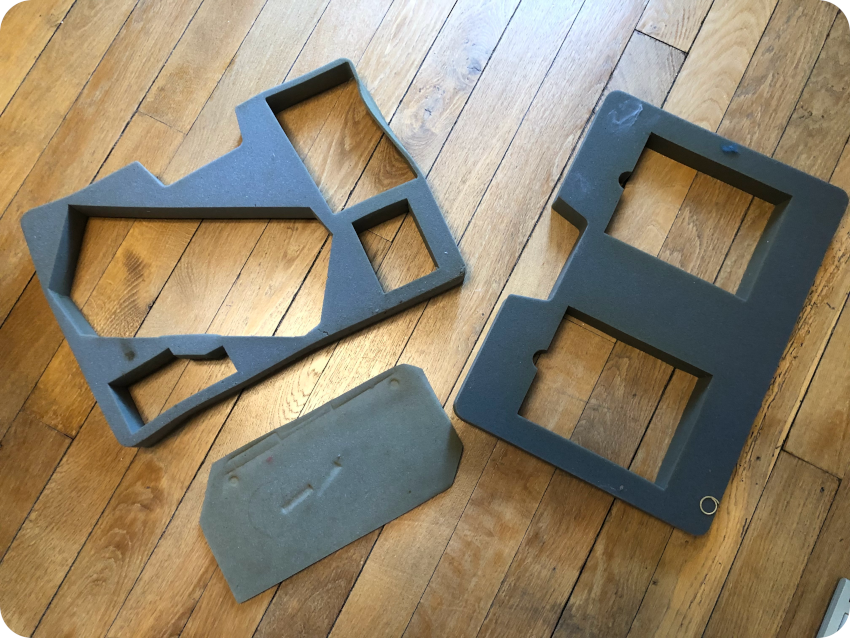
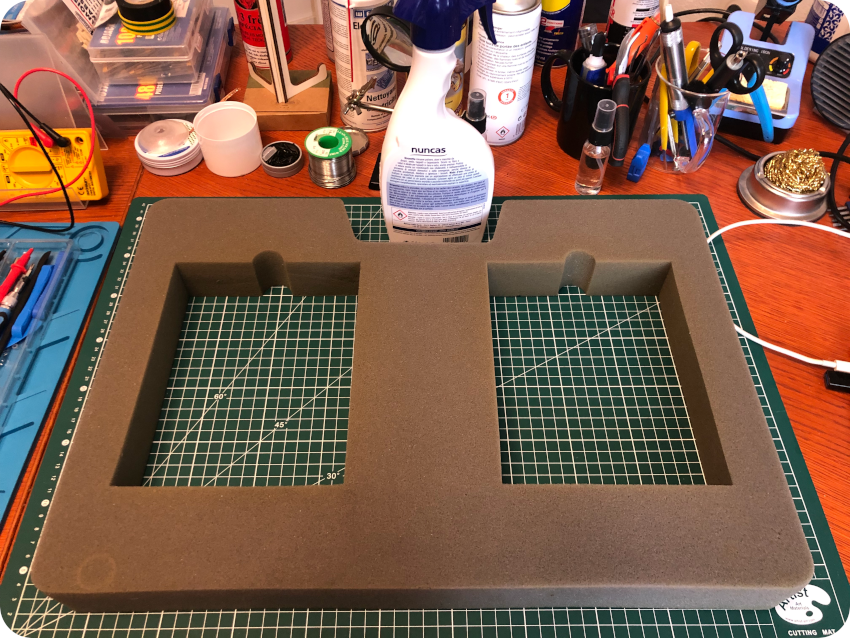
There are 4 pieces of foam inside the suitcase :
- One to store books / manuals
- One to store the computer itself, tapes, datacorder and cables
- One with the funky shape of the Alice 90
- One square-shaped, for the Datacorder (not in the picture since it was already on the bench when I took it)
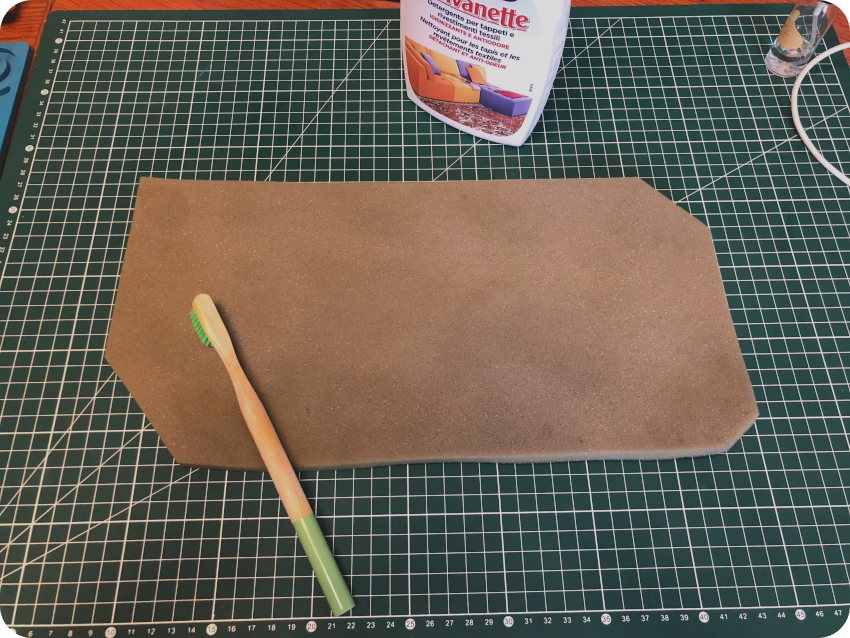
I gave it a try with the last one (also the smallest one and probably less important in case I messed up):
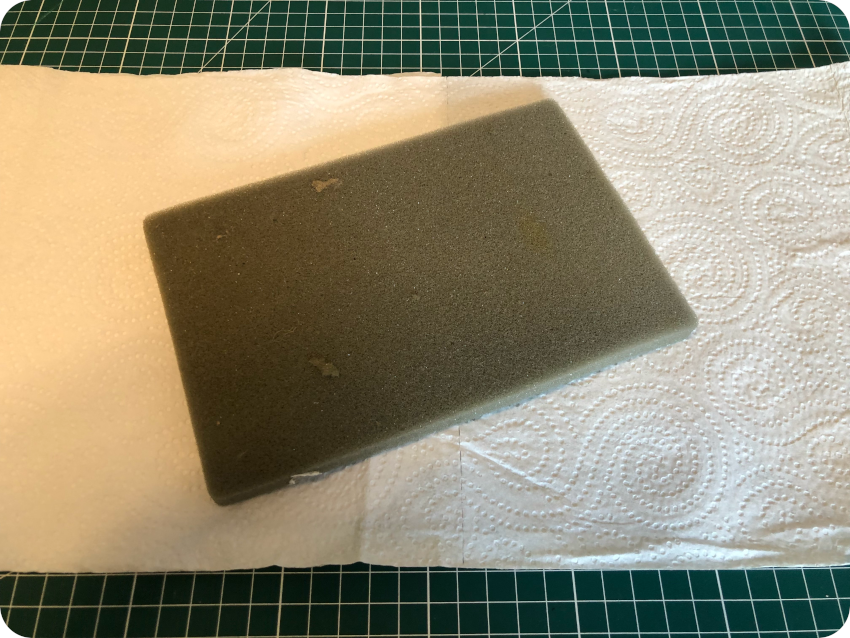
I vacuumed and brushed both sides:
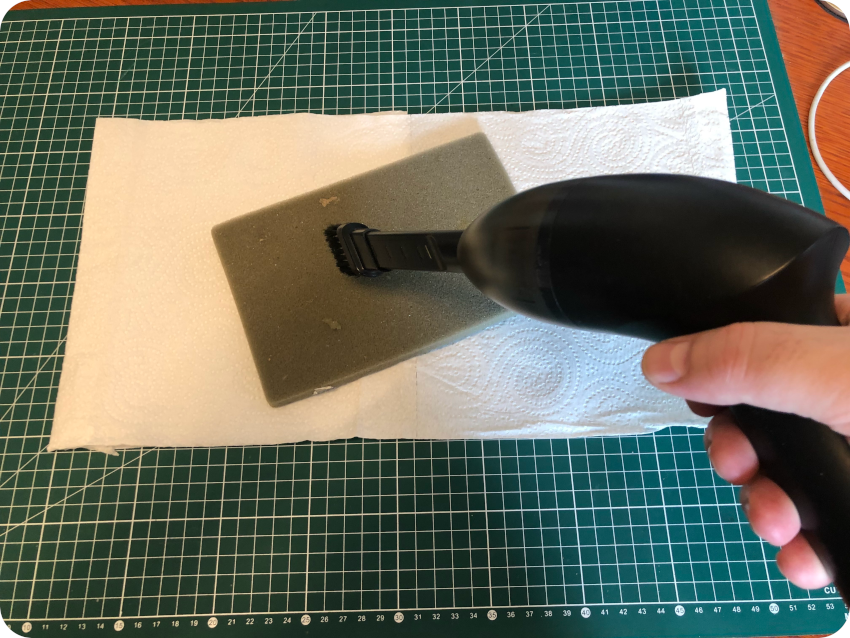
Then I sprayed a generous amount of IPA everywhere, then brushed it with a toothbrush:
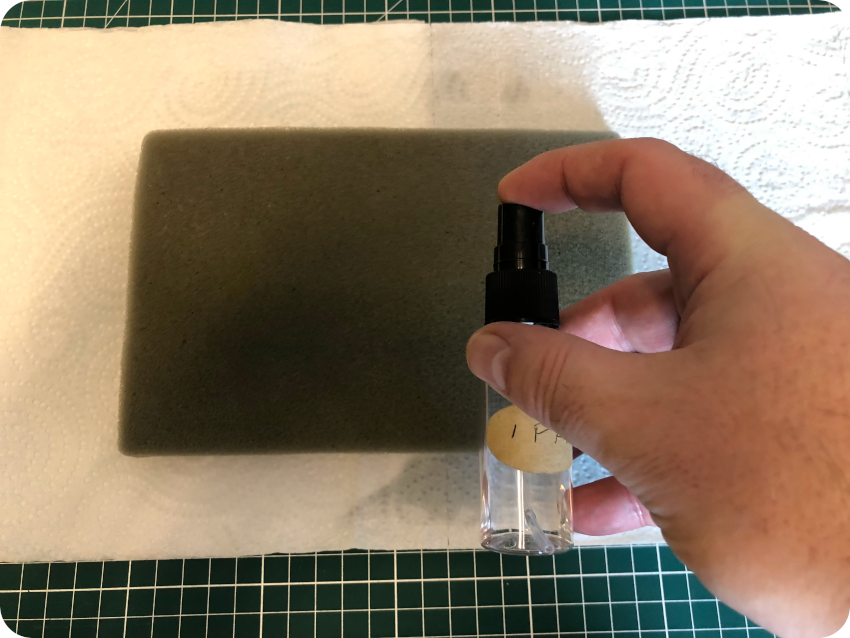
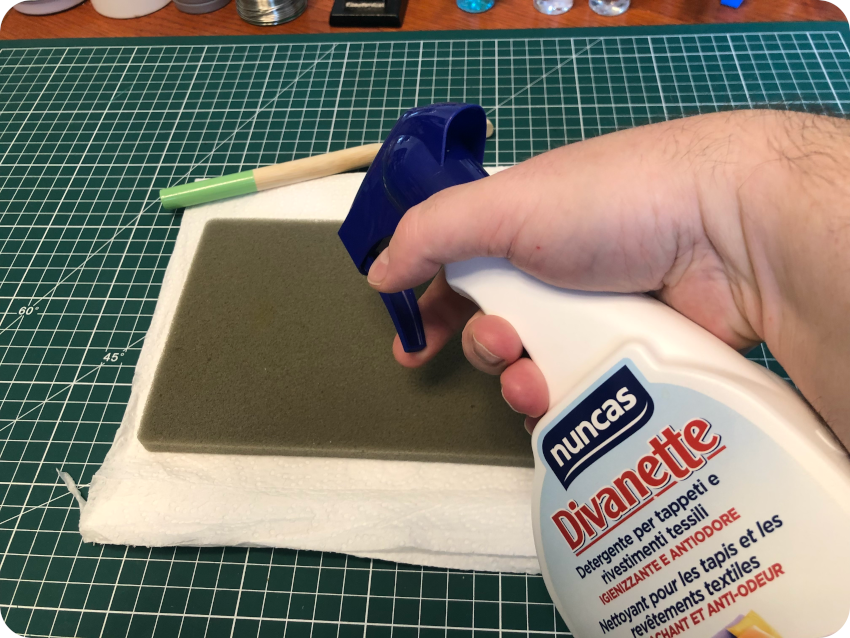
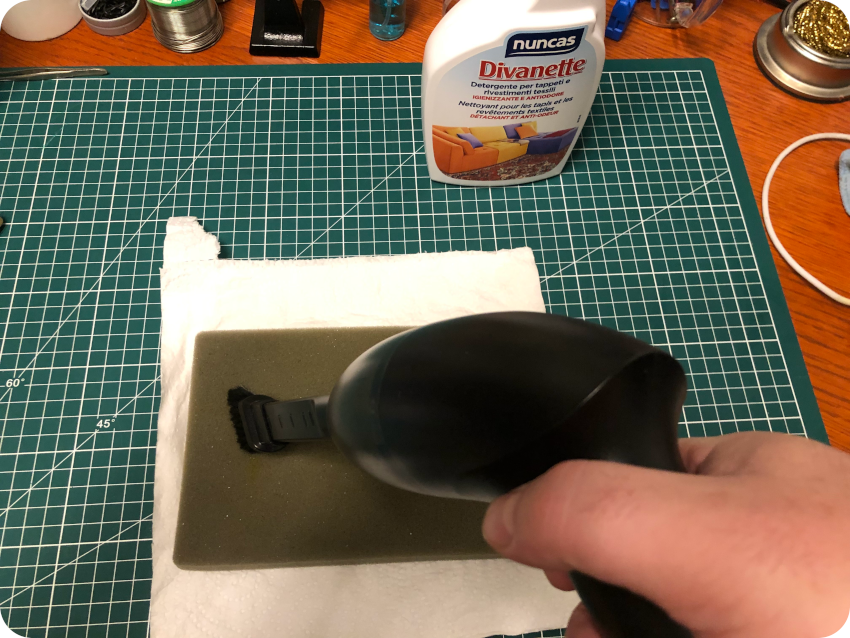
Then I wrapped it in paper towels and put a bit of weight on top of it so it does not deform while drying. I waited for one hour. Once dried, I sprayed fabric detergent / anti-odor, bushed, then waited for a couple of hours for the detergent to sink in, then vacuumed it one last time:

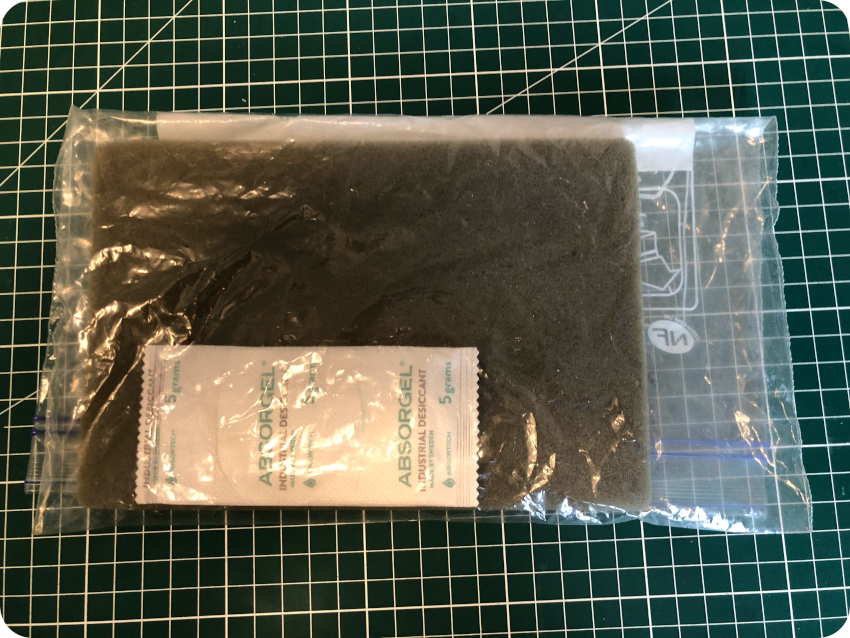
I let it dry overnight, then bagged it with Silica gel:
I followed this procedure for the other pieces of foam :
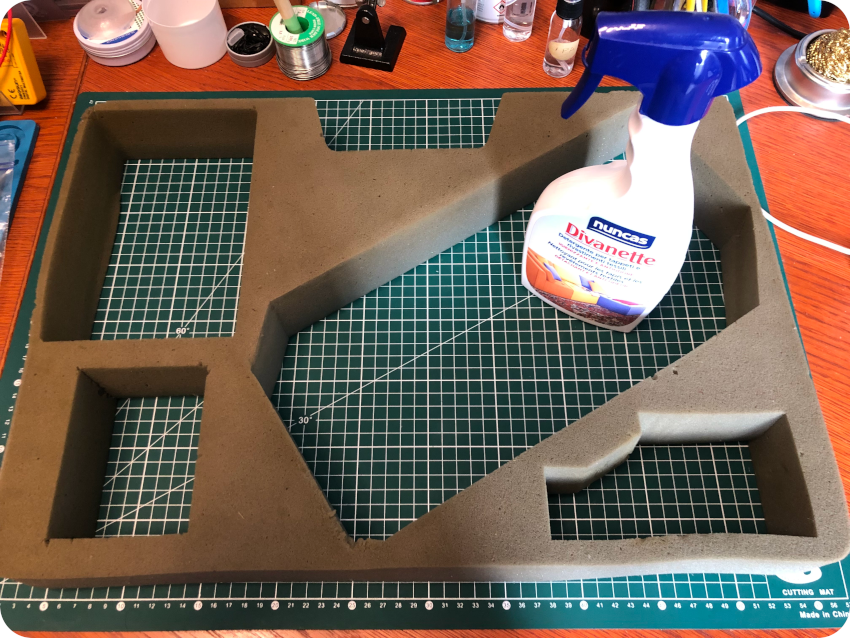
Here is the final result. It is not great though. Some yellowing is still there and some bad stains couldn’t be removed. The stench is mostly gone. Still, it does not yet smell fresh. Hopefully, it is sanitized. To top foam came out well, but, in the end, I swapped the much more fragile bottom foam upside down in the suitcase to preserve its degraded side.
The suitcase is nevertheless a bit better now than it looked originally:

I’ll keep on reading, looking for advice to get these in better conditions…
restoring Manuals and software boxes
The main manual, “Découvrez le BASIC” (Discover BASIC) has seen better days:
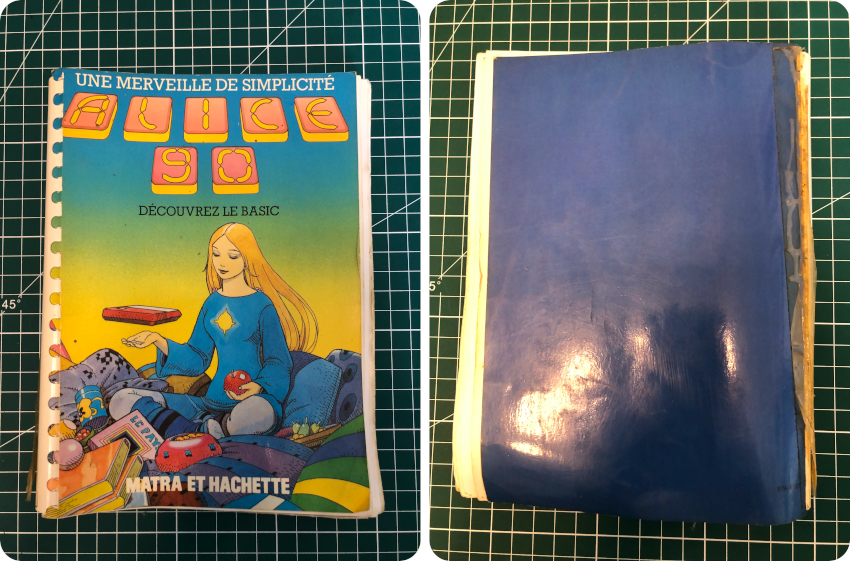
Even though the pages are in relatively good conditions – in the sens that there are no stains and that none have been torn apart – they are all twisted. The binder is disgusting and the back cover is covered with some badly yellowed tape.
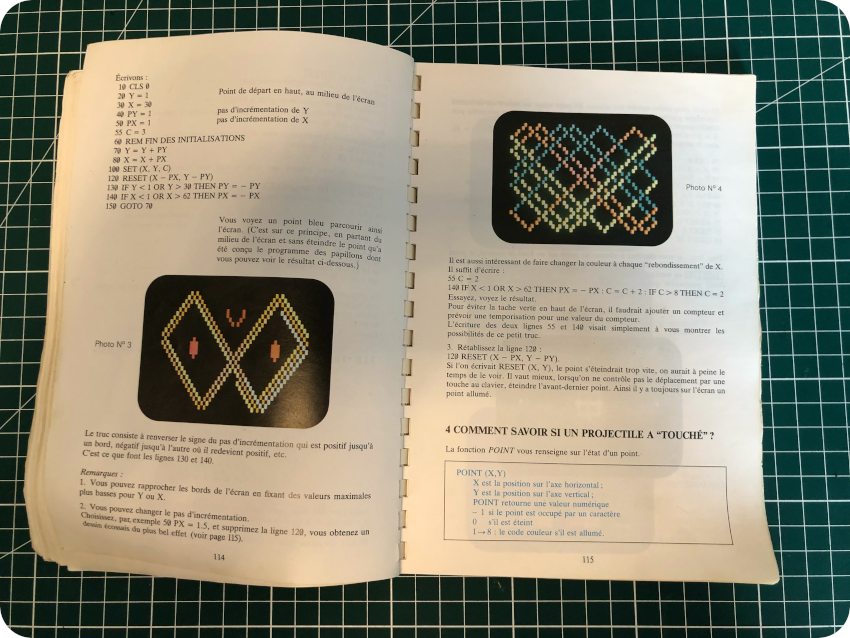
Let’s try to give this manual a new life ! I carefully pulled off the yellowed tape and the removed the binder:
Then I cleaned the binder with soapy water and IPA:
Then came the tedious part: ironing each of the 211 pages (including covers) of the manual, RMC Retro–style:
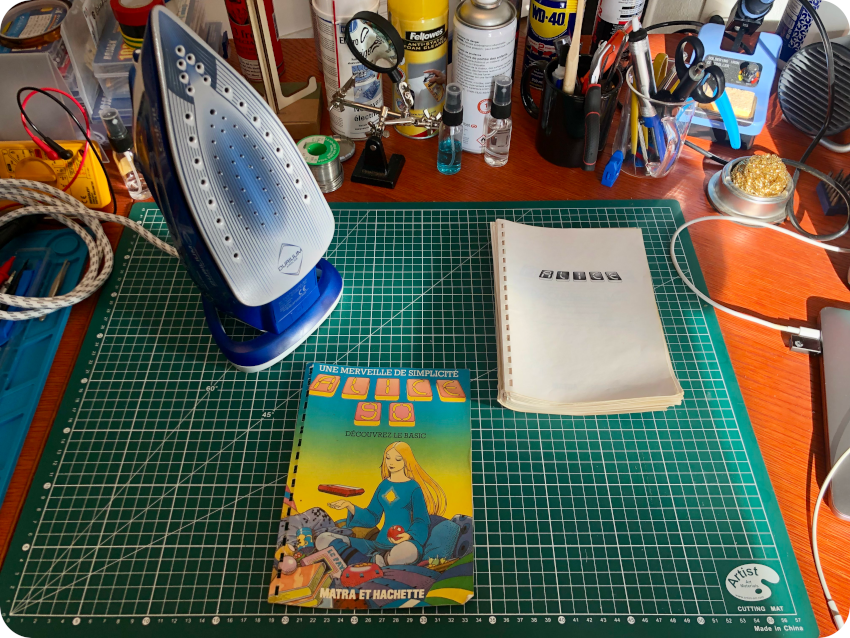

Then I stacked pages by batches of 20 and put each of them under weight for a few days.
I also took care of the software boxes. The results are not perfect, but it is definitively better looking now:
Next Steps
I must say that I changed my mind about the Alice. Sure, it is not a powerful machine. Yes, it was badly marketed and badly priced. Indeed, it was released way too late when compared to the other 8-bit computers of the time (Amstrad, MSX, Commodore 64, …). And there were no possible competition with the 16-bit ones (Atari ST, Amiga, …) that conquered the market in the end. But, still, it is a decent, nice and simple little device.
Anyways, there are still a few things I would like to do:
- Recaping : for my part, it is still an unresolved dilemma. Should I replace the capacitors ? It is a good thing to prevent any leakage and protect the PCB. But … they do look very good, I must say. After 40 years, it means that they were most certainly very high quality at the time. Would nowadays capacitors be that good ? I am still struggling to answer that question…
- Sunbrighting: the keys are a very slightly yellowed and sunbrighting may help. Unfortunately, Autumn is (somewhat) here, so I may have to wait until the sun shines enough !
- Video overlay: I’d really like to try video overlay functionalities of the Alice 90, but I have yet to figure out how to setup a proper test for that.
- Playing with the assembler: I don’t know much about the 6803, but I’d like to give it a try for the fun of it !
What will be the next vintage computer to work on ? Well, for one, I am planning to add new shelves to my study, so I will have more room to store them (I was running out of space).
I am still aiming at a computer with a small form factor. Quite probably an Oric Atmos or an Apple IIc (if prices are not as mad as they are now). We will see !
Acknowledgments and links
As usual, I am deeply indebted to the retro-computing community. Here are a few thanks and links (sorry, most resources are French only):
Emulation:
- DCAlice: http://alice32.free.fr/emulateur/index.html (French). Also a fantastic source for documentation and software.
Communities and dedicated web sites:
- Le [wiki] d’alice: https://alice.system-cfg.com/about.php (French)
- System.cfg Forum (8bits): https://forum.system-cfg.com/viewforum.php?f=1 (French)
- MO5: http://mo5.com/musee-machines-alice.html, http://mo5.com/musee-machines-alice32.html, http://mo5.com/musee-machines-alice90.html and http://mo5.com/musee-machines-alice8000.html (French)
- Obsolete Tears: https://www.obsolete-tears.com/matra-hachette-alice-machine-17.html (French)
- Silicium.org: Matra-Hachette Alice forum (French)
YouTubers:
- GalaMoon Retrogaming: https://www.youtube.com/channel/UCHoSrYaPSHUIMXoXH3bRRbQ (French)
- RMC – The Cave: https://www.youtube.com/c/RMCRetro
Catalogs, manuals, Book & schematics:
- Catalog: “Premier voyage dans la planète Micro” [PDF] – 1984, MATRA DATASYSTEME (French)
- Catalog: “Découvrez l’univers d’Alice” [PDF] – 1984, Matra-Hachette (French)
- Manual: “Découvrez le BASIC” [PDF] – 1984, Matra-Hachette (French)
- Manual: “Guide d’instructions de l’éditeur assembleur” [PDF] – 1984, Matra-Hachette (French)
- Manual: “Lecteur enregisteur de programmes” [PDF] – 1984, Matra-Hachette (French)
- Manual: “Imprimante thermique” [PDF] – 1984, Matra-Hachette (French)
- Manual: “Manuel Technique Alice 90” [PDF] – 1984, Matra-Tandy Electronique (French)
- Manual: “IVA Incrustation Vidéo Alice” [PDF] – 1984, MATRA DATASYSTEME (French)
- Book: “Alice, Alice-90 – Votre micro-ordinateur”, Jean Delcourt (Cedic Nathan) ISBN 2-7124-1515-9, 1984 (French)
- Schematics: “Schéma électrique Alice 90” [PDF] (French, but understandable in any language)