Let’s go a little further into retro-computing. After these first steps with the Sinclair ZX81 and ZX Spectrum, if was time for another British 8bit computer from the 80’s: the Amstrad CPC 464 !
![]()
The Amstrad CPC 464
The Amstrad CPC 464 is very dear to me. Unlike the Sinclair ZX81 and ZX Spectrum I worked on a few months ago, I did own an Amstrad. It was my very first computer. I received a CPC 464 with a green monochrome monitor as a Christmas gift from my parents in 1984. By 1984-1985, the CPC 464 was widely successful here in France, driving a large community.
I spent a huge amount of time with it, playing – of course – but, most of all, learning with it: BASIC programing, CP/M, Zilog Z80 assembly programing, …
In 1985, I completed my setup with a DDI-1 external 3″ floppy disk drive. Later on, I bought a Vortex 256k expansion RAM card. Though it did not require any soldering, installing this expansion card required to open up the case, to locate and to remove the processor and the gate array (along with its heat sink) from the main board. You’d have to insert them back to the proper sockets on the expansion card, then to connect the expansion card itself to the board with a ribbon that fitted the gate array socket and then wire the board to a resistor with a clip. A bit of a challenge for a 13-14 years old boy. It was actually my with experience with computer electronics I knew nothing about minutes before.
In 1988, I moved on into the world of 16-bit computers. I sold my setup to buy an Atari 1040 STF, with a 640×400 bitmap monitor. It was the natural evolution of things: selling your old stuff without any regrets in order to buy a brand new setup.
Sourcing an Amstrad CPC 464
I took the same path I followed with both Sinclairs and headed for Leboncoin. It was less easy this time, since most offers are bundling the CPC with a monitor (as they were sold in the 80’s). But … I do not have enough room in my study to store a CRT monitor. After a few weeks, I finally stroke a deal for a CPC 464 alone, without its monitor. A week later, it arrived home:

Unboxing
As advertised by the seller, the Amstrad was desperate for a good clean ! And indeed, the case was filthy, sticky, with a lot of dusts and stains. It smelled really bad: one of the previous owner was a smoker. And the keyboard was also very, very crunchy.
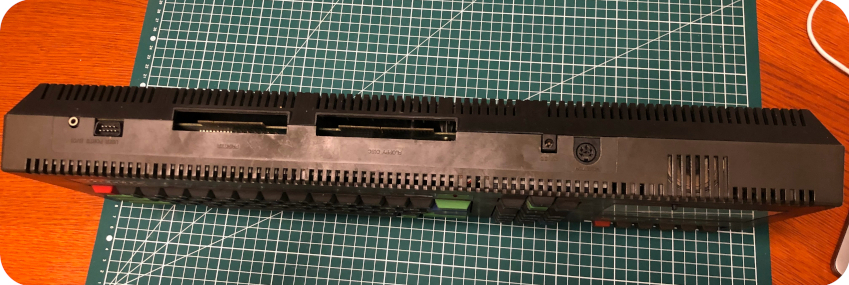
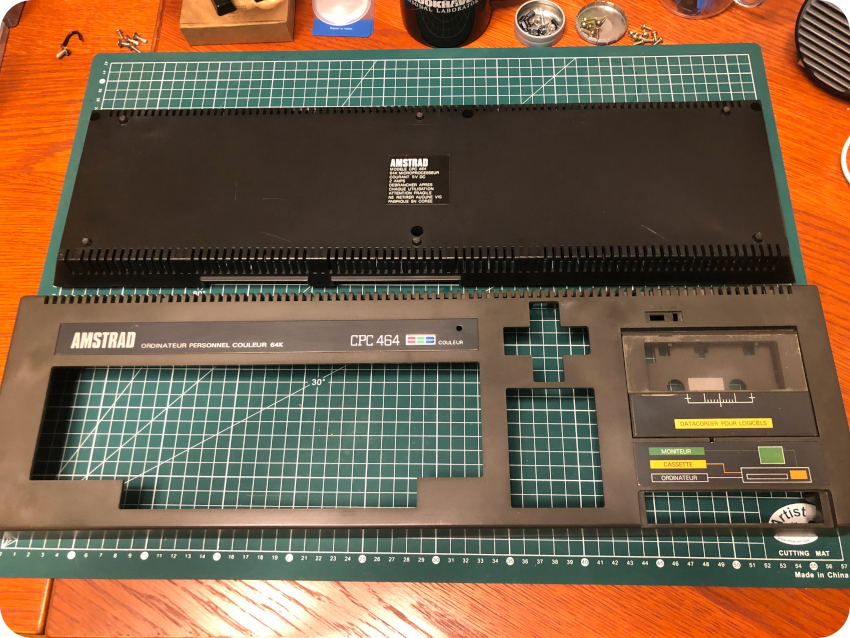
The version I bought wasn’t exactly the same I owned at the time. Mine was probably a bit older and was … more British than French. This one bears the same old Amstrad logo and has the same QWERTY keyboard as my old one, but the lettering is in French (“Ordinateur Personel Couleur 64K”). Later French models would have an AZERTY keyboard and the “new” Amstrad logo with a stripe. The colors of the markings on the tape deck are also slightly different, with yellow colors where mine were red. But still, it is the closest to the one I owned I could find. Even if this CPC has seen better days, the keyboard has still its vivid green, blue and red funky colors ! Yeah !
Opening Up
I still have a clear memory of how the CPC looks inside, from the time I opened it up to install the Vortex expansion board.
Nevertheless, before opening up the Amstrad, I took the time to watch videos, especially the ones from Noel’s Retro Lab focused on CPCs.
I also found online a nice schematics – scanned from an old service manual, I guess – that gives a general overview of the design. I touched up and cleaned the image a bit, then added those red arrows :
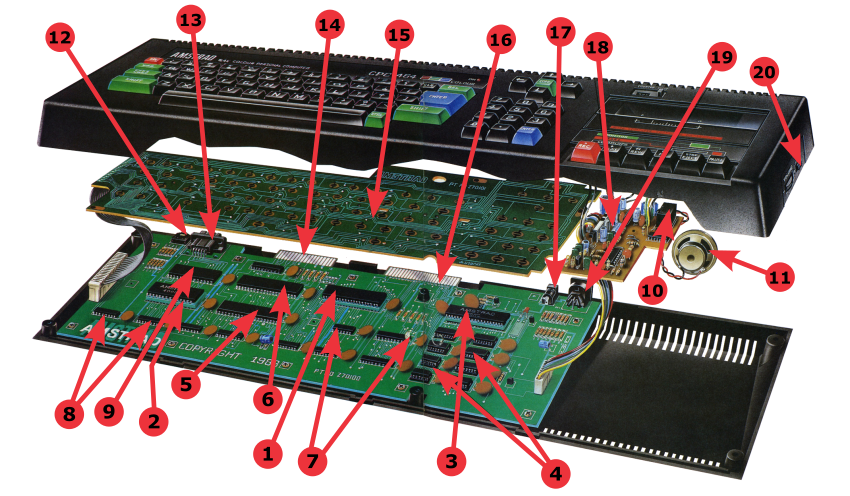
- Processor
- ROM
- Gate Array
- RAM
- CRT Controller
- Peripheral Controller
- TTL Interfacing Buffers
- TTL Buffers
- Sound Generator
- Motor control
- Speaker
- I/O Port
- Joystick
- Printer Interface
- Keyboard PCB
- Expansion Interface
- DC Power
- Cassette Controller PCB
- Video Out
- On/off Power Switch
This is exactly how mine looked like. Nevertheless, since the one I bought was slightly newer than mine, I was expecting a few differences, especially for the keyboard.
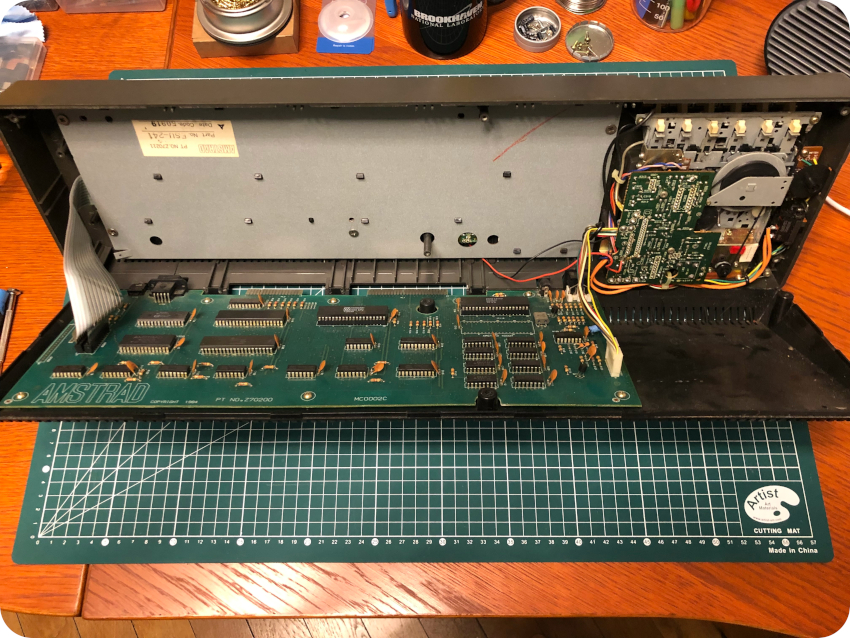
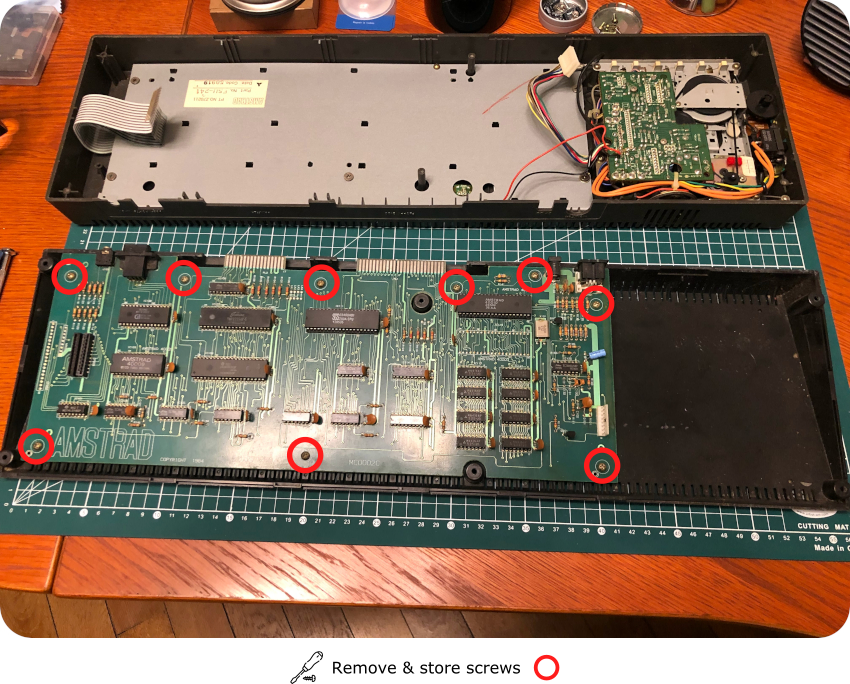
Enough waiting, let’s open this bad boy ! First, let’s flip the case, then remove and store the screws:
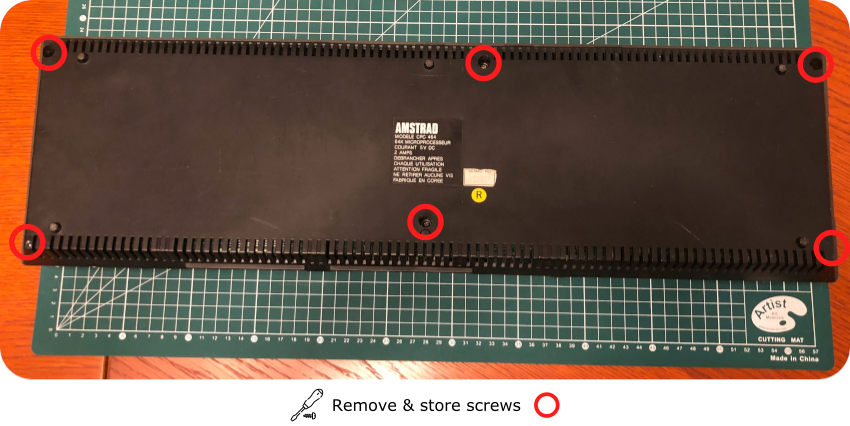
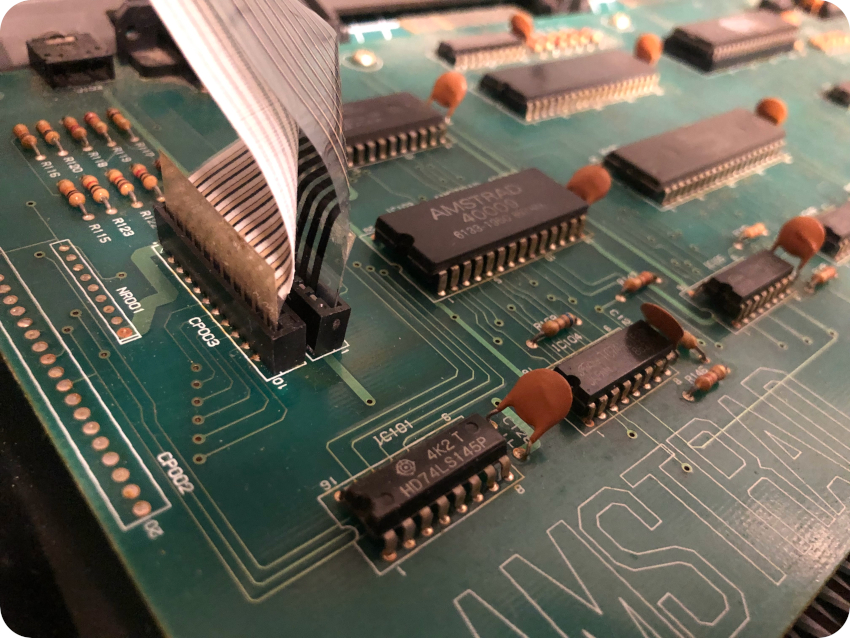
I slowly opened the case, being very careful of the keyboard connector. As expected, this version of the Amstrad CPC comes with two ribbon cables, connected to the main PCB. Just like the Sinclair ZX 81 and ZX Spectrum, these ribbons are very brittle !
Next steps: gently pull these two ribbons free …
… and then, disconnect the cassette controller cable:

Bottom part
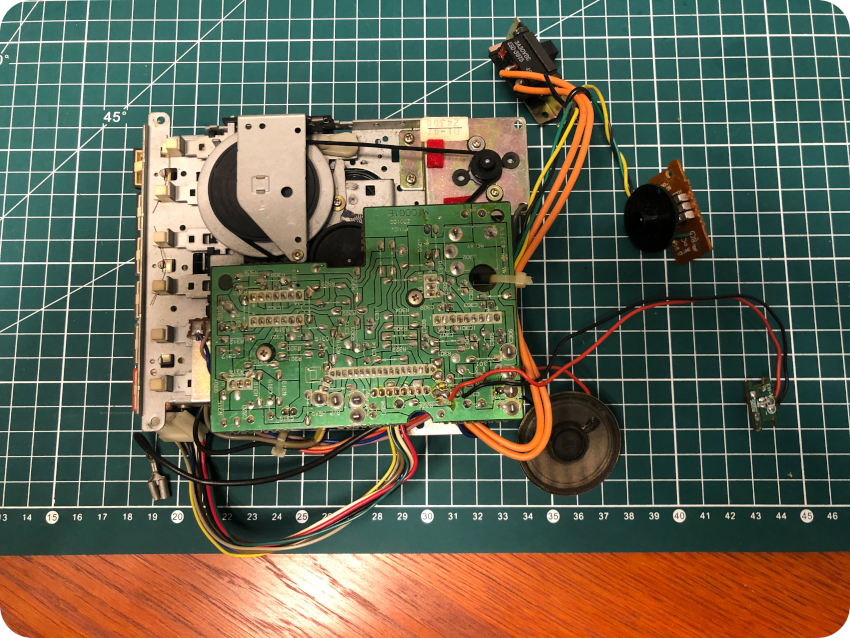
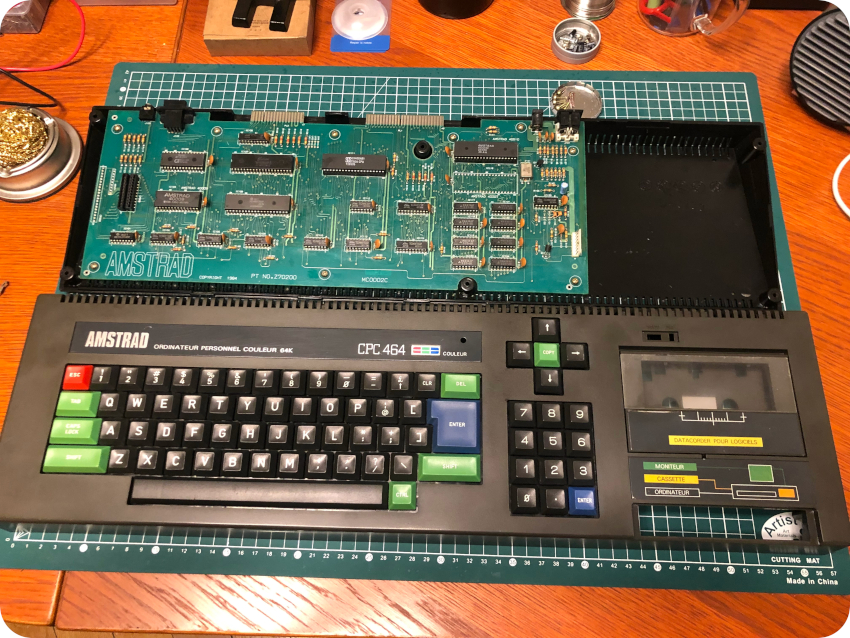
Once it is done, you can separate both sides of the case and unscrew the motherboard from the back of the case:
The PCB is now freed from the case:
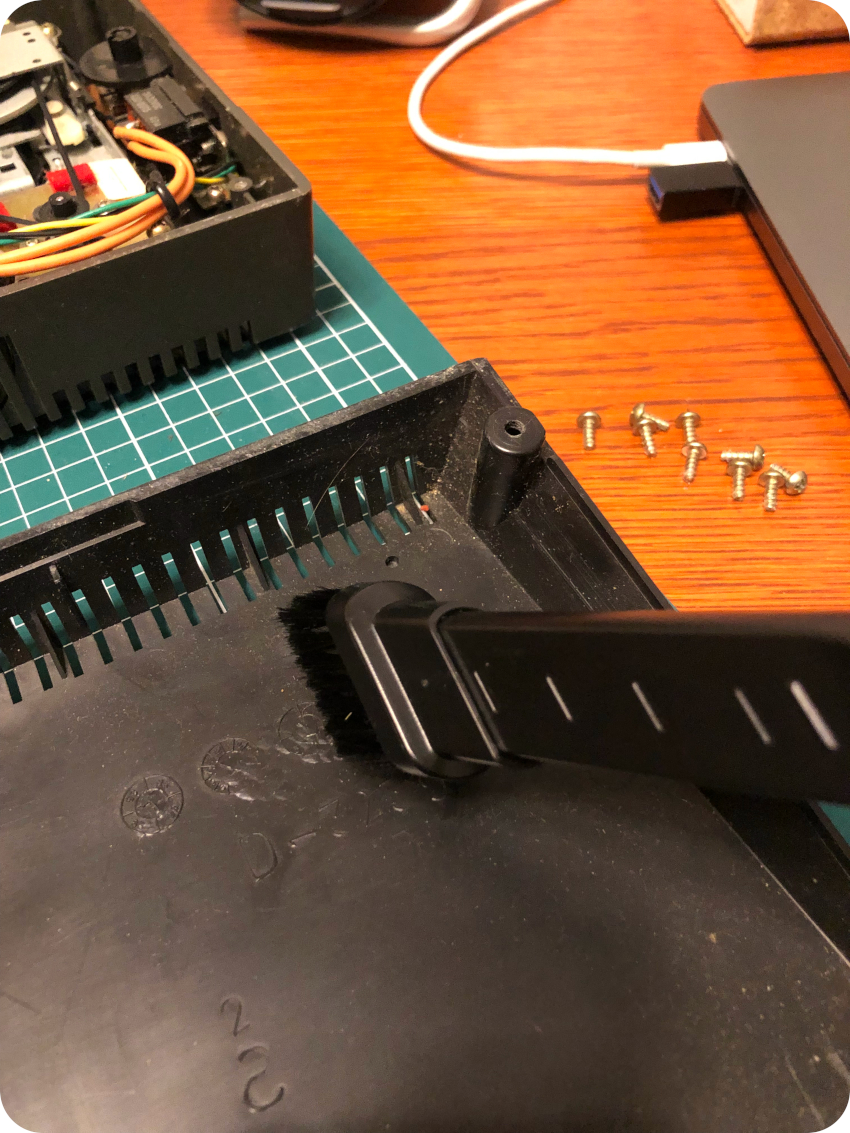
Let’s take care of the bottom part of the case. Once the PCB was removed, I could remove as much dirt, hair and dead spider remains as I could, with the help a small vacuum cleaner:
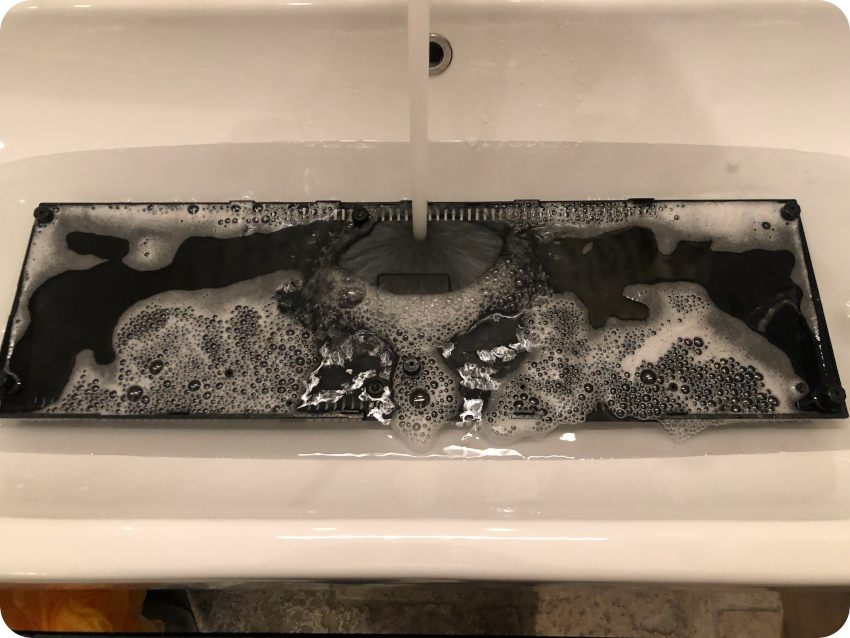
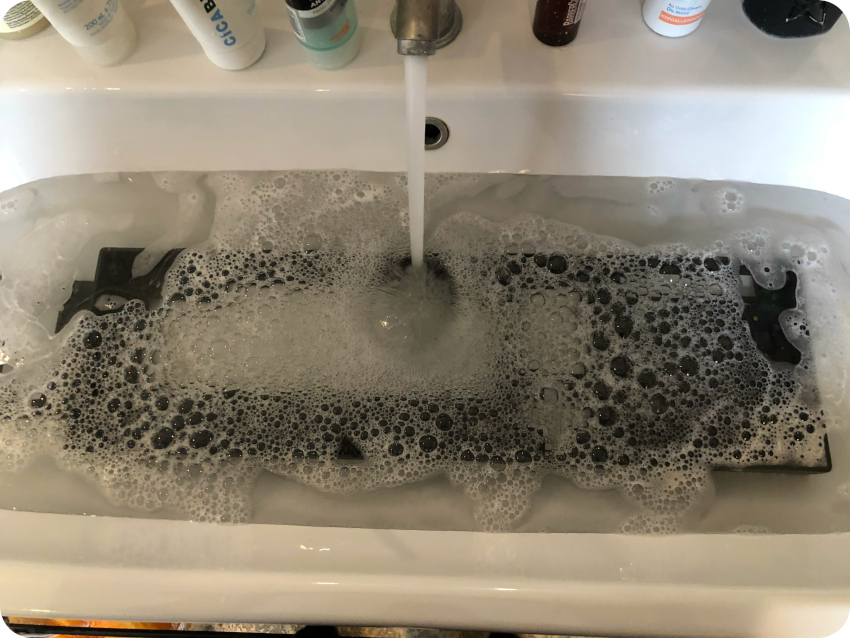
Then, the bottom part of the case what up for soapy water bath and a good scrub:
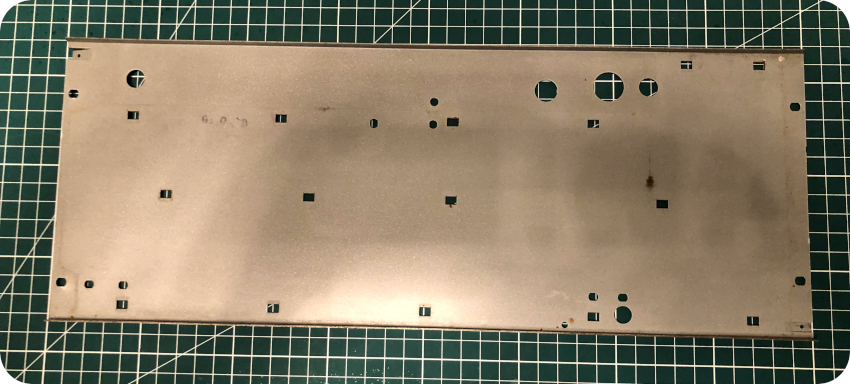
Top part
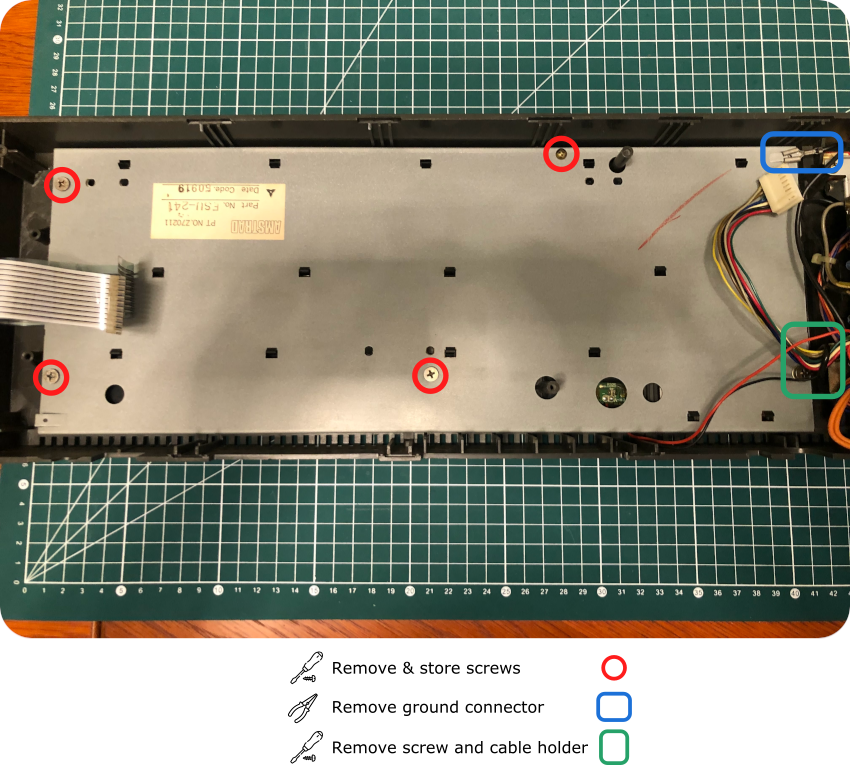
While the bottom part of the case was soaking, I took care of the top half. The keyboard is protected by a metal shield, that you will have to unscrew from the case. You will also have to remove the ground connector and the thick wire that is holding the tape controller and the LED cables:
Once the keyboard is free, one has to take care of the power LED, which is glued to the case. I removed quite easily the glue with some acetone, but, unfortunately, I snapped one of the two plastics legs holding the LED (these are very brittle, be gentle). I’ll have to glue back the snapped leg later on…
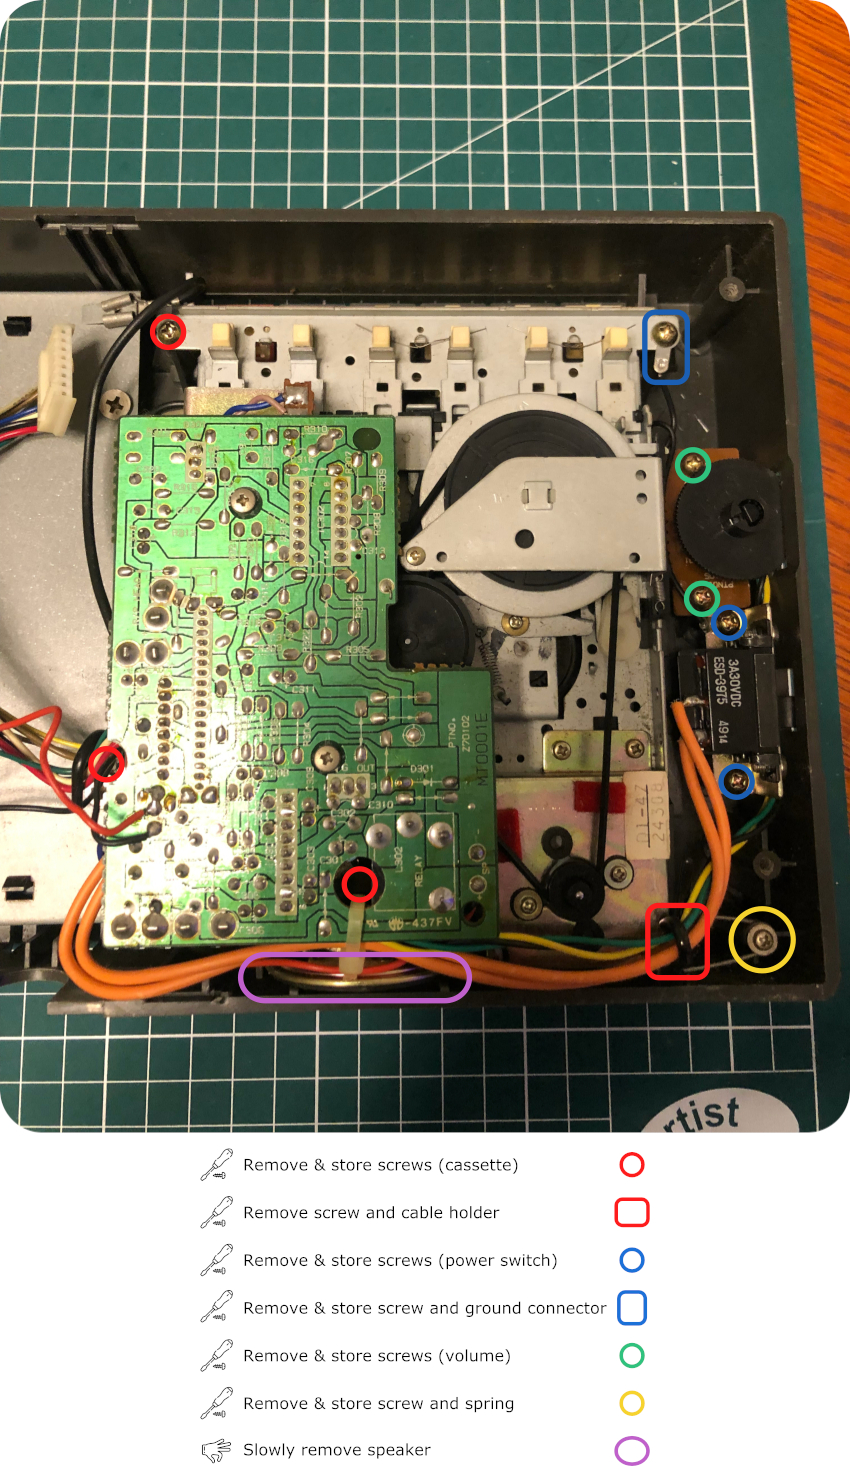
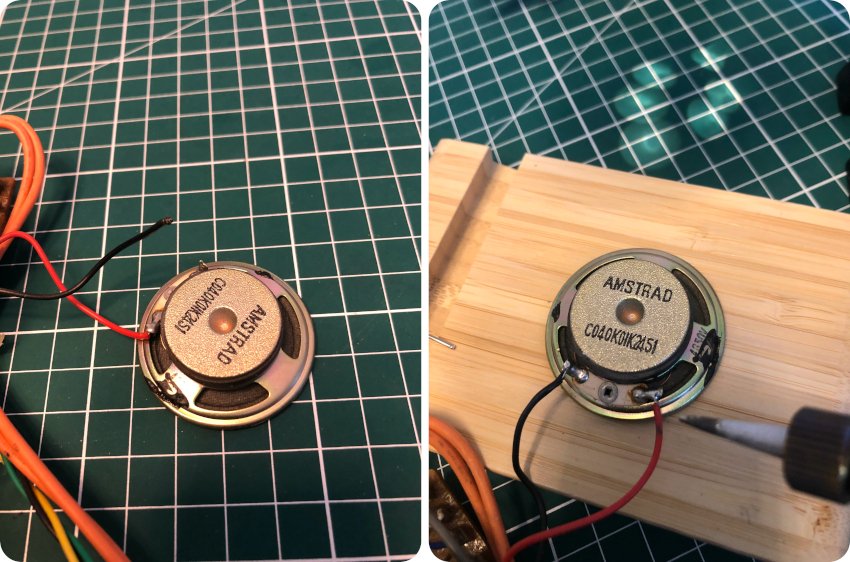
Then, one has to unscrew the tape deck, the power switch, the volume, the spring mechanism holding the cover on the tape, and remove the speaker. Be very gentle, as the solder joints (power, volume, speaker) tend to quickly break. The speaker is also very fragile (almost paper-like):
Just like the top part, the bottom case is up for a soapy bath and a good scrub:
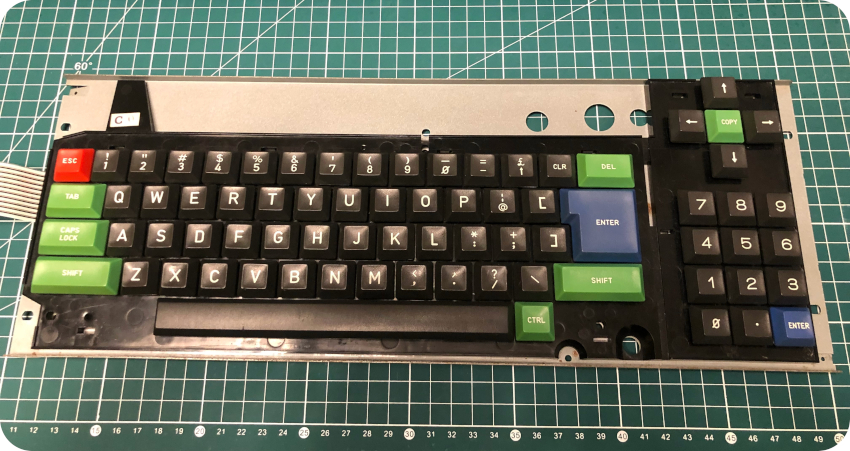
Keyboard
To service the keyboard, you will have to flip it, then push each of these plastic clips in order to remove the metal shield:

Once the shield is removed, you an gently pull apart the keyboard membrane. Then, you will have to remove the metal bars holding the space bar, both green shift keys and the big blue enter key:

You can now remove eack key one by one. There seems to exist two types of CPC 464 keyboards:

- The “old” keyboard style, with a PCB, plastic domes and wire cable. This is the one I used to have in the 80’s. In this case, a key remover may be used, I guess
- The “new” keybard, with a membrane and ribbon cables. This is the type of keyboard used here. In this case, don’t use a key remover. Each key have small pins on the sides. To remove the key, just press on the pins, and the key will come off right away. A key remover might just snap these pins, so be careful if ever you used one.
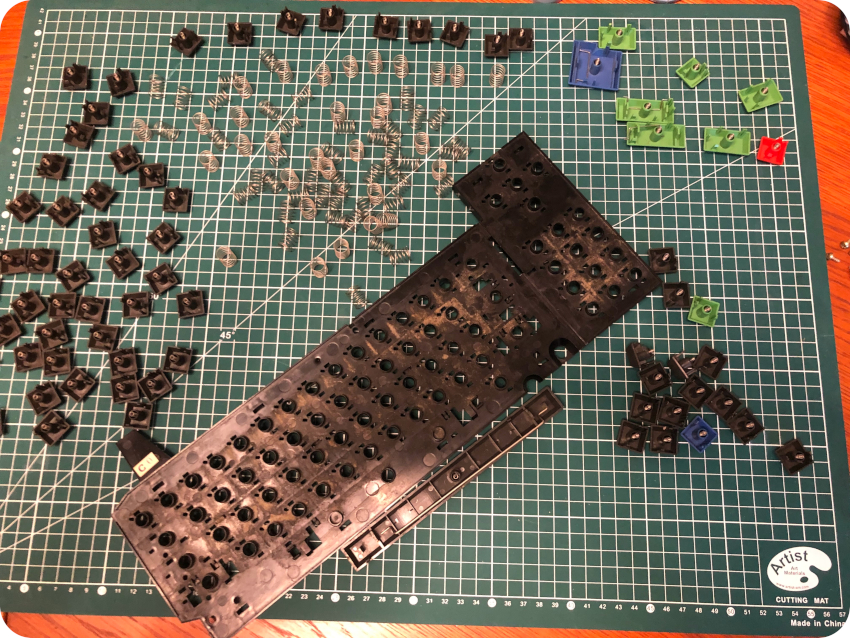
Of course, during the process, one of the springs got loose, and, being clumsy, I stumped on it while search for it … No real harm done actually, with patience, I could put back the spring (almost) into its original shape.
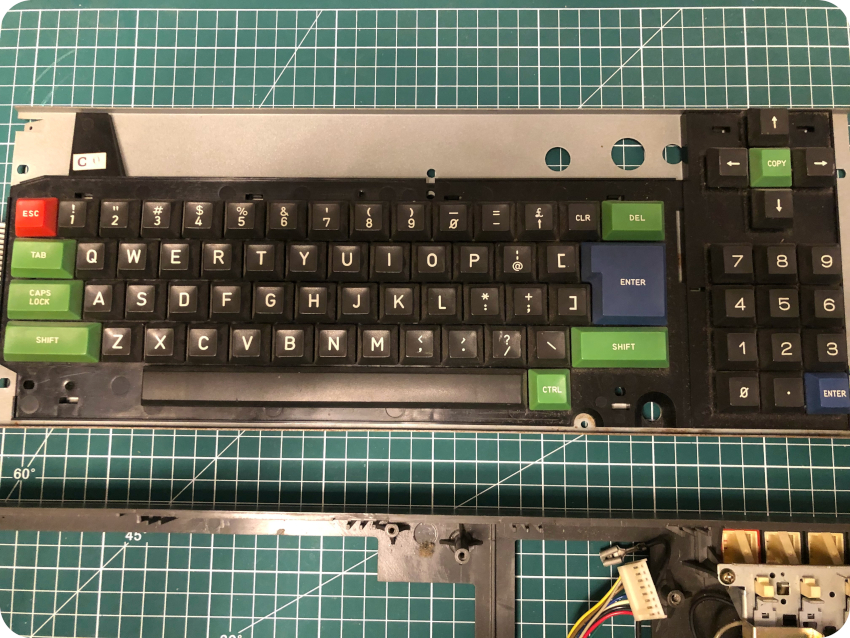
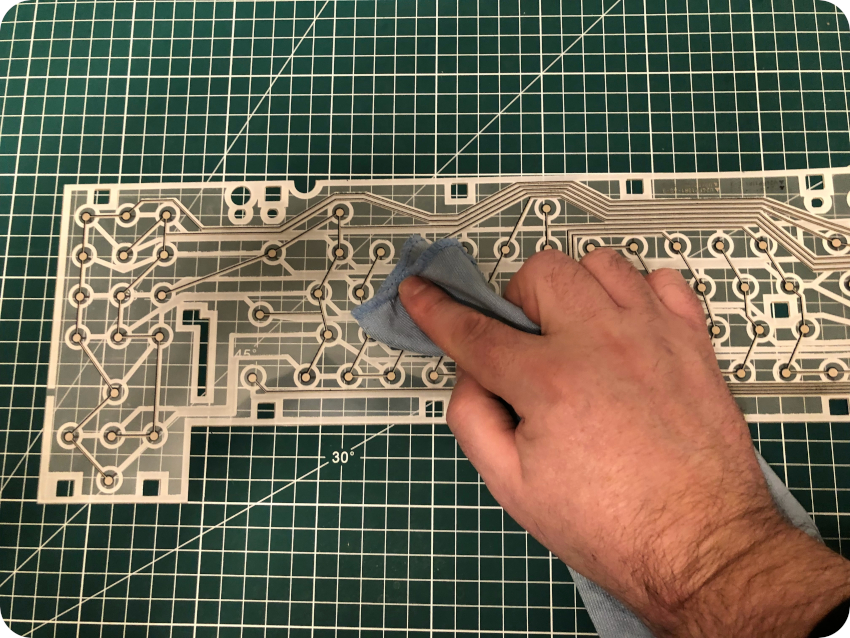
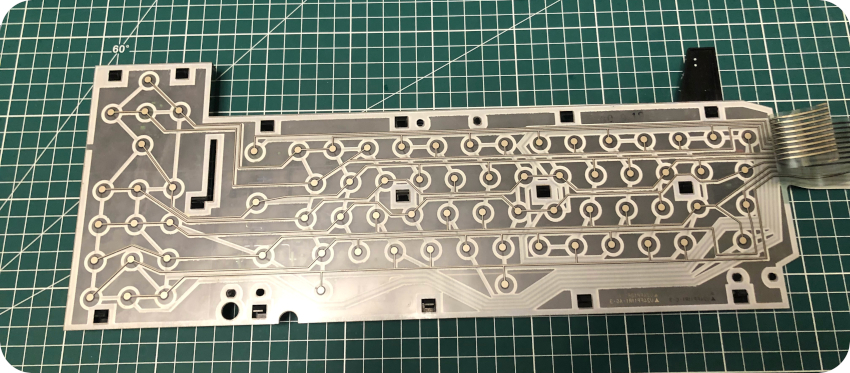
Now that all key are removed, you can see how scruffy the keyboard was ! Each key was cleaned up with window cleaner, the keyboard case took a bath, then was scrubed with a toothbrush. While it was drying, I took care of the membrane, with a soft microfiber cloth and window cleaner:
Meanwhile, the keys and the keyboard plastic case were dry. It was time to put everything back:
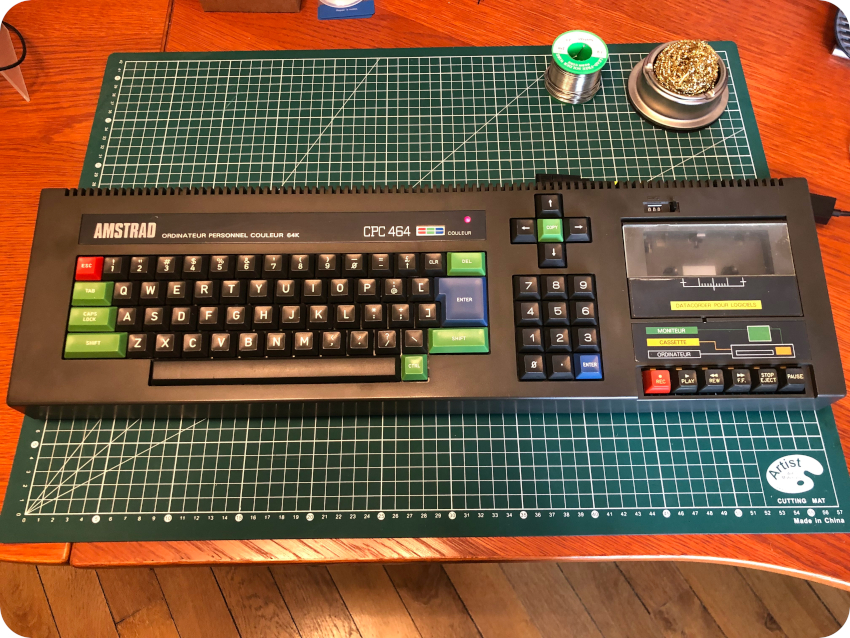
There you go ! Fresh, clean and shiny. And the “crunchy” feeling was gone !
Taking care of plastics
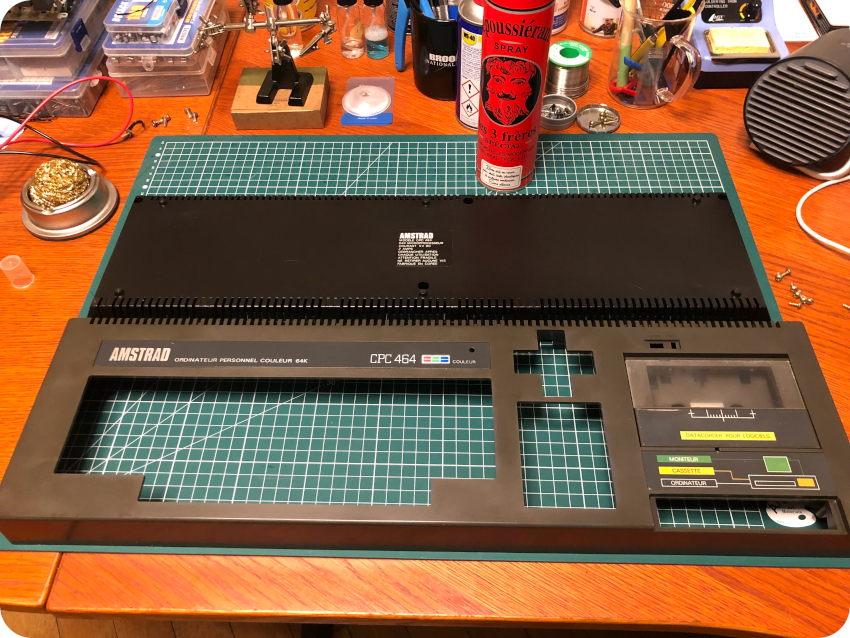
Let’s now take care of the plastics. Both parts of the case were cleaned and dried:
They smelled much better, but I had to take care of the plastics. The acrylic window of the tape deck was badly scratched. With patience, a toothbrush and … baking soda-based toothpaste, it worked nicely (though not perfect).
Then I cleaned the plastics with an anti-static cleaner and a soft cloth. Clearly, that wasn’t enough to give back the CPC it’s former glory:
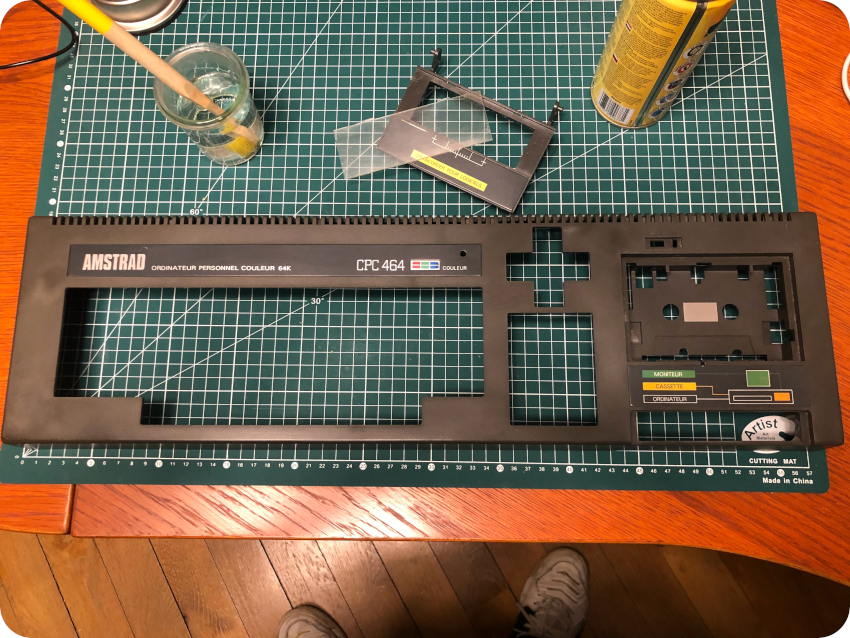
I went on for shopping something more efficient. I settled for a specific plastic cleaner, sprayed it, and let the plastics soak up the product for 1h. Then I cleaned the case with a soft cloth. I iterated a couple of times this process, as it got better each time, until I was happy with it. In the end, it is still a little bit “greenish”, but I am not sure I can do anything about it.
Servicing the tape deck
While the plastic case was soaking, it took the time to servicing the tape deck. It wasn’t in good shape: lot of dust, gunk, a bit of rust …
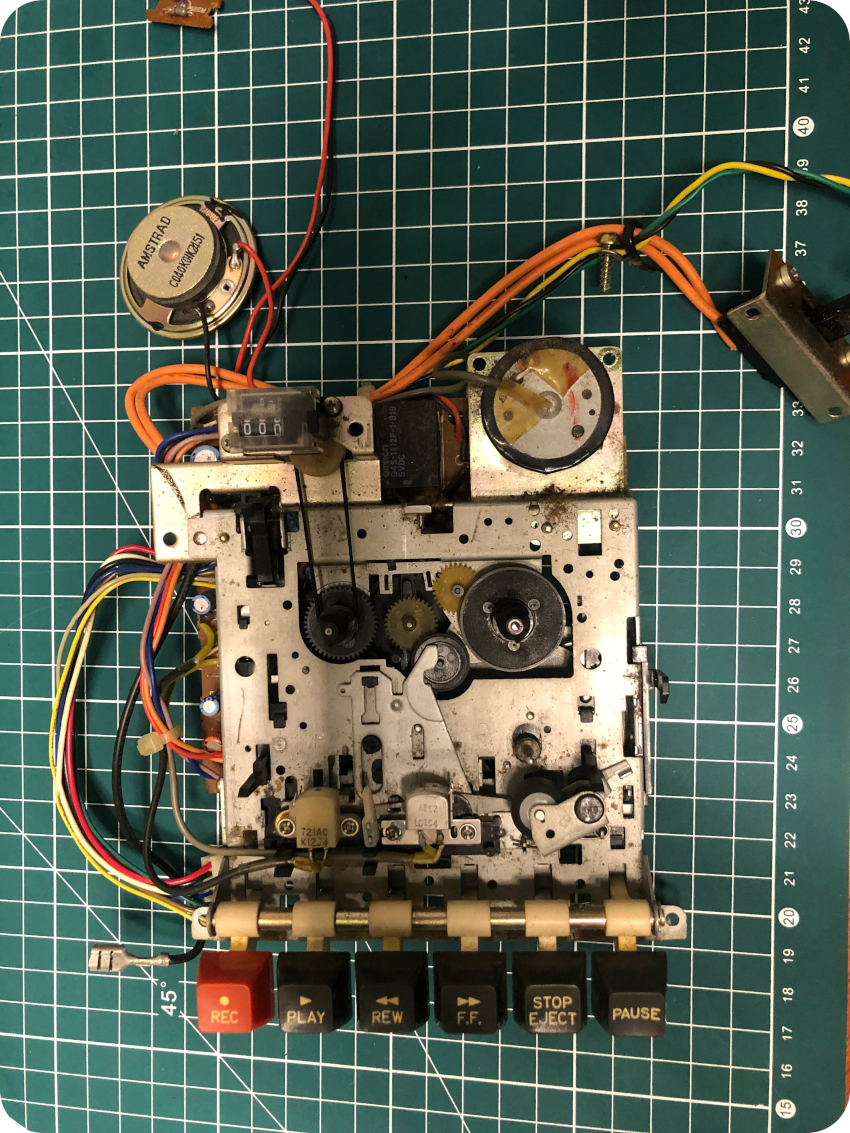
On the plus side, all keys and mechanical parts were working. Moreover, the counter is working, its belt is not loose, and the reset button is not broken (this happens a lot). Good !
Let’s go for a lot of cleaning: first blowing dry air, then, patiently, cleaning with q-tips and IPA:
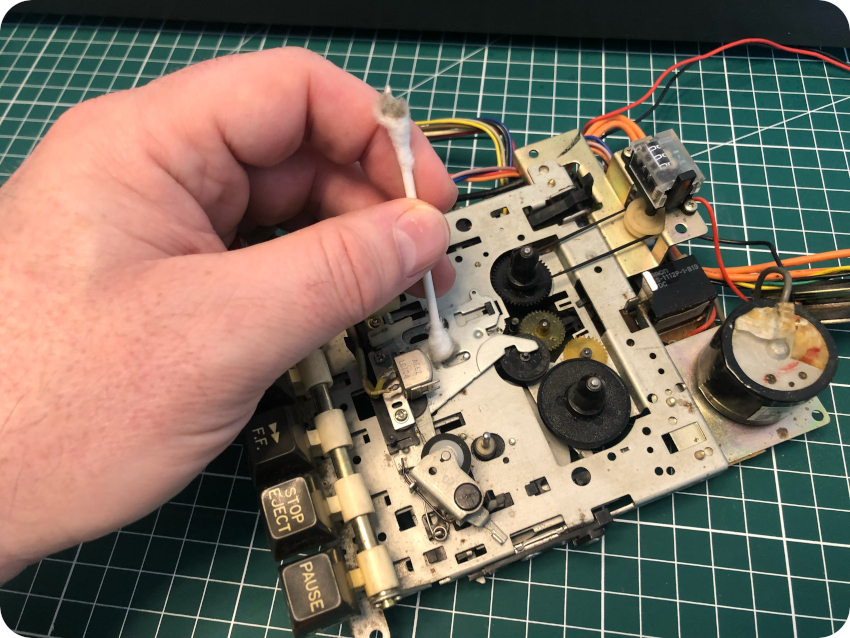
I used a bit of WD-40, then applied a bit of silicon grease on the mechanical parts. Finaly, I cleaned up the head with IPA.
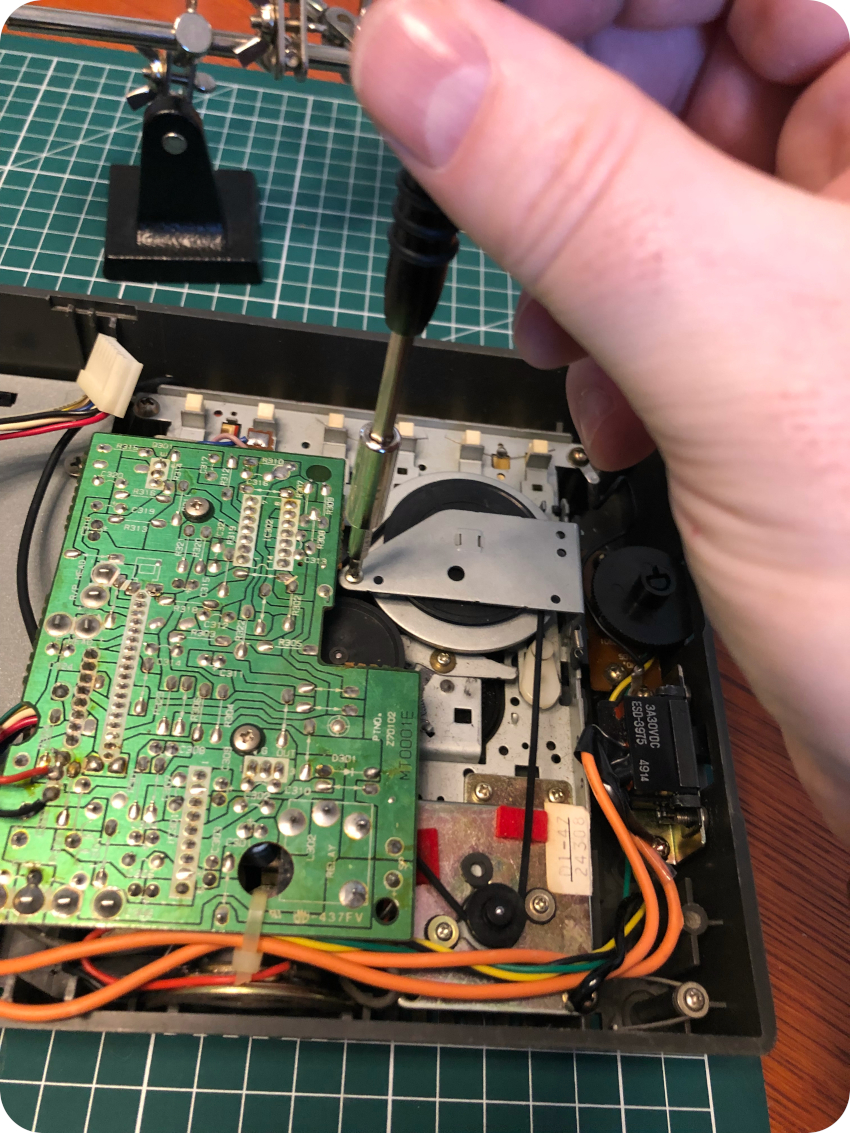
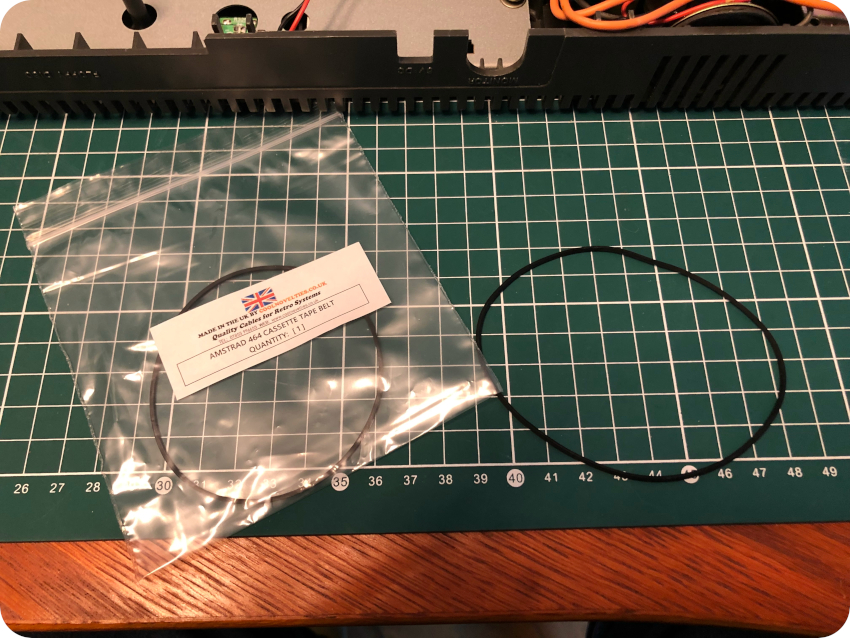
Now, let’s flip back the deck and have a look at the motor belt. Though it wasn’t horrible, the belt was a bit loose:
I ordered a new belt (as well as a RGB-SCART connector) from coolnovelties.co.uk. About a week later, I received both of them.
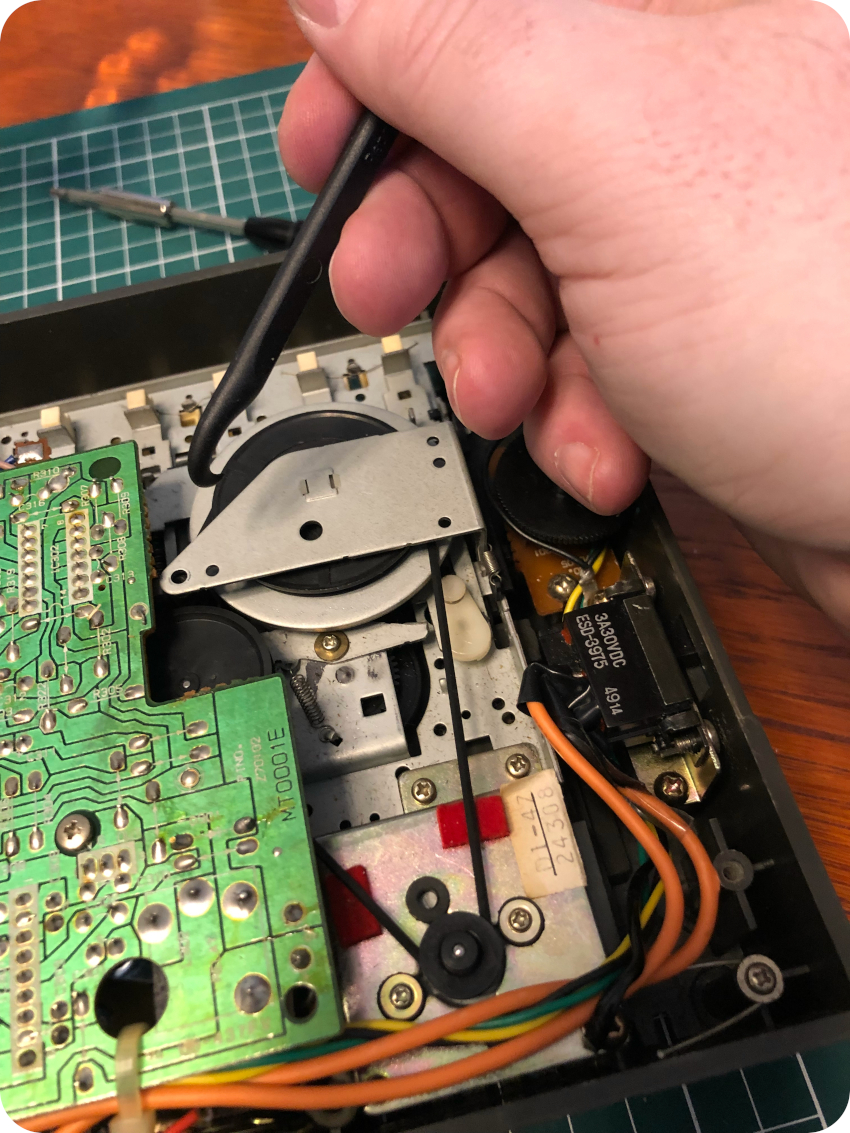
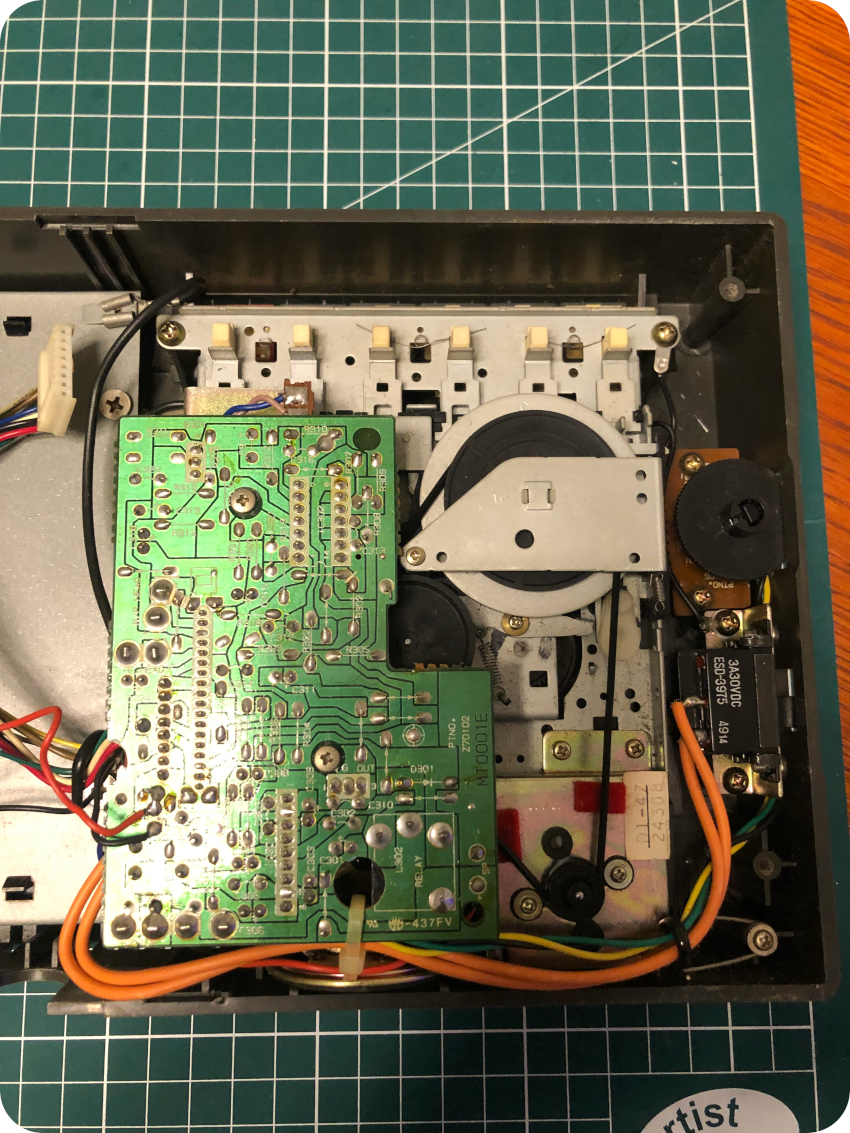
To remove the old belt, you just have to remove this one screw:
Then pull off the belt from the cog and slide it underneath the metal plate :
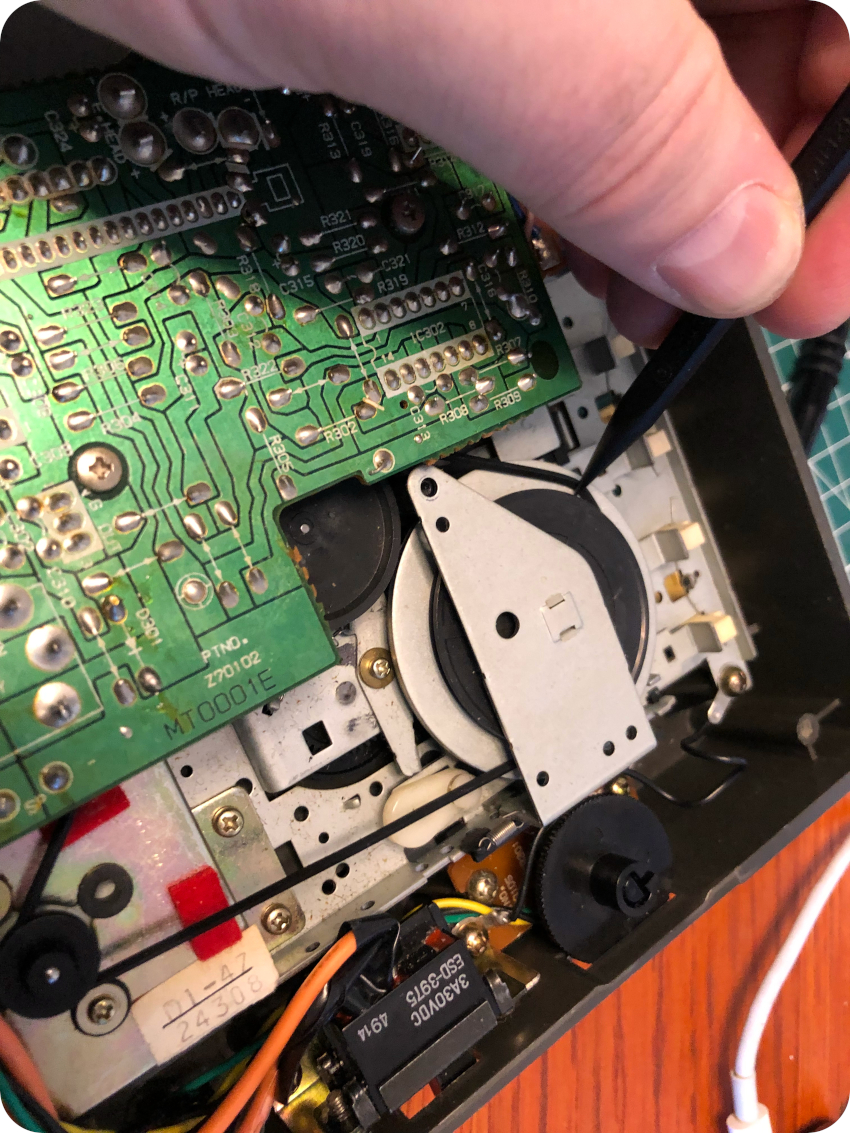

Once it is done, you can reverse the process with the newly bought belt:
Inspecting and cleaning the PCB
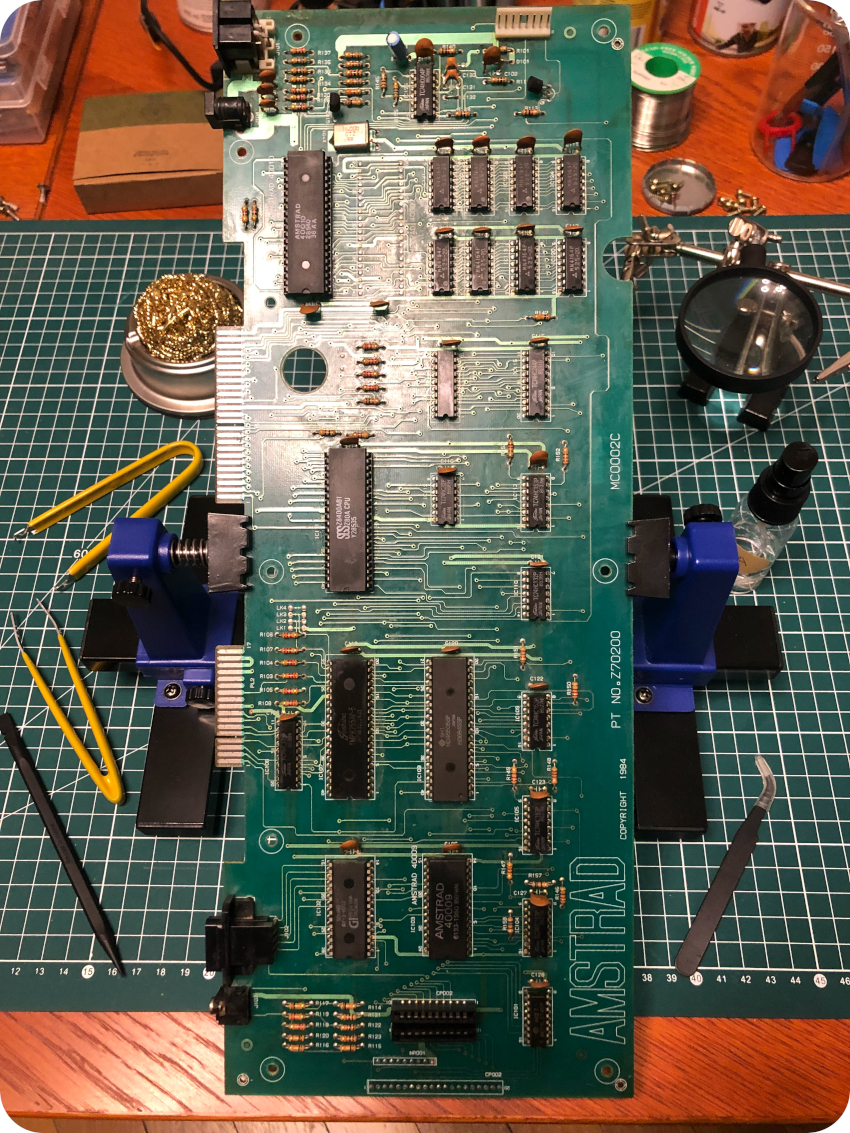
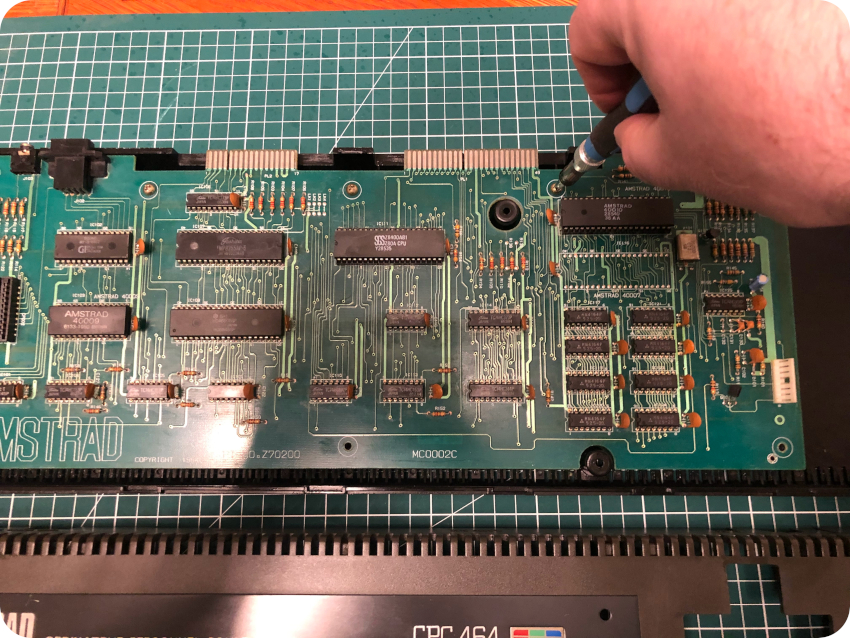
Let’s have a look at this looooong PCB !
On the positive side, after close inspection, there were no signs of corrosion, no dry solder joints, and none of the electrolytic capacitors have leaked (there are very few of them on the board). Very good !
On the negative side, both sides of board are absolutely disgusting: dirt, gunk, filth. It was very very sticky and smelled like cold cigarettes. Yet again, time for a cleaning session, with q-tips, a toothbrush and IPA, then contact cleaner on all connectors:
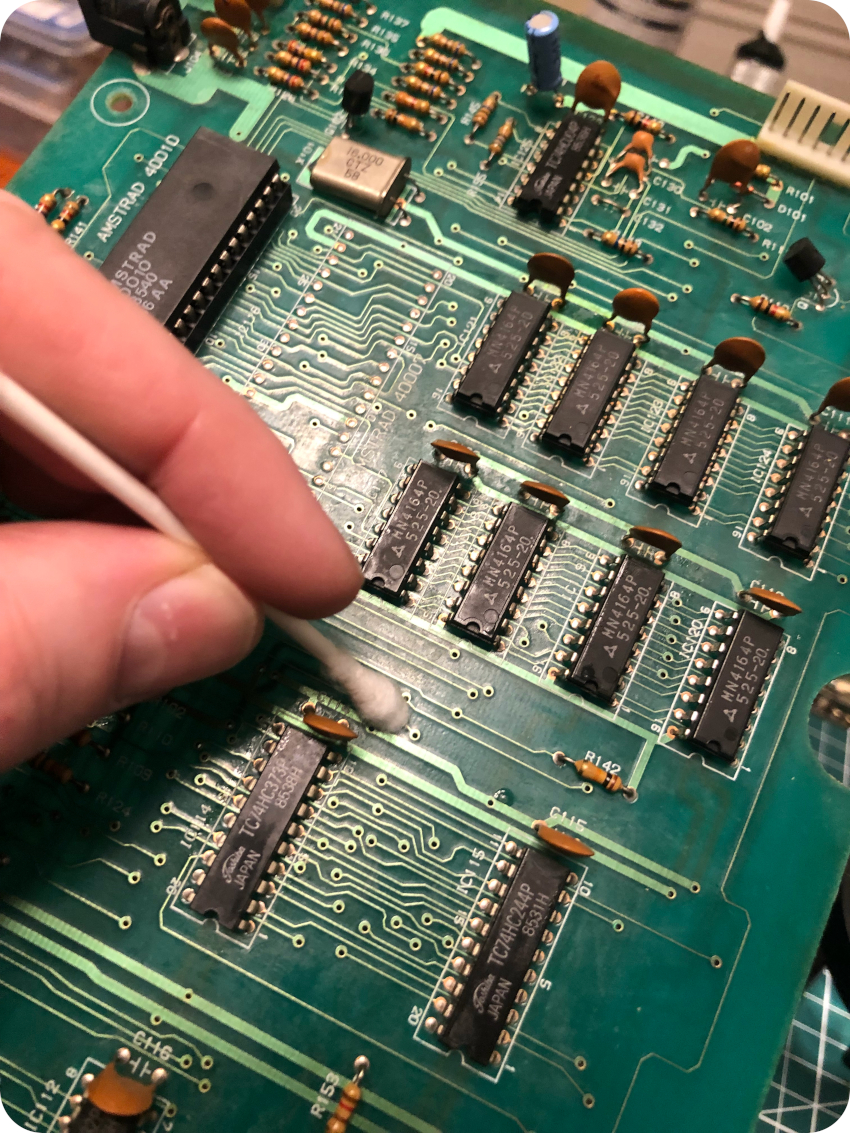
It took me more than an hour to restore the board. It but was worth all the efforts !
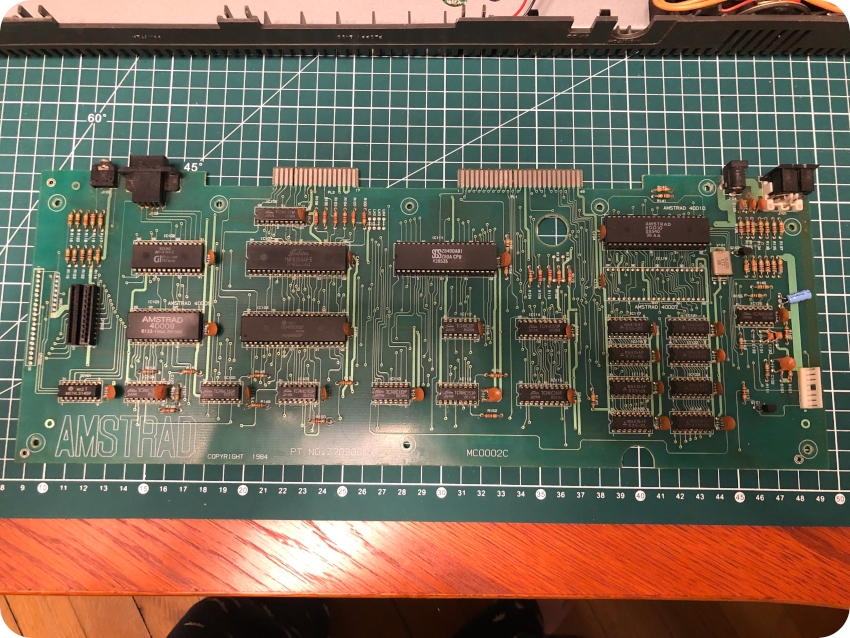
Let’s detail the essential parts of the PCB. There have been many revisions of the board, including much shorter ones (versions 3 and 4). This one is a version 2, labeled “NO. Z70200, MC0002C”, from 1984 (mine was most probably also a version 2, but either MC0001A, 2A or 2B):
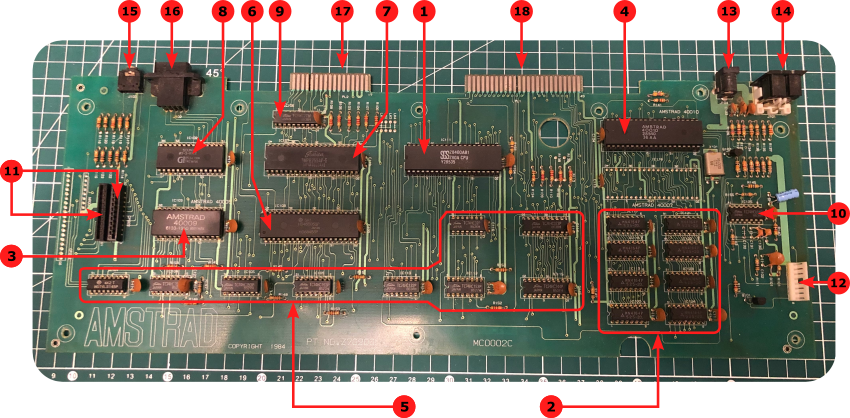
- Microprocessor: the Amstrad CPC 464 uses Zilog Z80 8-bit microprocessor, clocked at 4MHz. The one used here is manufactured by SGS
- RAM: the board is equiped with 64K of RAM, composed of 8 x MN4164P NMOS DRAM manufactured by Matsushita
- ROM: the CPC has its OS and a BASIC interpreter built in as ROM, using a 32K chip, labelled 40009. There exists other ROM versions for the 464, like the 40050 (CPC464, French) or 40037 (CPC464, Spanish)
- Gate Array: the gate array is a chip specifically designed by Amstrad to be responsible for the display (color palette, resolution, horizontal and vertical sync.), interrupt generation and memory management. The gate array version on this board is 40010. It is the third version, the others being 40007 and 40009, which used a different pinouts than the 40010 and were both equipped with a metal heat sink. This board has an empty location for the 40007
- Logic Glue: logic ICs, manufactured by Toshiba and Hitachi
- CRT Controller: a 6845 chip manufactured by Hitachi (labelled HD6845SP), providing an interface to raster scan type CRT displays
- Peripheral Controller: a programmable peripheral (P10) controller 8255AP-5 chip, manufactured by Toshiba
- Sound generator: the CPC 464 uses a AY-3-8912 sound chips from General Instrument. It provides three channels, each configurable to generate square waves, white noise or both. This chip (and its many variants) were widely used in 8-bit and 16-bit computers (Intellivision, MSX, Oric-1 / Atmos, Atari ST, …) but also in arcade game machines (1942, Bomb Jack, Frogger, Moon Patrol, Tron, …)
- Logic Glue: logic IC (D-type flip-flops) manufactured by Toshiba
- Logic Glue: logic IC (Hex Inverter) manufactured by Toshiba
- Keyboard connectors: connectors for the two ribbon cables used by the keyboard membrane
- Cassette connector: connector for the tape deck
- DC Power: 5V (2A) DC power jack (2.1mm barrel, center positive)
- Video: 6-pin DIN socket (RGB)
- Sound: 3.5mm stereo socket
- Joystick: DB9 9-pin socket for Atari-like joystick
- Printer port: edge connector for printer. It supports parallel one-directionnal 7-bit data, sufficient for English 7 bit ASCII character sets, but … not enough for 8 bit character sets. Printing is not Amstrad CPC 464s best feature.
- Expansion port: edge connector for expansions. It is used for example by the DDI-1 Controller for external 3″ disk drives
A bit of soldering, a bit of glue and putting all back into place
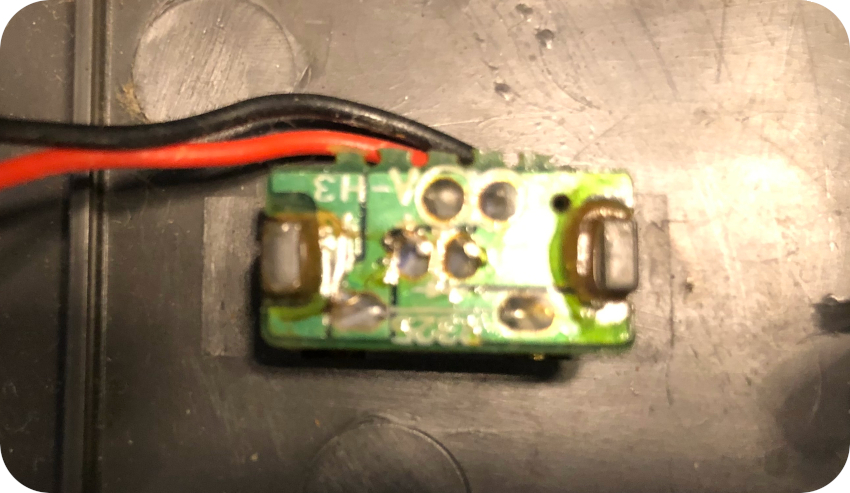
Before putting all back into place, a bit of soldering was required. The solder joints from the speaker and from the power switch were bad, and actually broke while I was servicing the tape deck:

Let’s now screw the PCB back to the case:
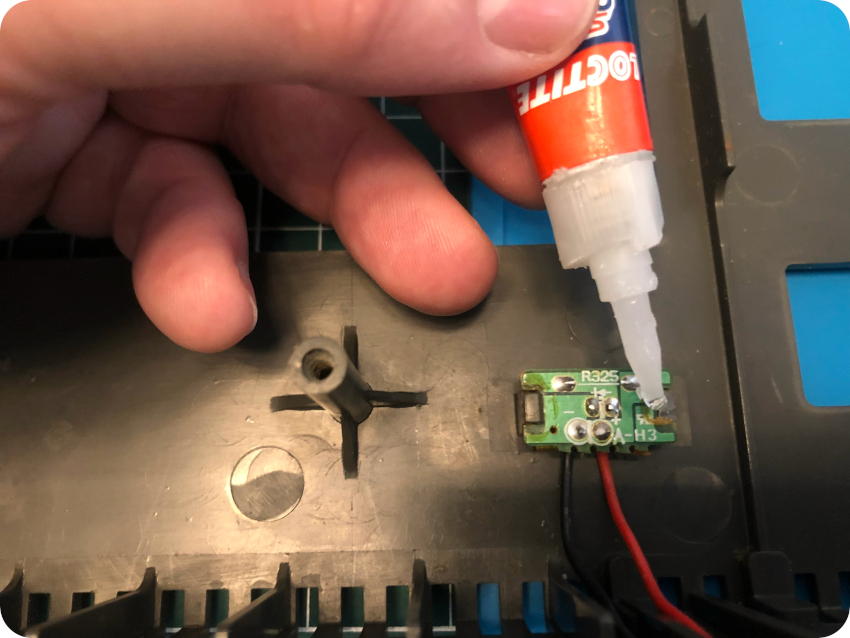
Then let’s “super-glue” the plastic leg of the power LED that snapped:
Now, it is time to screw the keyboard back to the front case:
Once the tape deck is screwed back, one has to connect the keyboard and the cassette controller cables back to the PCB, then close and screw back both parts of the case.
Power on !
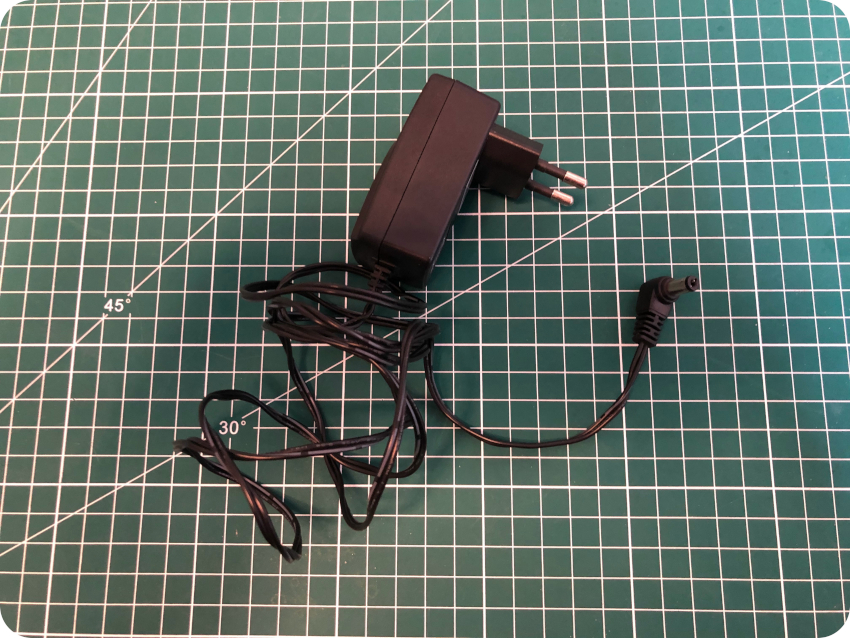
The Amstrad CPC 464 was sold bundled with a Monitor (either green monochrome or color). The computer itself was drawing its power from the monitor via a power jack coming out the its front. Since I made the choice not to buy one of these monitors, I used a regular 5V/2A power supply equipped with a 2.1mm barrel center positive connector :
Let’s turn the power switch on !
No magic smoke. The power LED turns one. The green “DEL” key beeps when stroked. So far, so good !
Connecting the CPC to a LED TV Screen
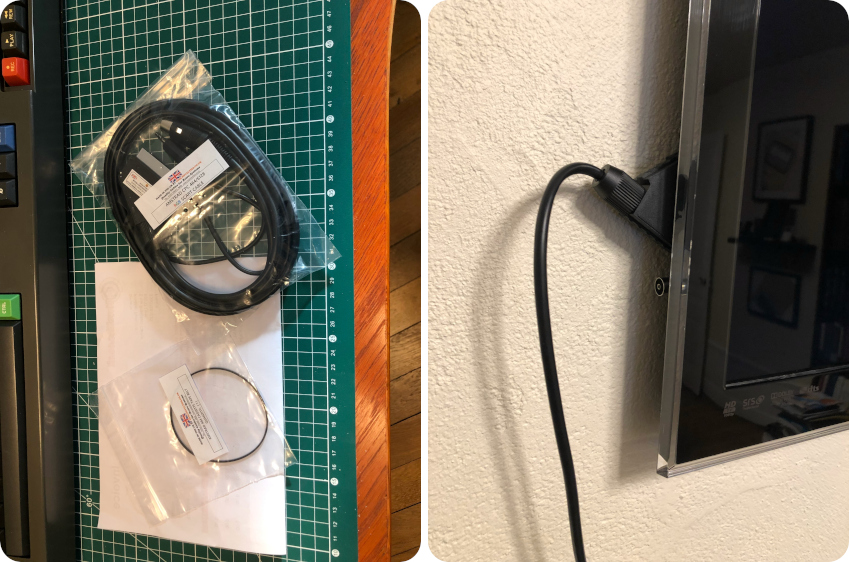
To connect the CPC to the LED TV Screen of the study, I bought from coolnovelties.co.uk a RGB-SCART cable, specific for Amstrad CPC 464/6128 computers:
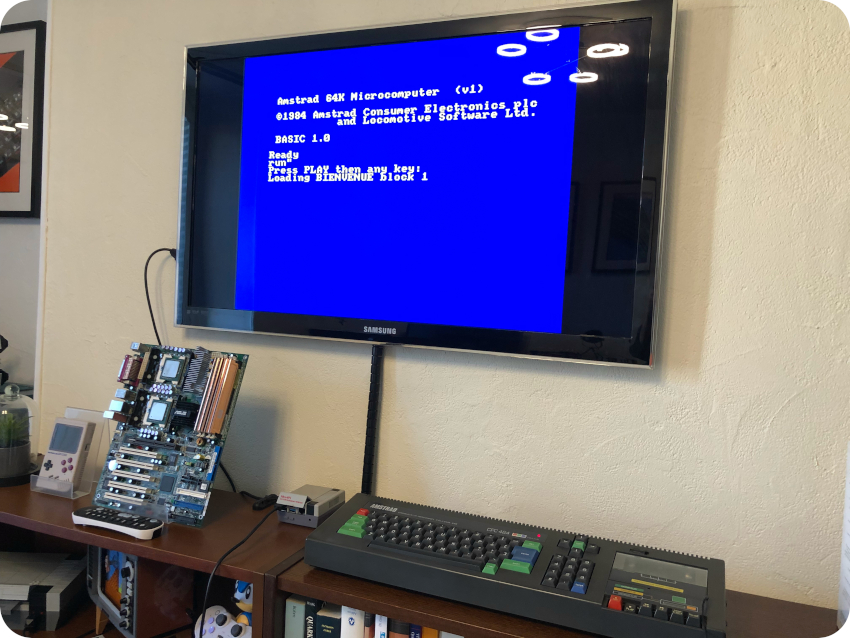
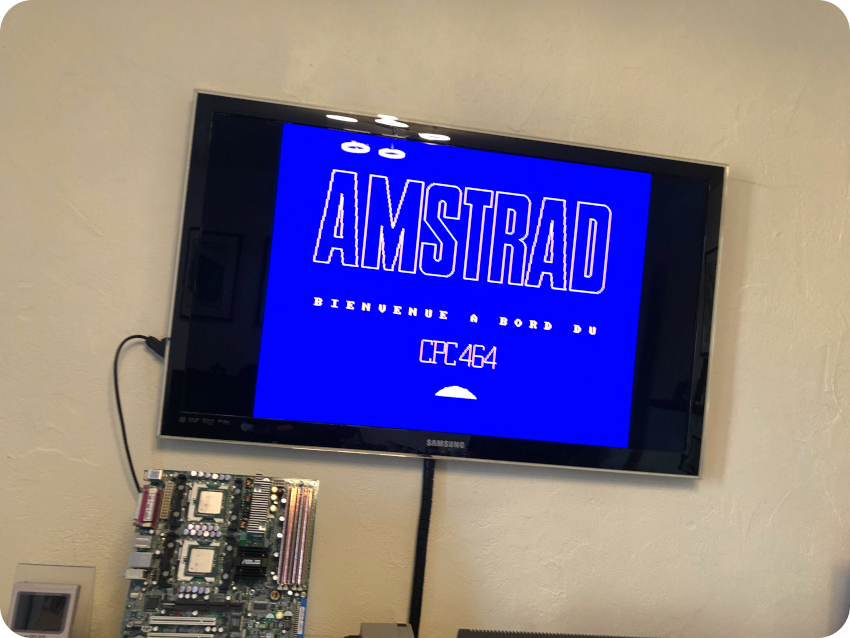
Once connected, I fired up the Amstrad, messed a bit with the TV parameters … et voilà !
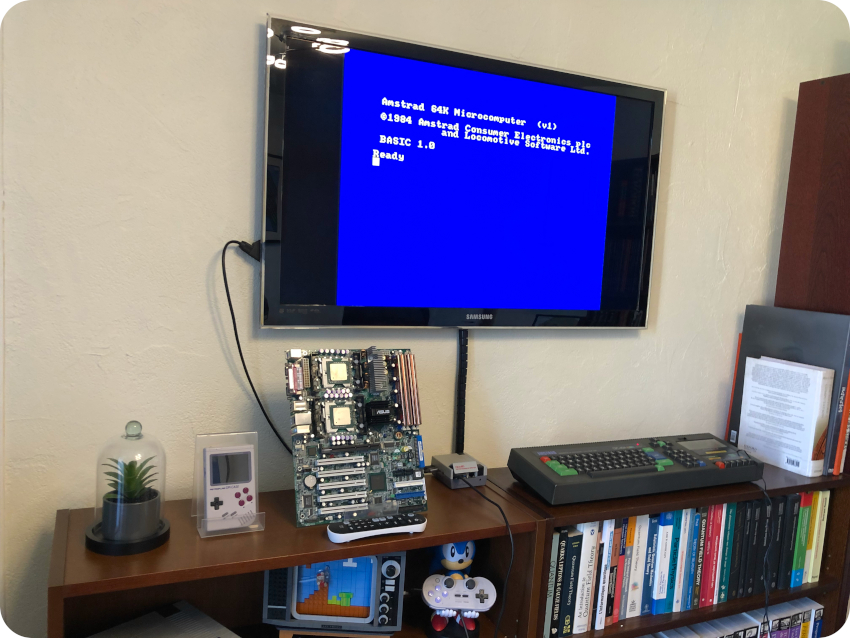
How cool is that ? Even after 38 years, I still love this prompt.
Final tests, and loading programs
Let’s go a step further and run programs. For this, you would have to use the tape deck to load programs from cassettes. Of course, nowadays, there exist much more effective ways to load CPC programs, via SD cards for example. Still, for some weird reasons, I wanted to experience the pain joy of waiting long minutes for the program to load.
Trouble is, I don’t have any cassette with CPC program to play with. There is nevertheless a very simple solution:
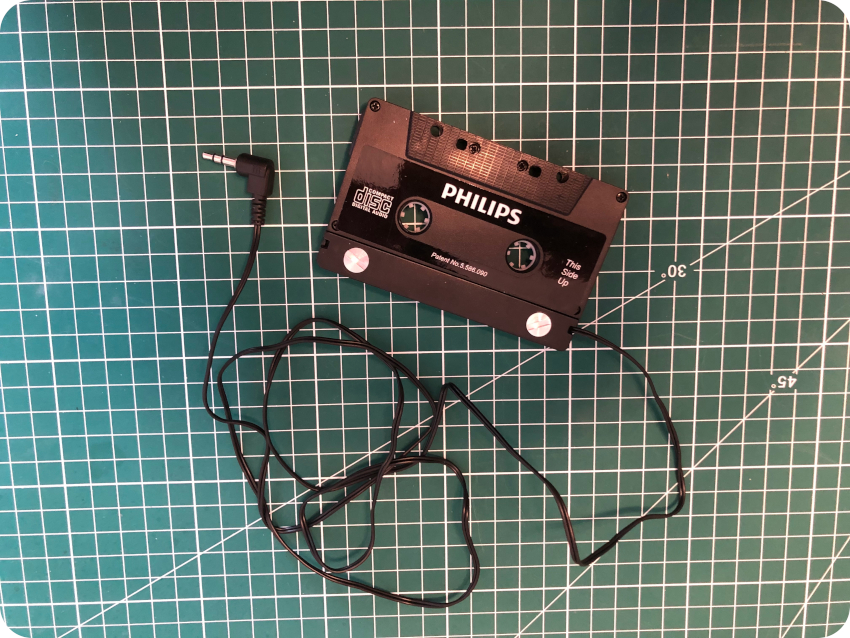
- Get one of these MP3 / Audio cassette adapters with a jack connector
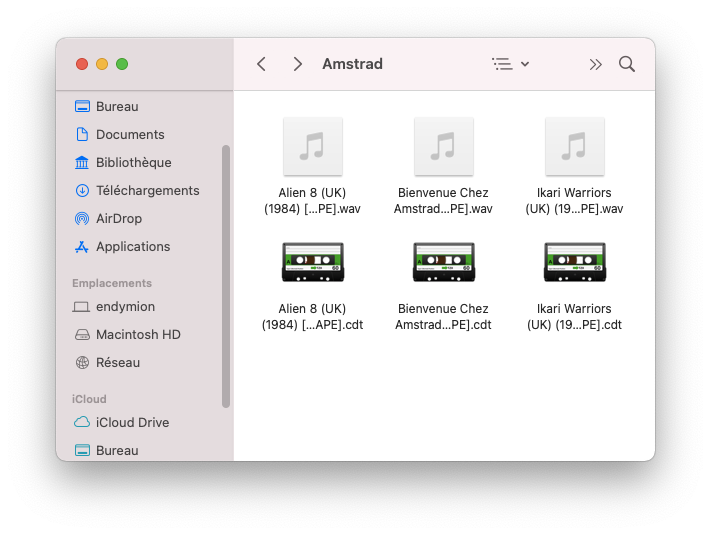
- Find Amstrad programs stored on tape-image (.CDT) file format
- Convert the .CDT files into .WAV or .MP3 sound files
- Play the sound files and use the cassette-to-jack adapter as a regular tape on the Amstrad
I bought at my usual electronics shop around the corner, for only a couple of euros, this Philips cassette adapter:
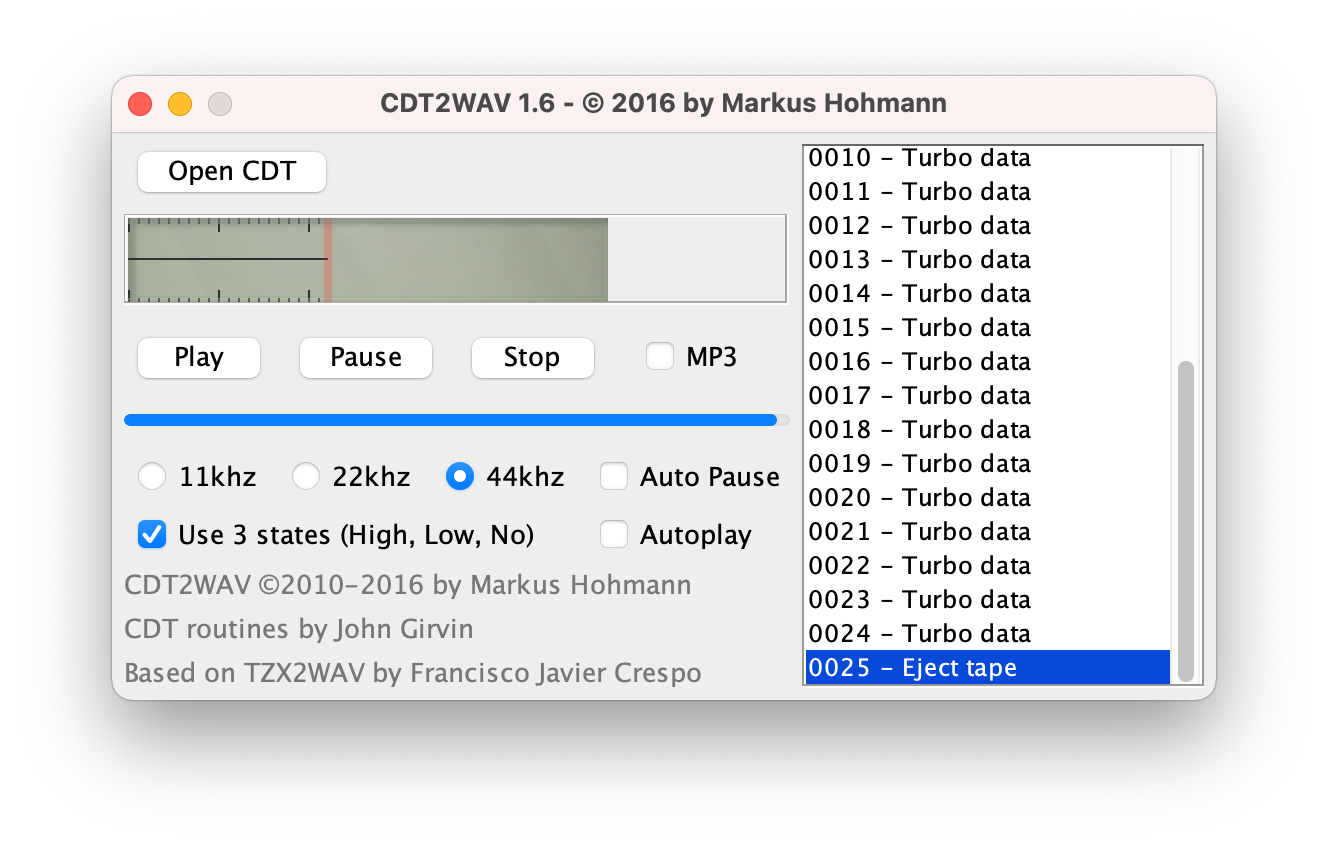
I downloaded a few .CDT tape-image files. I converted them into .WAV files thanks to Markus Hohmann’s CDT2WAV 1.6 (which is Java-based, thus running on Macs, GNU/Linux, MS Windows, …):
For the fun, I chose the following tapes :
- The “welcome program” which was bundled with each Amstrad CPC 464, and was the first ever program I loaded on it
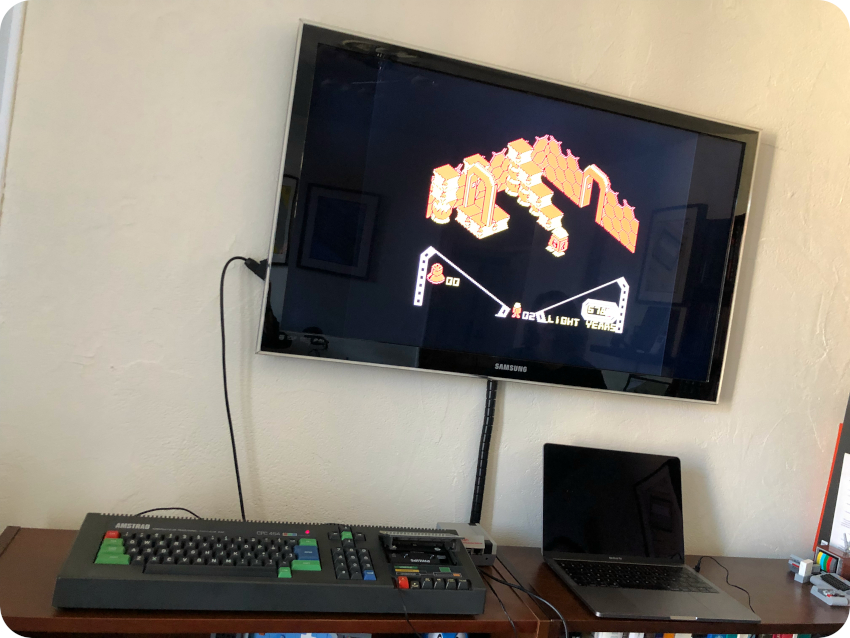
- Alien 8, which I remember loading from tape at the time
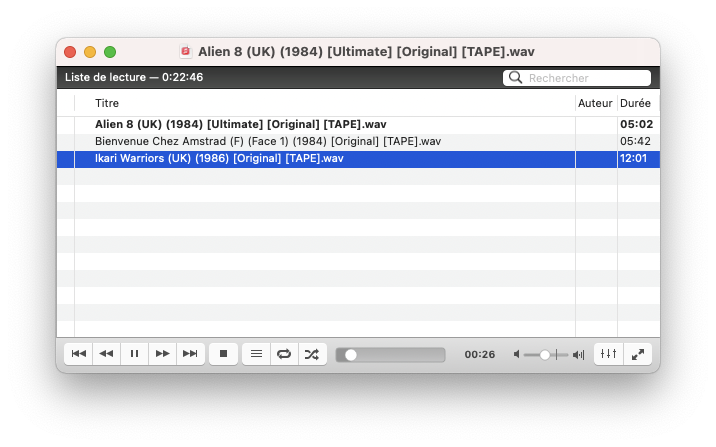
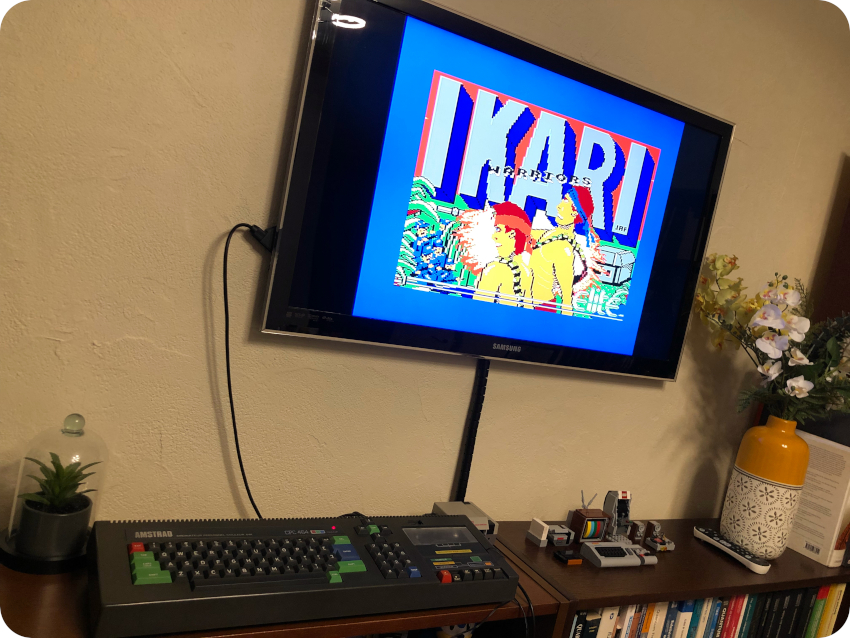
- Ikari Warriors, which I used to load from a 3″ diskette, but was one of my all time favorite games on Amstrad
Once converted into .WAV, the procedure is quite simple:
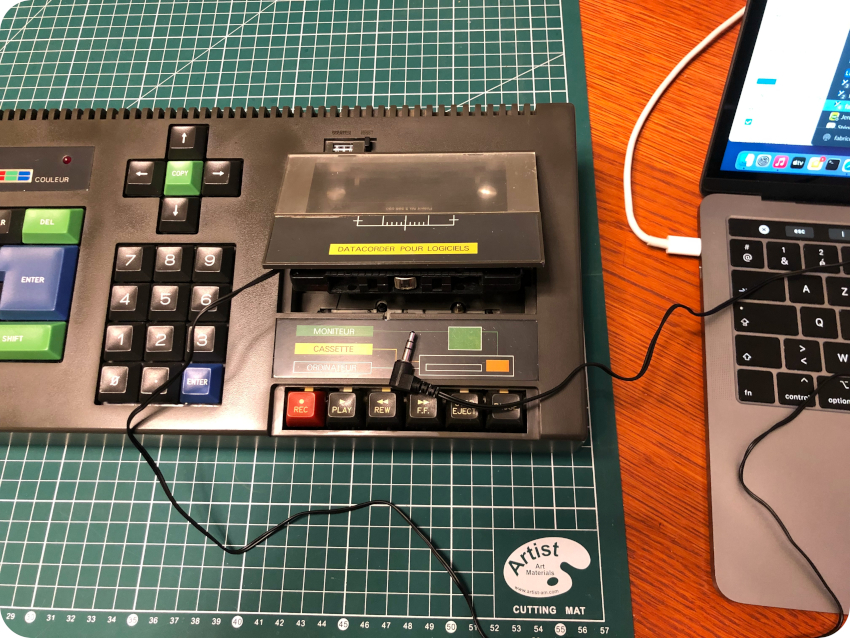
- Insert the cassette adapter into the Amstrad tape deck
- Hook up the adapter’s jack to the external sound output of the computer from where you will play the sound files
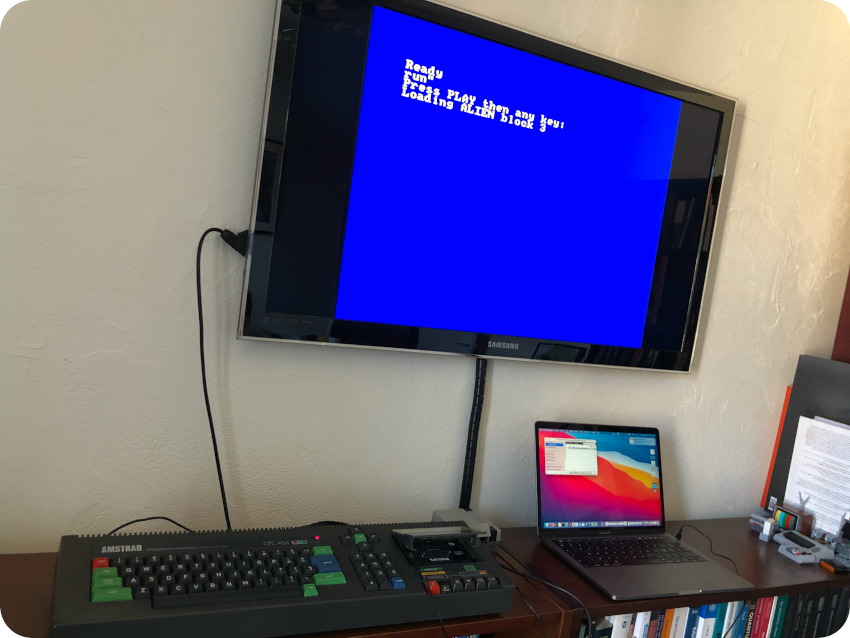
- Type RUN ” + enter, then press “PLAY” and any key
- Play the desired .WAV file
- Wait
- Wait
- Wait again
- Still wait
- Have fun
I used VLC to play the sound files. Yes, you would have to wait 12 minutes for Ikari Warriors to finish loading:
Here are a few pictures of the results:

Next steps
It took me quite some time to get there, but it was definitely worth the efforts and week-ends !
Next steps ? Well, a few of the keys are not responding as well as the others (mostly the numeric keypad and arrows). There may be something wrong with the keyboard membrane, I may have to replace it.
Recaping the PCB would also be a nice bonus. Maybe buying an M4 board and connecting the CPC to a WiFi network. It would be fun to play with Homekit devices from the Amstrad via an HomeBridge setup.
But … by the time I finished working on the CPC, it was already March.
And … oh well … to celebrate MARCHintosh2022, I bought a Macintosh Plus to restore:
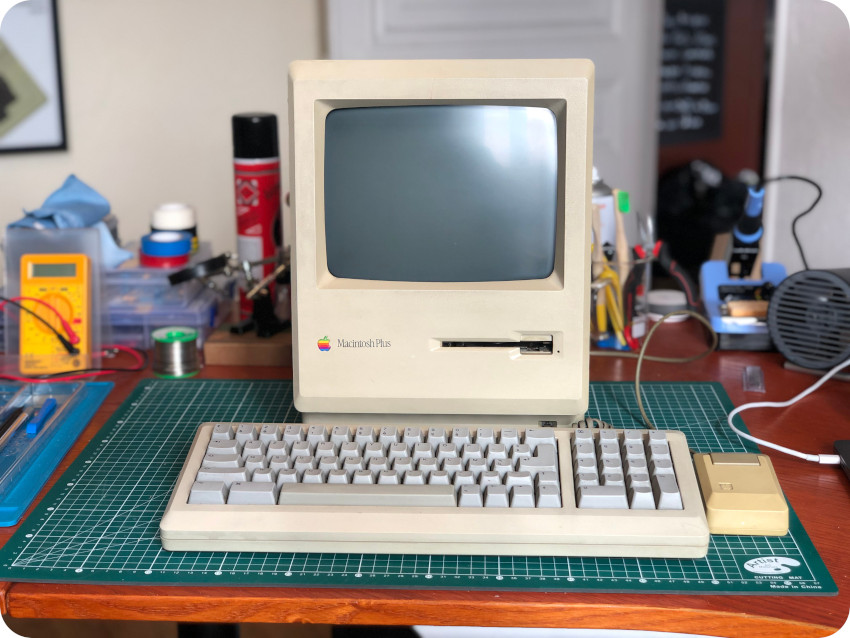
And that’ll be the subject of a next post …
Excellent. I have no idea why these old computers are so compelling, i had one back in the day and have just been reunited with it. My father died and i found it while clearing his attic. It was his initially, bought after he’d tried to make a computer from a kit which never worked. I was given the CPC when i went to uni around 1990 and it was my word processor (and games machine, well i had two games). I even remember writing a program for a basic word processor, which loaded more quickly then the mini office one and of course laboriously writing out the code for space invaders.
Thank you so much !