I am an Apple Fanboy. Always been. Nevertheless, it took me a long time to actually own an Apple device. The first Mac I ever bought was a 12″ PowerBook G4, in 2003. Since then, I went down the rabbit hole, with a 3rd generation iPod (2003), a Mac Mini G4 (2005), a 4th generation iPod nano (2006), a first generation iPhone (2007), an iPhone 3G (2008), a first generation MacBook Air (2008) and so on. By now, the apartment is now filled with Apple hardware, including an iPad pro, 2 Apple TVs, 4 HomePods and HomeKit devices in every room.
I am, at this very moment, typing this text on a MacBook Pro, listening to music on AirPods Pro and wearing an Apple Watch at the wrist. Yes, all this is probably insane.
The first Apple computer I ever touched was an Apple II+, in 1982 if memory serves. It had been brought at school by the father of one the students, and, being nerdy, I had the chance to be one the selected few to get access to it. Nice memories.
But the one I dreamed of in the late 80’s was – of course – the Macintosh. So damn cool. And so damn expensive. Then, years and years later … I caught the vintage computer fever. And MARCHintosh2022 was coming. What the hell, why won’t I make that dream come true ?
![]()
First encounter with a Macintosh Plus
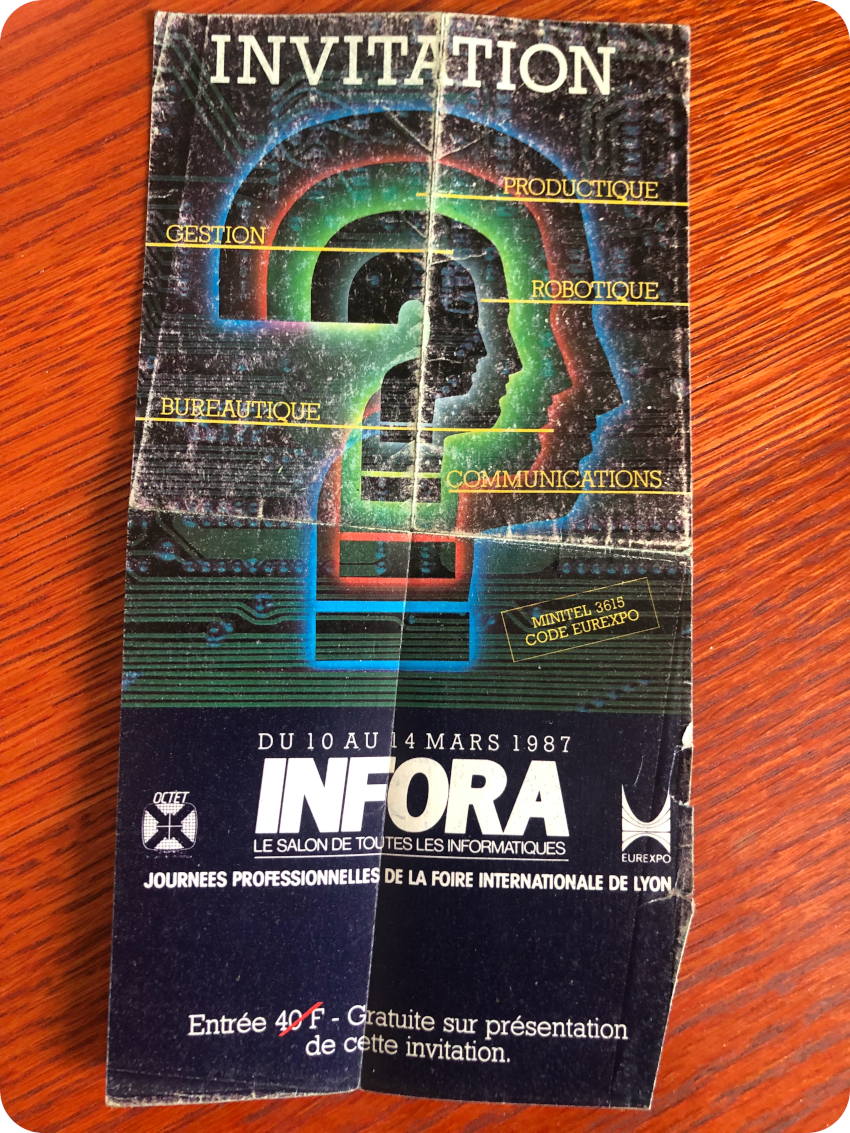
I remember quite well my first real-life encounter with a Macintosh Plus. It was in 1987, I was 16 and I managed to get a free ticket to the Infora expo. It was my first computer expo, and I preciously kept that ticket :
I took the bus to get to Eurexpo. The boring PC part of the expo was … well … boring. I happily skipped this part to went straight to a Silicon Graphics IRIS (1000 or 2000 series, I can’t remember) stand were they were demonstrated. Unix/IRIX, 3D, real-time computing. Now, that was something !
And then … next to these amazing workstations, there was a stand filled with 4 or 5 Macintosh Plus. For some reasons, everyone could get hands-on with them. One of them was running MacPaint. Oh boy, I was hooked ! I went home and started writing a MacPaint clone … for my Amstrad CPC. It took me a couple of months. It wasn’t that bad, though using a joystick and arrow keys instead of a mouse wasn’t the best user experience ! By 1988, I had pushed my trusty Amstrad to its limits, and since there was no way I could afford a Macintosh, I bought a Jackintosh instead.
35 years later, it was about time I got a Macintosh Plus !
Sourcing a Mac Plus
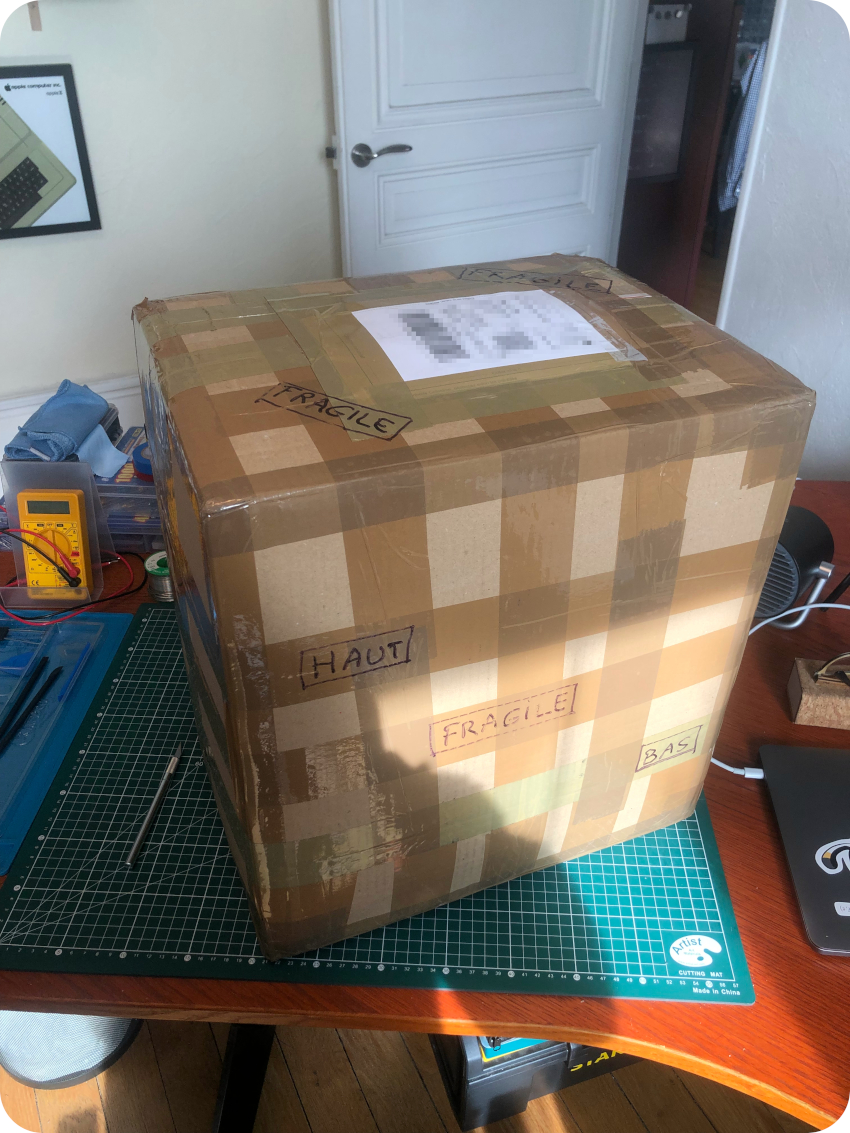
Since I was happy with both Sinclairs (ZX81 and Spectrum) and the Amstrad CPC 464, I went straight to Leboncoin web site. It wasn’t easy to find a proper offer. Most of them were madly overpriced. Some Macs were in (very) bad shapes and/or incomplete. Some were obvious scams (wrong keyboard, wrong mouse, major differences between pics and descriptions, …). Most of them had to be handpicked 100’s of kilometers from where I live (I don’t drive). In the end, after 2-3 weeks of intense researches, I settled for an offer with a reasonable price (250€, including shipping). A week later, I received this package:
Unboxing and first boot
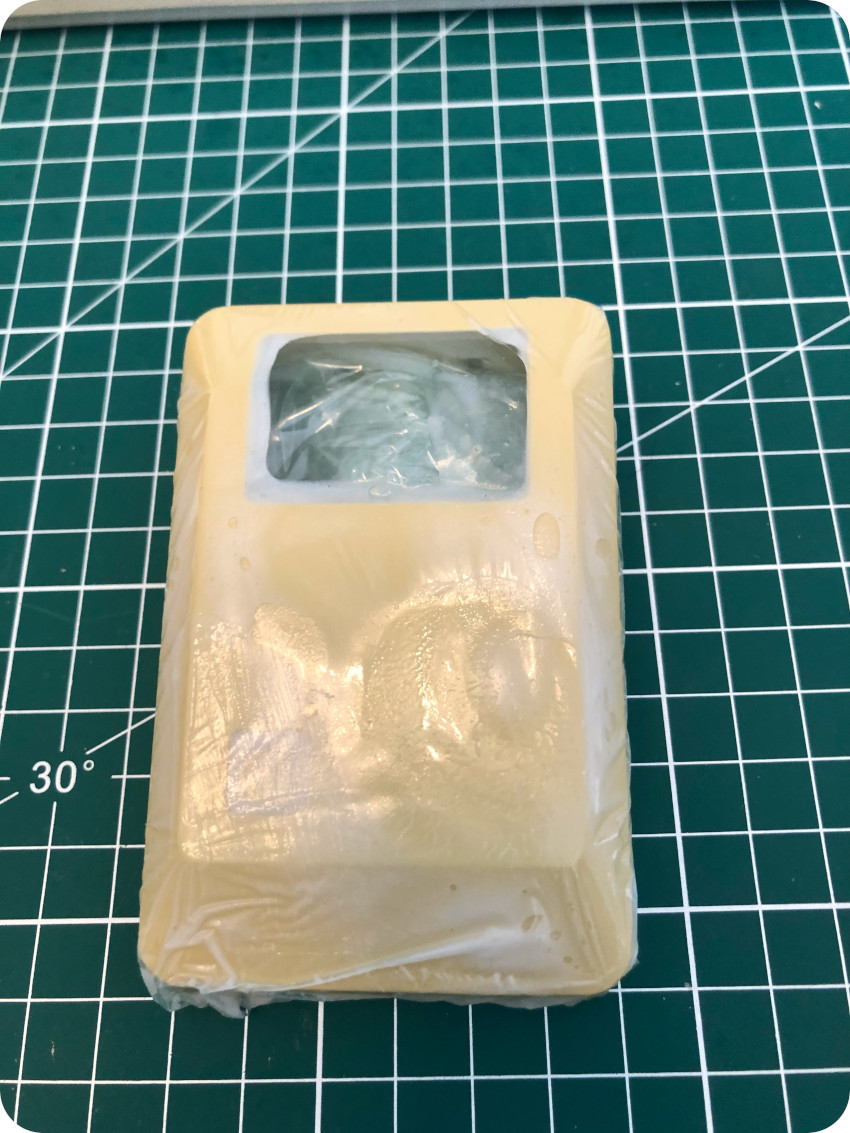
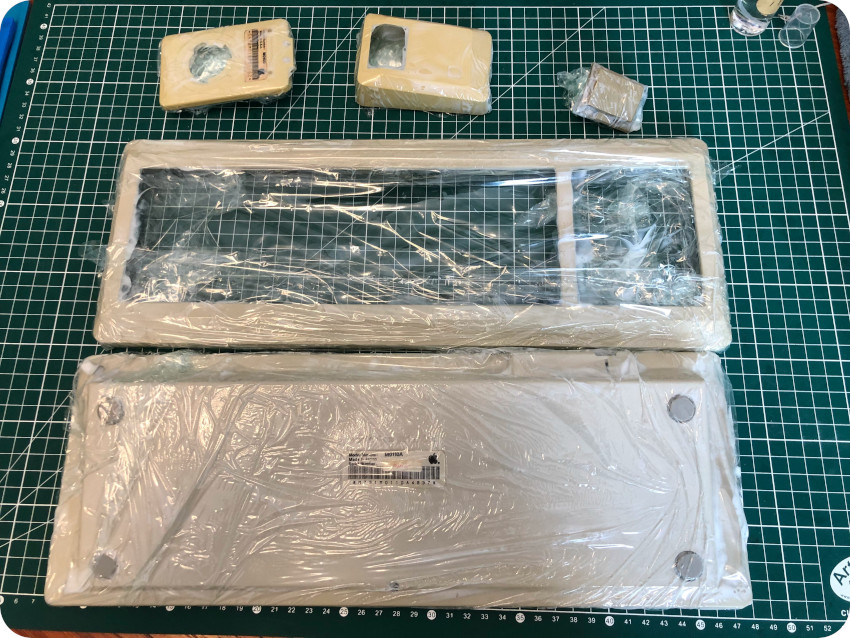
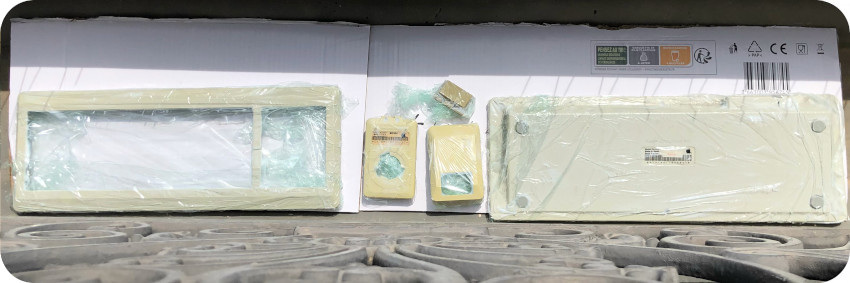
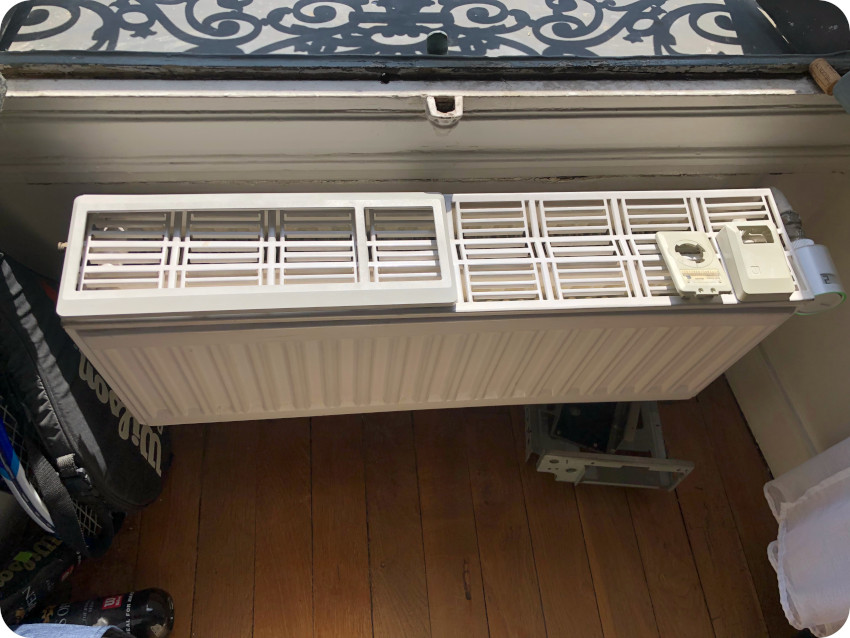
I was very worried about the shipment. But the Mac Plus came neatly packaged, with no apparent signs of anything broken:
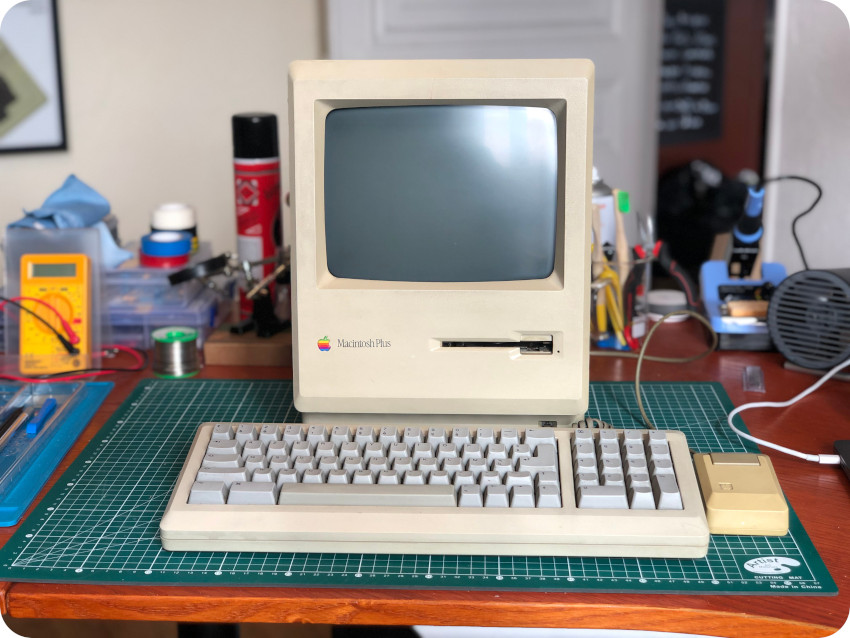
I had to make sure. Even though it was most certainly unsafe (since nothing was checked yet), I plugged the Mac in and pushed the power button on.
Crossing fingers. No magic smoke. Good. I was greeted by the “Bong” startup sound. That’s a good start. And no sad Mac. Nice !
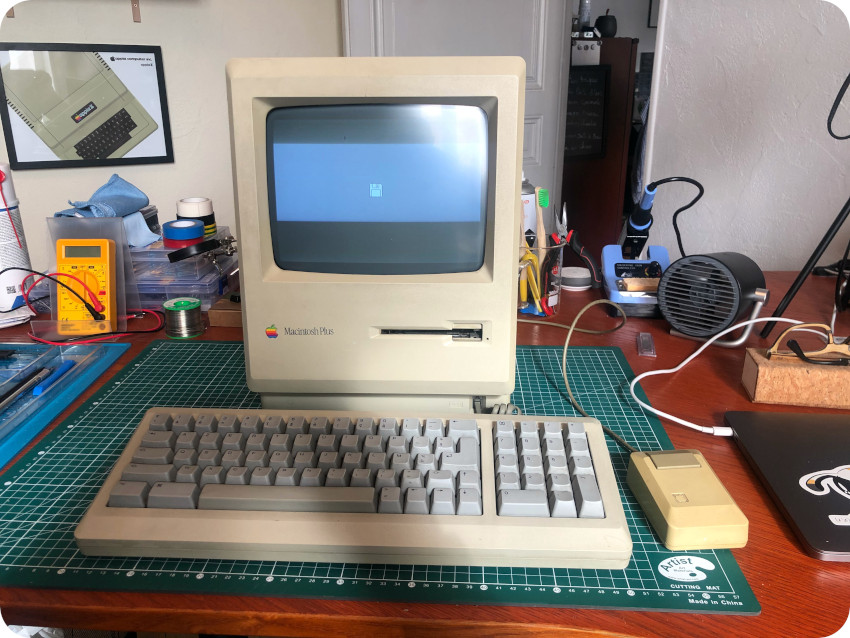
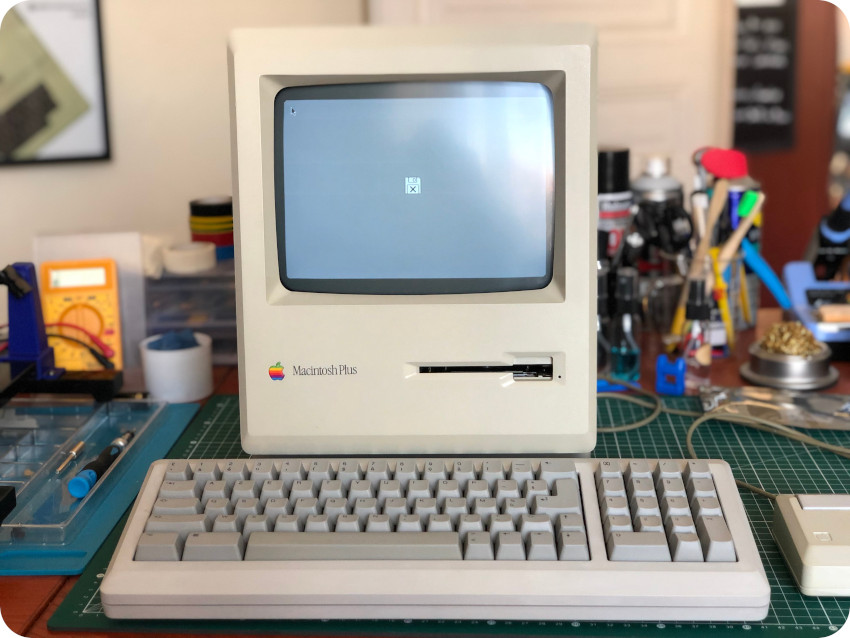
The screen turned gray. Yeah ! The Mac booted up to the point where it needed to load MacOS, displaying a 3 ½-inch floppy disk with the usual blinking question mark:
The internal floppy disk drive started making creepy noises. A few seconds later, the Mac displayed a floppy disk with a blinking cross, as pictured here:
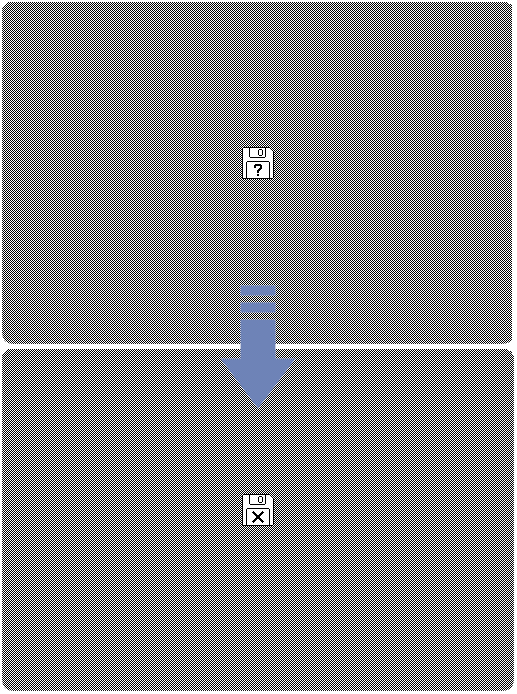
Not good, since there was no disk inserted. The blinking cross is displayed whenever the drive cannot read a disk. I was expecting the question mark to keep blinking. There is probably something wrong with the floppy disk drive …
On top of the noise coming from the drive, there were also funky electrostatic noises (but no sparks), coming out of the case. I was suspecting something could be wrong with the flyback transformer. But no ozone smell. I shook the case a bit, slapped (gently) on both sides of the case. Still, the screen was very stable. A screen going on and off while slapping the case could have been a sign of bad connections or cracked solder joints on the analog board.
At least, the CRT wasn’t broken during the shipment, which was my major concern. The mouse also seemed to be working fine. I switched off the Mac. Time for inspection !
Decoding the serial number
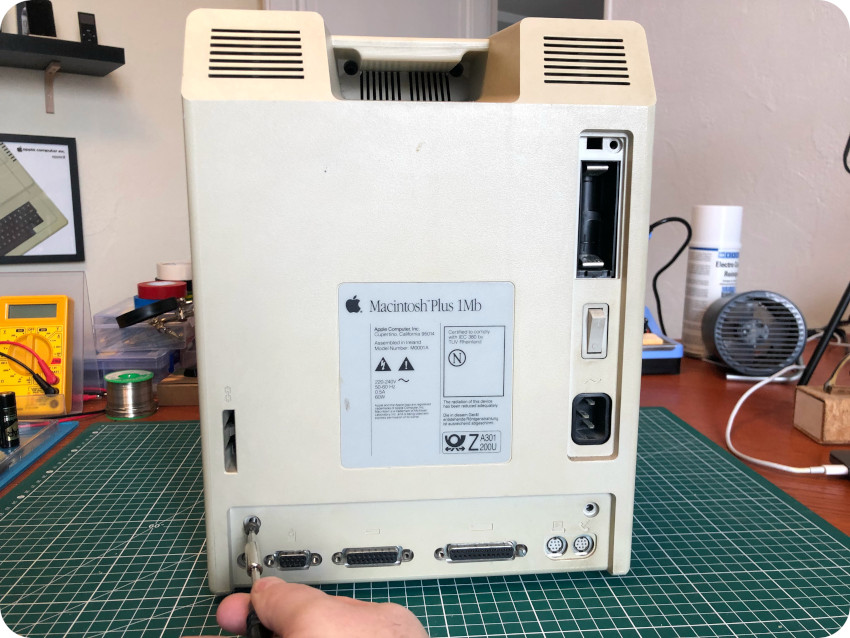
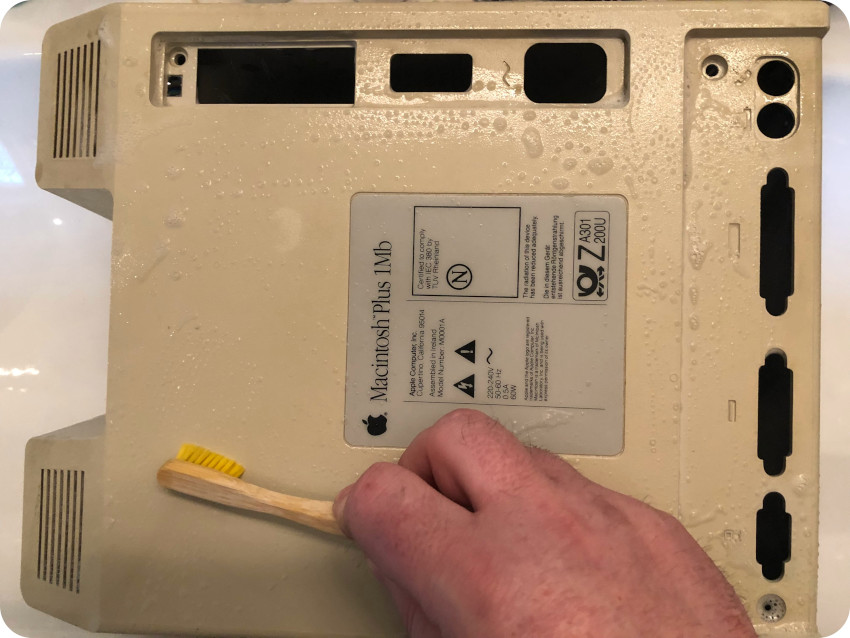
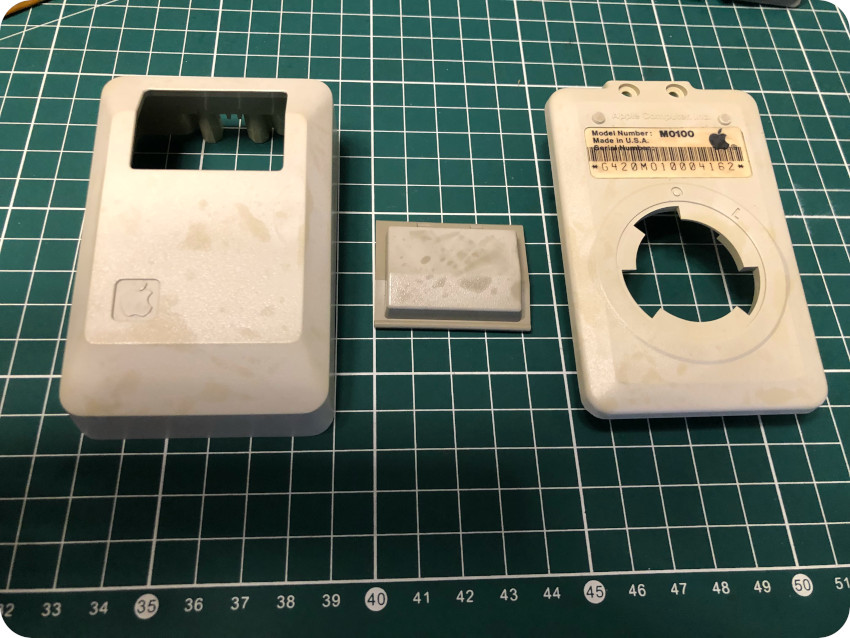
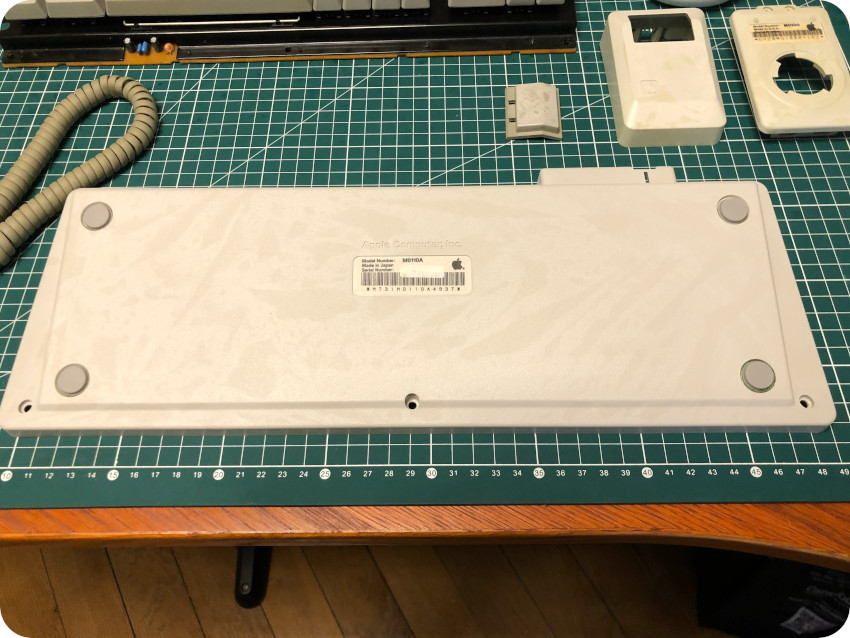
From the outside, this Mac seemed in good conditions. No scratches, nothing obviously broken. But very, very, very dirty.
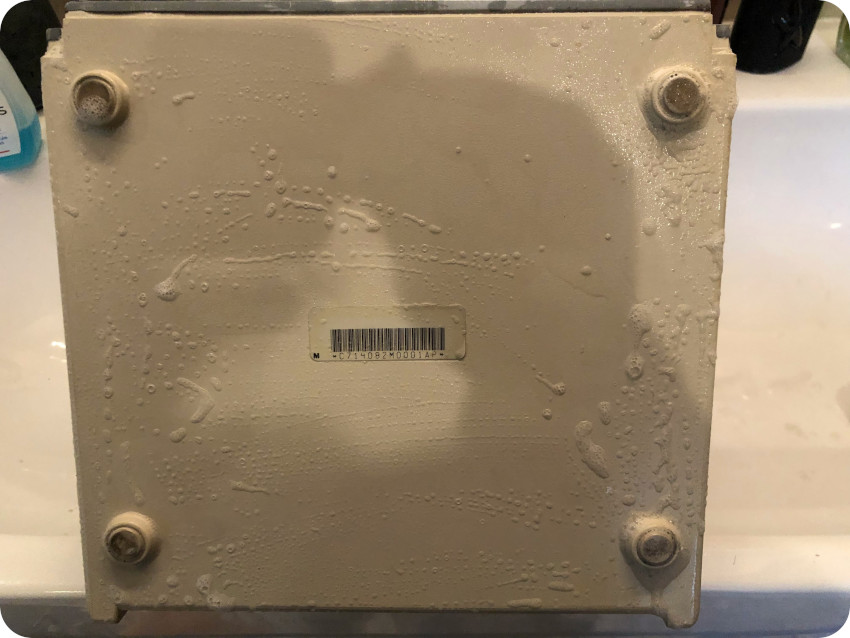
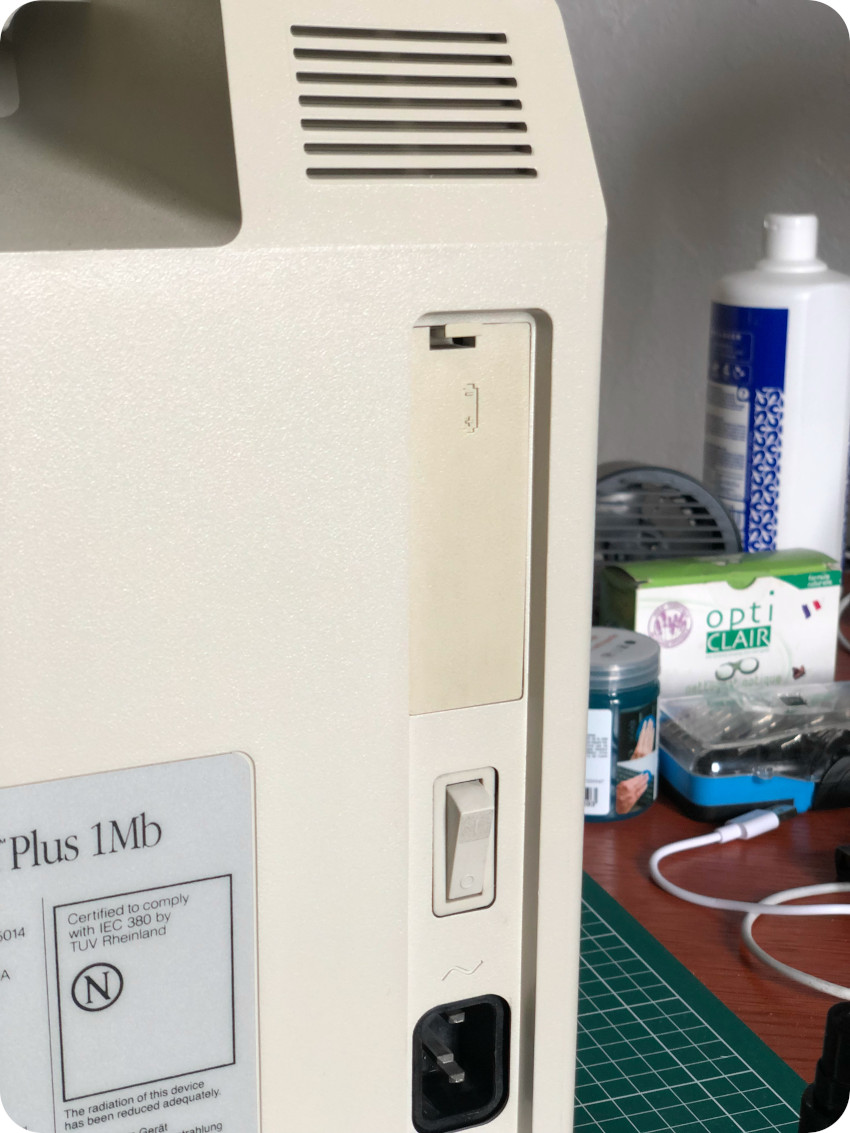
On the back of the case lies a sticker with a serial number, reading “C714082M0001AP”:
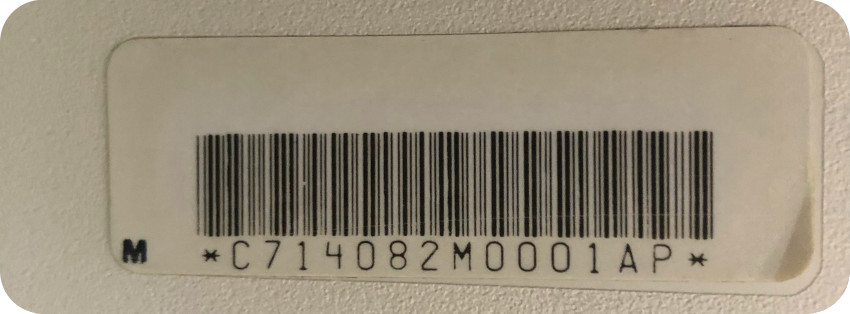
This serial number can be decoded using this script: http://macfaq.org/serial.html
It returned: “Your European Macintosh Plus (M0001AP), with serial number C714082M0001AP, was the 274th manufactured during the 14th week of 1987“.
The plastic case had yellowed, so it is hard to tell. But, judging by the date of manufacturing, this Mac Plus was most probably a Platinum one, and not an early beige (aka Pantone 453) one. The mouse is much more yellowed though, so it might be an older mouse and might have belonged to an older beige Mac.
Opening up the Mac
Opening up and fully disassembling a Mac Plus is a tedious process. Before anything, make sure the Mac is unplugged.
Let’s start from the back of the case, and let’s open the PRAM battery compartment:
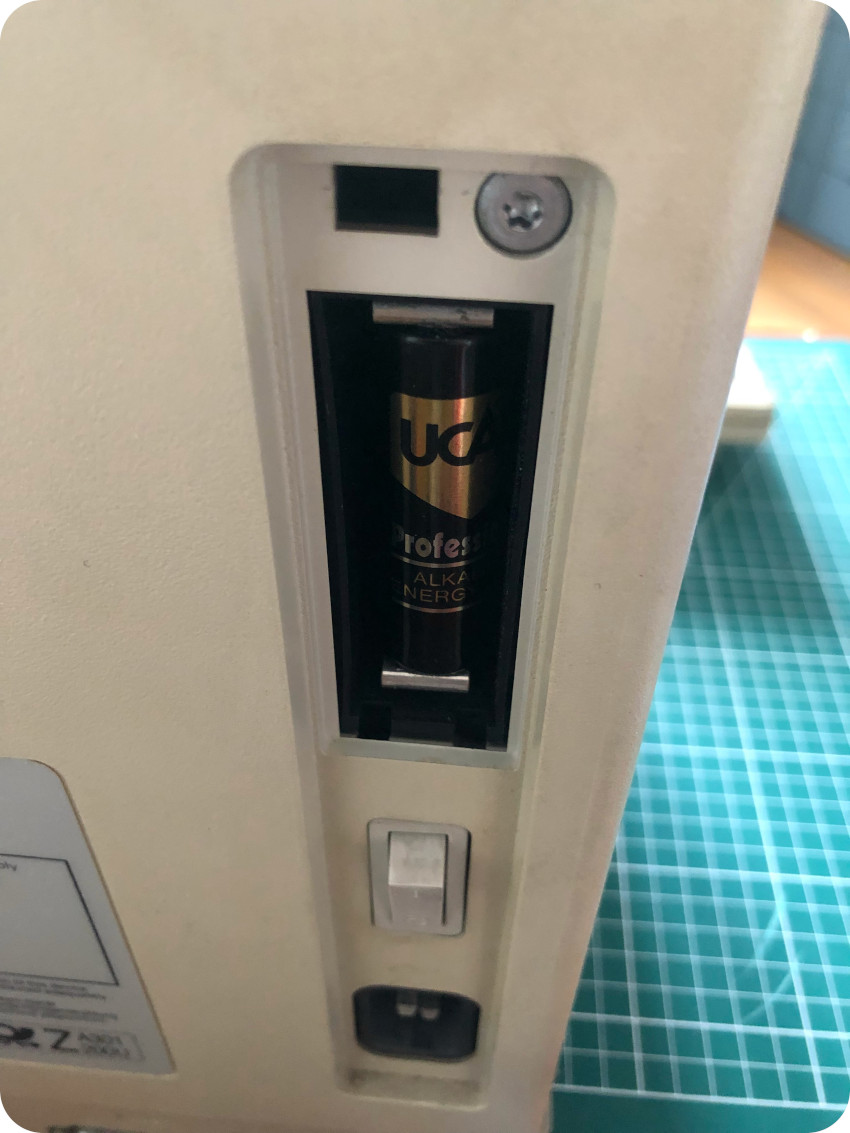
Gosh, the battery was still there ! I promptly removed it. But there were only very little signs of corrosion. That was (somewhat) a relieve.
The next thing to do is to remove the screw on the top of the battery compartment with a Torx T15 screwdriver. Then, with the same screwdriver, you will have to remove the two black screws at the bottom of the case:
Then comes a first tricky part: removing the screws from the top, under the handle. For this, you will either need a very long screwdriver or, as I did, use an extension:
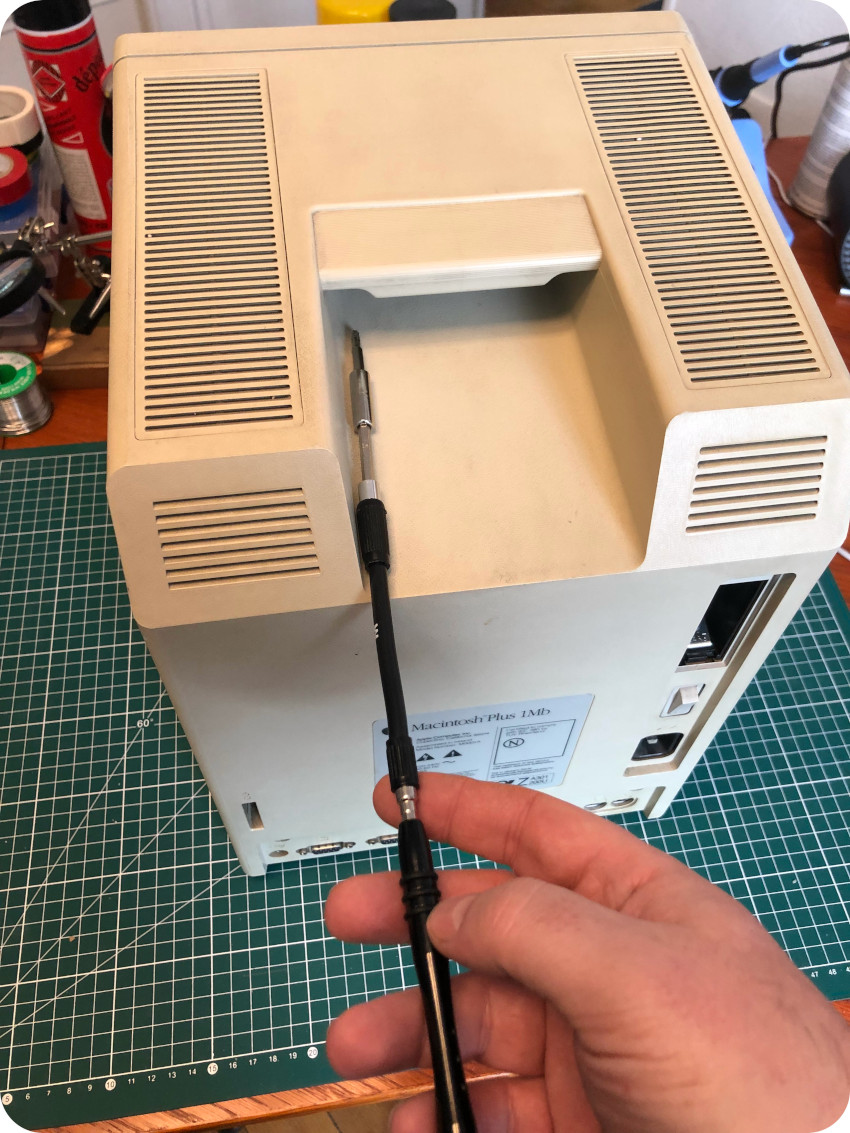
Once unscrewed, don’t forget to remove the programmer switch on the side of the Mac. It you don’t, since it is reaching inside of the case for push buttons on the PCB, it can break while separating the front and the bottom parts of the enclosure:

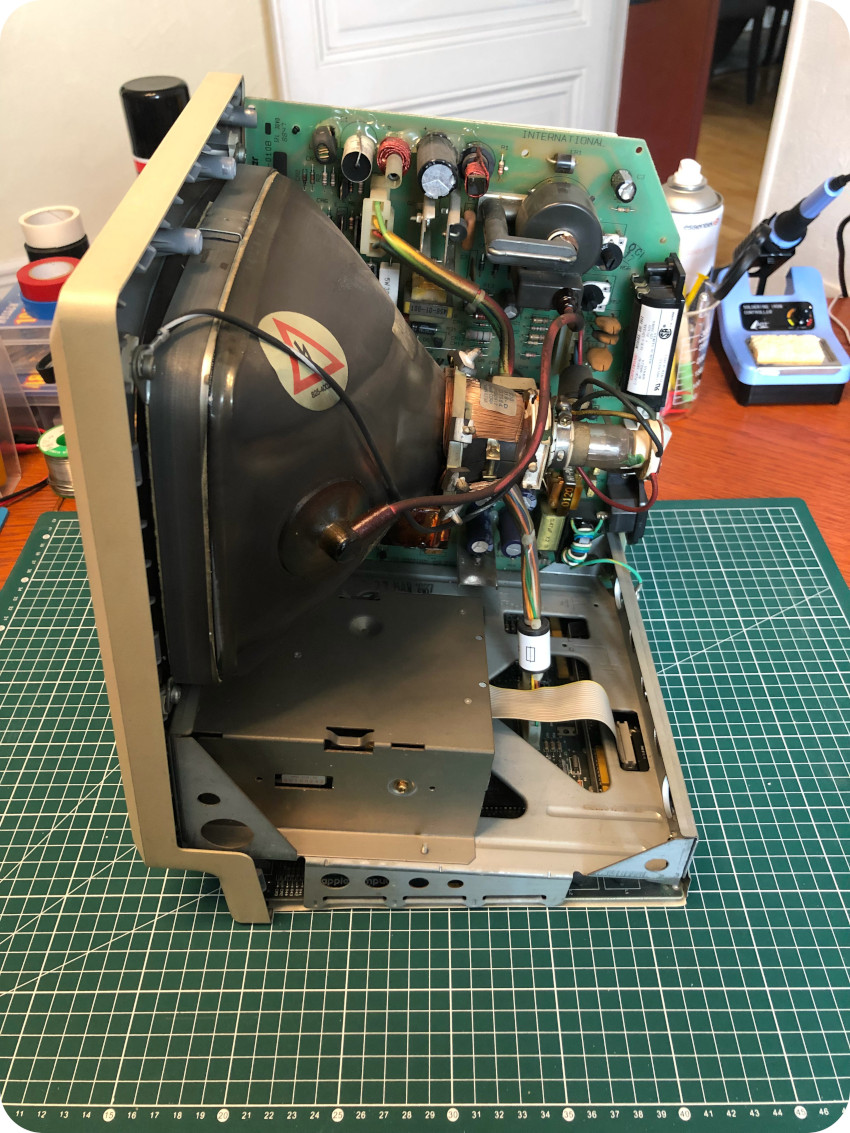
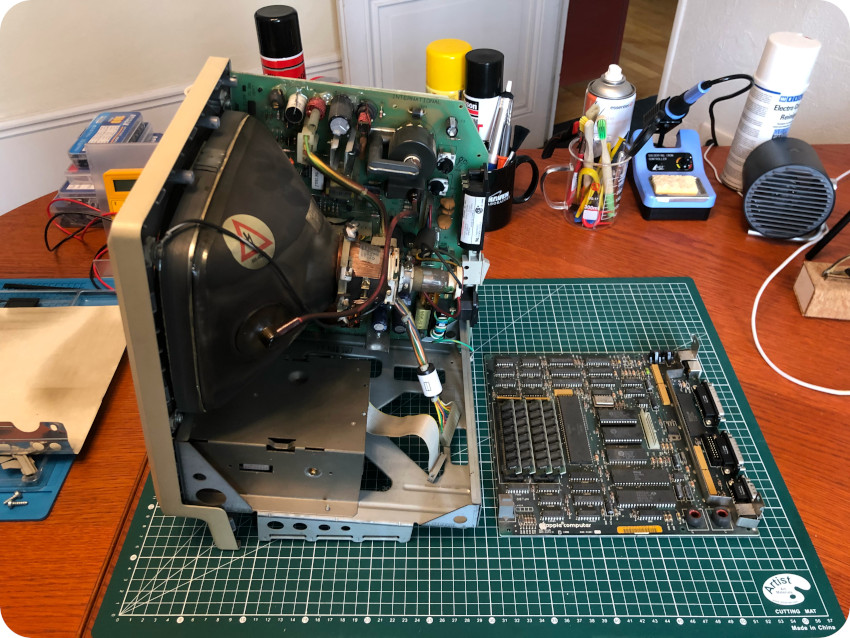
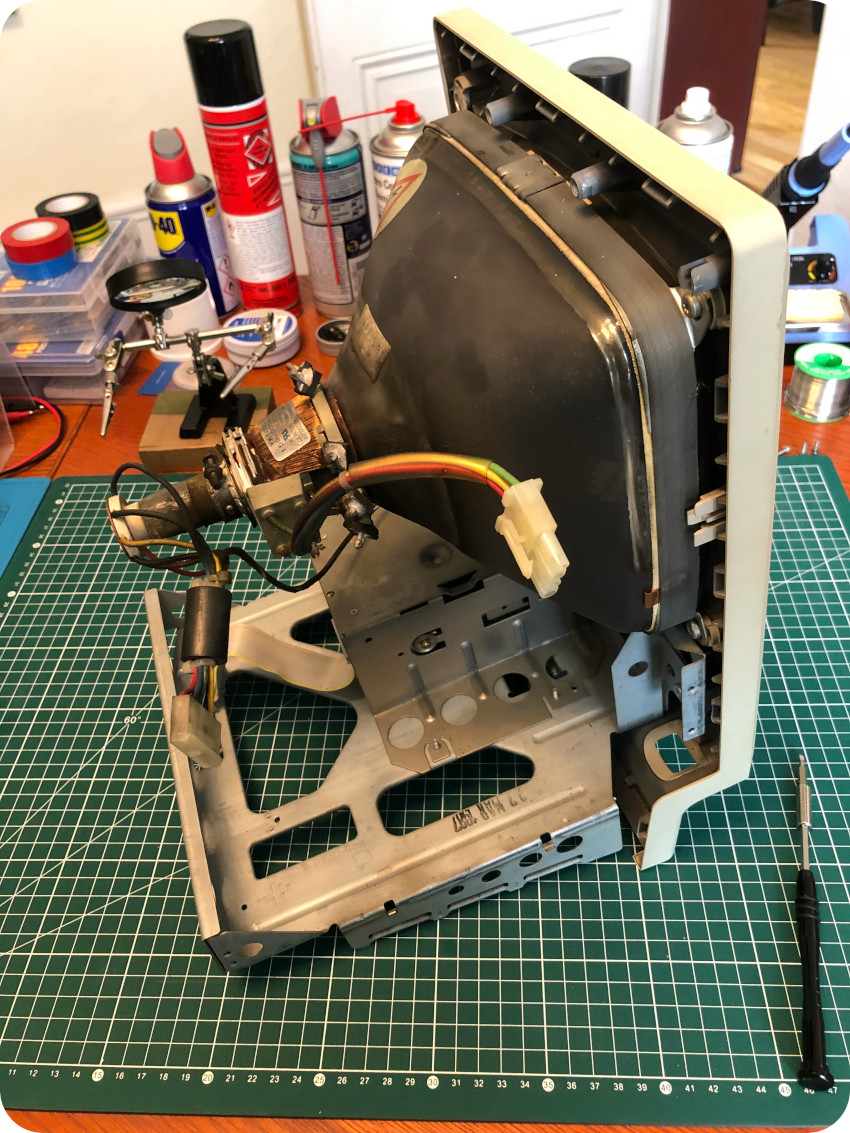
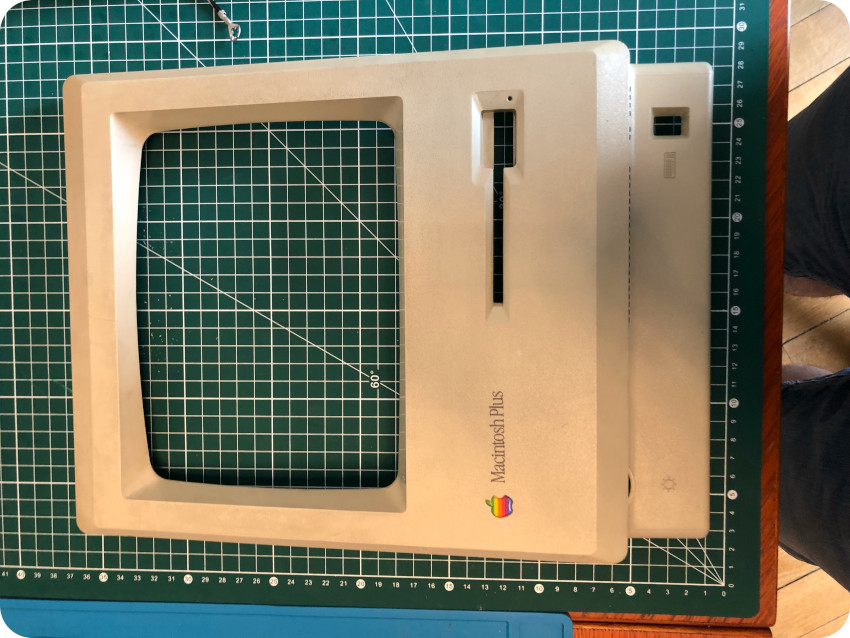
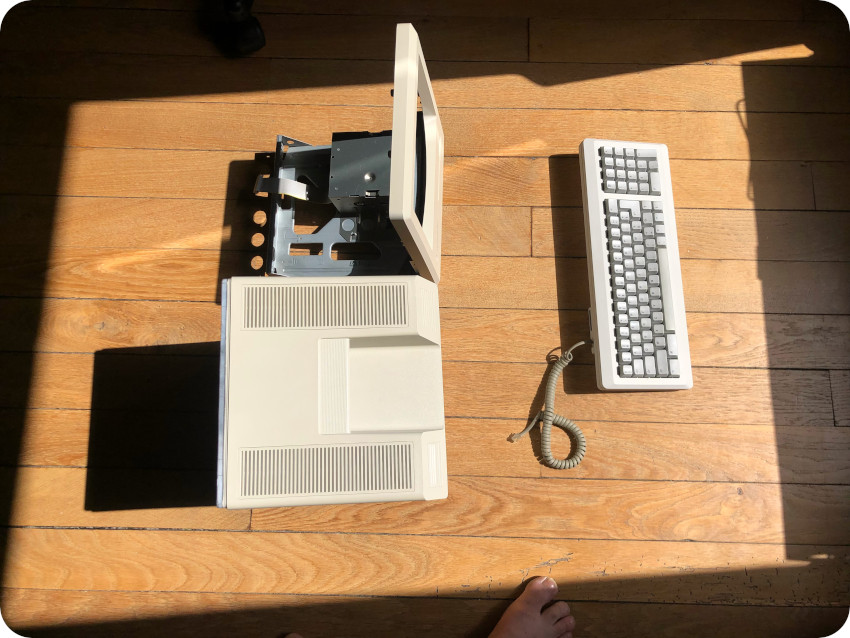
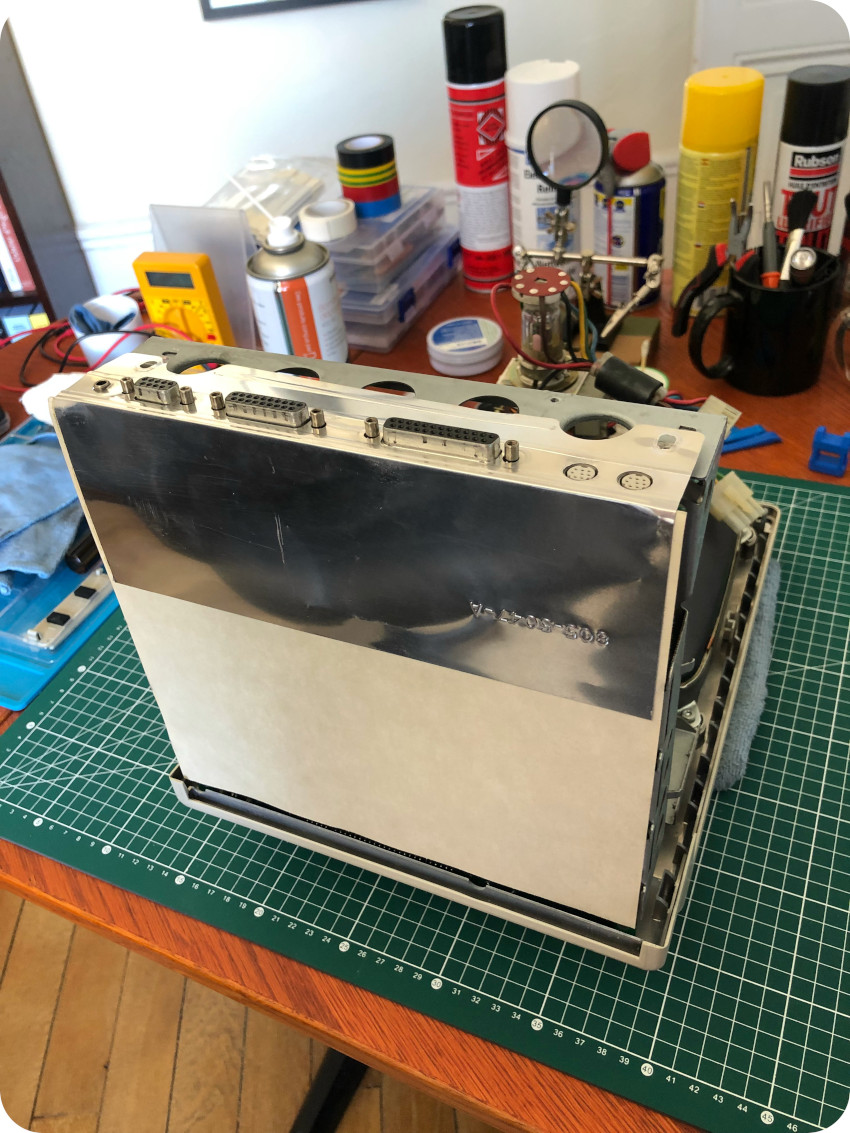
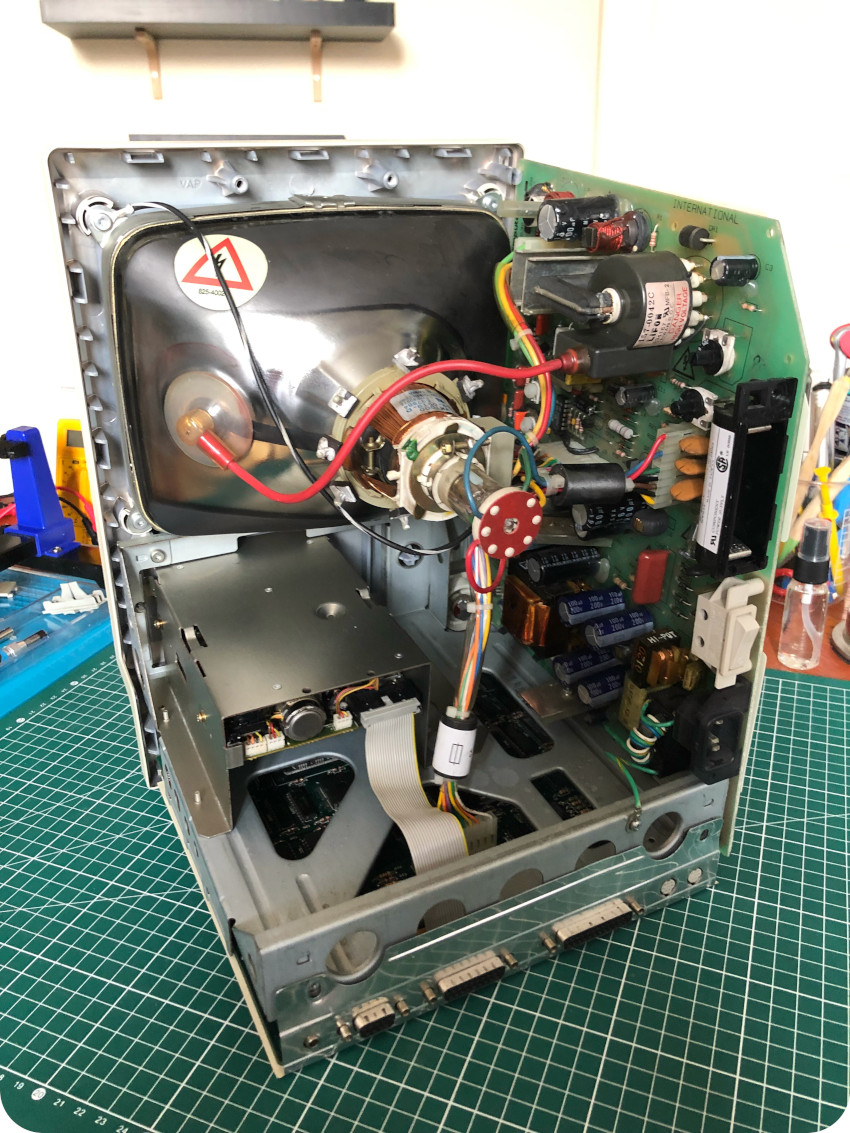
Once removed, the Mac case can be opened, separating the front bezel from the rear housing:
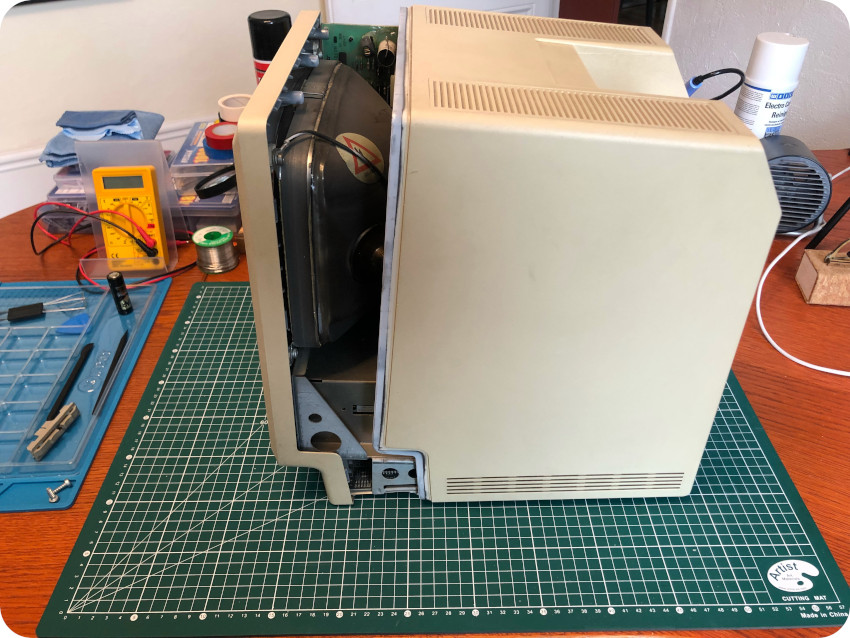
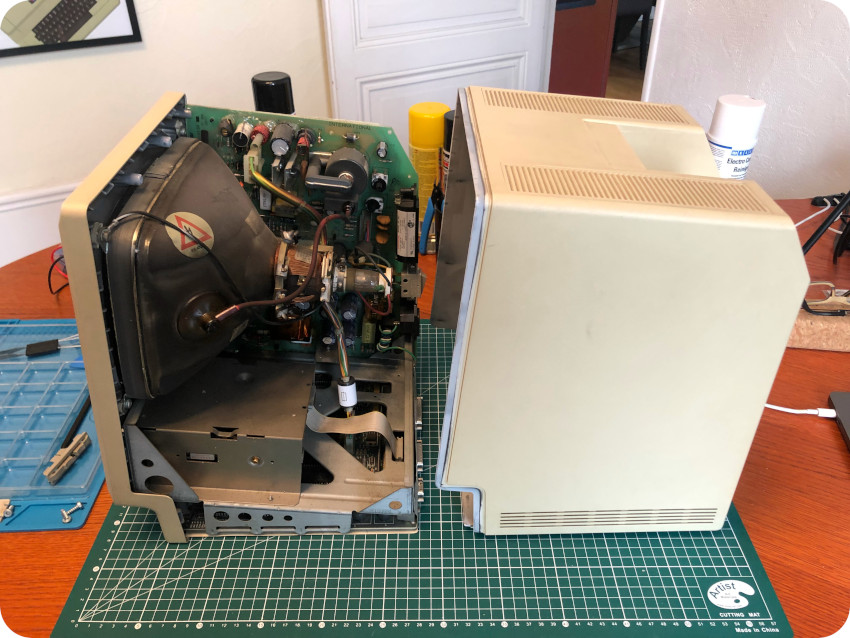
The PCB you see in the back is the analog board. It powers the main board (which lies underneath the metal chassis). It also powers and drives the CRT. The analog board is protected on its side by this insulator plastic sheet:
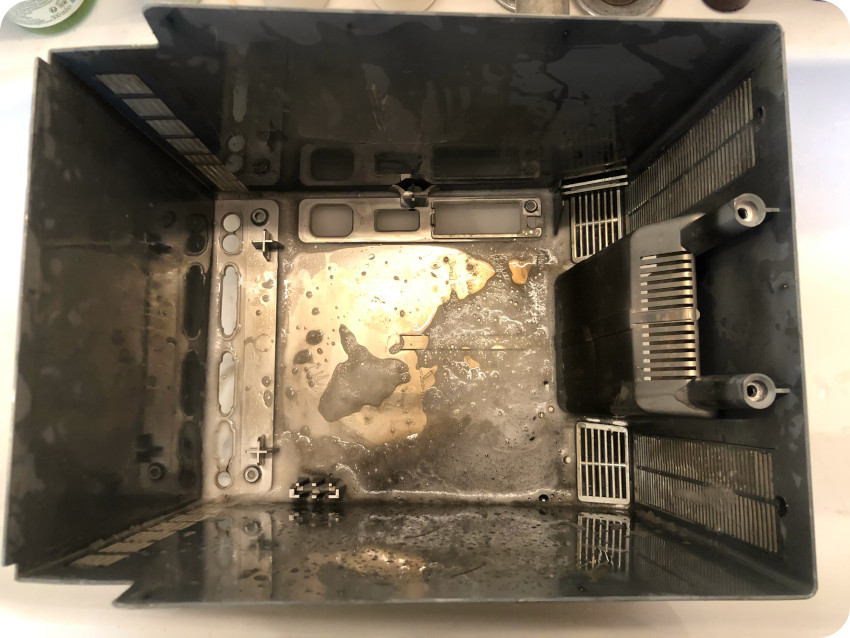
Let’s have an overall look inside. It is extremely dirty. Everything here is filthy, covered with black and sticky dust. It doesn’t seem to be some kind of burn artifact though. Cables are utterly sticky.
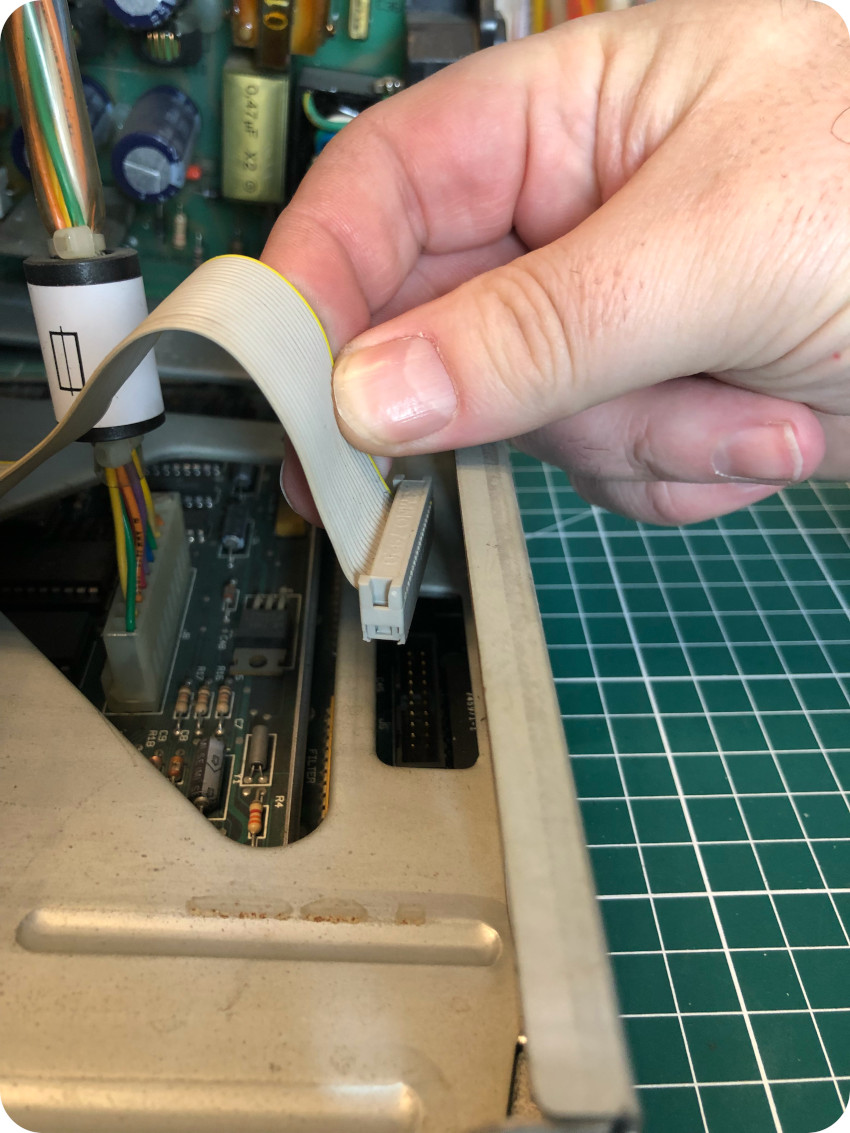
Removing the logic board
To remove the logic board, first, will have to pull free the floppy disk drive ribbon:
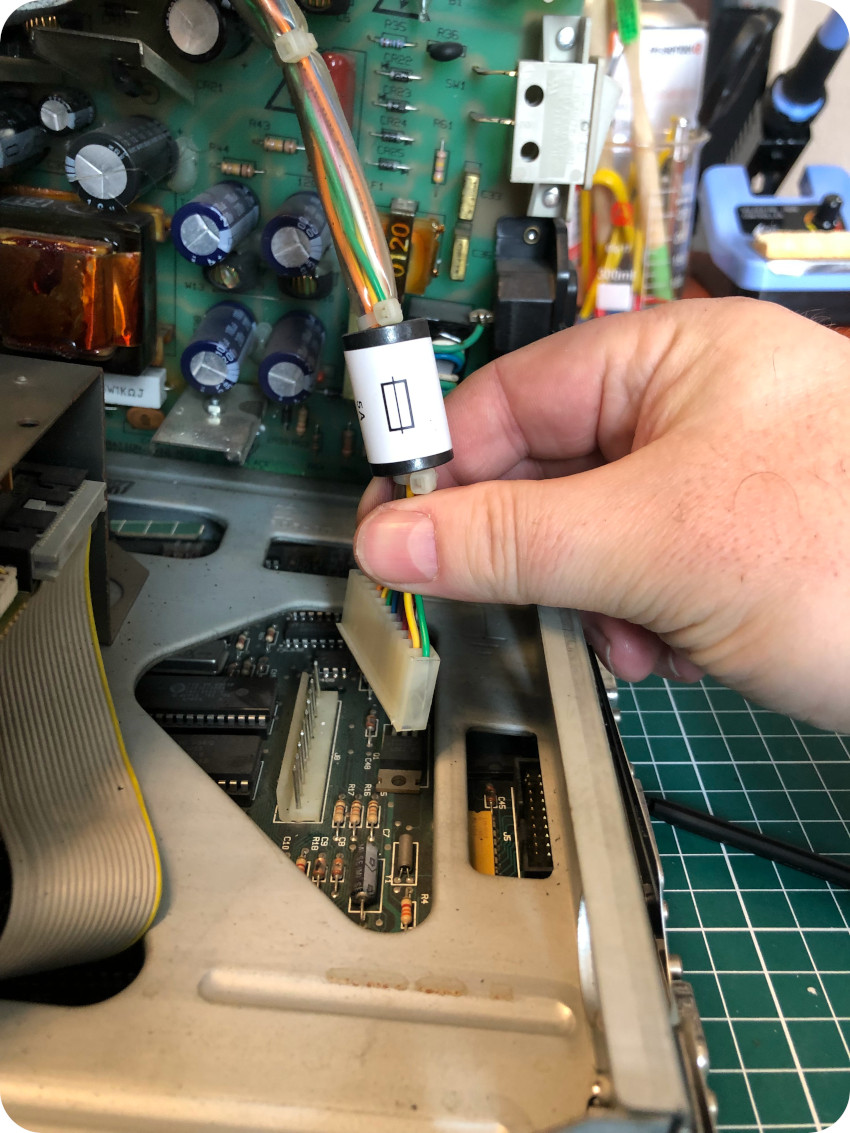
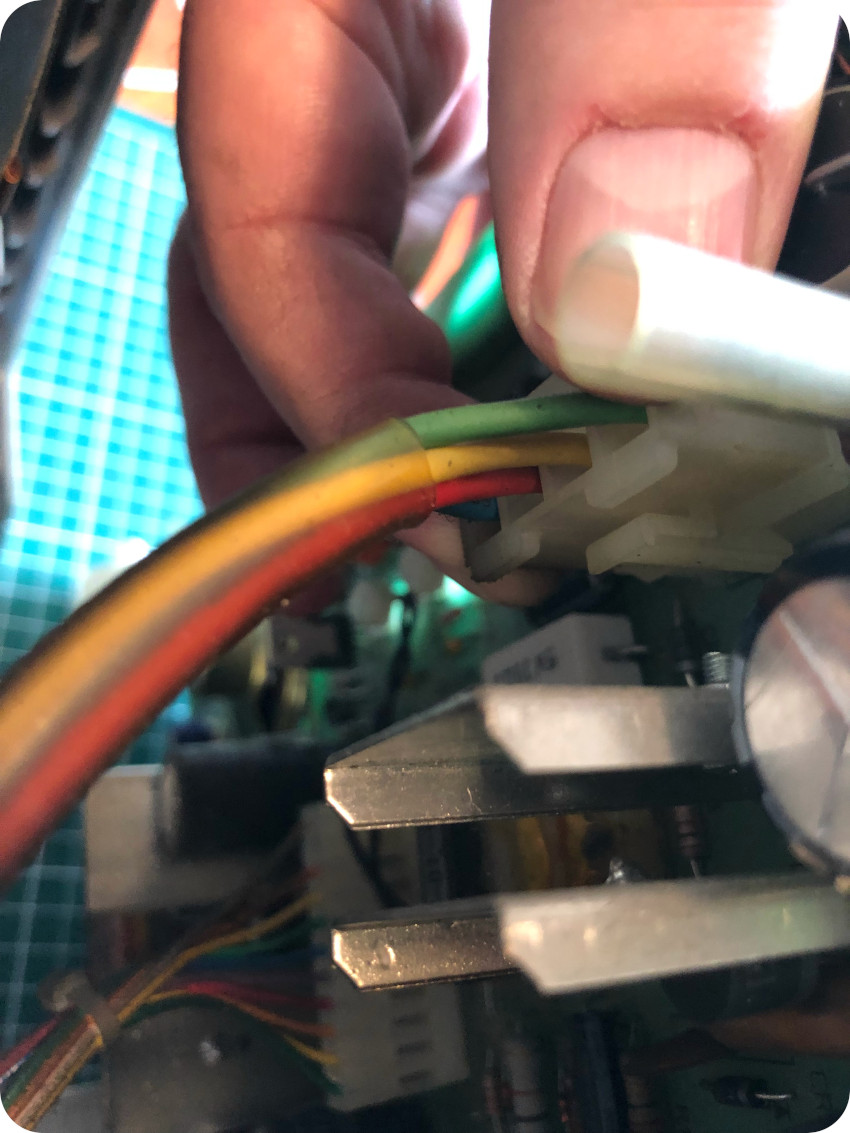
Then, you will have to do the same with the harness of the main connector:
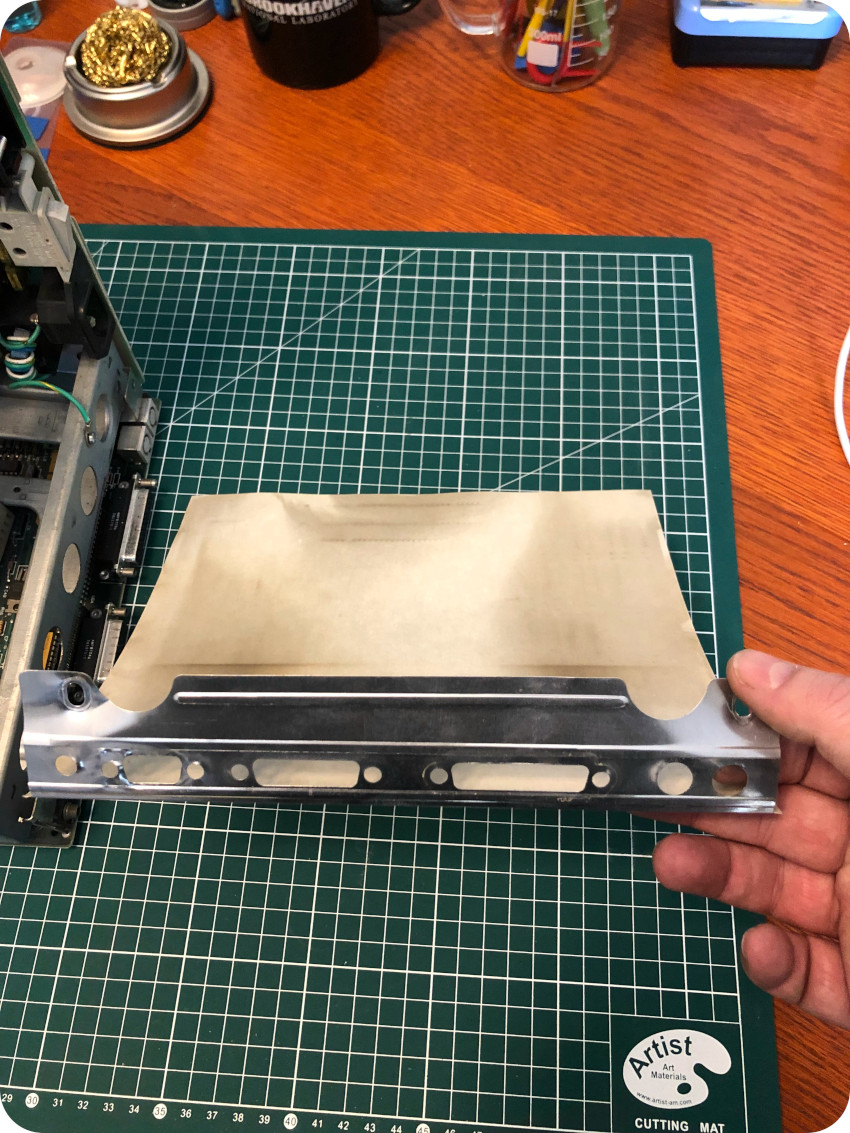
Next, you will have to slide off the protecting shield, underneath the logic board:
Finally, you can gently slide the logic board off the chassis:
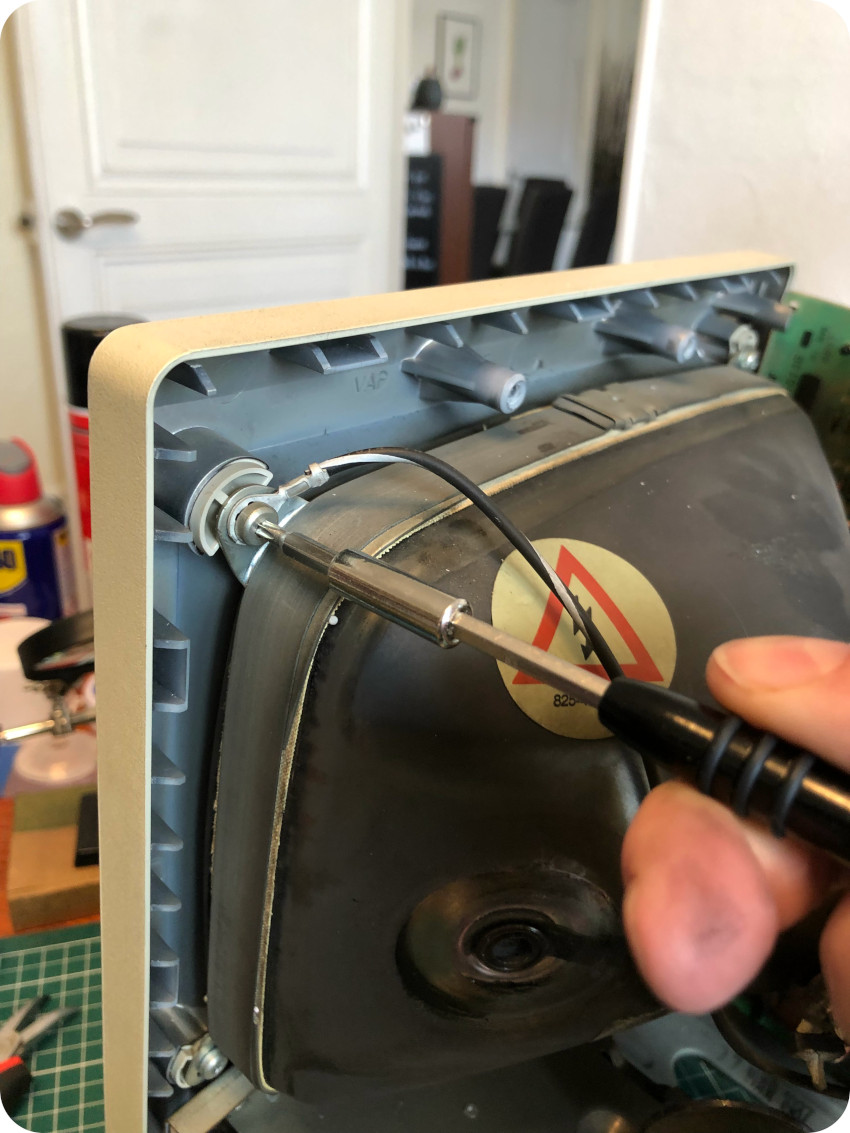
Discharging the CRT
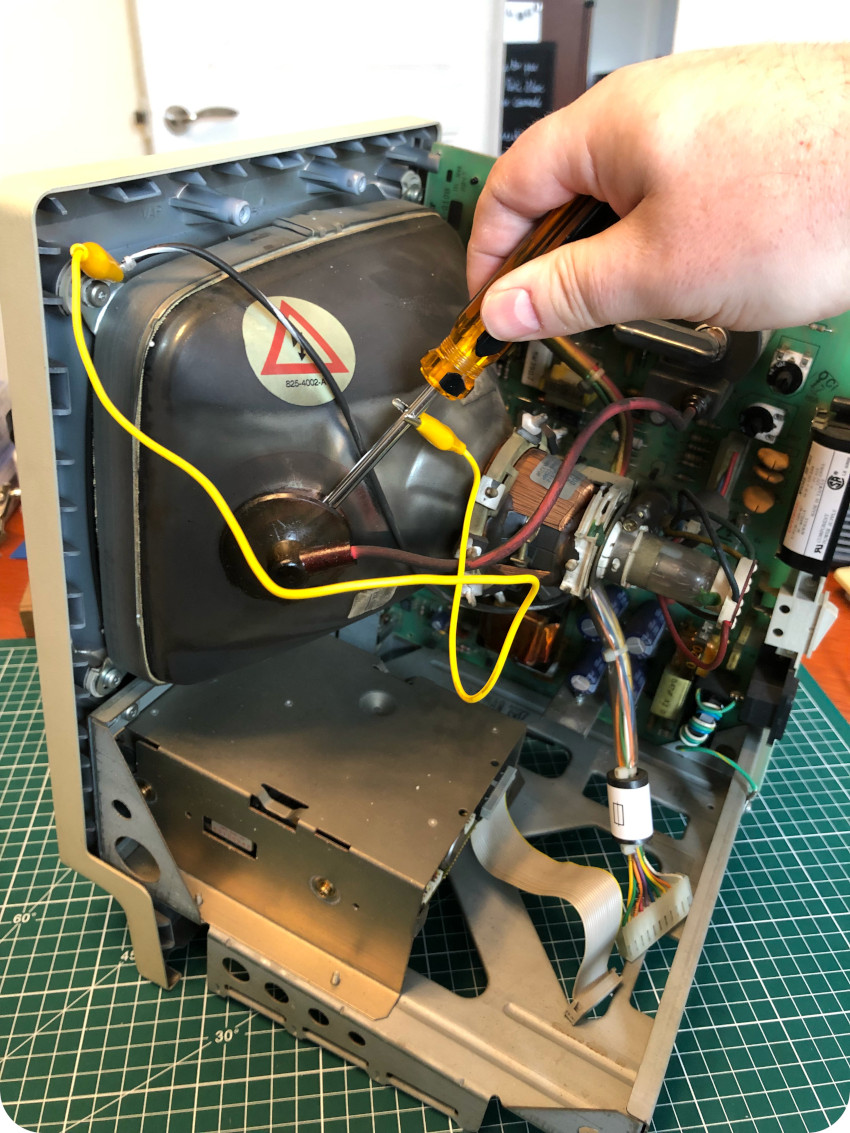
To be safe, before doing anything related to it, it is important to discharge the CRT. The first thing is to make sure you have unplugged the Mac. Then, take off any jewellery or anything metallic from your hands. During the next steps, make sure to work with only one hand. You don’t want to have two hands in when working with high voltage. If anything goes bad, the current, taking the path of least resistance, would flow from one hand to the other, passing straight to you chest, where lies your heart. For the same reason, don’t use a grounding strap while discharging the CRT. Wearing rubber soled shoes if also a good precaution. It is also good to have someone around, who could take actions (first aid, calling emergencies, …) in case something would go wrong.
The next step it to attach one side of an alligator clip to a flat head screwdriver, the other side being attached to the ground, as pictured in the above photo. Make sure that the screwdriver has a good insulated handle.
Then, you will have to carefully slide the end of the screwdriver under the anode suction cup. You will to push far enough to make contact with the prongs under the anode cup. This will discharge the CRT. You might hear or even see a spark. In any case, hold 5 seconds to make sure it is fully discharged.
Once, and only once it is done, you are safe to go. You can push sideways until one of the prongs is released, then you can pull free the suction cup:
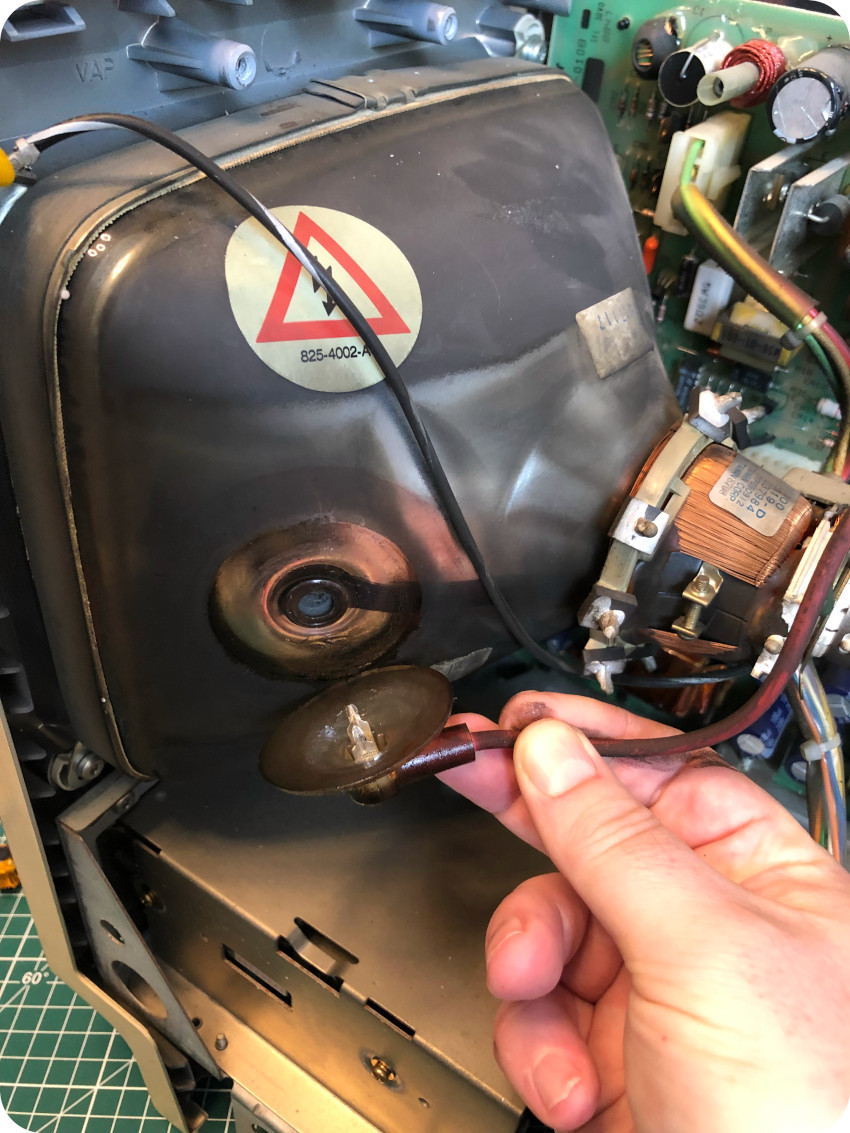
As you can see, this anode cup is oily and very sticky.
Removing the analog board and the CRT
The next step to remove the analog board and the CRT themselves from the chassis. First, you will have to pull free the connector going from the analog board to the neck of CRT:
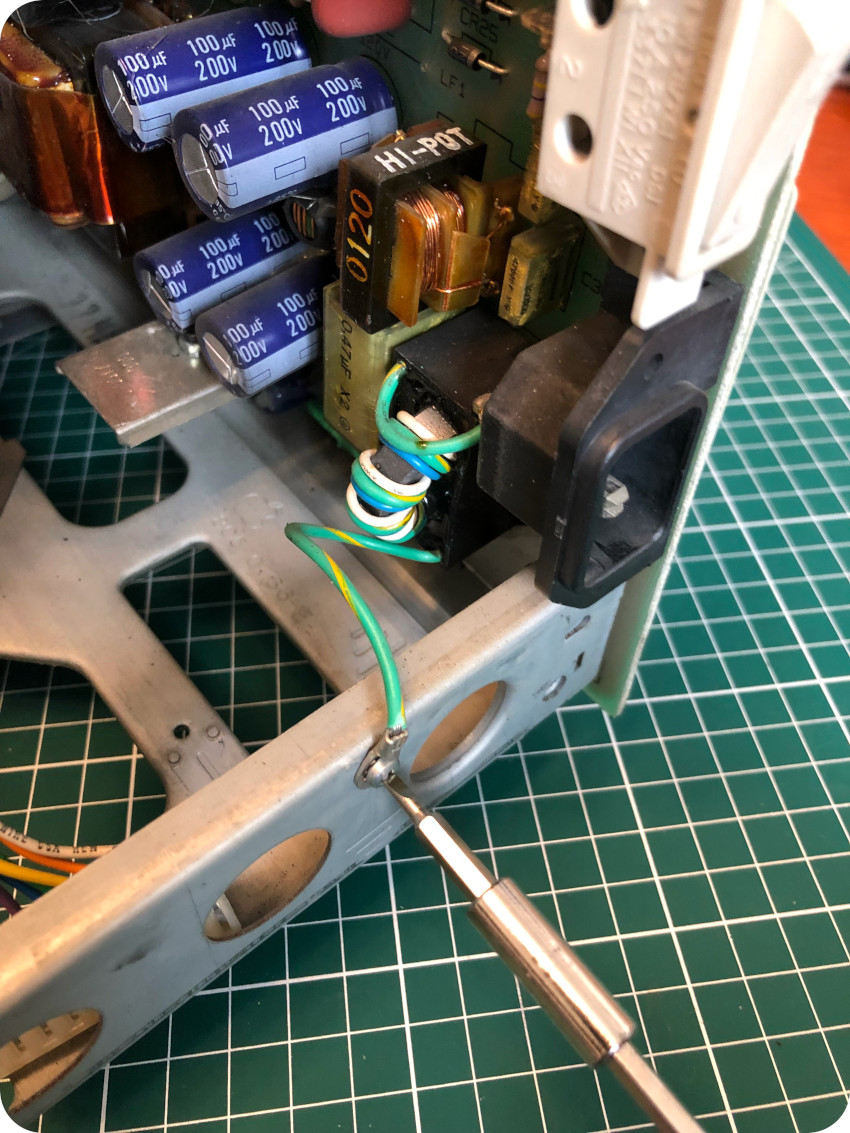
Then, you can unscrew both grounds:
Now, you can unscrew the analog board from the chassis:

You will now have enough space to reach for the other analog board to CRT connector and pull it free:
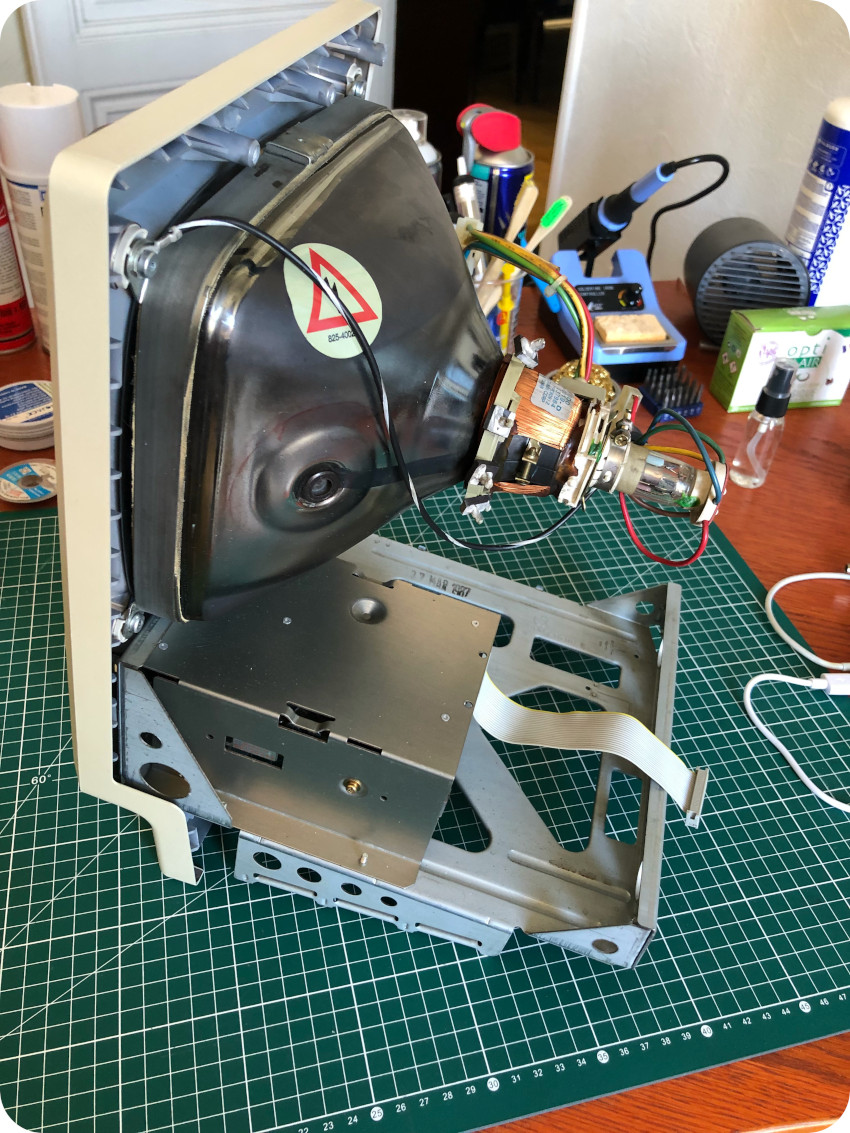
You can now remove the analog board. It is an easy task to remove the last screws of the front bezel and separate the CRT from the case:
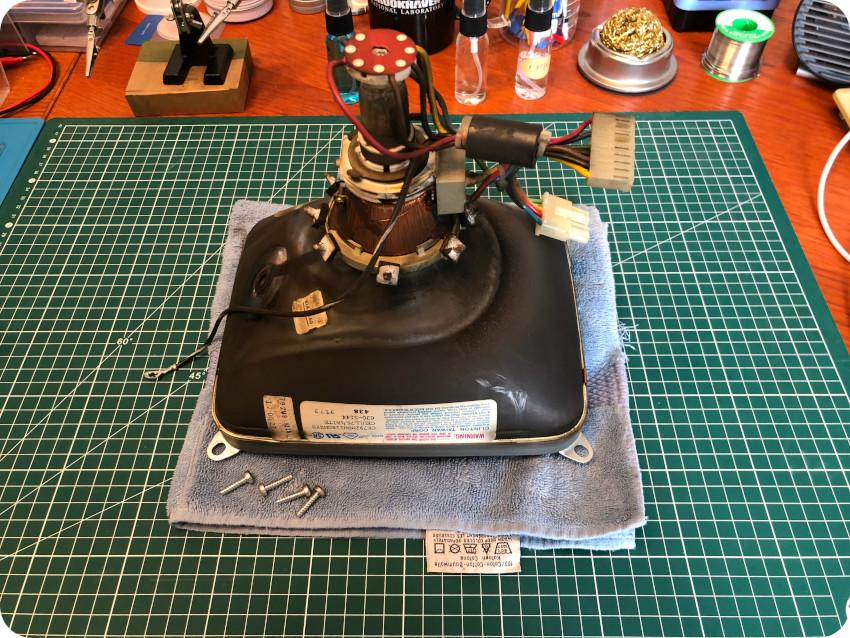
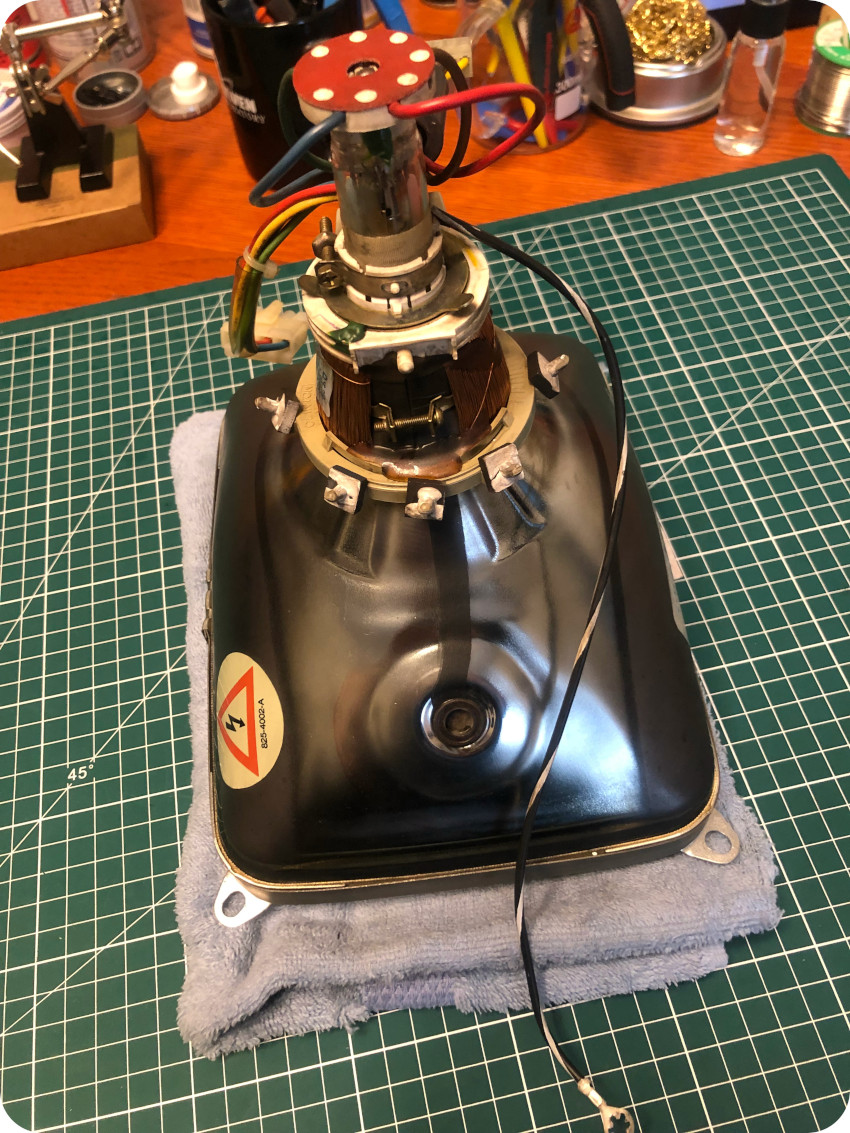
During these step, handle very careful the CRT. The neck is especially fragile. In the end, I put the CRT safely on a old towel:
Removing the chassis and the disk drive
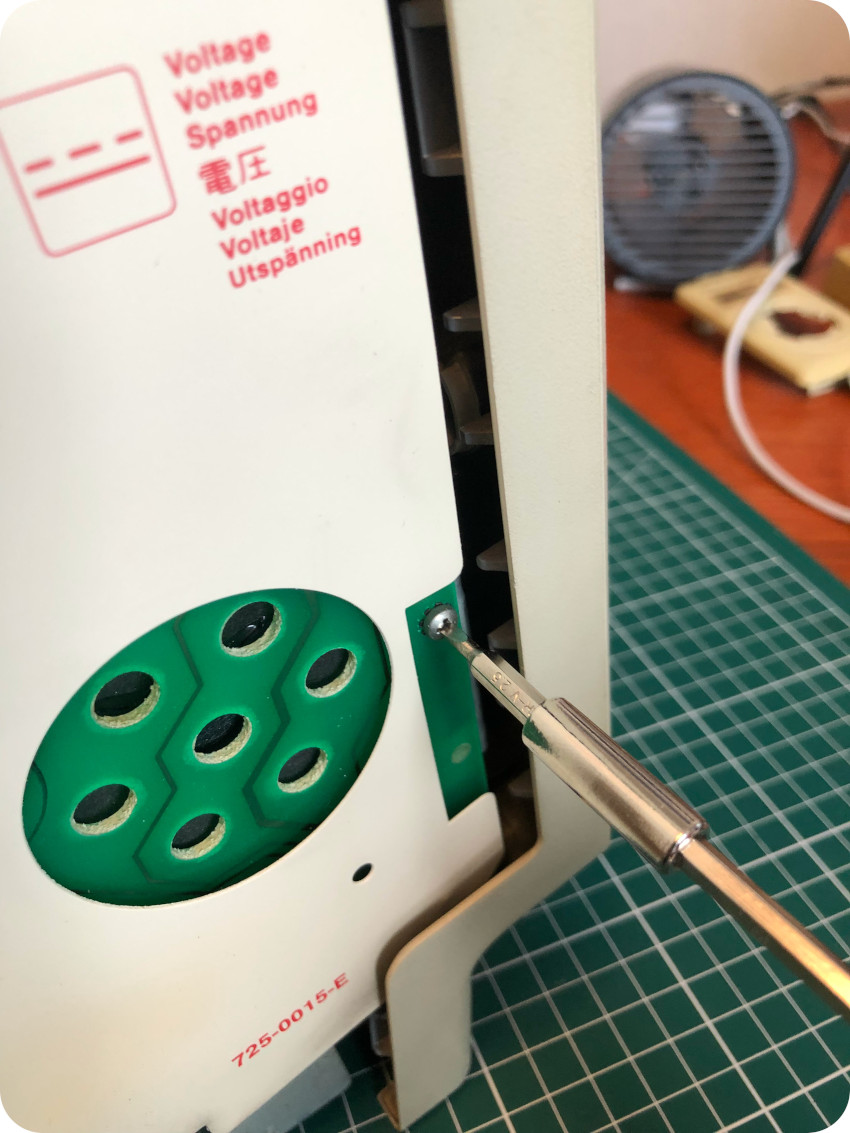
The next steps are fairly easy ones. First, take care of the last screws on the front bezel, to set the chassis free:
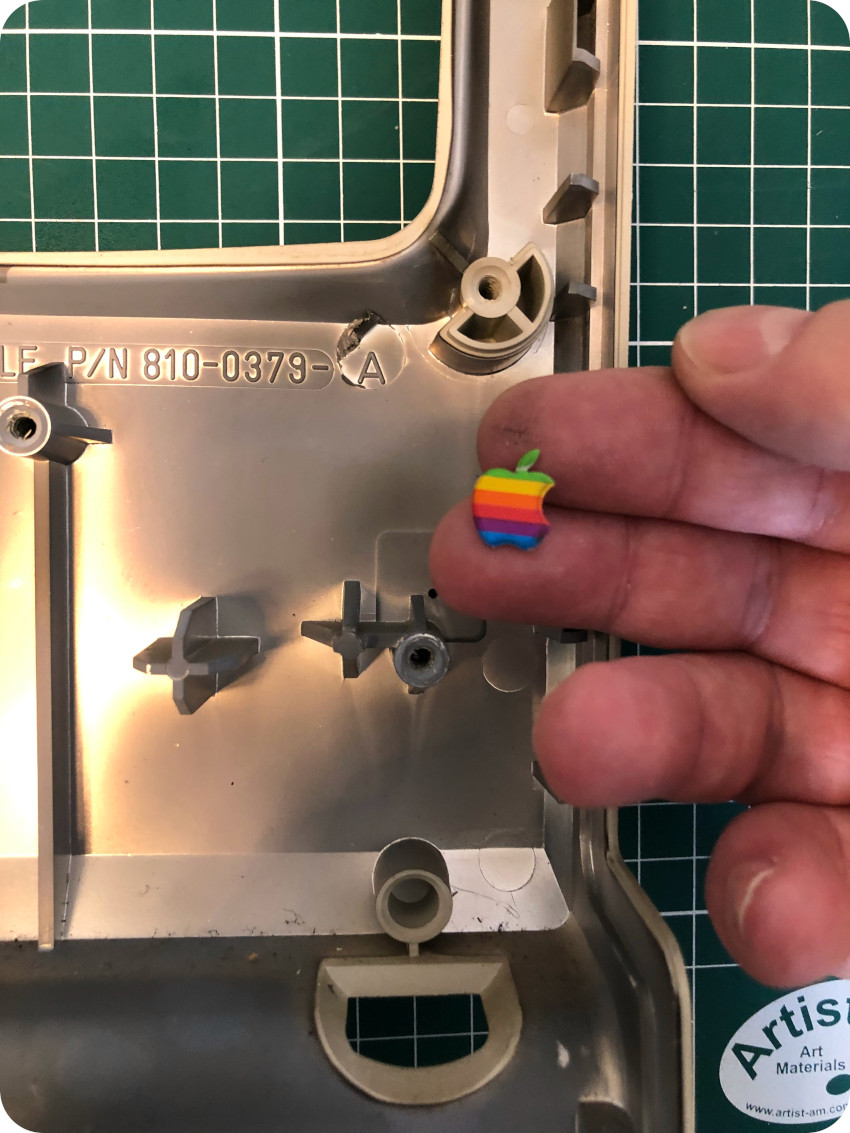
Once the front panel is freed, you can remove the Apple logo to keep it safe, pushing with a pin:

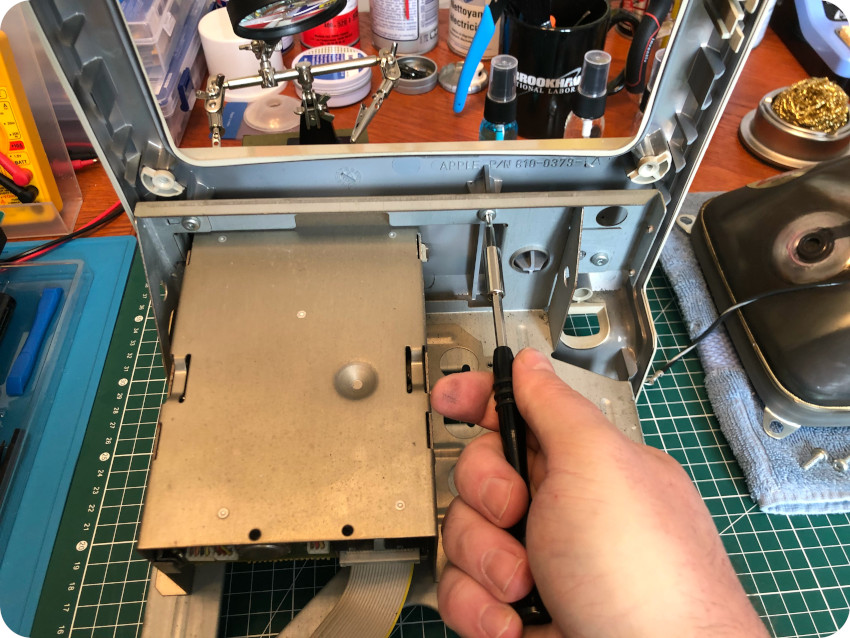
Now, you can take care of the internal drive shield, removing these four screws:
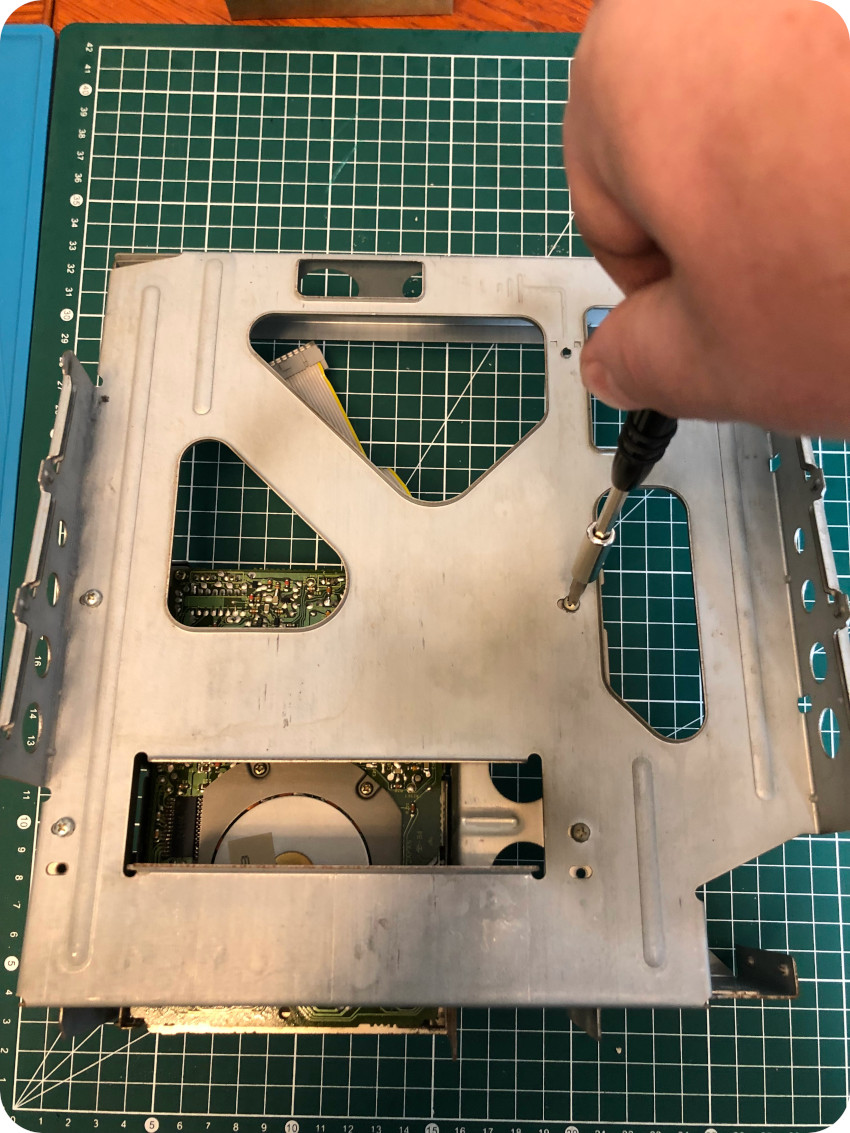
The metal chassis is now free (and, according to the markings, was built in the end of March 1987):
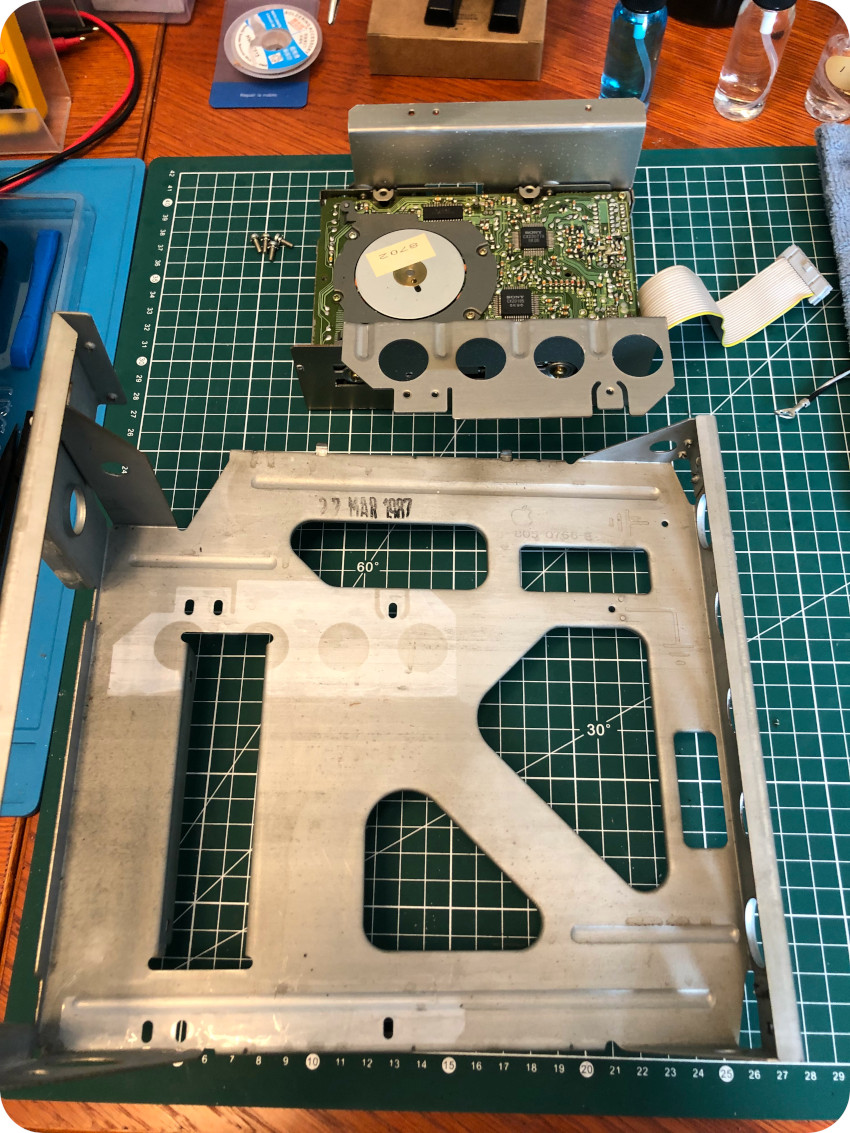
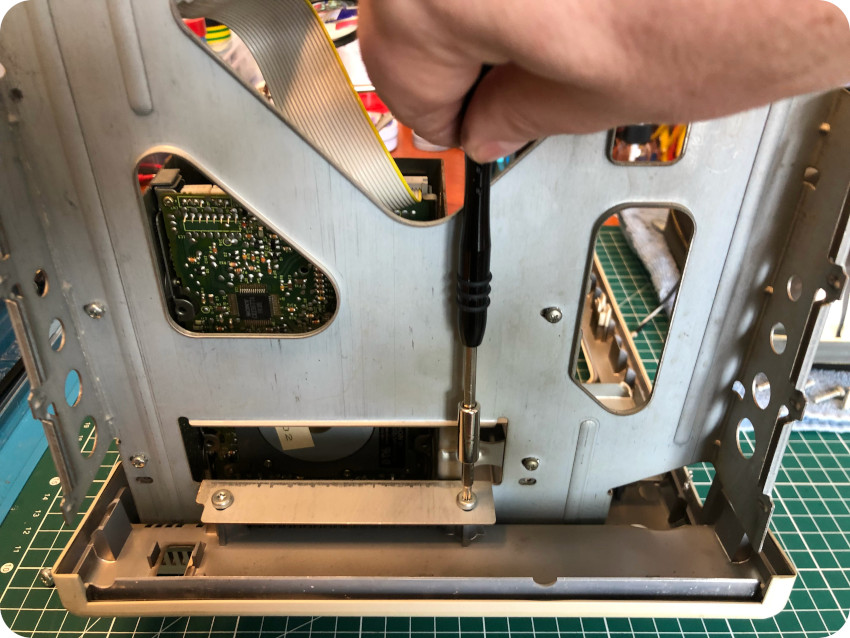
Finally, you can set free the disk drive itself, removing four golden screws on the sides:
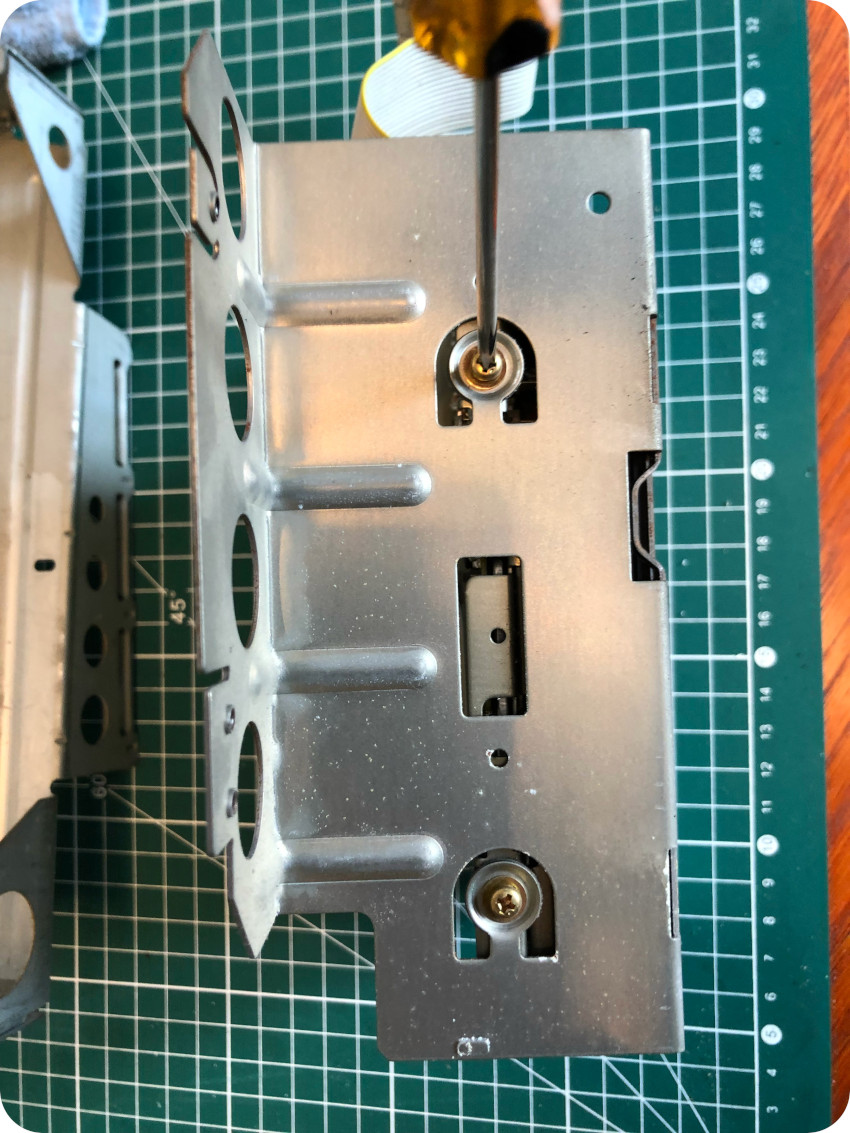
And … that’s it ! The Mac case is now completely disassembled:
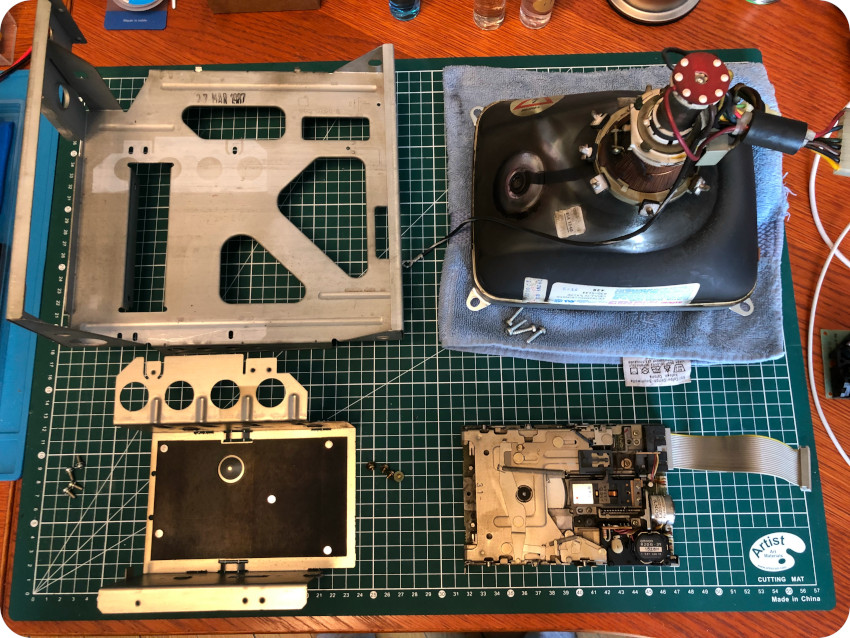
Time now to open up the mouse and the keyboard.
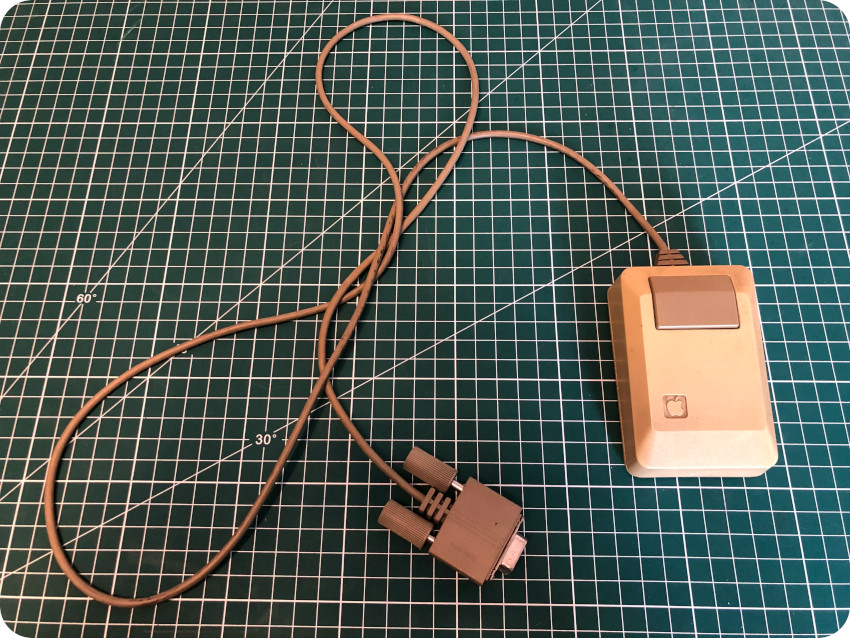
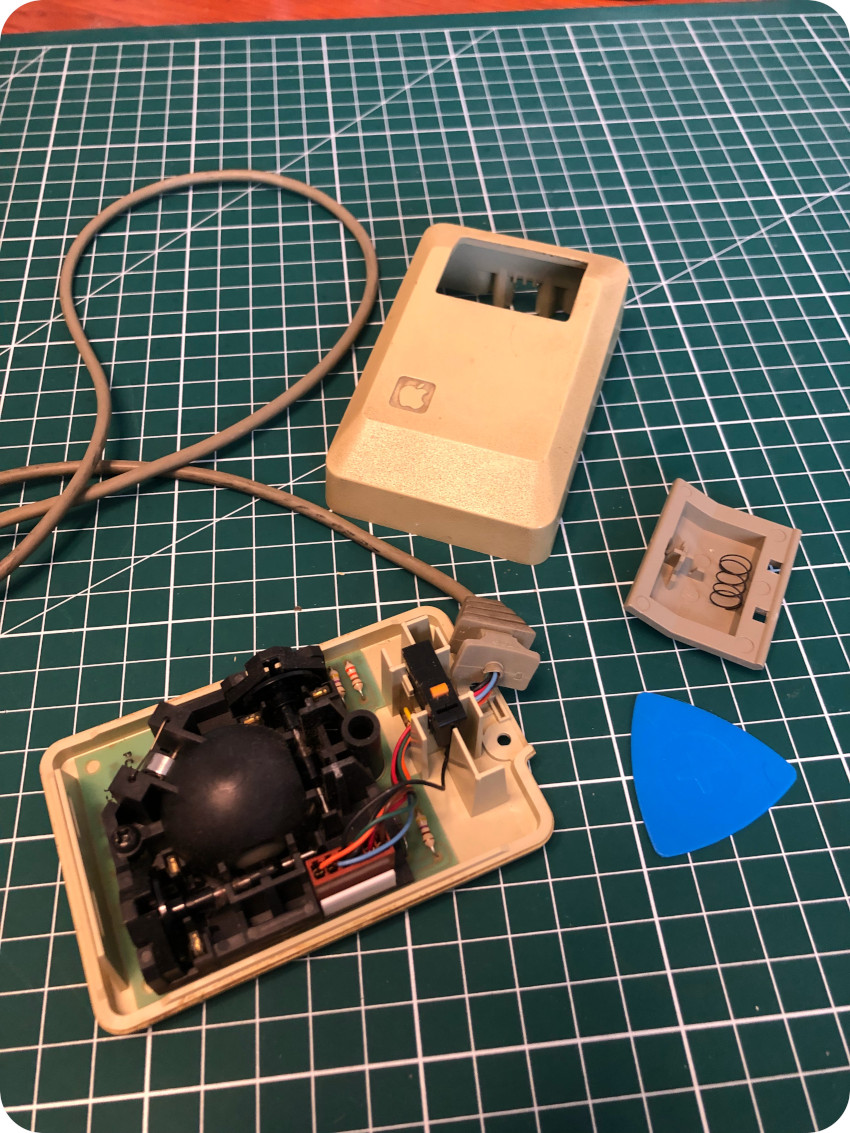
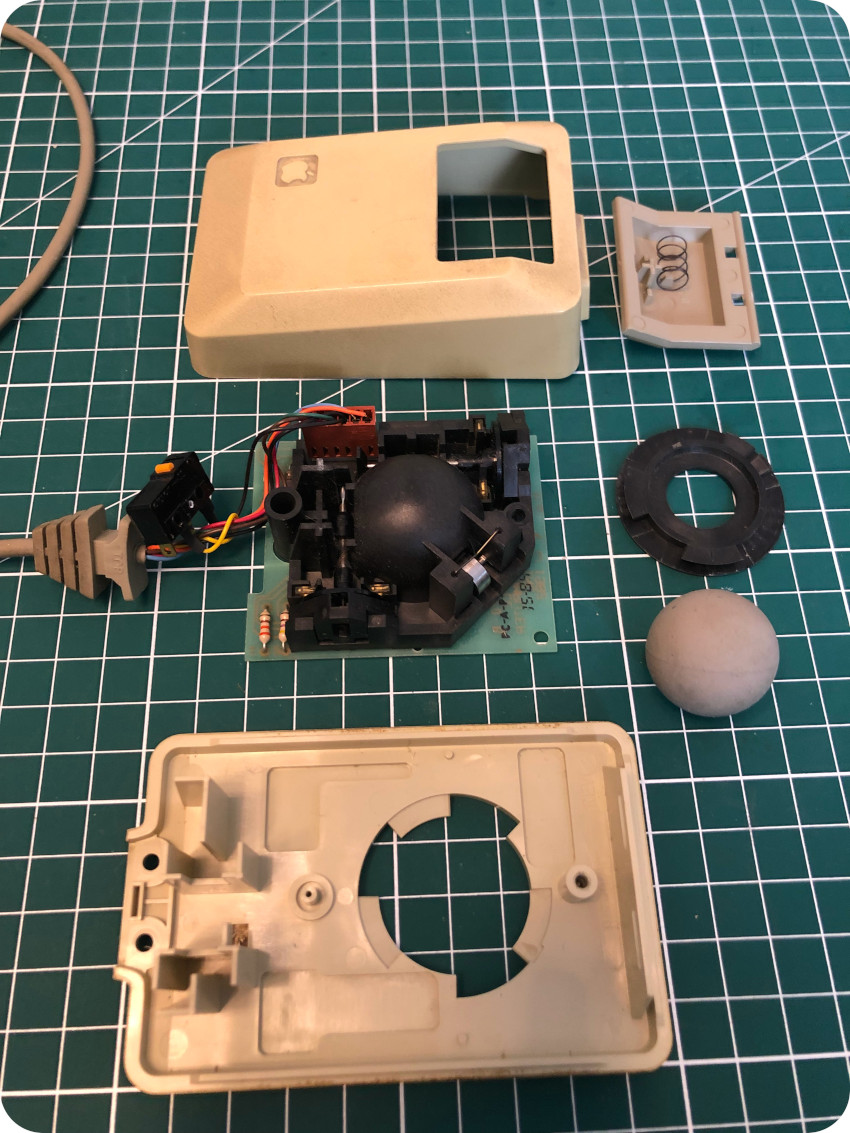
The mouse
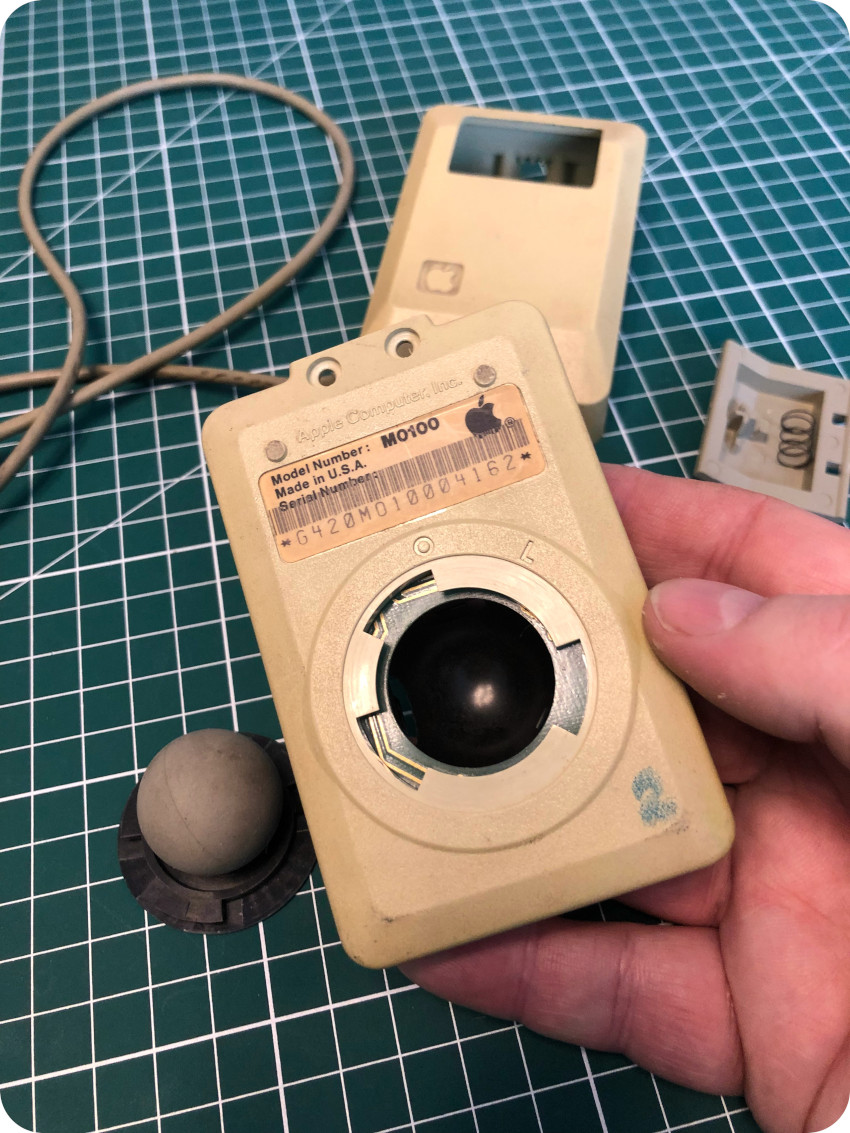
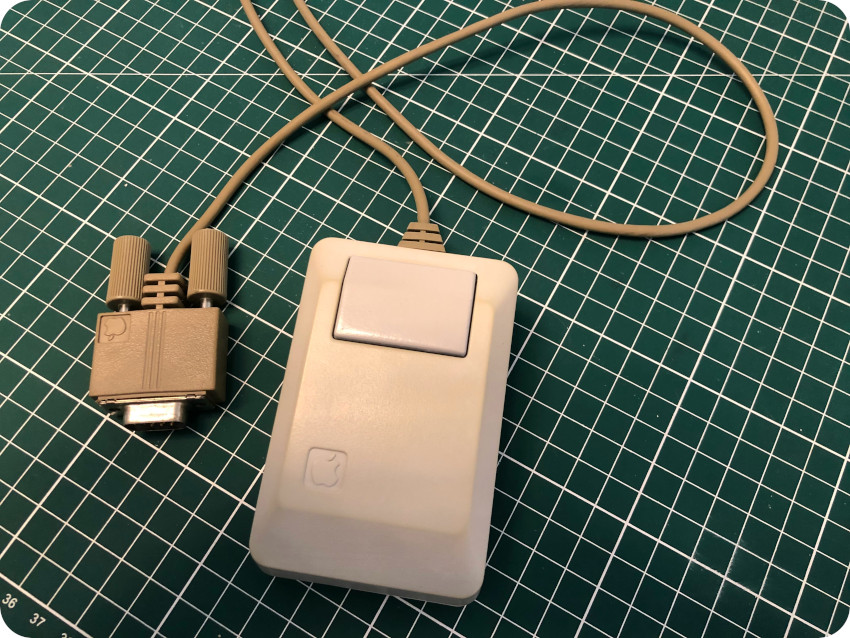
The mouse itself is of a different shade of yellow than the case and the keyboard. The color of the button is also different from the color of the keys.
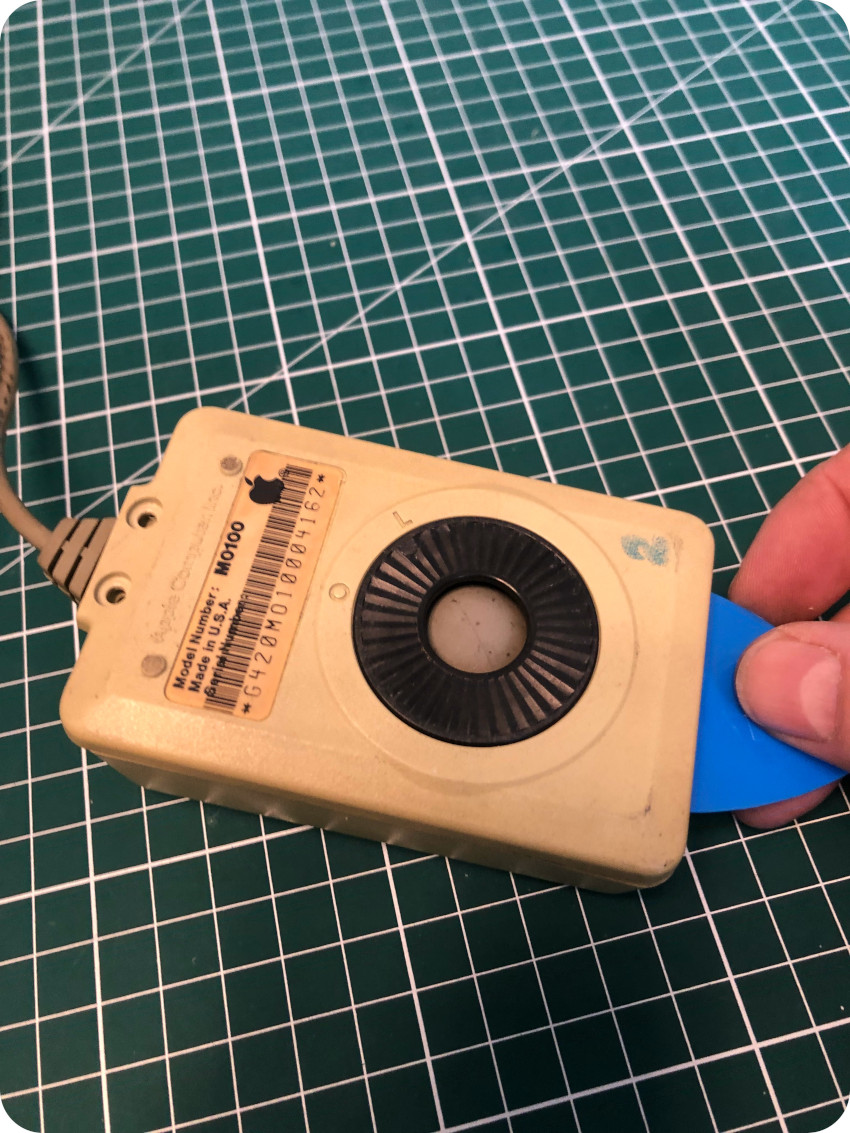
My hypothesis is that this mouse belonged to another older Mac Plus (not a Platinum Mac Plus, but a beige one). If am I correct, later mouses were made in Japan, the earlier ones (beige) being made in USA. Furthermore, the round “hatch” is black for beige ones, while it is grey for Platinum ones. On the back of the mouse, a number “2” sign was added using a blue marker. All this somehow corroborates the hypothesis …

To open the mouse, simply remove the two black screws from the top and open the case with the help of a plastic prying tool:
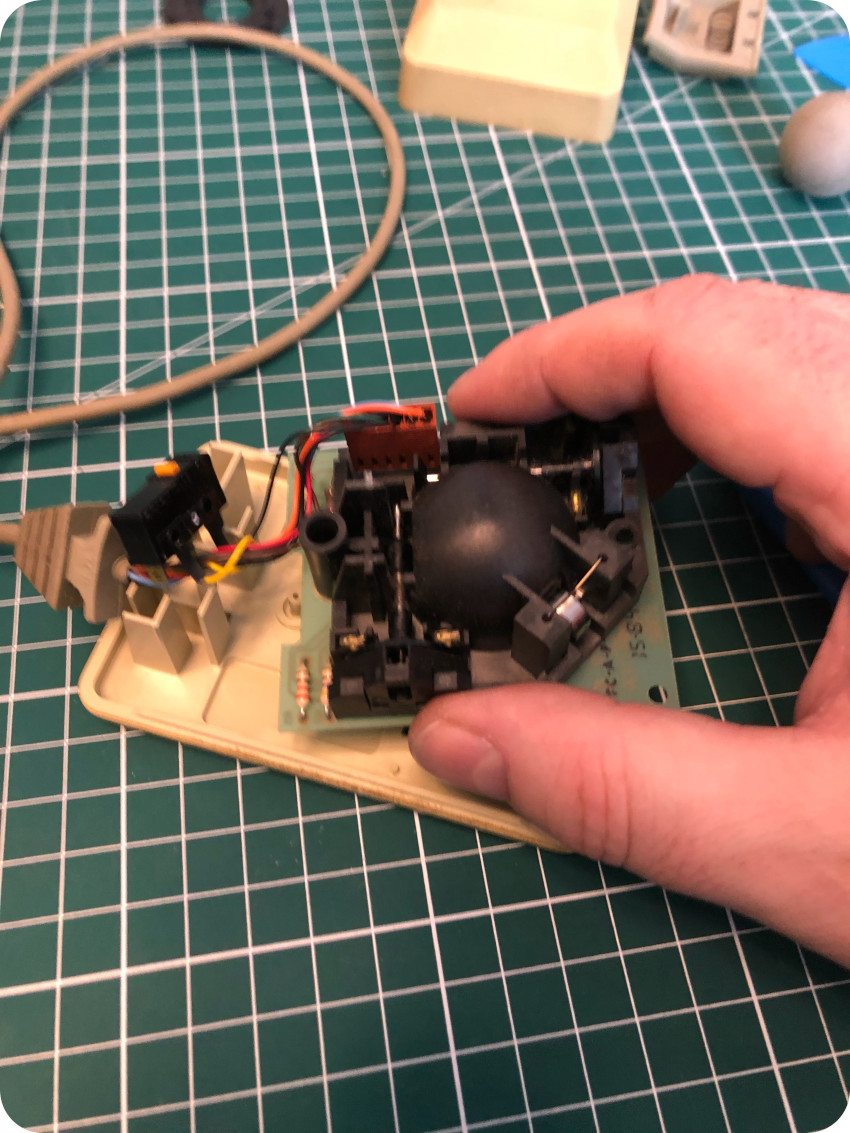
The button is easily removed (beware of the spring nevertheless). Inside the case there is a small PCB and the mechanical parts of the mouse:
The ball itself can be freed, turning left the round “hatch” :
There is only one screw left to be removed:
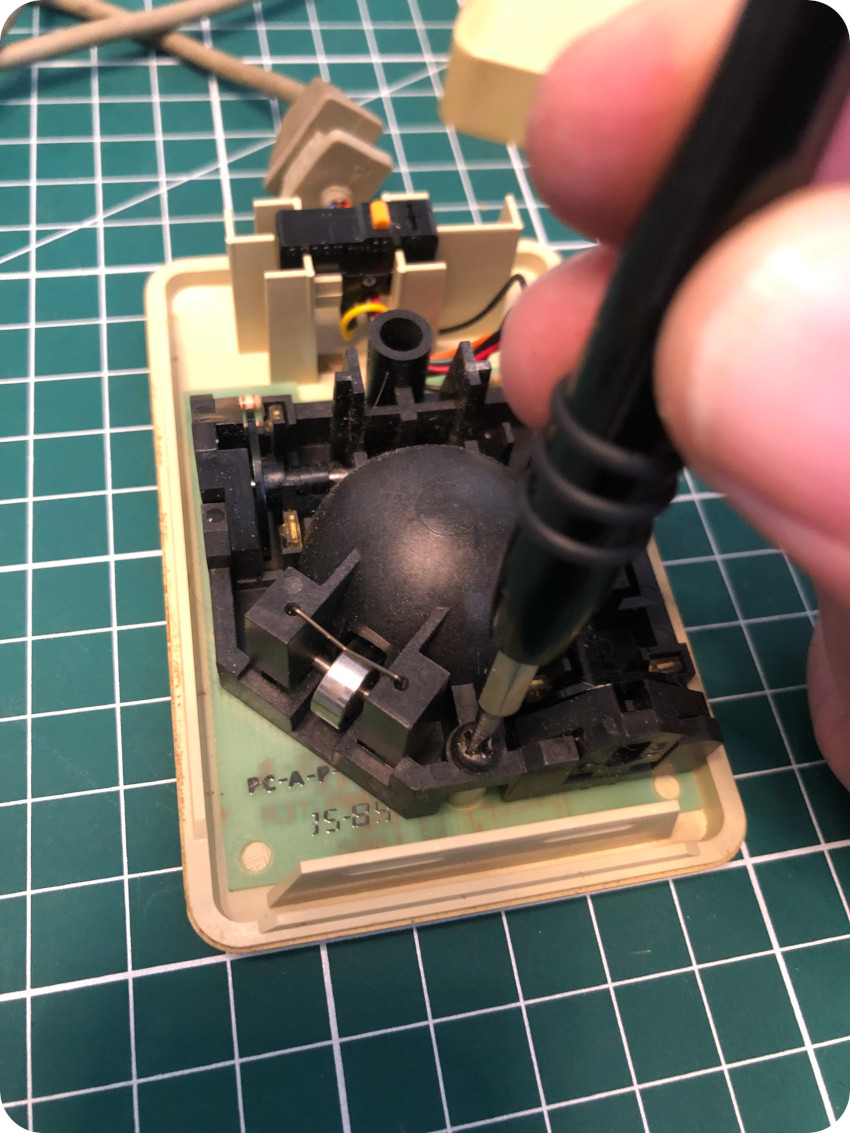
There we go, this mouse is ready to be cleaned !
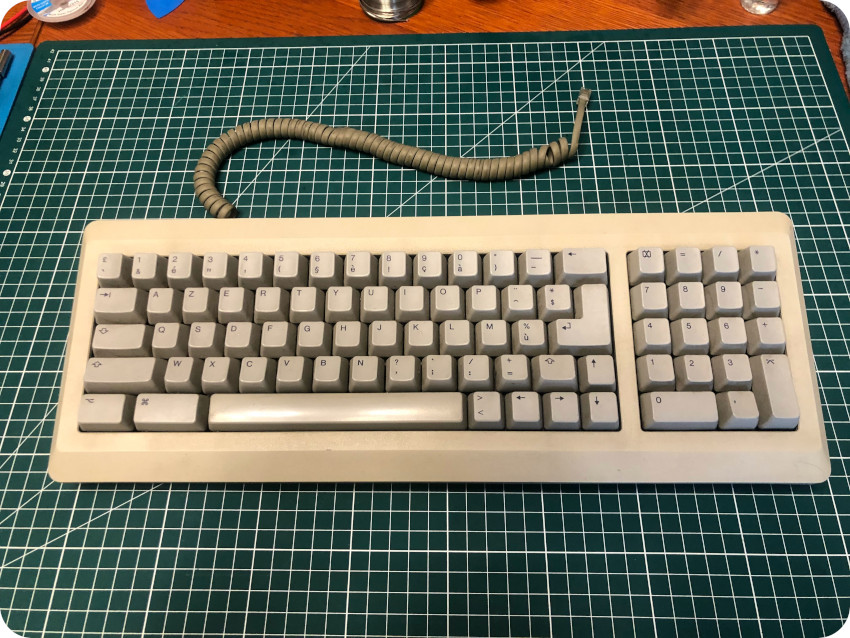
The keyboard
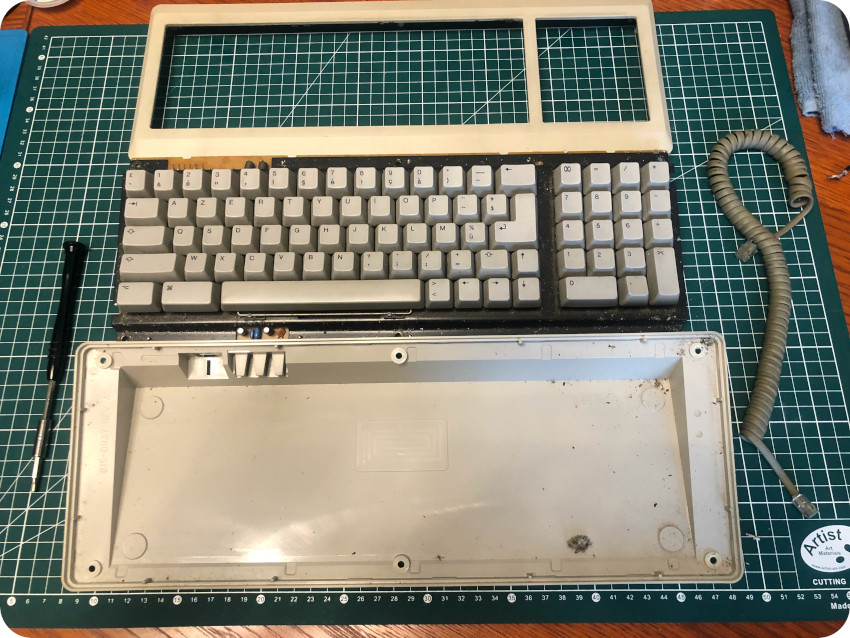
Overall, the keyboard is in decent shape, though extremely dirty, like the other parts of this Mac. It has a very crunchy feeling. Somehow, the case is a little twisted and couldn’t lie totally flat on the table. Let’s crack it open !
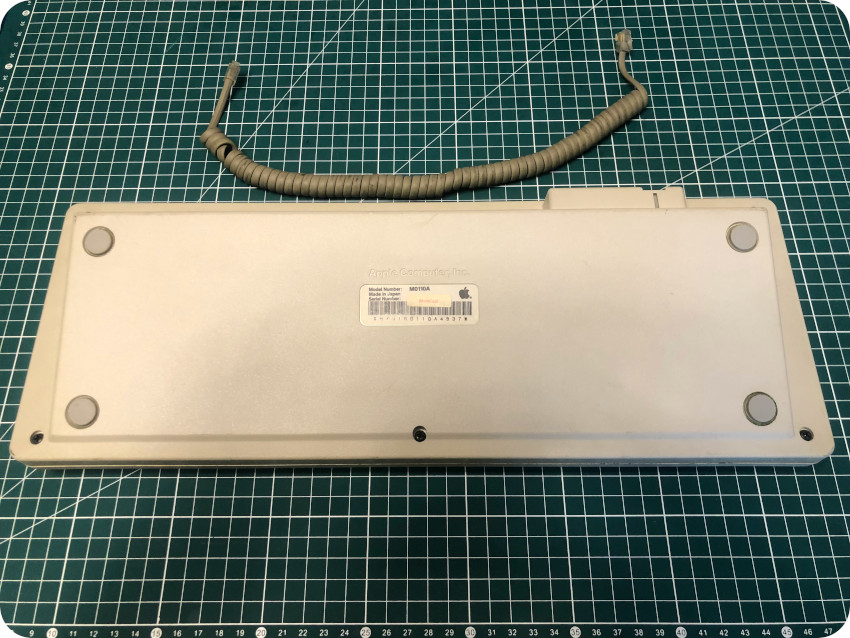
To do that, remove the cable, flip the keyboard and remove the six screws:
Once done, it is easy to extract the keyboard from it case:
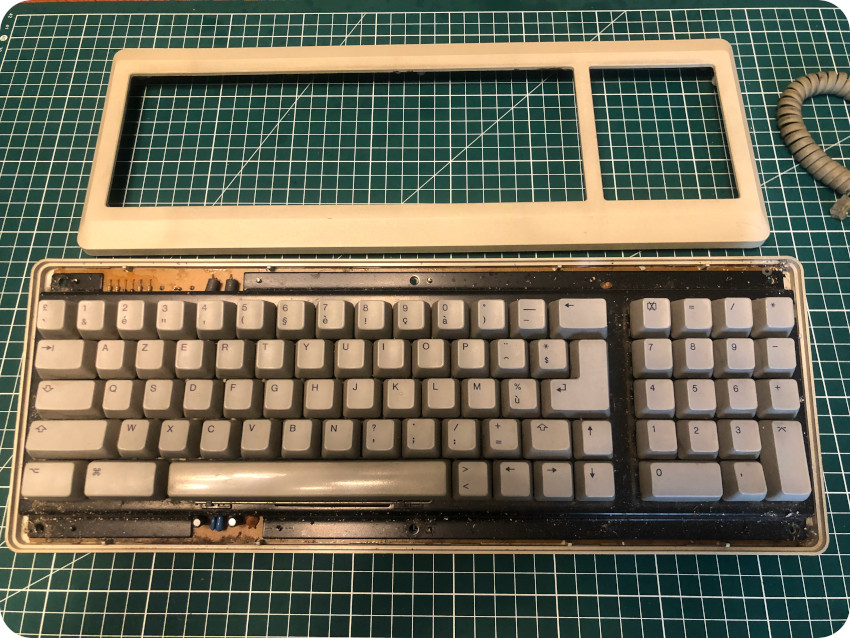
As expected, the inside is filled with dust bunnies, gunk, hair and dead insects:
I started removing the key caps with the help of a key remover. In the end, none of them were broken, though there were probably some kind of soda or coffee spillage on them at some time in the past:
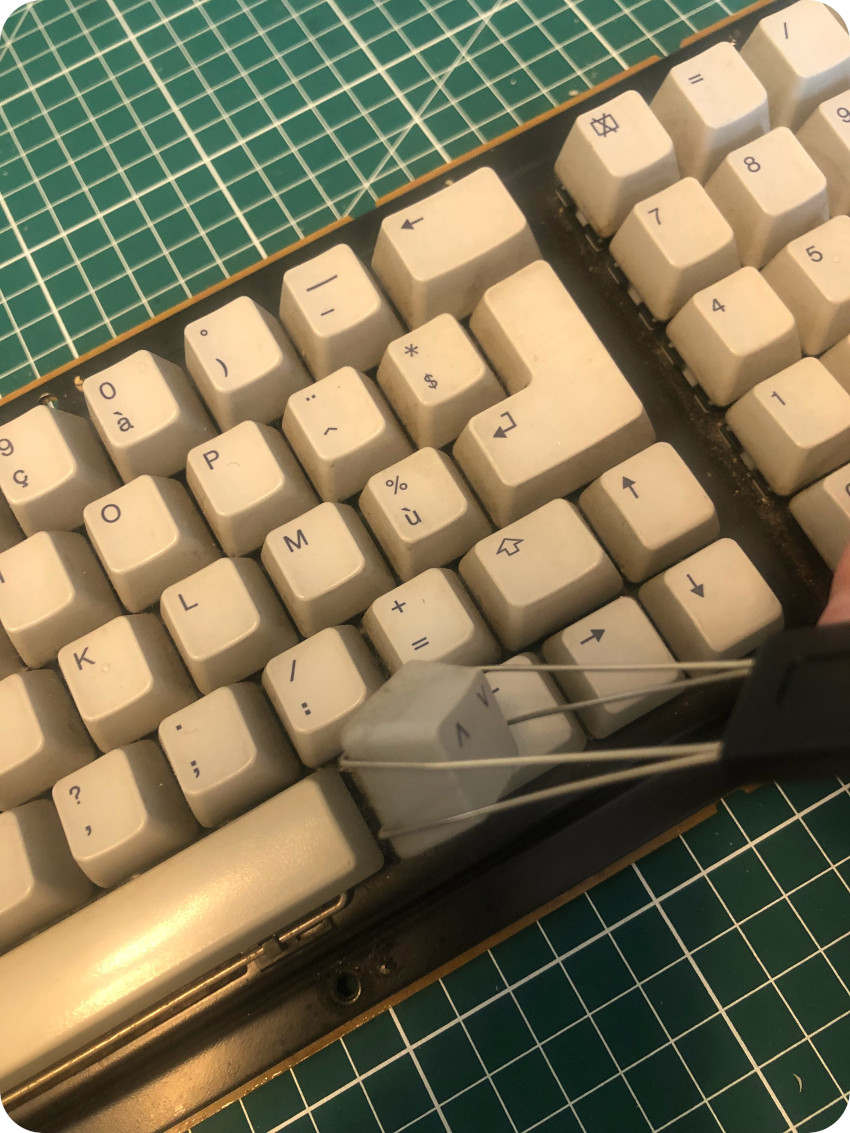
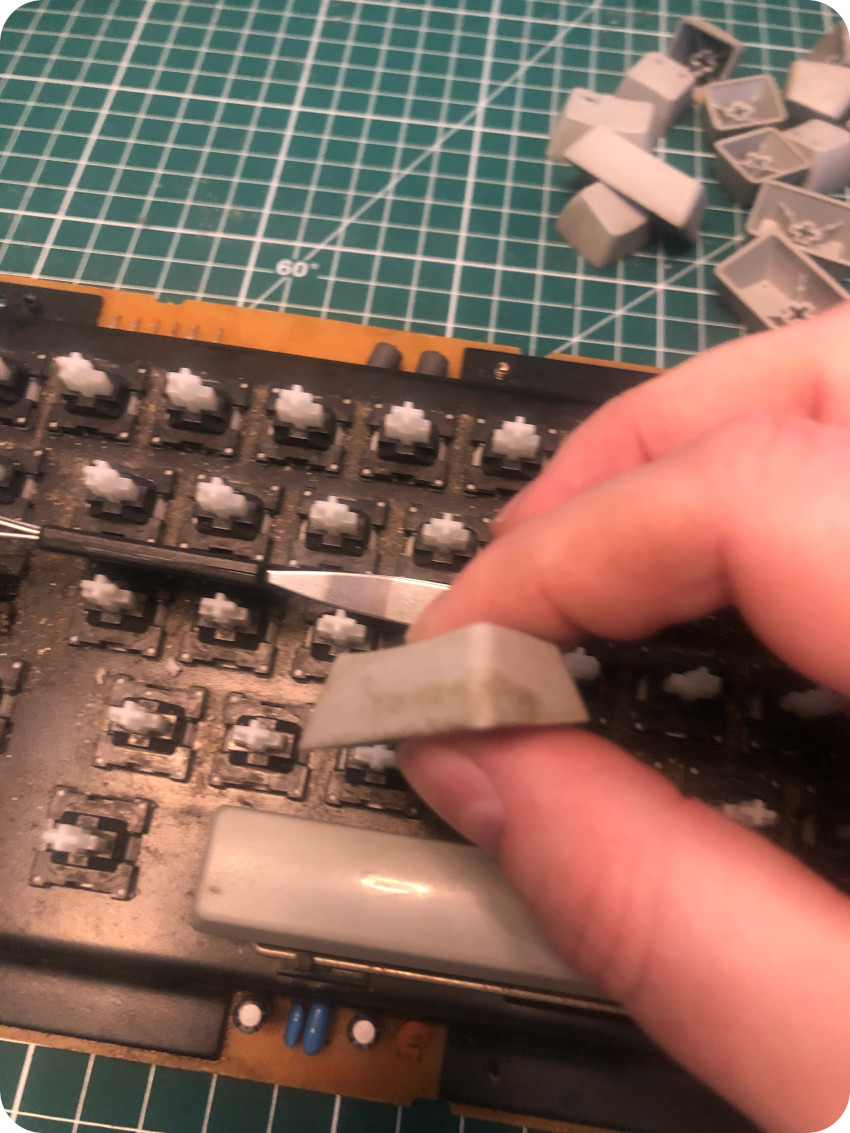
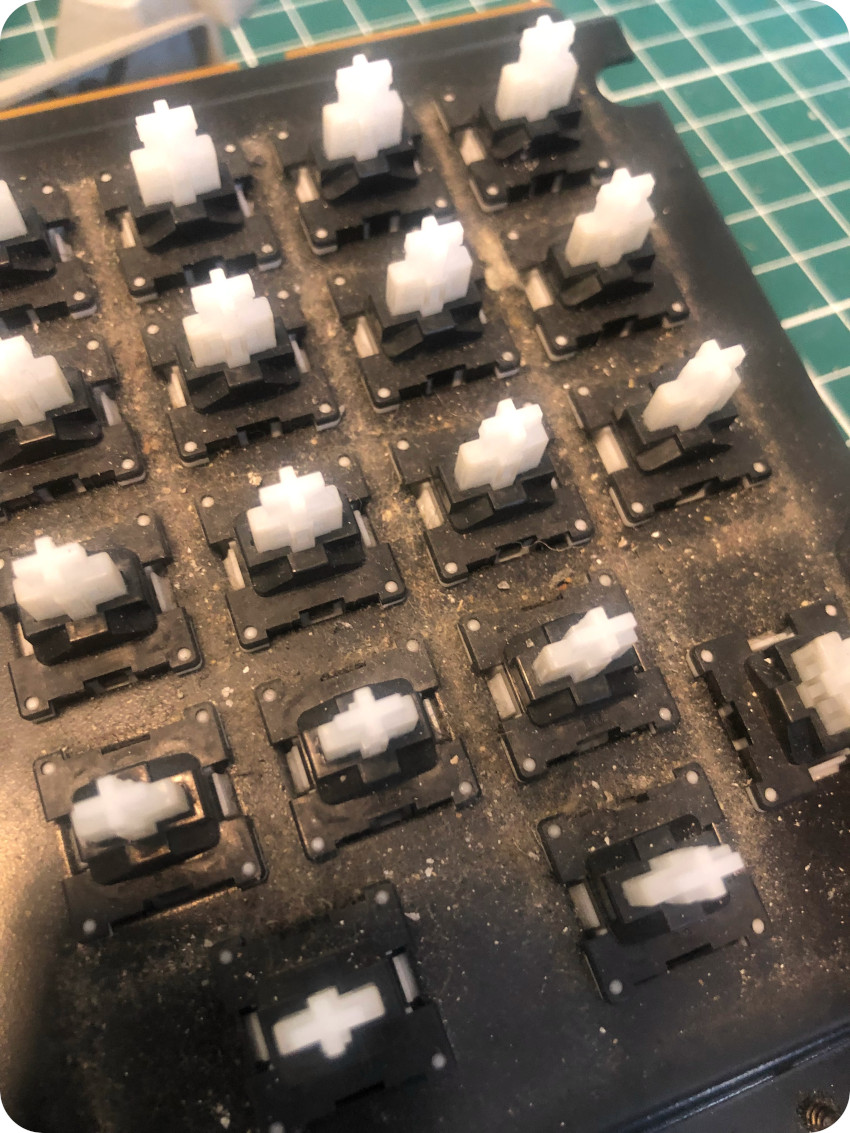
The amount of dust explains the crunchy feeling. None of the plungers were broken or stuck:
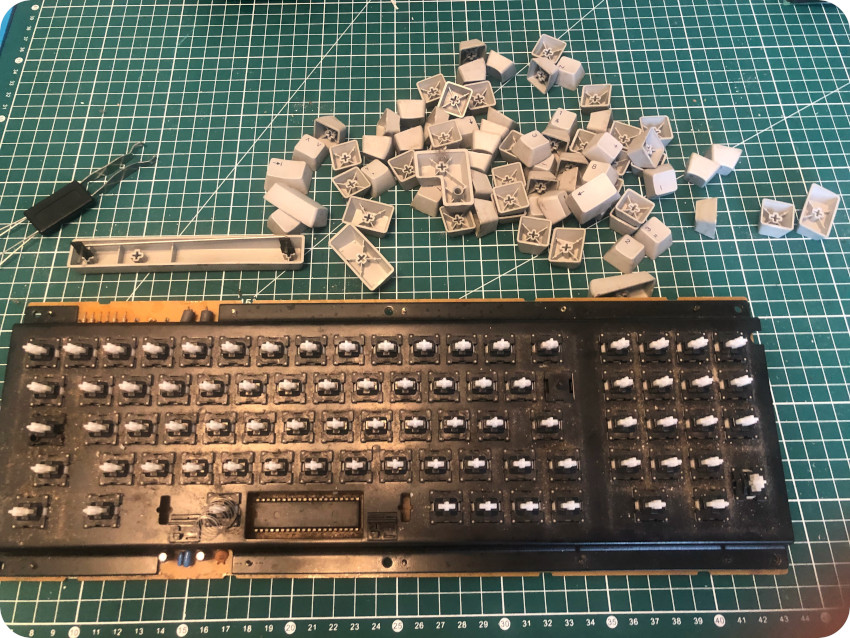
I could have fully disassembled the keyboard to get access to its PCB. But this is a tedious and probably risky process. It involves a lot of desoldering (at least two per key, on the back of the PCB) and, for each of them, pushing a snap mechanism which might break if the plastic were to be brittle. Since the PCB and the mechanisms seemed more than OK, I didn’t bother getting into this process. Crossing fingers. Testing the keyboard in the end will tell !
Cleaning the keyboard
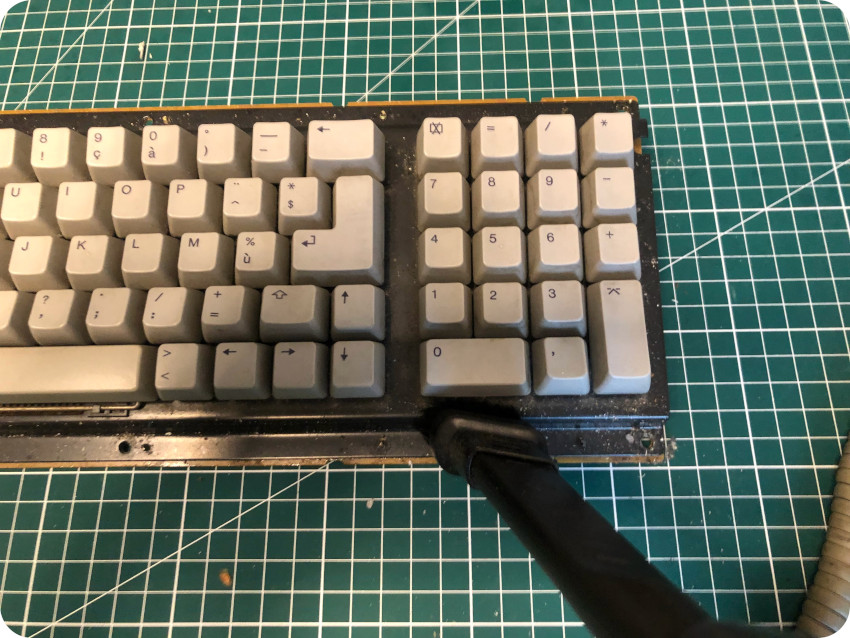
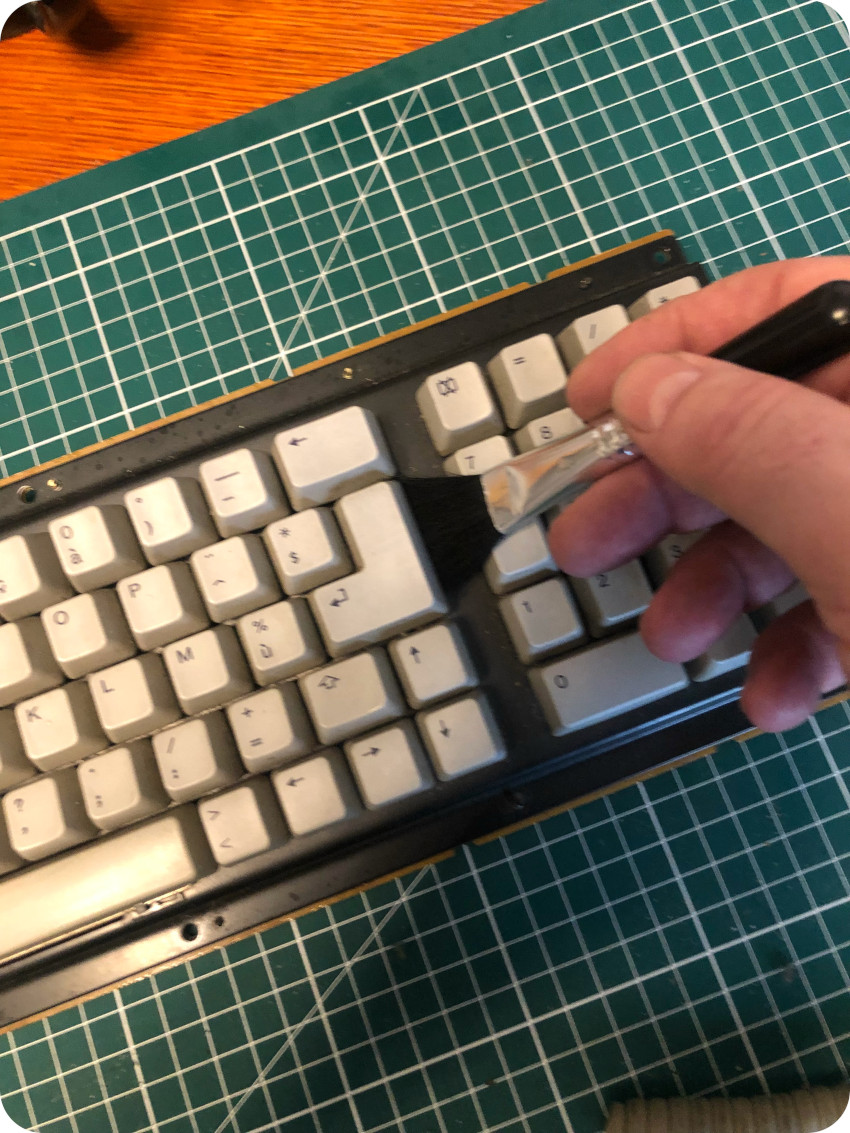
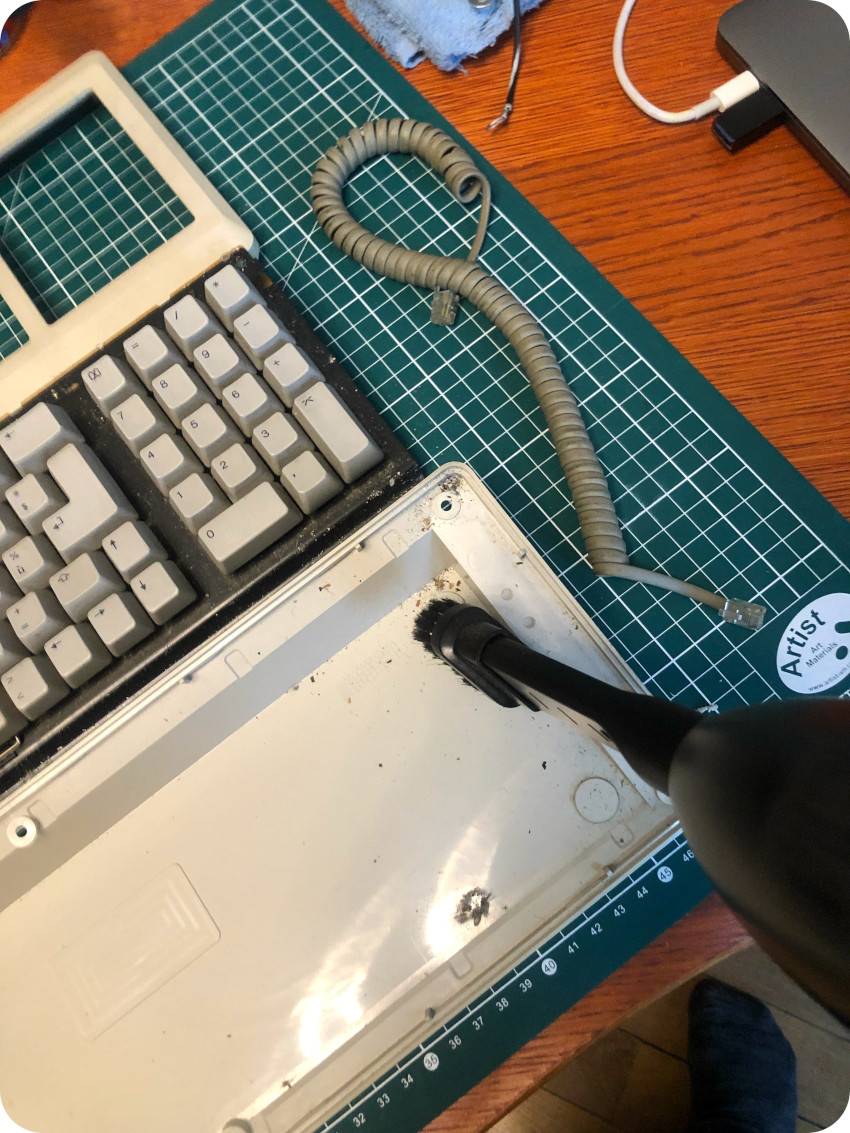
I let the key caps soak into soapy water for quite some time. Meanwhile, I started vacuuming the keyboard:
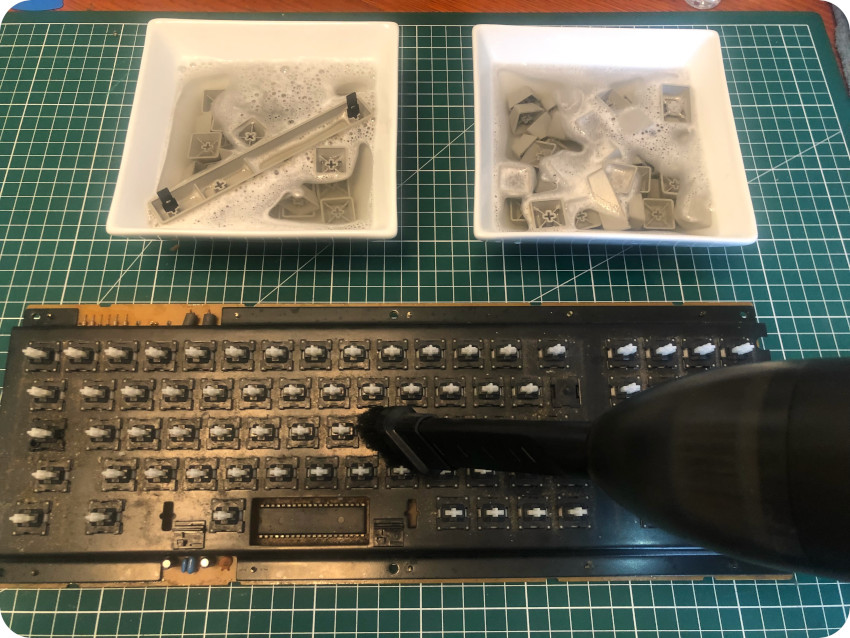
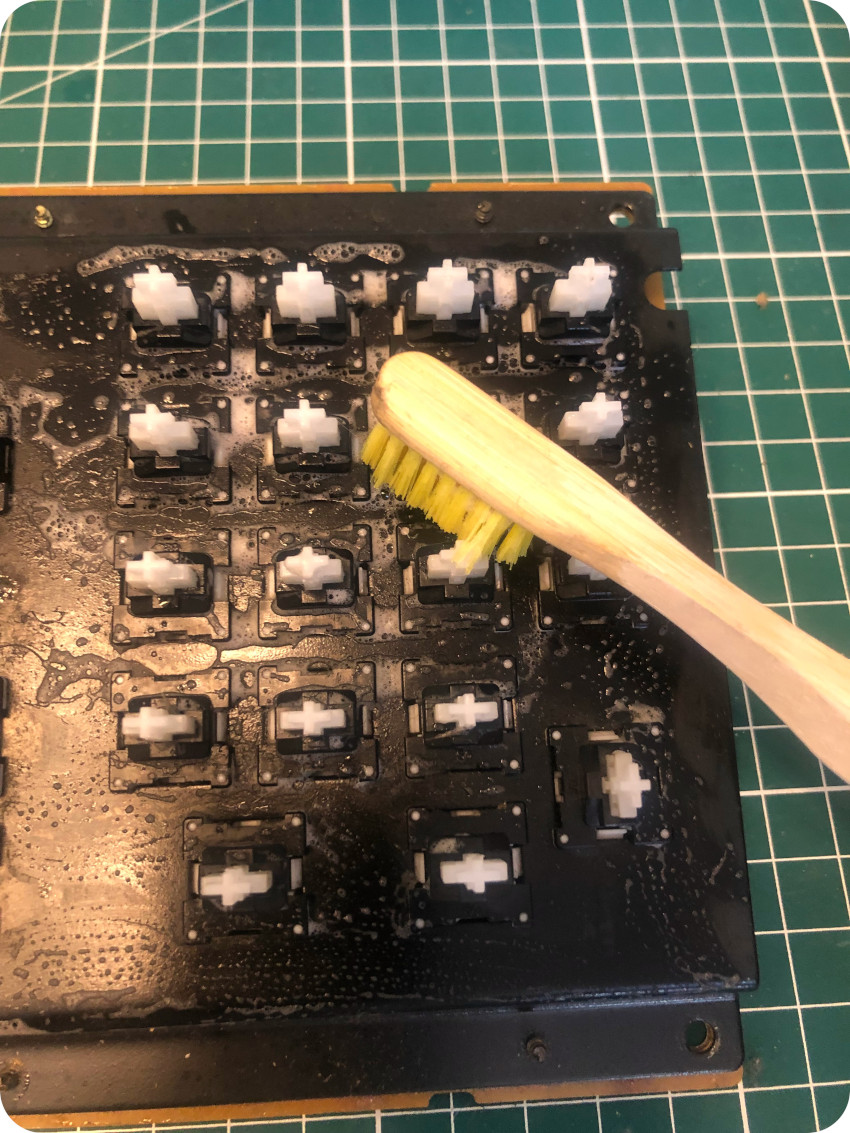
Then, using a toothbrush and soapy water, I cleaned the top part of the keyboard:
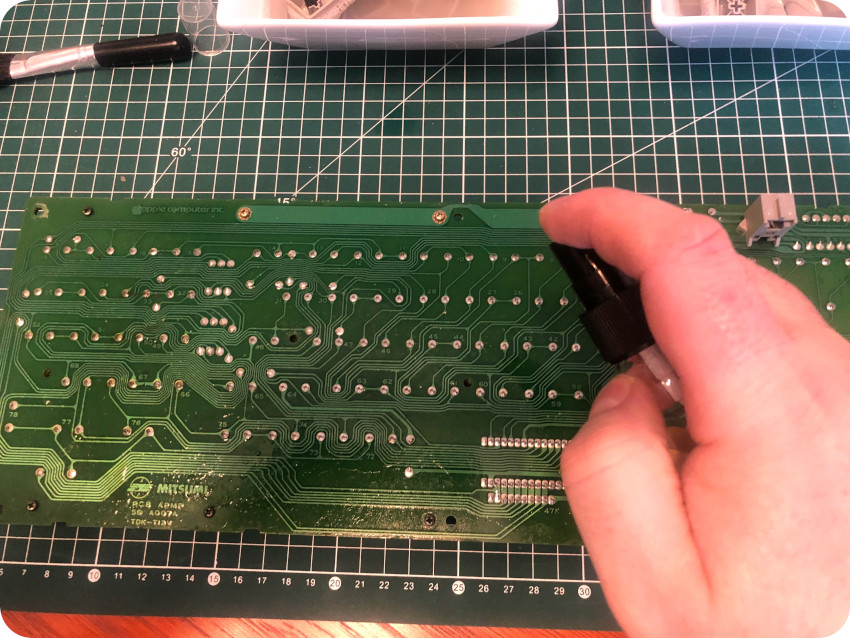
Once done, I cleaned the back of the PCB with some IPA:
After letting the keys into soapy water for a couple of hours, cleaned each key one by one with a micro-fiber cloth, let them dry and then started putting back the keyboard:

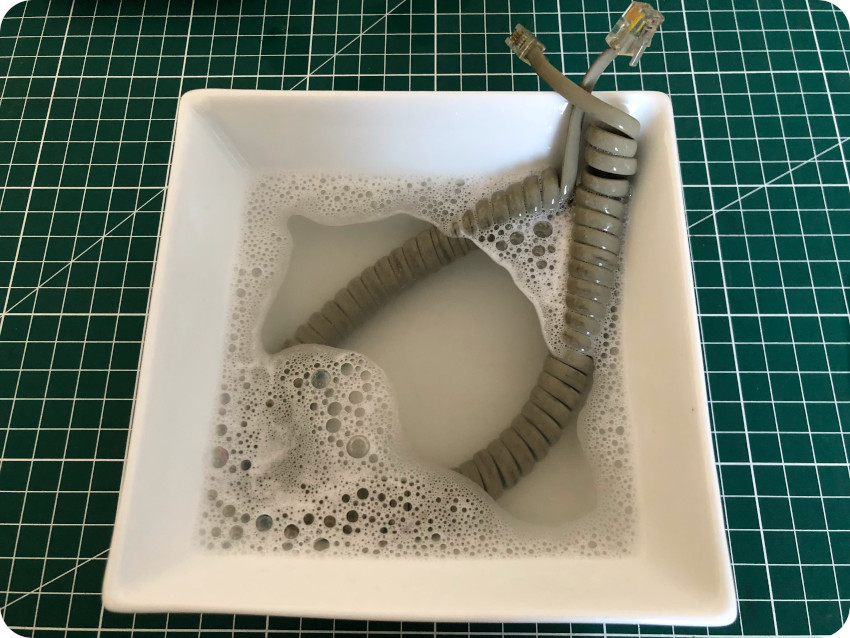
In the meantime, the keyboard cable was taking a much need bath:
And so were the bottom and top parts of the keyboard case:
Cleaning the case
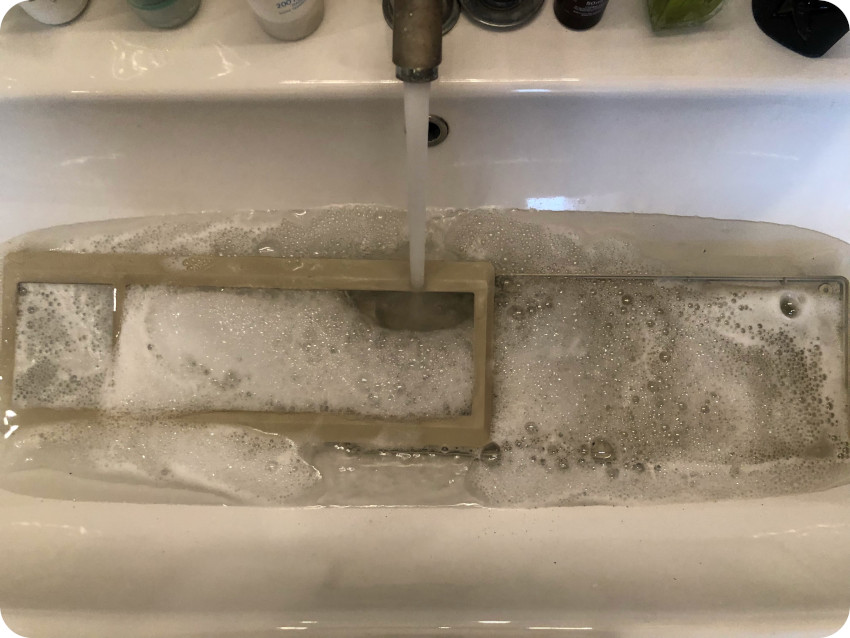
Just like the keyboard, all parts of the case took a bath, followed by a thorough scrubbing with a toothbrush:
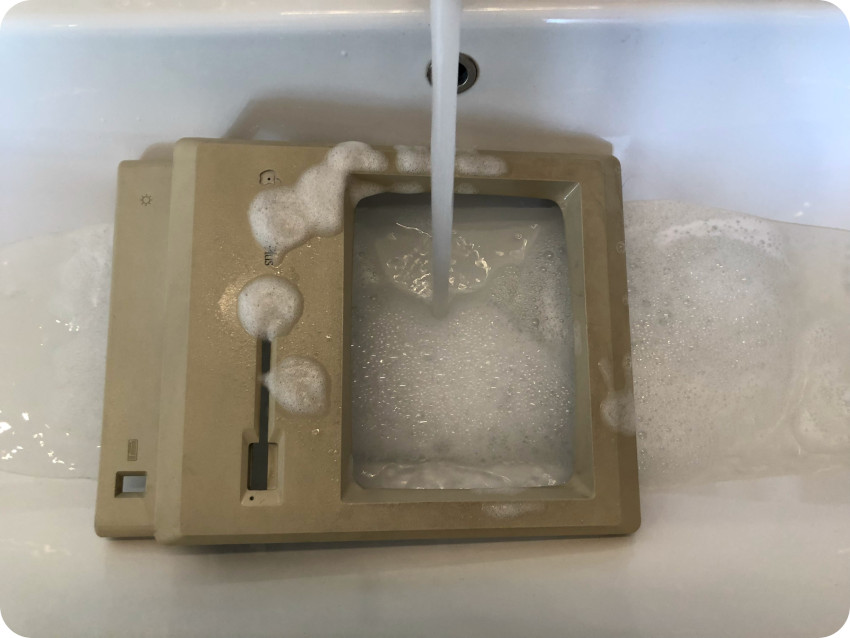
You can judge by the color of the water how filthy it was !
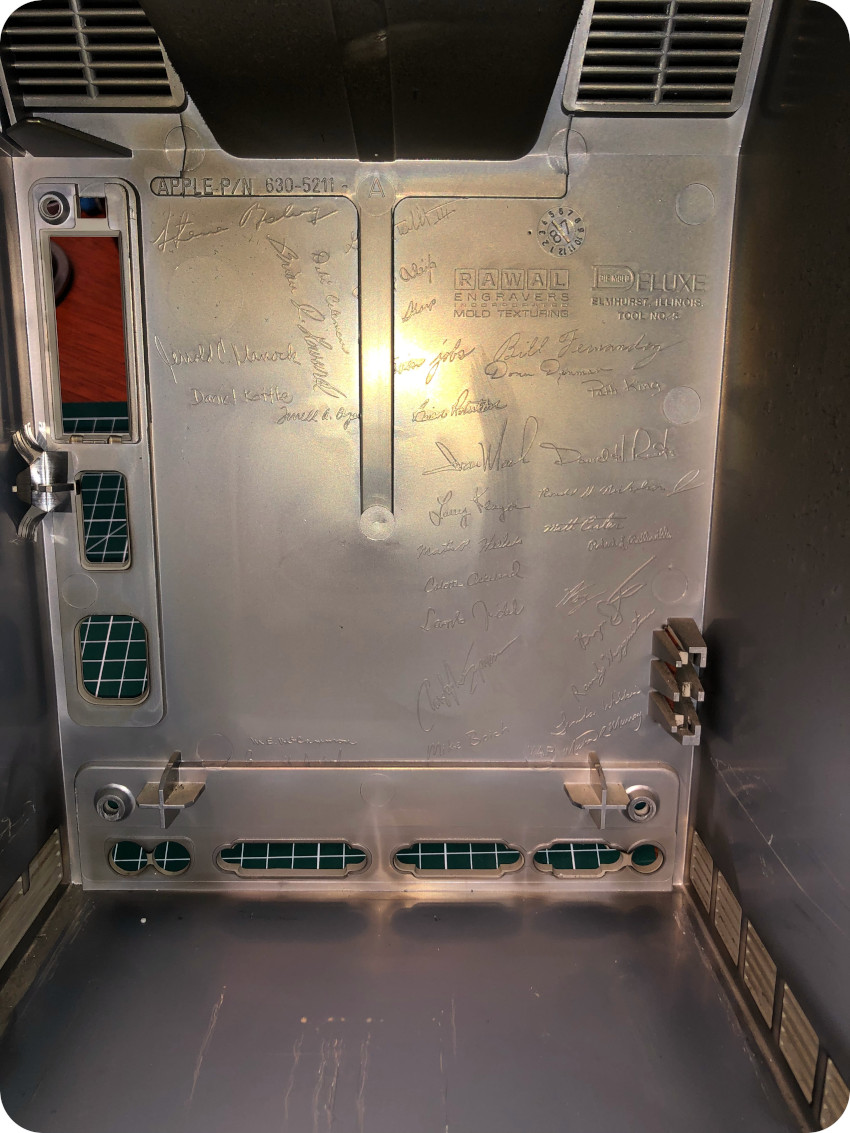
Once cleaned and dried, I could, at last, read the famous signatures engraved inside the back of the case:
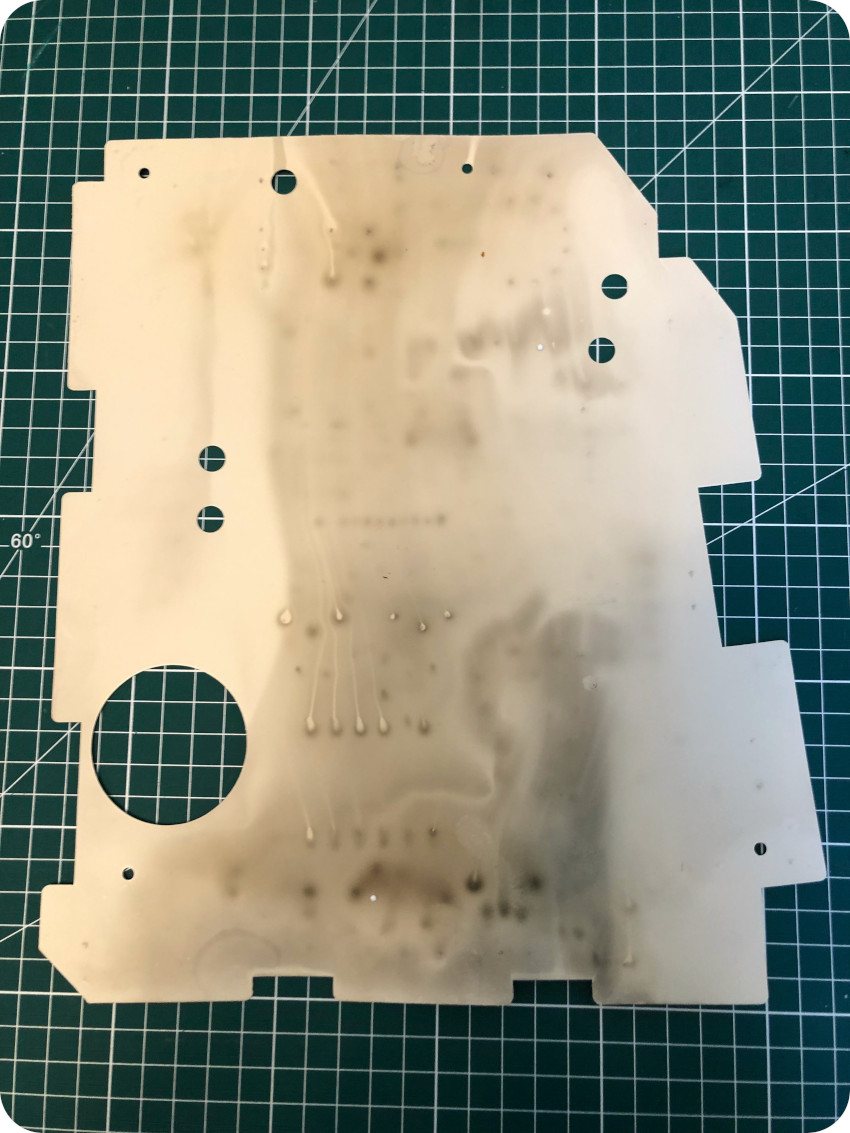
Finally, I took care of the analog board insulator sheet:
Then it was time to clean the motherboard shield:
Cleaning the mouse
The mouse took a soapy bath, and was scrubbed with the help of a toothbrush:
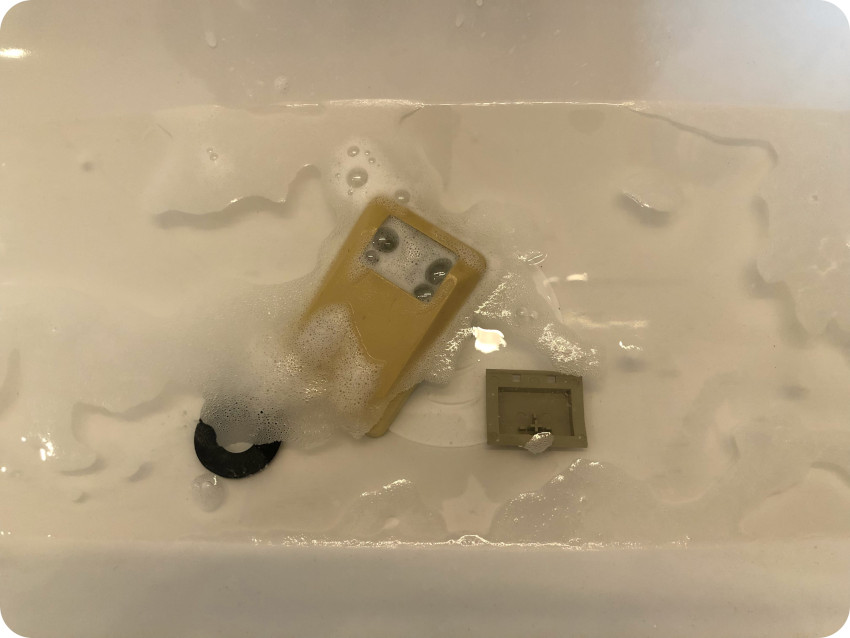
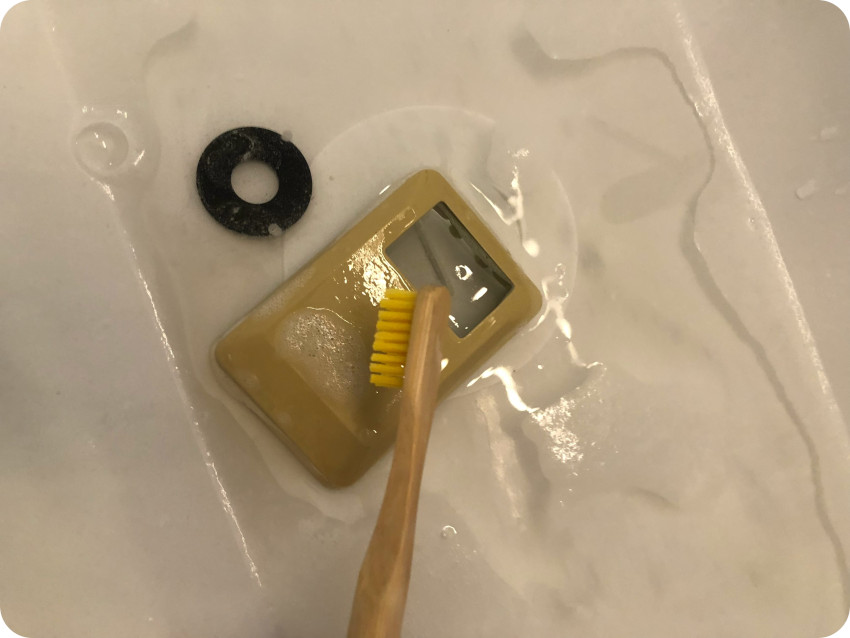
I finished this part cleaning the ball with a soft cloth.
Cleaning the CRT
Cleaning the plastics was an easy job. Cleaning the CRT was something else. Oh boy, it was absolutely disgusting :
I took me quite some times and efforts, using WD40, IPA and window cleaner.

But in the end, I was very, very pleased with the results !
A disk drive in poor shape
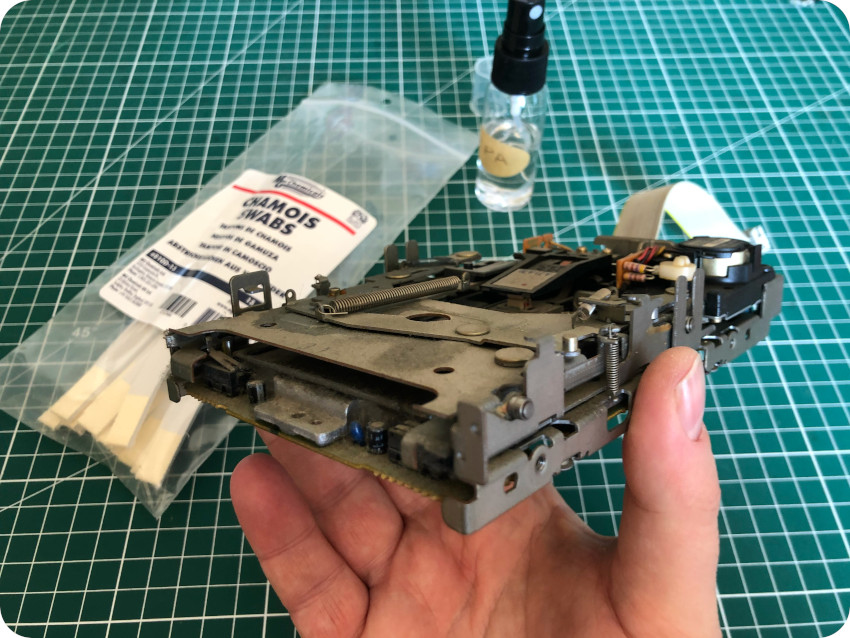
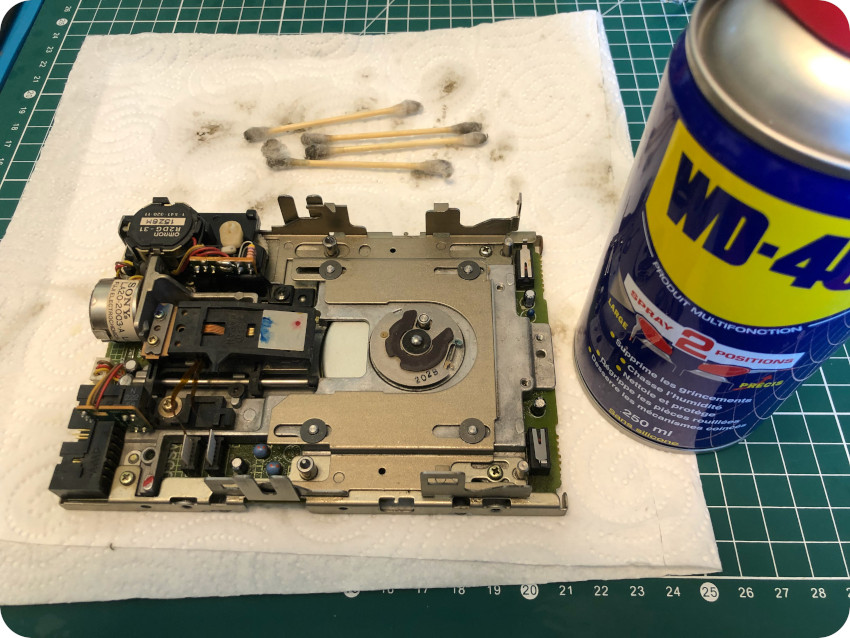
From the first boot attempt, I was expecting some troubles with the floppy disk drive. On first inspection, nothing really alarming at the mechanical level, apart from being dirty:
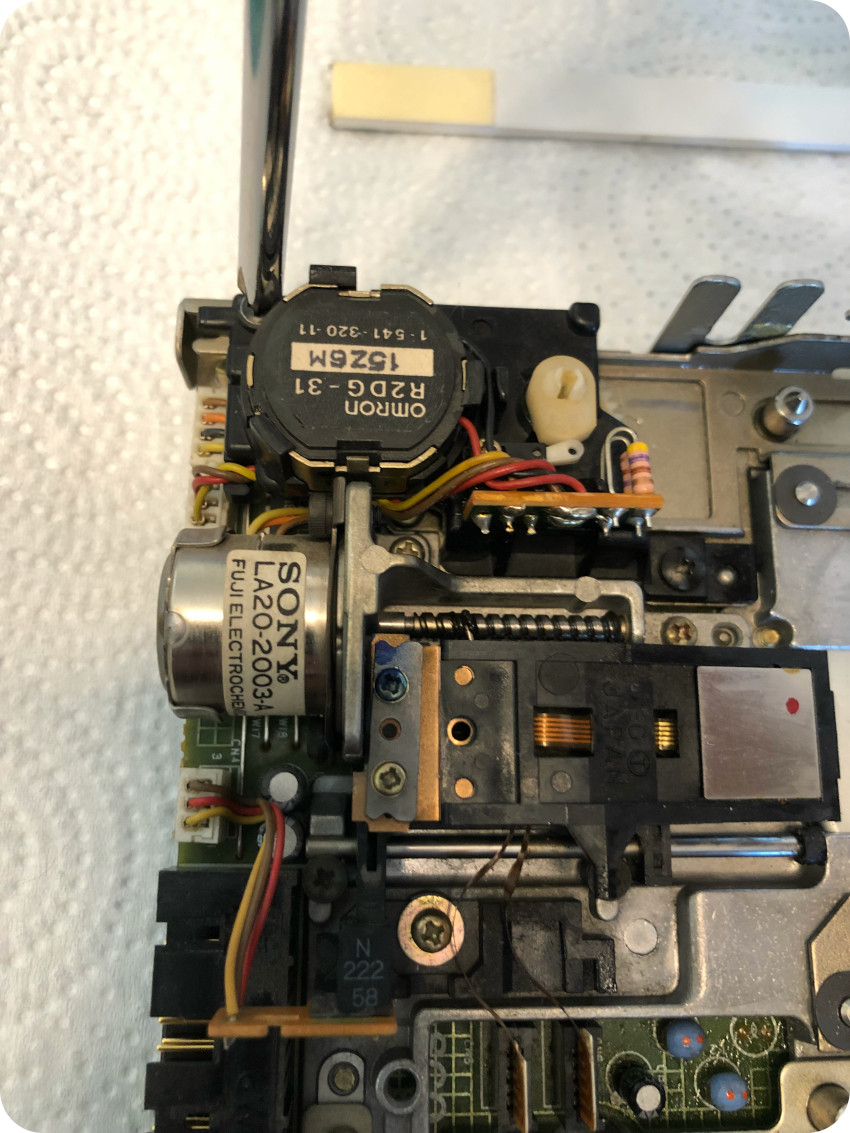
The first thing to do is to carefully unhook both springs on the sides of the floppy disk drive:
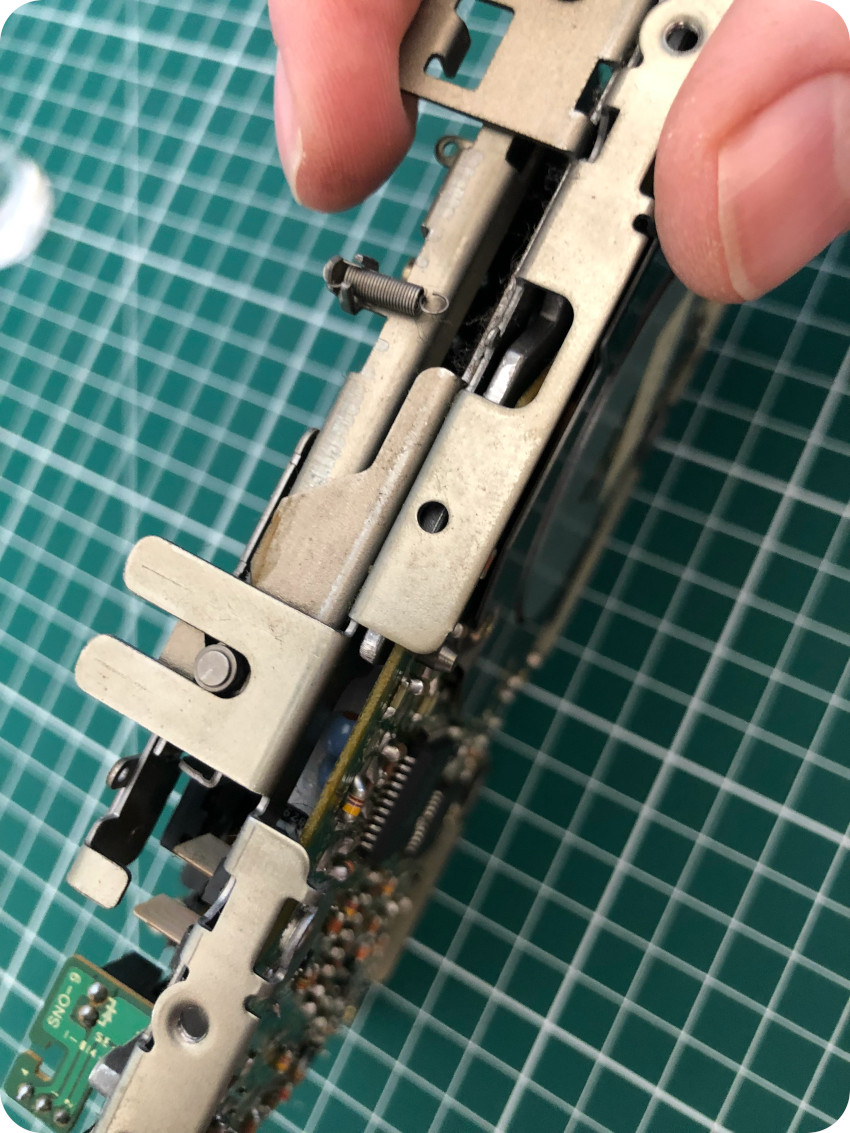
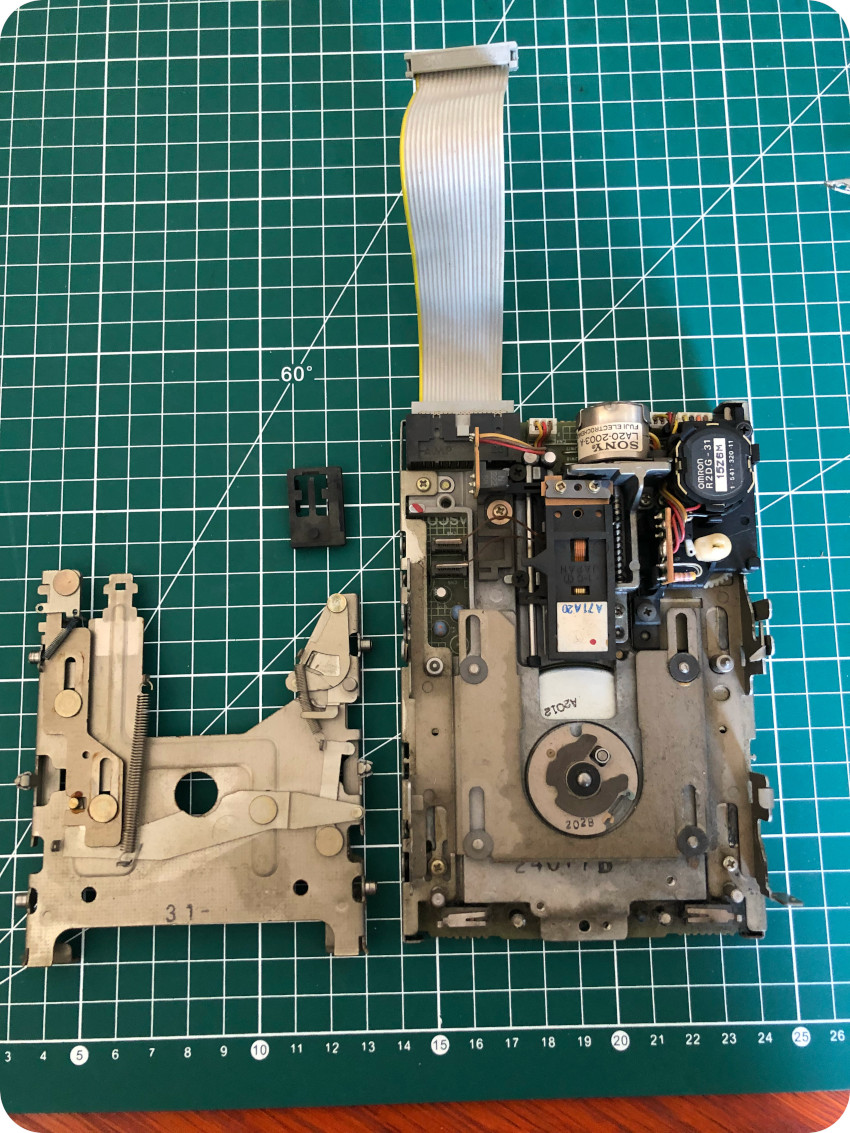
Once done, and once the black piece of plastic holding the head was removed, you can separate the top part, giving access to the inside of the drive:
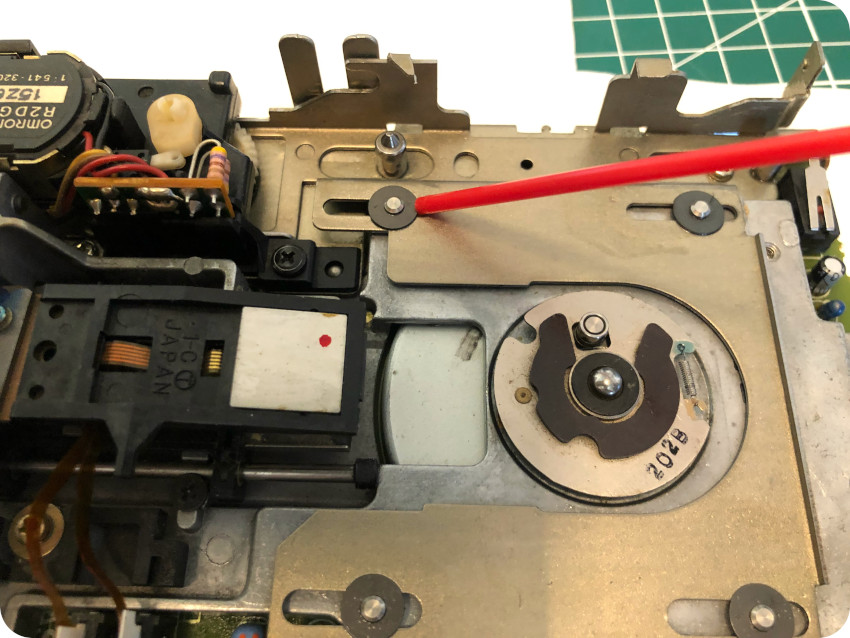
These parts were cleaned with WD-40 and q-tips:
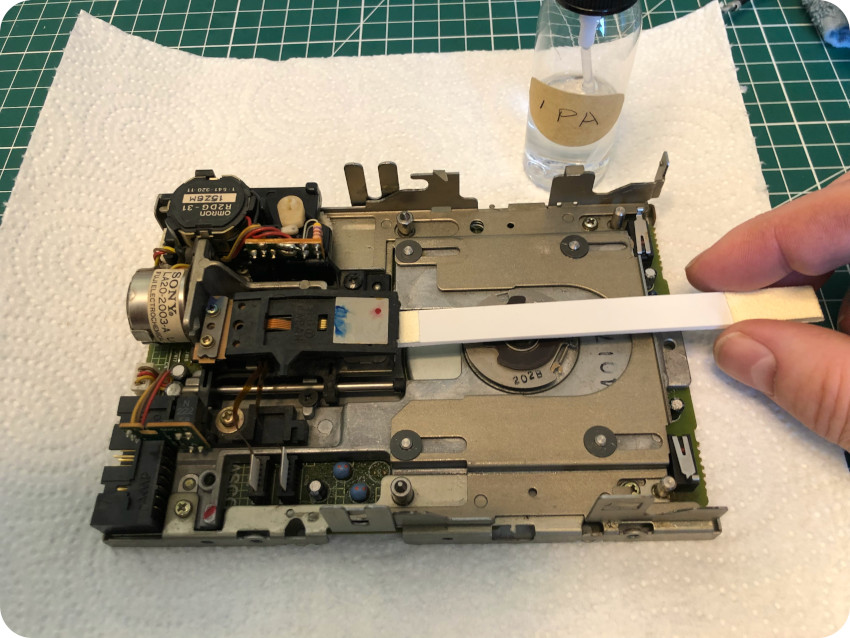
I then cleaned the head with IPA and a chamois swab:
Apple floppy disk drive are very peculiar devices. First, to reach 800Kb (instead of the usual 360Kb per side for usual single density 3″½ disks at the time), Apple used a variable speed rotation trick, so that they could put fewer sectors on the smaller inner tracks and more sectors on the wider outer tracks of the disk. To do that, the disk speeds up when accessing the inner tracks and slows down when accessing the outer ones. That is a neat trick, but I makes it impossible to use regular floppy disk drive to write disks for Macs of this era, since “normal” drives are using a constant speed. That is problematic nowadays to create disks for Mac 128/512/Plus.
Second, the eject mechanism is motorized. There is no eject button per se. Well, mechanically speaking, there is one, but it is not user accessible: you have to use a pin or a paper clip to push it through a tiny little hole on the right side of the disk slot. The eject mechanism is software driven. From the finder, if one drags and drops the Floppy icon to the Trash icon, the disk is ejected via a motorized mechanism. Neat, but … very fragile : remember how the disk drive was making weird noises when the Mac tried to boot up.
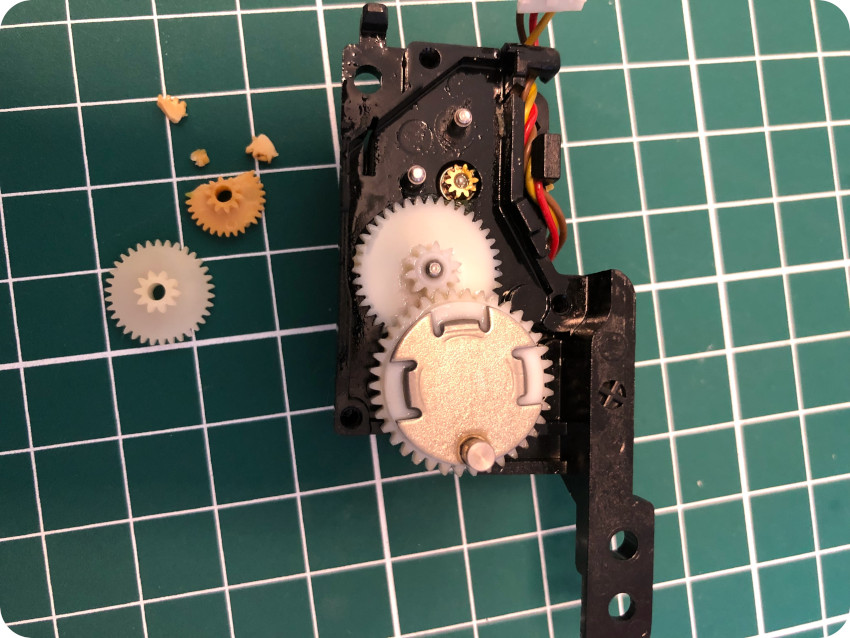
Let’s open up the motor compartment of the eject mechanism:
Inside the motor compartment, there is a series of four gears. As expected from the noise, they were stuck …
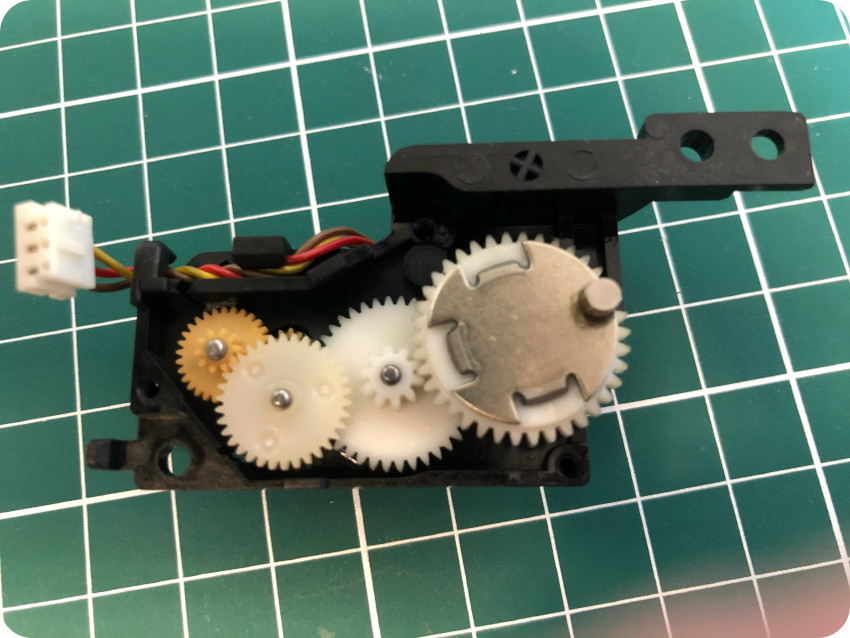
I used WD-40 lithium white grease, and carefully removed each gear:
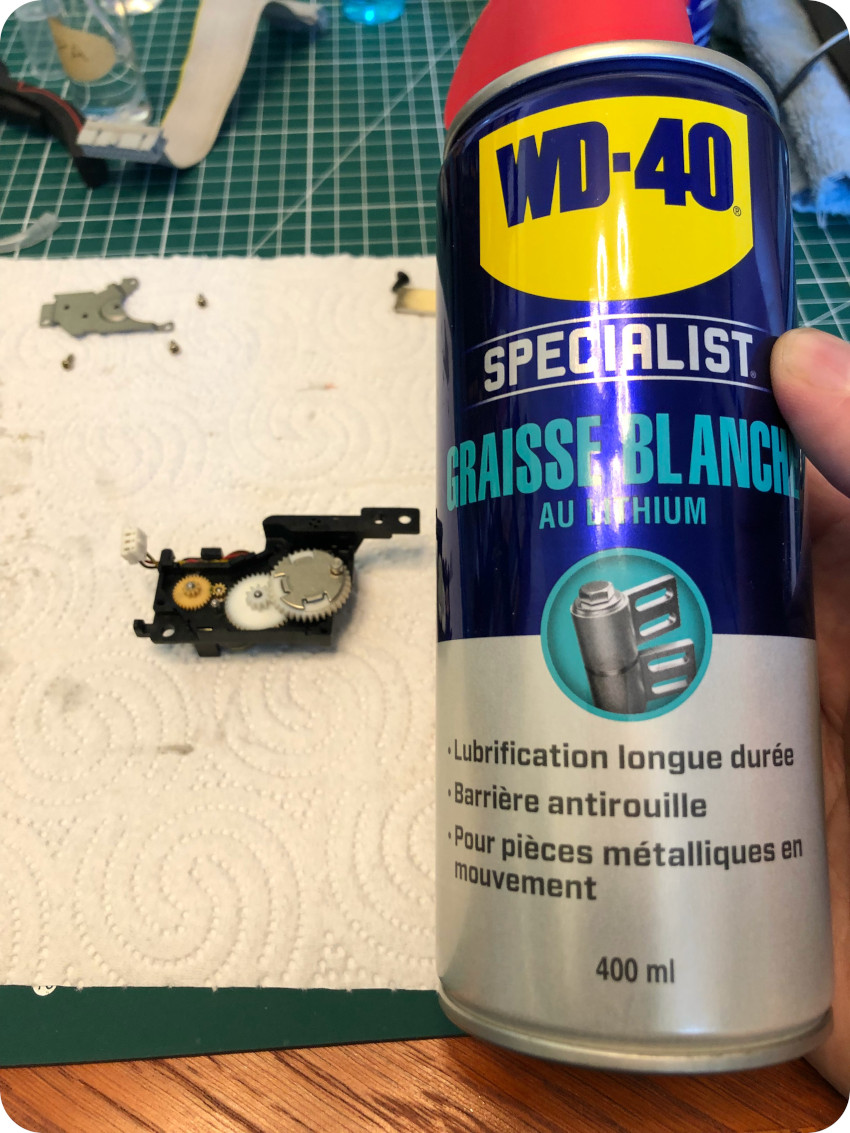
Unfortunately, the last one immediately broke into pieces. It is a well known phenomenon. This piece is not made of the same material as the other ones. It is actually designed to easily break, in order to protect the motor in case of problems. But, as times goes, this little gear can get stuck (lack of grease, etc.) and … literally explodes as soon a you try to remove it.
Arm is done. I will have to change it (you can find 3D-printed replacements online).
I moved on and applied lithium white grease wherever was needed:
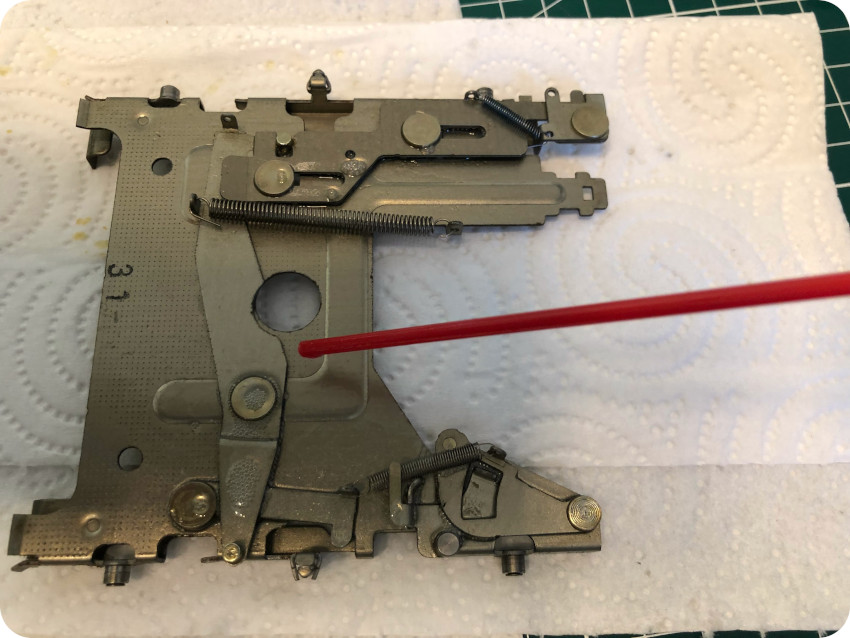
Then, I put back all parts of the floppy disk drive, and manually tested the eject mechanism. It was much better:
The floppy disk drive is now cleaned and oiled. But the motorized eject mechanism not functional for now. And the whole drive might be faulty (remember the abnormal blinking cross during the boot process).
The analog board
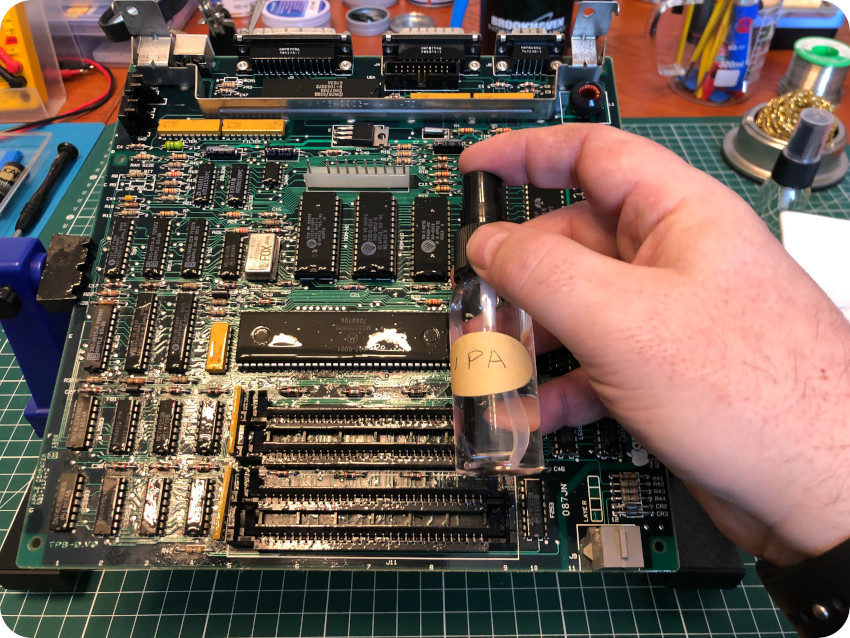
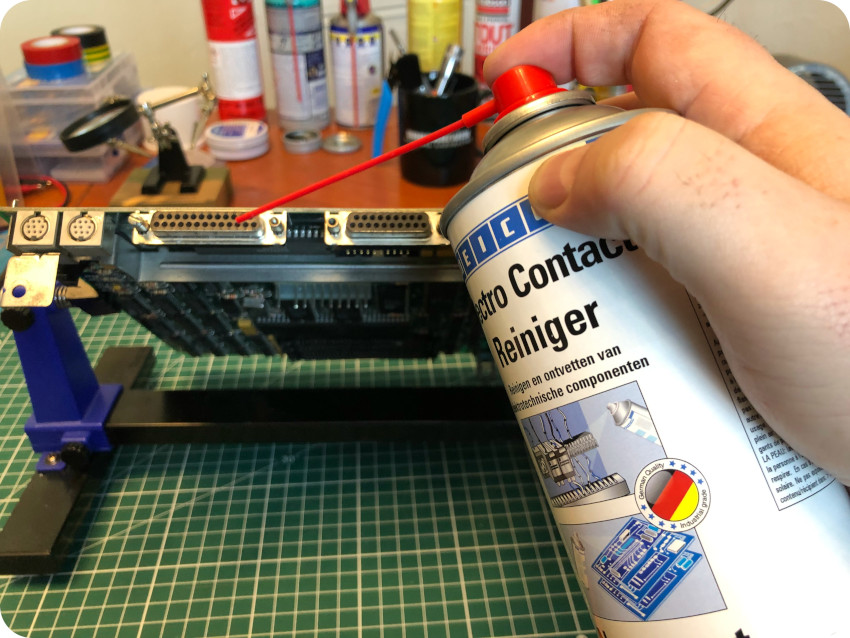
Let’s move on to the analog board. The first thing was to thoroughly clean it, using IPA, WD-40 (for the anode cap) and contact cleaner:
It looked so much better !
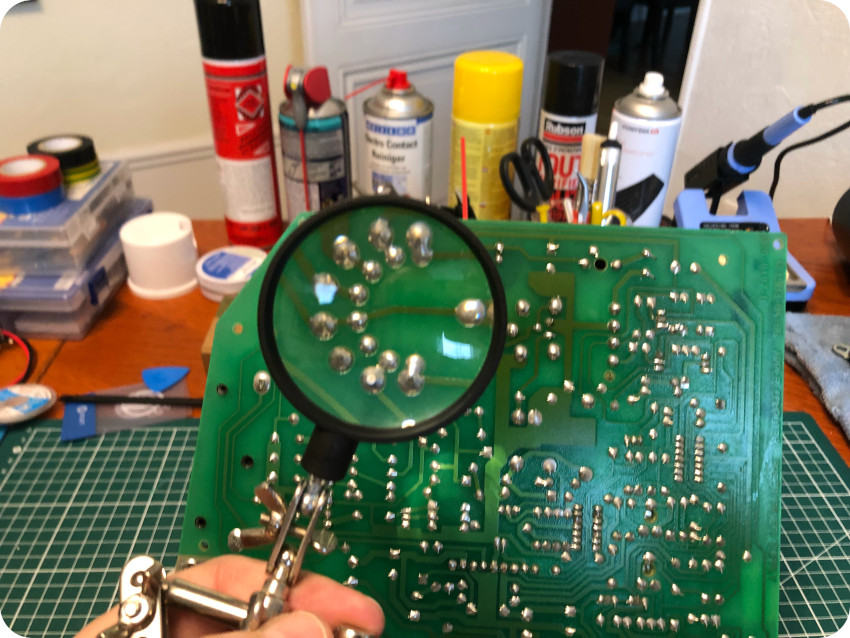
Let’s have a closer look. I inspected solder joints, especially the ones from heavy components, like the flyback transformer. Everything looked nice. Good !
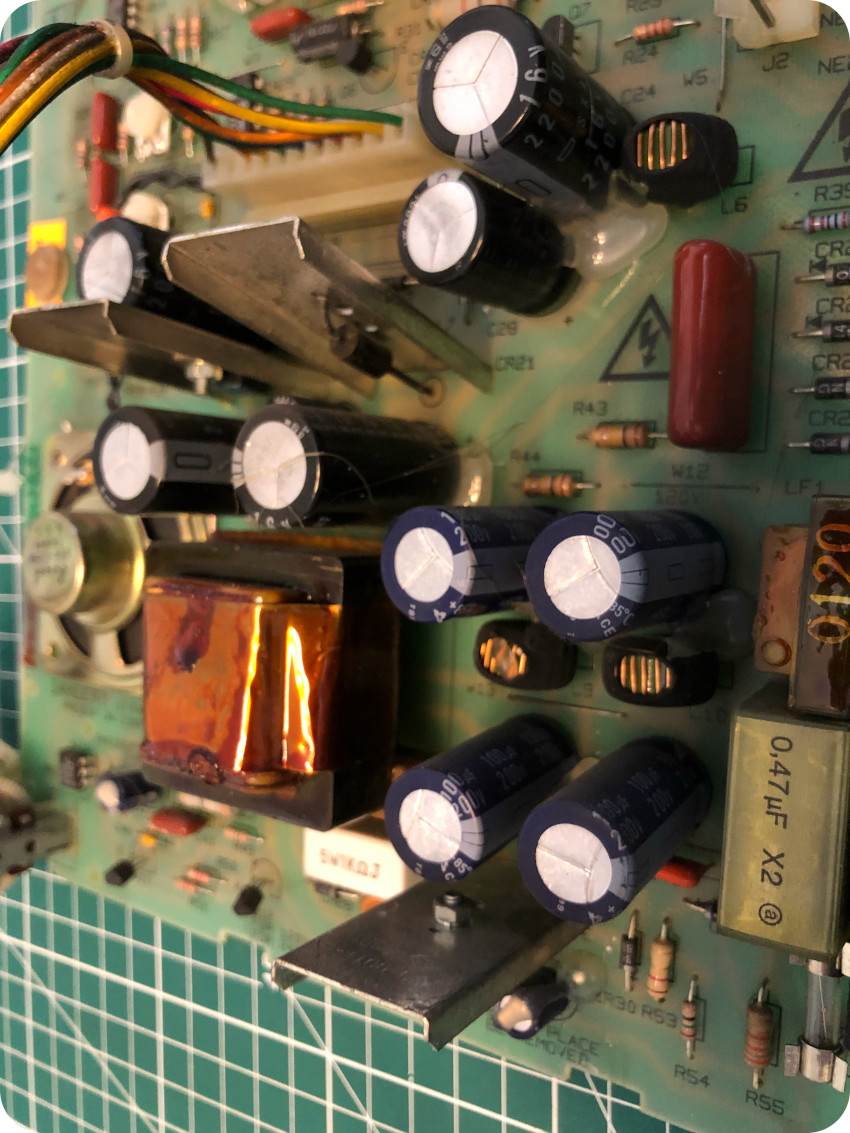
I inspected the electrolytic caps, looking for leaks or budges. Nothing wrong, even the RIFA caps were looking good (though I will most probably change them).
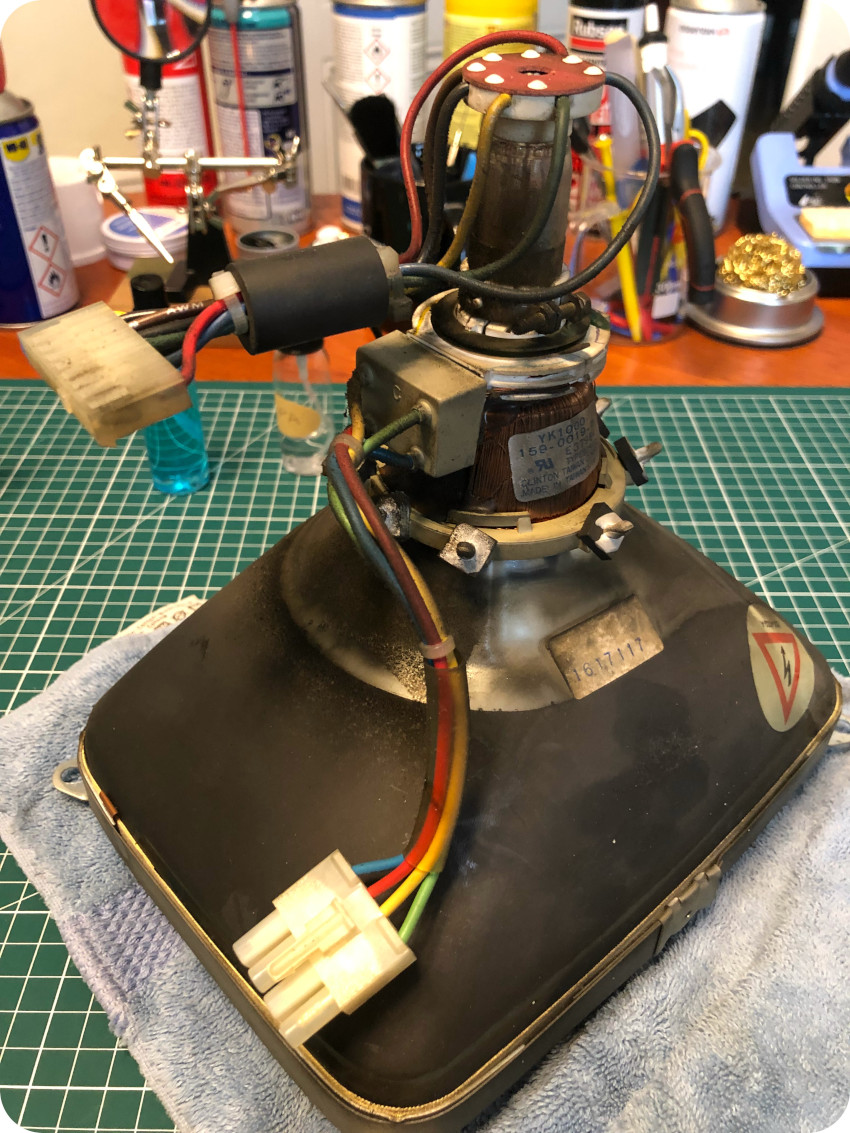
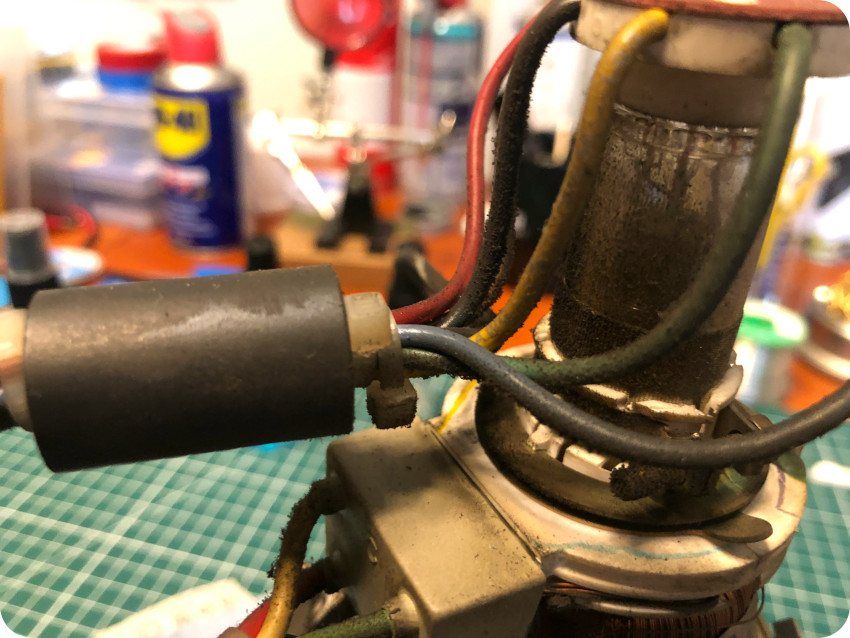
Let’s have a look at the flyback transformer. I was concerned with it because I heard static noises when I first powered up the Mac.
Around the “neck” of the flyback, there should have been be some kind of yellow protecting coating like this one:
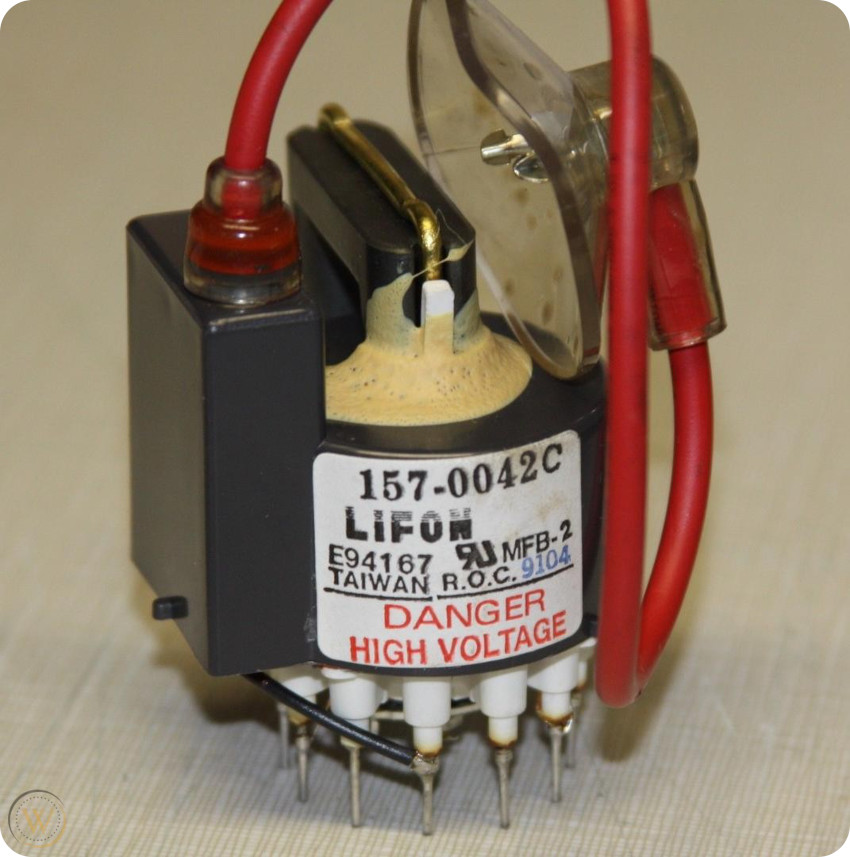
This coating protects from corona discharges. With time, the “yellow goo” tends to dry and turns brown. It was the case for my Mac. Actually it disintegrated into pieces as soon as I touched it:
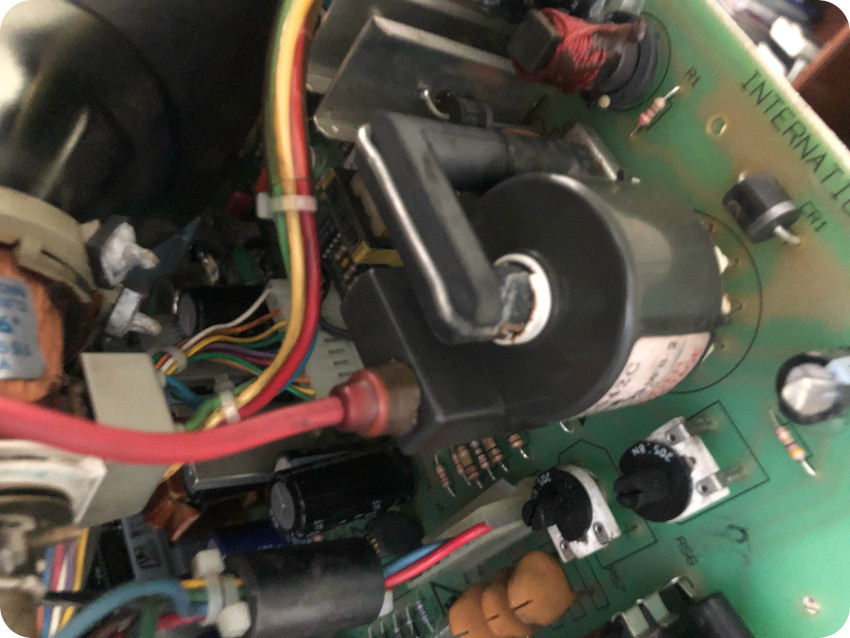
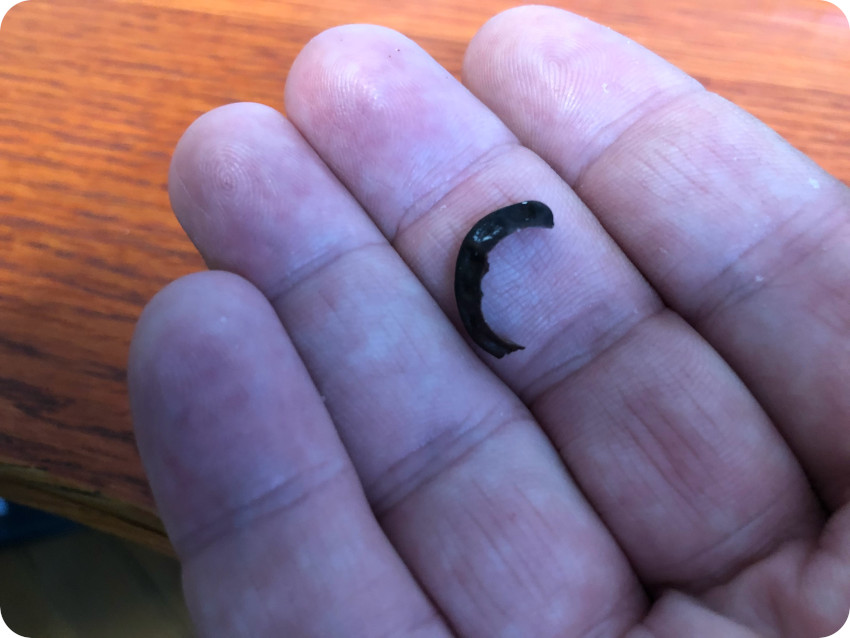
If this transformer actually discharges, it is dangerous and it will fail. Repairing a flyback transformer is not an easy task, so I may have to replace it (and it is not something that can be easily found). This is a new concern…
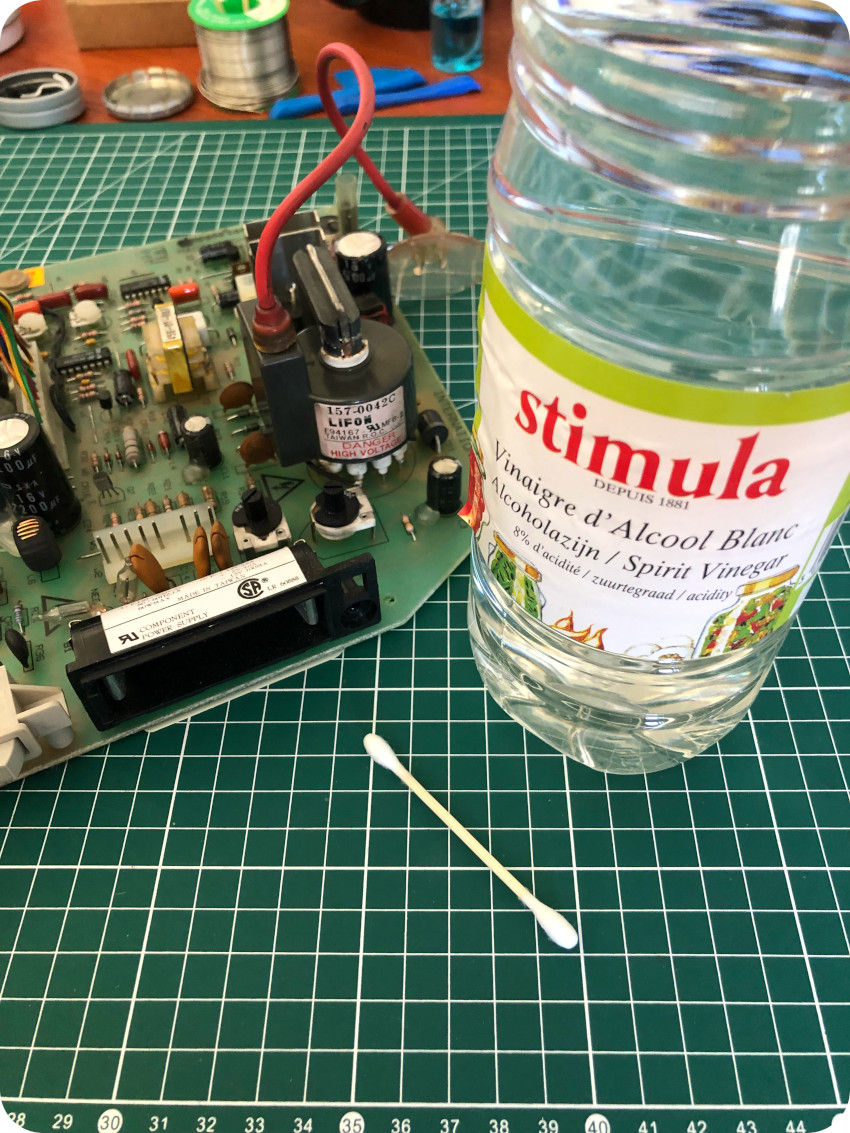
The last thing I did during this phase was to clean the battery compartment. There was a tiny bit of corrosion (the PRAM battery wasn’t removed). It was an easy task, using white vinegar:

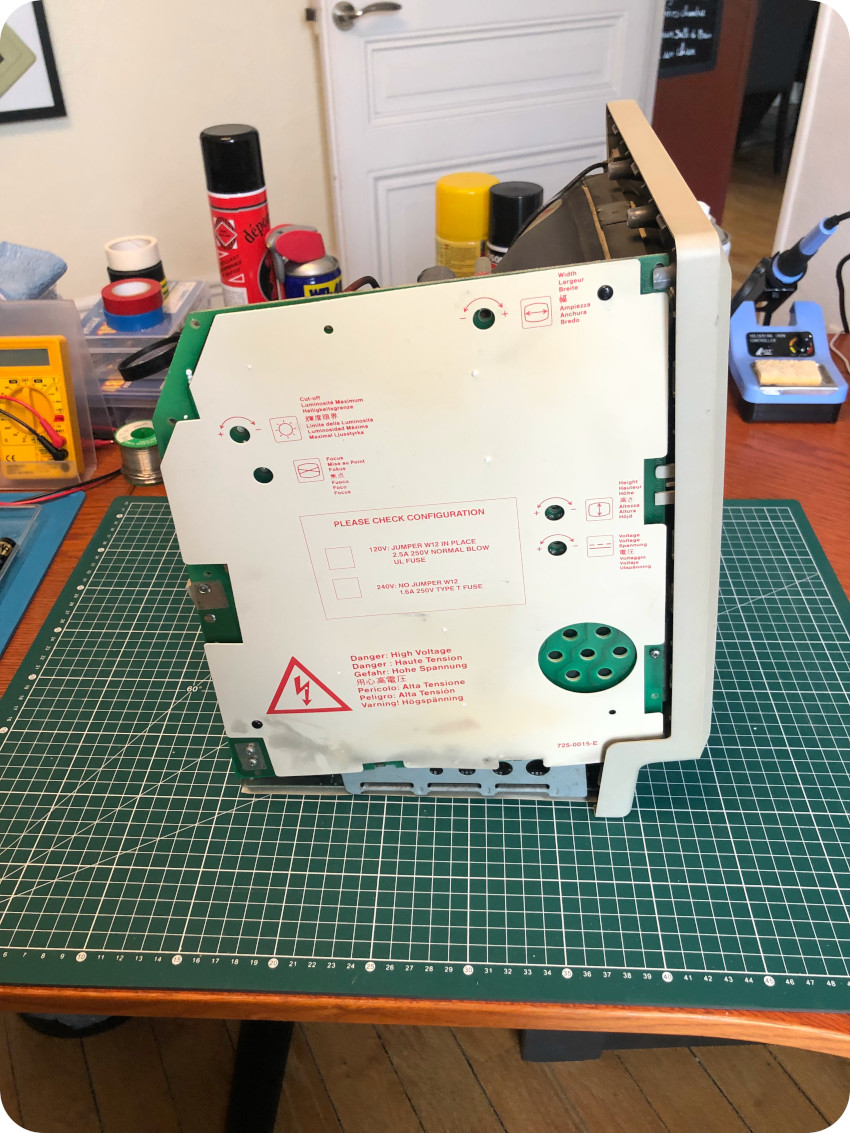
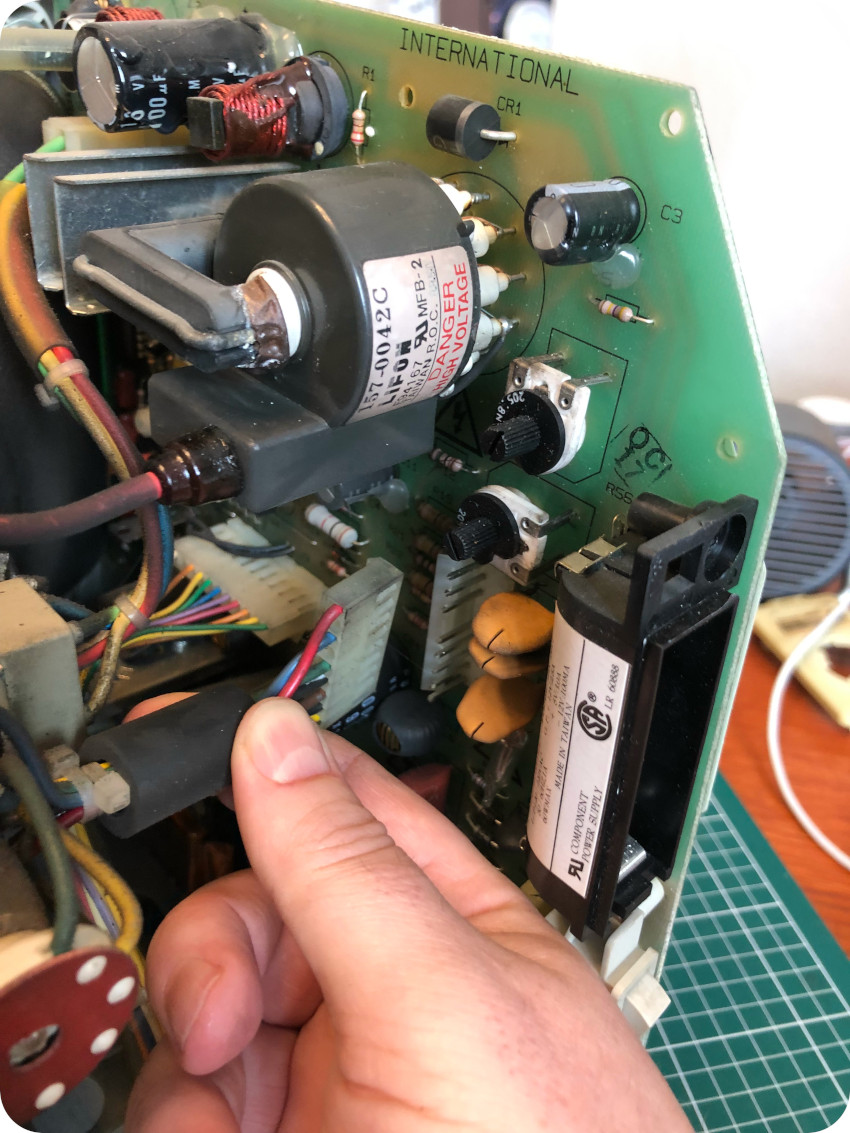
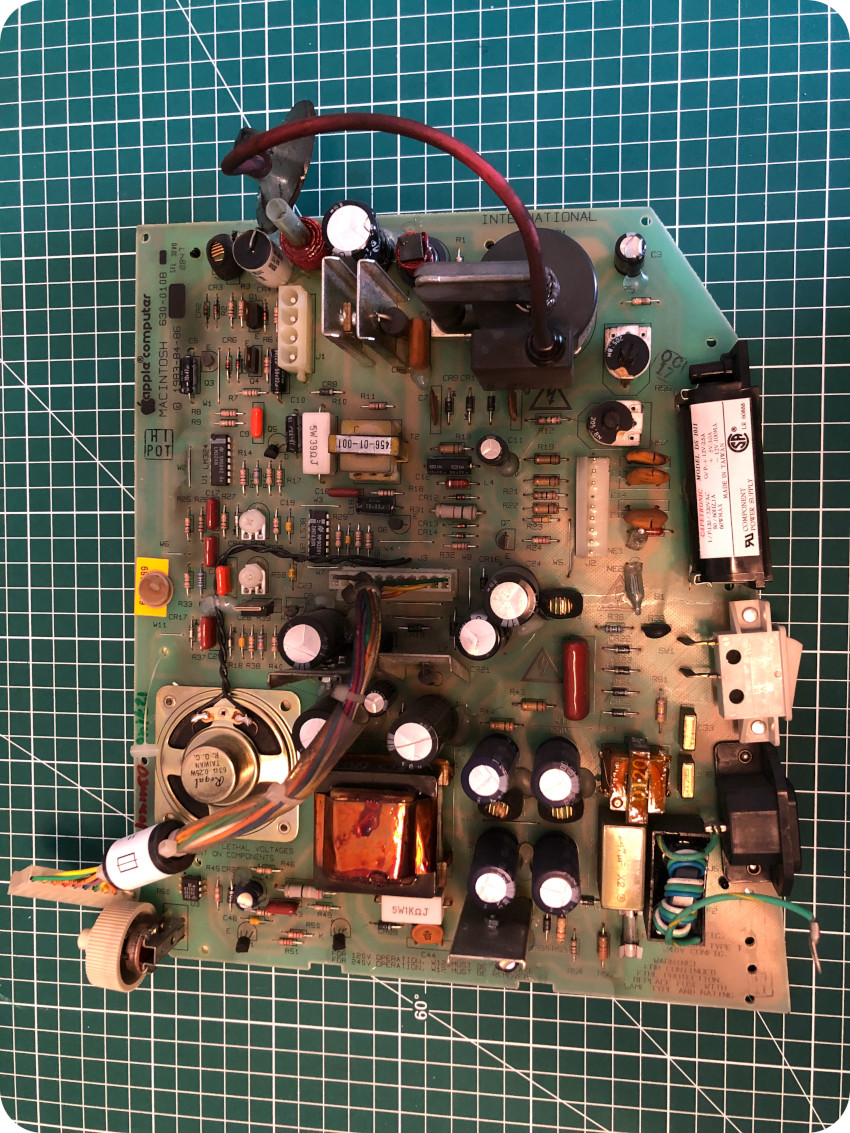
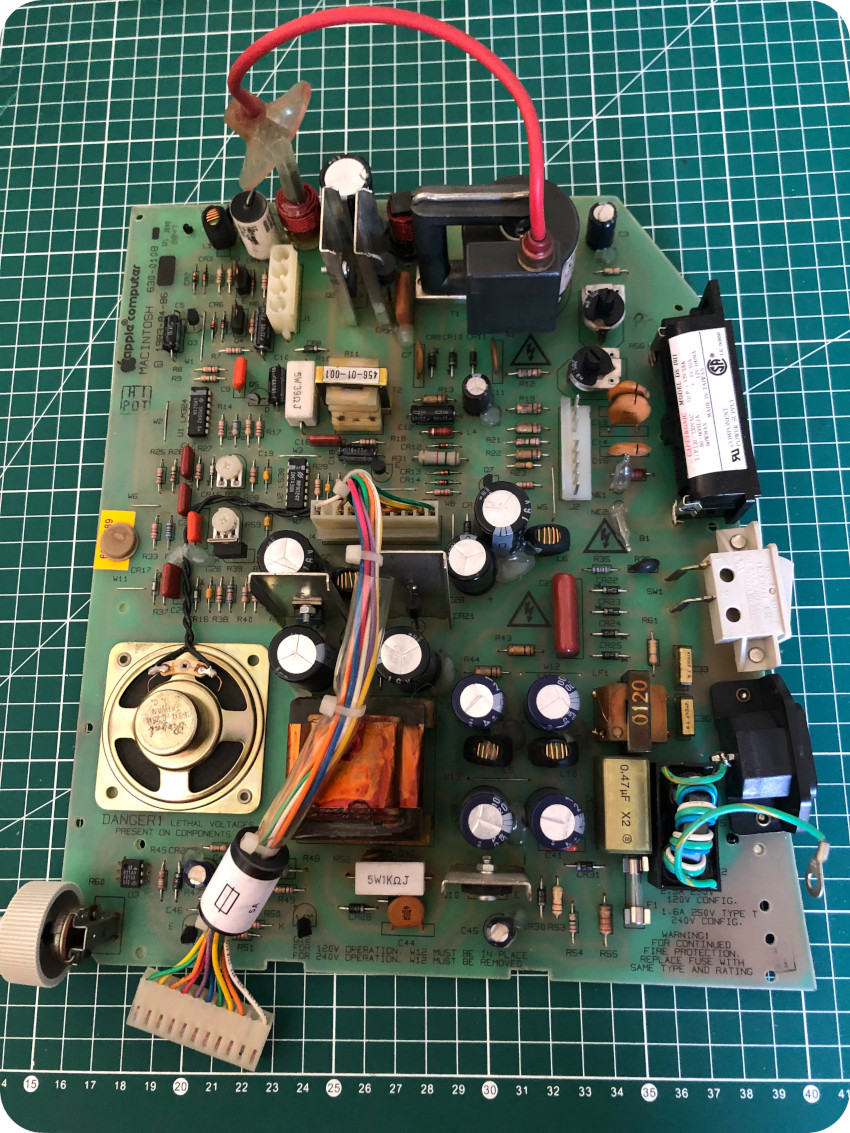
Let’s now have a more detailed look at the analog board. As the name says, this circuit board contains the majority on analog circuitry. This is the international revision, labelled 630-010B and set for 240V operations:
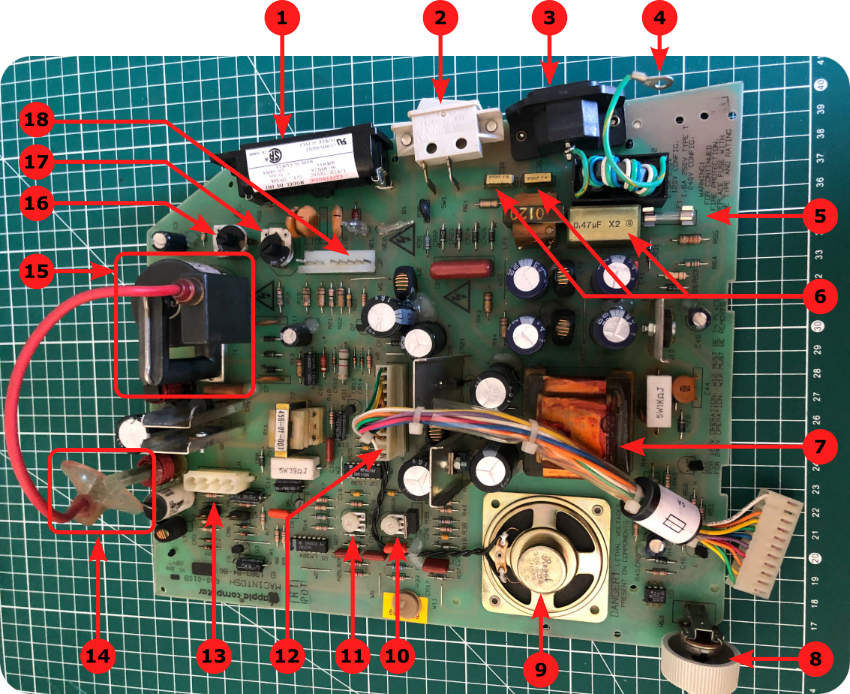
Let’s detail the essential parts of the analog board:
- PRAM Battery compartment: the Macintosh Plus uses 4.5V PX21 batteries to keep settings such as time and date. This battery is not needed to boot the Mac Plus.
- Power switch: on/off power switch.
- Power: socket for AC Power plug.
- Ground: connected to the metal chassis.
- Fuse: 1.6 A fuse (a 2.4 A fuse is used for 120V operations)
- RIFA capacitors (X and Y): RIFA (Radioindustrins Fabrik Aktiebolag) was a Swedish electronics manufacturer of resistors and capacitors. RIFA capacitors are found on many units from the late 80s and early 90s. Class-X and Class-Y capacitors are safety-certified and generally designed and used in AC line filtering in many electronic device applications. RIFA capacitors, unfortunately are known to crack from thermal stress and aging, resulting in bad magic smoke and other havoc.
- Power Transformer
- Brightness knob: Controls the screen brightness.
- Speaker: internal speaker.
- Height knob: Controls the screen height. Accessible from the back of the board, through the plastic protective sheet.
- Voltage knob: Controls the screen voltage. Accessible from the back of the board, through the plastic protective sheet.
- Logic board connector: harness, connecting the analog board to the logic board.
- CRT connector: connected to the CRT yoke coil, controlling the beam deflection.
- Anode cap: anode suction cap, plugged into the CRT with two prongs.
Note: not visible on this picture, under the anode cap, lies the screen width knob (accessible from the back of the board, through the plastic protective sheet). - Flyback transformer: a FlyBack Transformer (FBT), also called a Line OutPut Transformer (LOPT), is a special type of electrical transformer. It generates high voltage (over 10kV) for the CRT.
- Luminosity cut-off knob: Controls the screen luminosity cut-off. Accessible from the back of the board, through the plastic protective sheet.
- Focus knob: Controls the screen focus. Accessible from the back of the board, through the plastic protective sheet.
- CRT Socket cable: connects the analog board to the CRT tube.
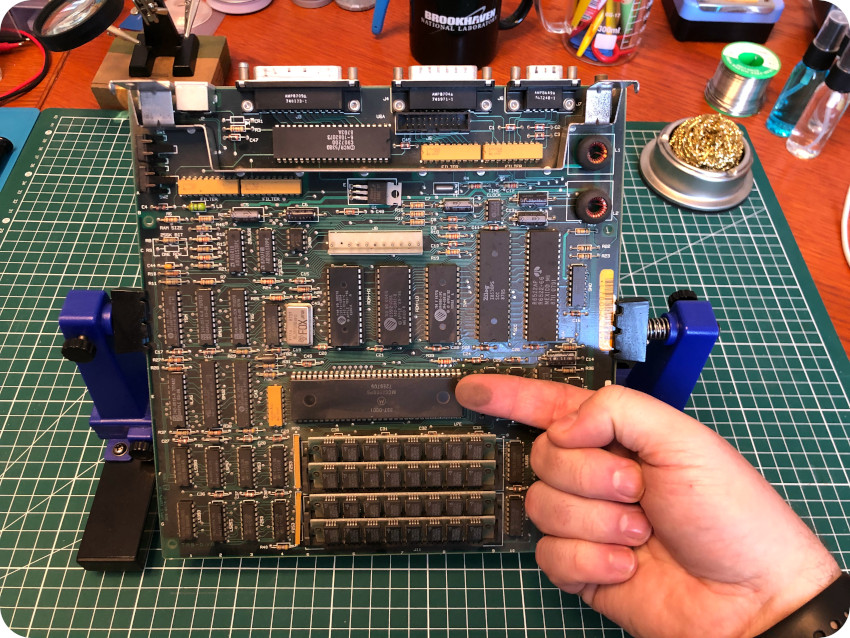
The logic board
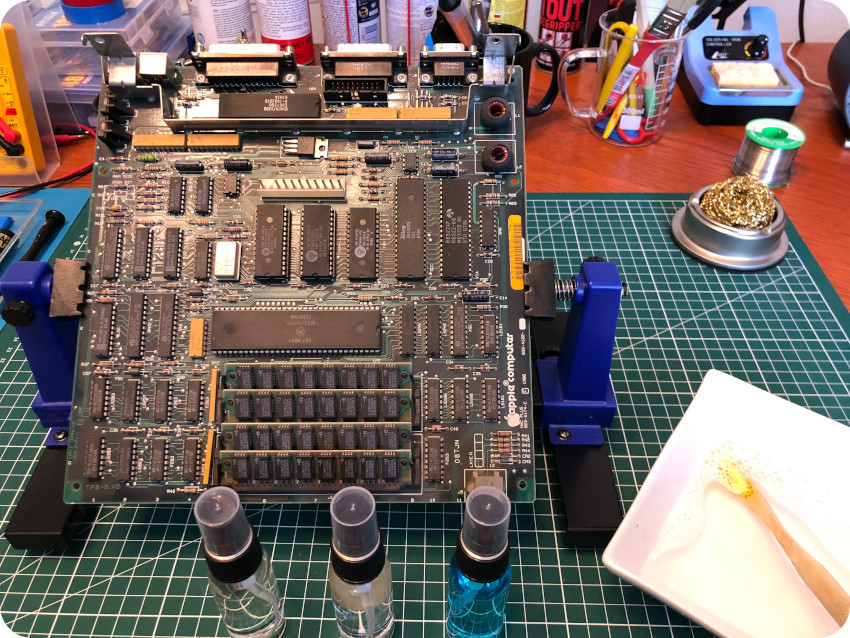
Let’s have a look at the logic board. The first obvious observation is that it is filthy:
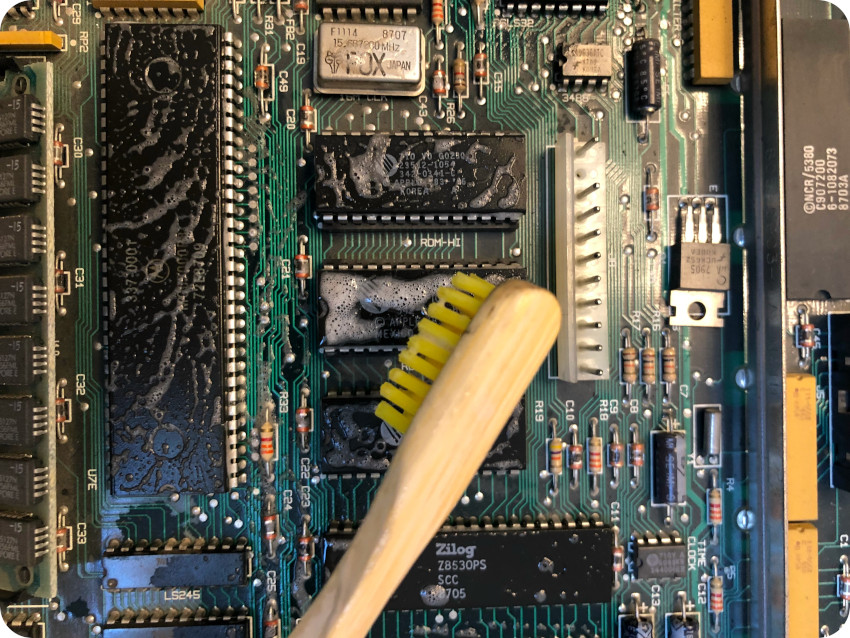
Let’s clean the logical board, with soapy water and a toothbrush and cotton swabs:
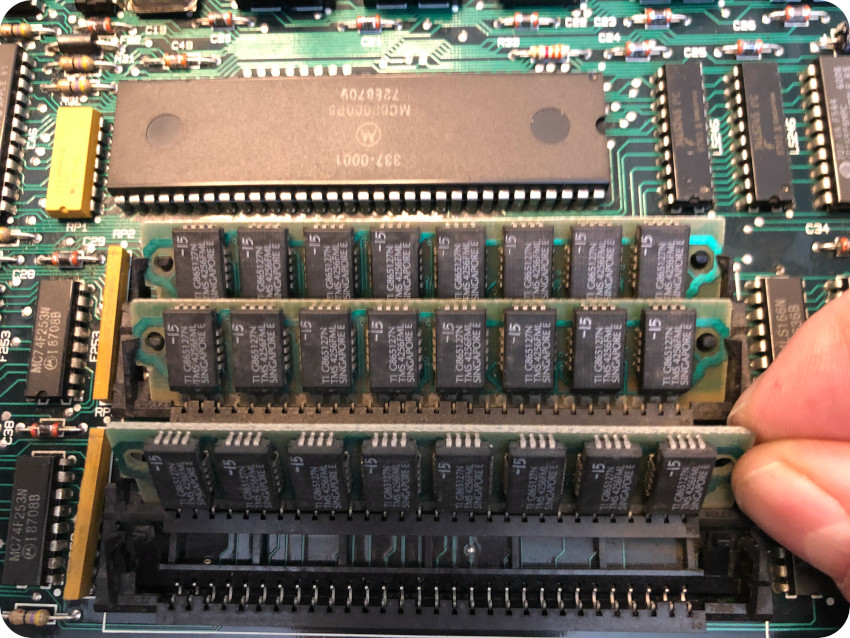
During this cleaning process, I carefully removed the four 256Kb DRAM SIMM‘s from their sockets. Be careful, these connectors tend to be very brittle as time goes.
Once removed, I found what was probably part of the flyback coating (from the analog board), stuck between RAM connectors:
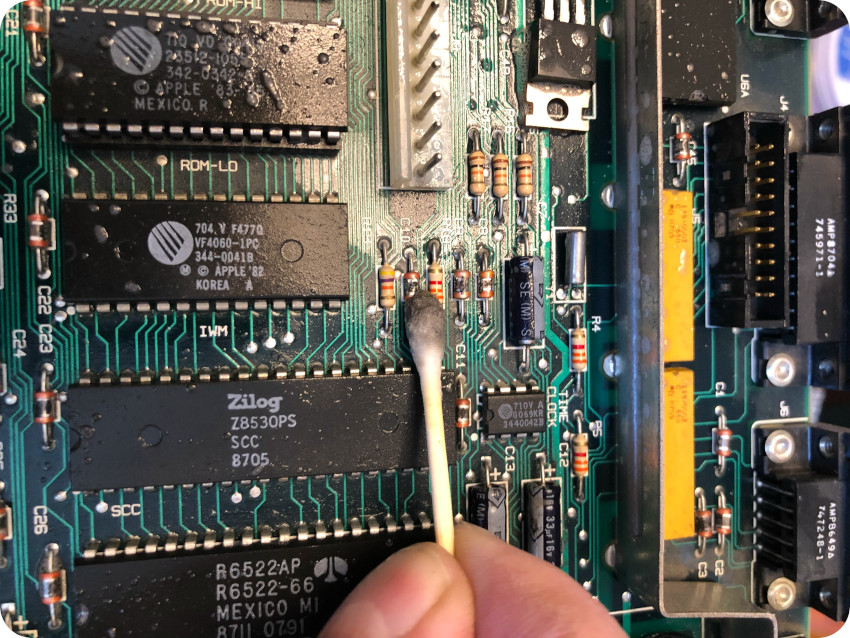
I cleaned the board with IPA and cotton swabs:
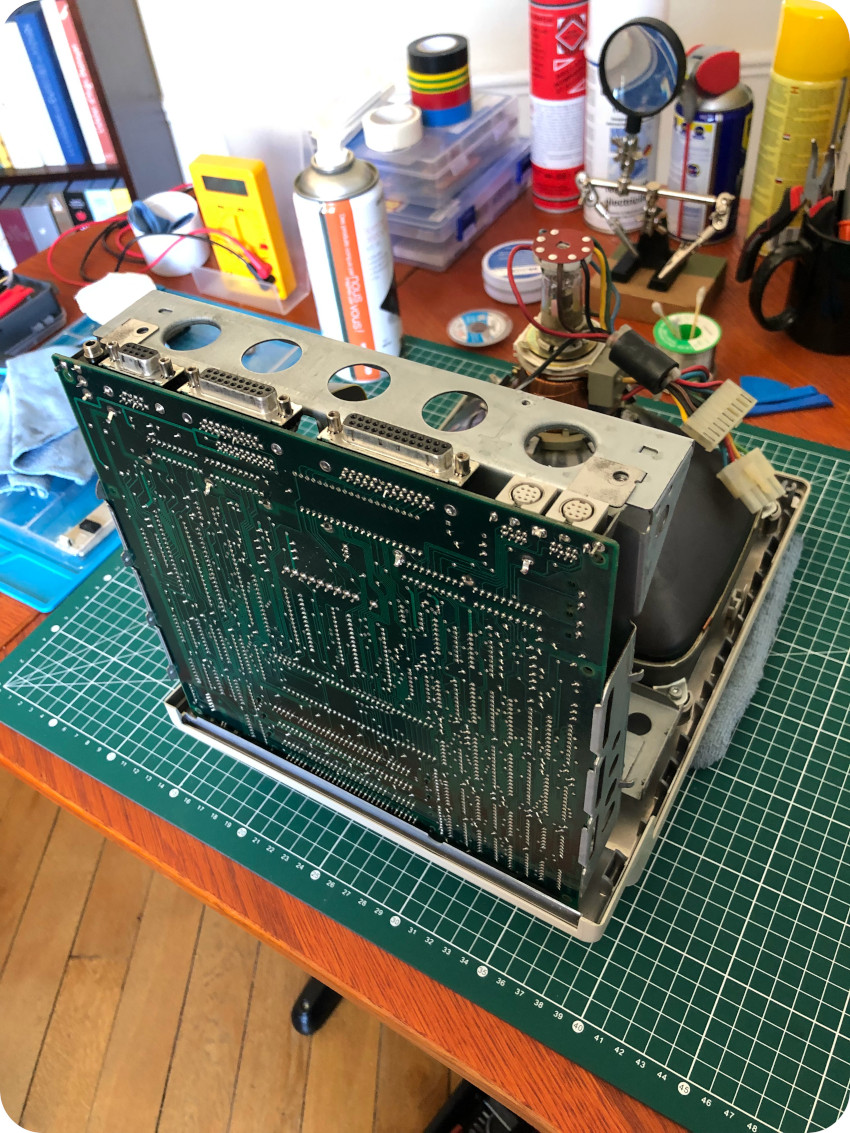
I did the same with the back of the PCB, and took time to inspect it for bad solder joints. Everything was fine. Good.
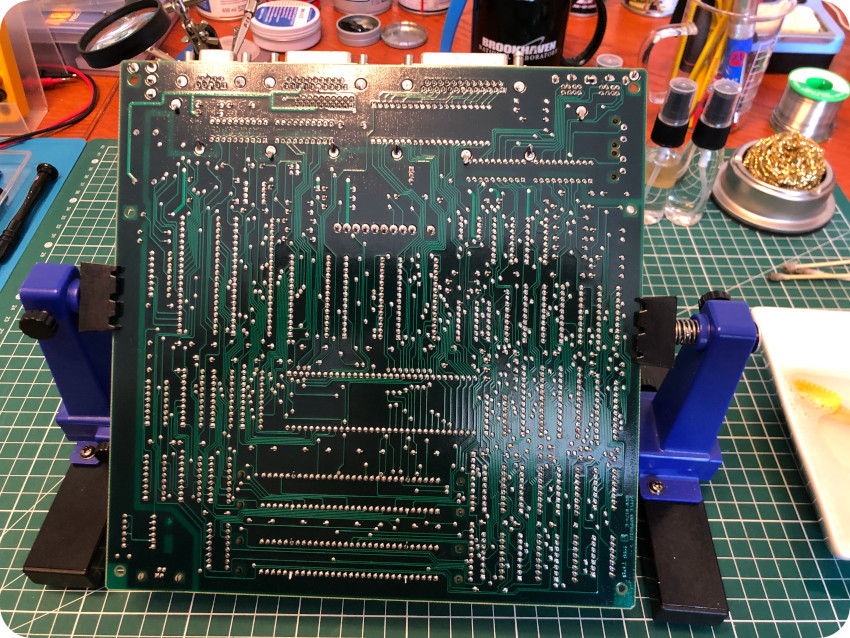
I finished the cleaning process with contact cleaner:
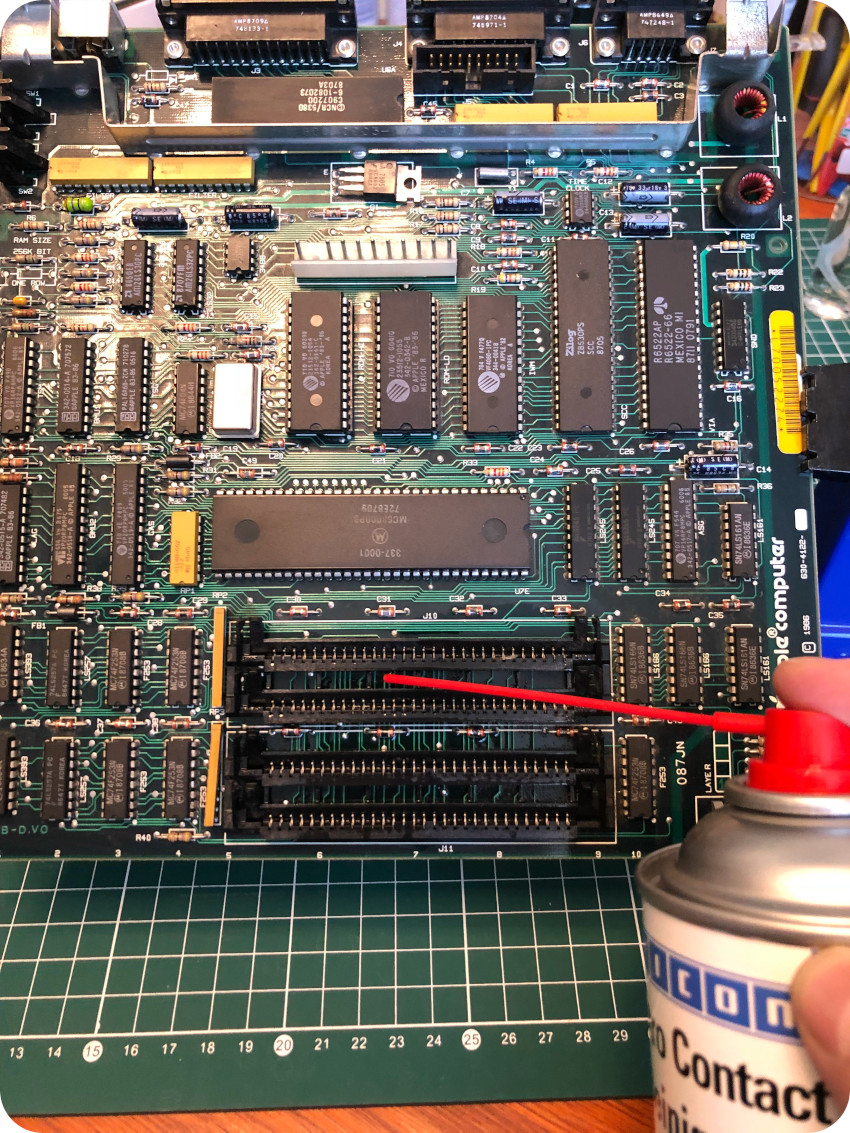
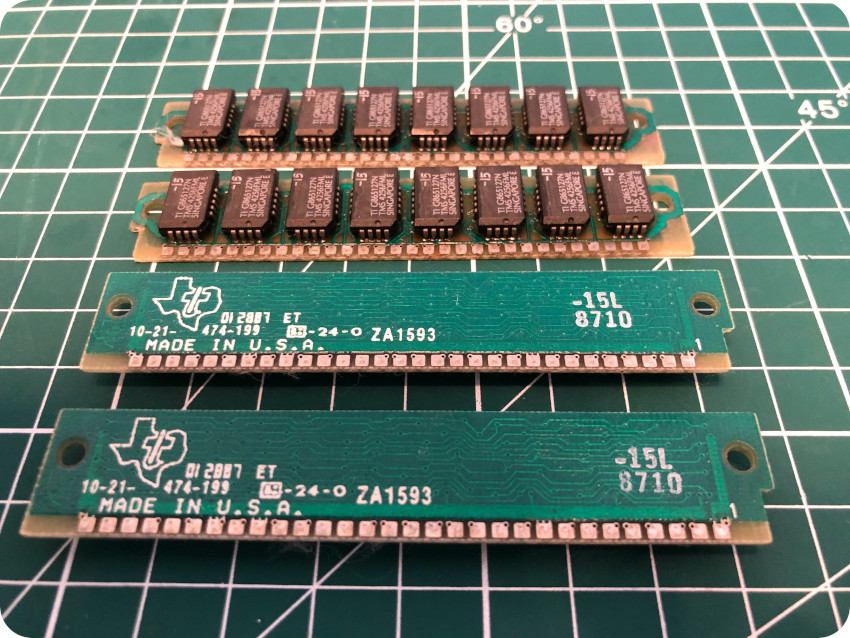
I took time to clean the DRAM SIMMs and used dioxide on the contacts:
Once cleaned, the SIMMs were put back into a nice and fresh smelling logic board:
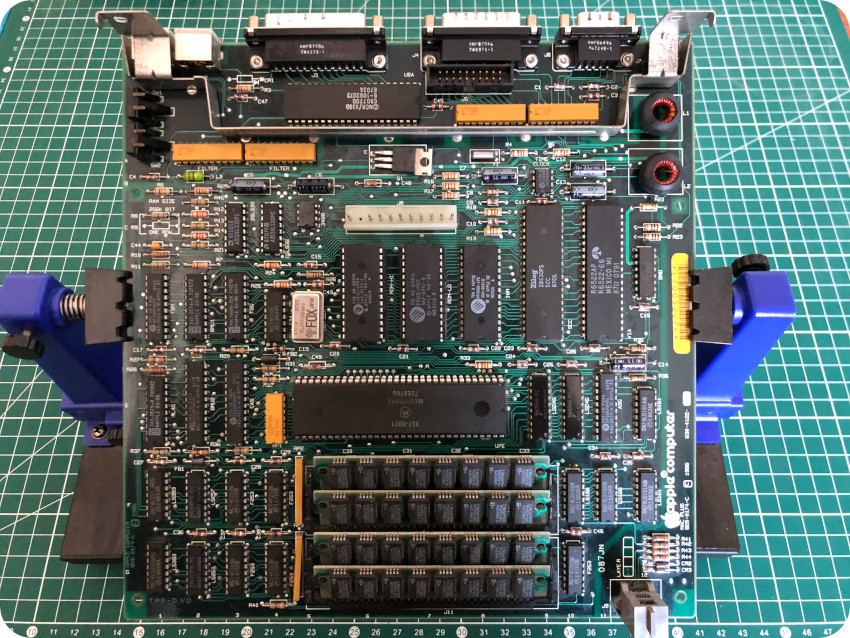
Let’s detail the essential parts of the logic board:
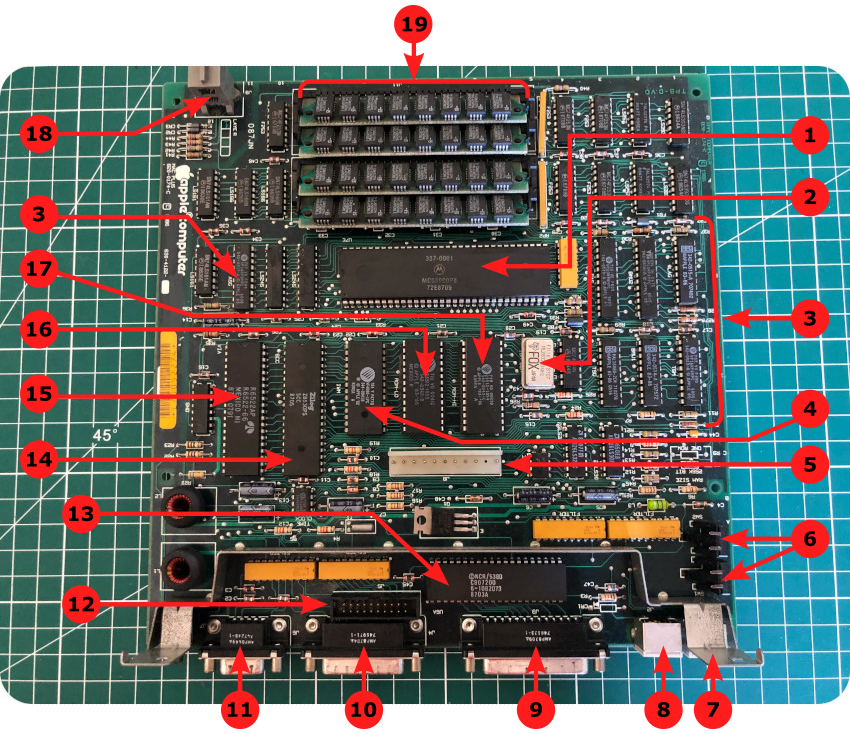
- Microprocessor: the Mac Plus is powered by a Motorola 68000 processor, clocked at 8 MHz. It is a 16/32 bits CISC microprocessor. The design implements a 32-bit instruction set, with 32-bit registers and a 16-bit internal data bus. The MC68000 was widely used in the 80’s computers, especially for personal computer with graphical user interface. Beside the Macintosh, it was used by the Amiga, the Atari ST or the X68000. The Mega Drive console was also powered by a MC68000.
- Oscillator: a 15.6672 MHZ crystal oscillator, manufactured by Fox (now Abracon)
- Programmable Array Logic (PAL): the logic board is based on several Apple-designed PALs (BMU, CAS, TSG, TSM, LAG, ASG, …). For example, the LAG IC performs the majority of the video control functions.
- Intregrated Woz Machine (IWM): The Macintosh disk interface uses a design similar to that used on the Apple II and Apple III computers, employing the Apple custom IWM chip, designed by the Woz. Together with the VIA, the IWM and the ASG (Analog Signal Generator) generate all the signals necessary to read, write, format, and eject the 3 1/2-inch disks used by the Macintosh. It is manufactured by VLSI Technology.
- Harness connector: Harness connected to the logic board.
- Programmer’s switch: this switch can be activated by pushing the buttons on the side of the case, that were removed before opening the Mac. It triggers a NMI (Non Maskable Interrupt) that will make the CPU execute the assigned function (usually for debugging purposes).
- AppleTalk connector: mini DIN-8 AppleTalk connector. AppleTalk is a suite of networking protocols (now discontinued) designed by Apple for their Macintosh computers. It includes features that allow LANs to be connected without setup or centralized router.
- Printer connector: mini DIN-8 connector for serial printer.
- SCSI connector: SCSI stands for Small Computer System Interface. It is a set of standards for physically connecting and transferring data between computers and peripheral devices such as hard disk drives or tape drives, and later on CD-ROM, Zip Drives, etc. The Macintosh Plus was one of the first personal computers implementing SCSI. Actually, the SCSI implementation of the Plus was engineered shortly before the initial SCSI specification was finalized. It is thus not 100% SCSI-compliant and is thus very sensitive. The Plus uses a DB-25 external connector.
- External floppy disk drive connector: DB-19 connector for an external floppy disk drive
- Mouse connector: DB-9 connector for the mouse.
- Internal FDD connector: internal connector for the 590-0437 (yellow stripe) 800K floppy disk drive cable.
- SCSI controller: The NCR 5380 is an early SCSI controller chip developed by NCR Microelectronics. It was the first single-chip implementation of the SCSI-1 protocol.
- Serial Communications Controller (SCC): The serial ports are controlled by a Zilog Z8530 Serial Communications Controller (SCC).
- Versatile Interface Adapter (VIA): 6522 Versatile Interface Adapter (VIA) for the mouse and keyboard (manufactured by Rockwell).
- ROM (LO): The ROM is physically split into two chips on the motherboard, labelled “ROM-HI” and “ROM-LOW”, respectively. The data in ROM is split in half between these two chips. The “HI” chip holds the high-byte of each address in ROM, while the “LO” chip holds the low-byte. The “LO” ROM chip is labelled here “342-0341-C” (i.e. ROM 64kb*8, V3). It is manufactured by VLSI Technology.
- ROM (HI): The “HI” ROM chip, labelled here “342-0342-B” (i.e. ROM 64kb*8, V3). It is manufactured by VLSI Technology.
- Keyboard connector: RJ-11 connector for the keyboard.
- RAM: The Macintosh Plus RAM is provided in four 256K Single In-line Memory Modules (SIMMs). Each SIMM contains eight surface-mounted DRAM chips. Memory can be expanded to a total of 4MB. When 1 MB SIMMS are installed, the 256K resistor (R8) must be removed or clipped to enable recognition of the higher density SIMMs.
Retrobrighting: utter failures, fair results and a some success
Let’s now take care of these yellowed plastics. Yellowing in ABS (Acrylonitrile Butadiene Styrene) plastic occurs when it is exposed to UV light, which causes photo-oxidation of polymers that breaks polymer chains and causes the plastic to yellow and become brittle. It is a complex process, connected to (or at least accelerated by) the presence of bromine, a fire retardant.
The de-yellowing process is often called retrobrighting (retr0brighting, or retrobriting). It usually consists of using hydrogen peroxide, combined with UV light and heat and sometimes “active oxygen” laundry booster.
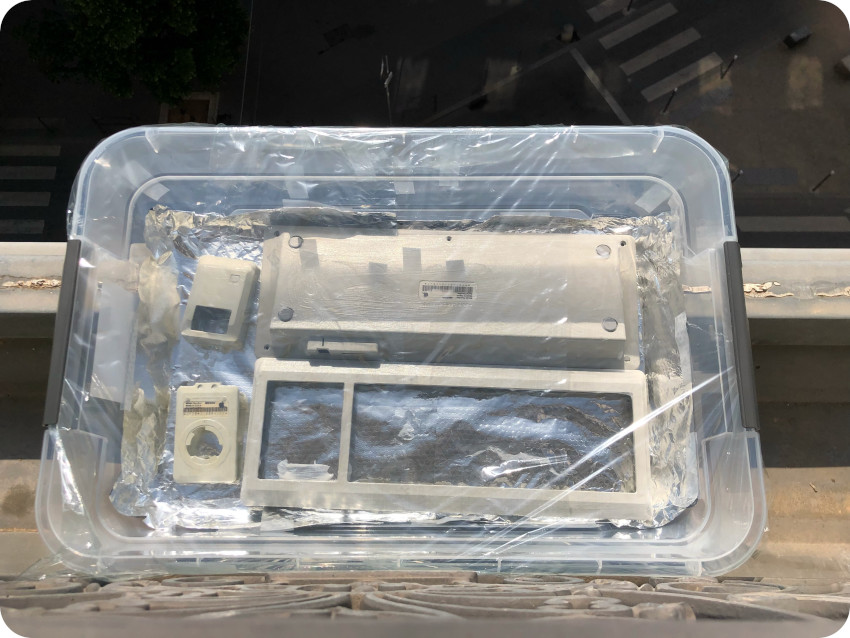
There are many techniques, more or less complicated, more or less time consuming, requiring more or less equipment. One very effective method is the following:
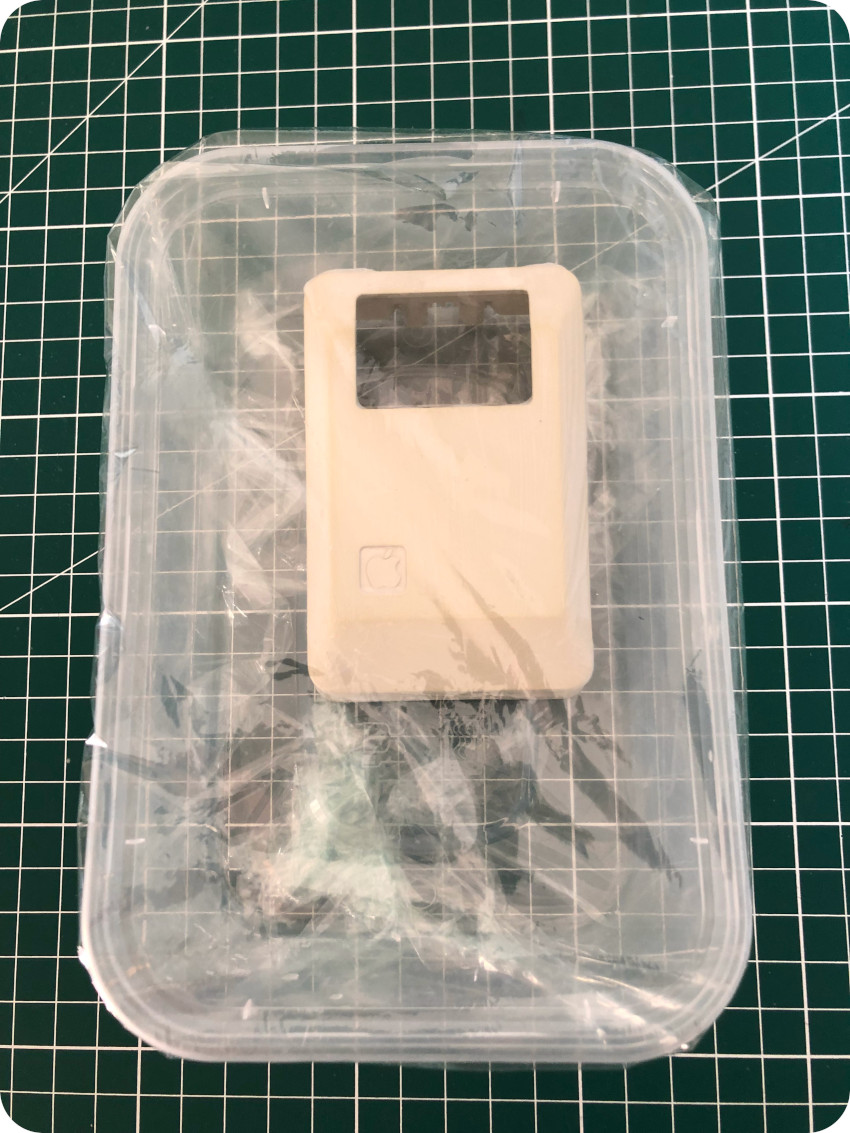
- After been cleaned, put each part to be retrobrighted inside of a ziploc-like plastic bag filled with liquid peroxide,
- Sous-vide the bags
- Put the bags inside a container covered with aluminum foils
- Fill the container with medium-hot water and keep its temperature constant
- Put the container under UV-light (the aluminum foils reflecting UV-light in all directions)
- Wait
This is a very effective method, but requires equipment I don’t have. I took an easier (though riskier) path:
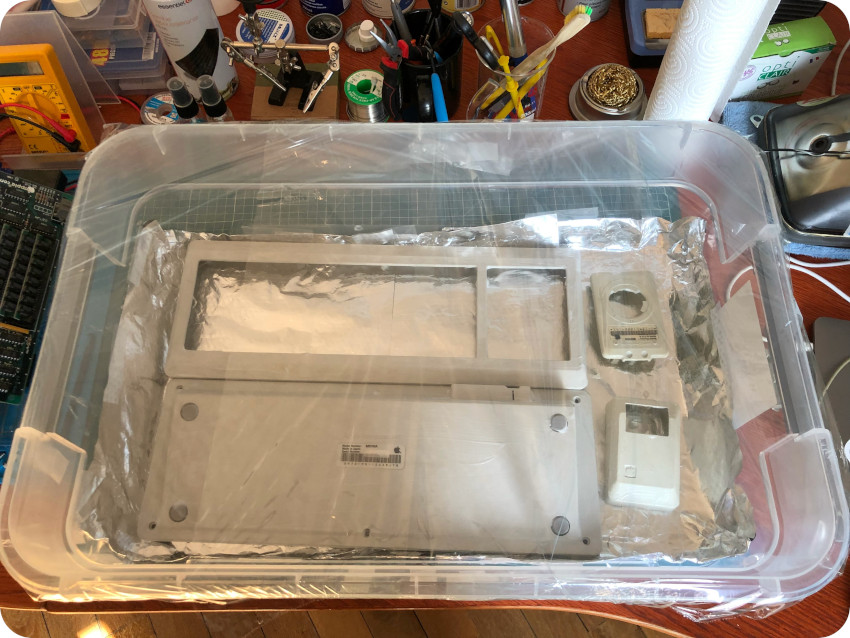
- Cleaning each part with IPA then letting them dry
- Apply a thin layer of 40 volume (12%) peroxide cream
- Wrap each part inside a transparent plastic film (so that the cream won’t dry and to keep a warm temperature)
- Put them under the sunlight, massaging them from time to time
- Wait
The process is much easier, requiring common equipment, but it is risky:
- They are no standard ways of knowing where to stop (over-brightening risk)
- In some case, this process leaves bad marbling effects
- Sunlight is … difficult to control
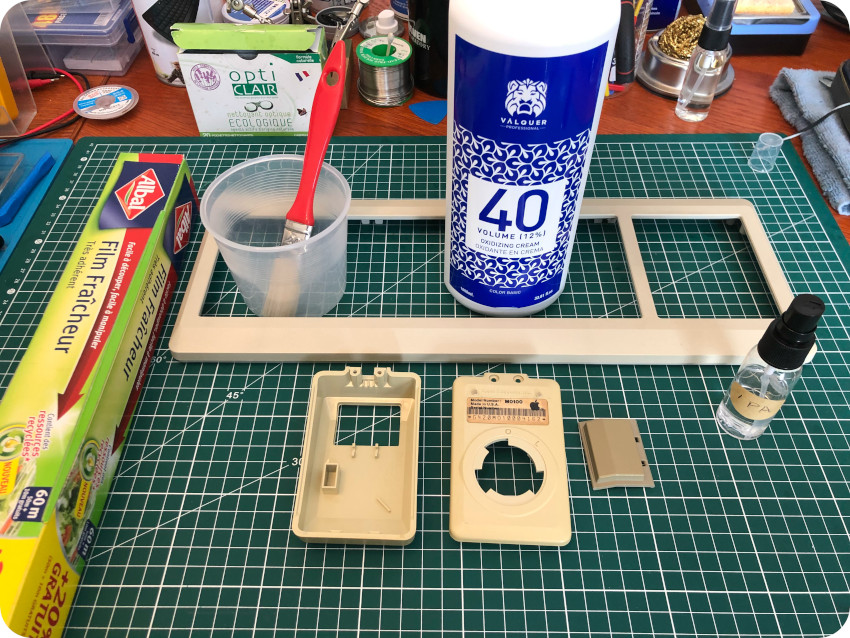
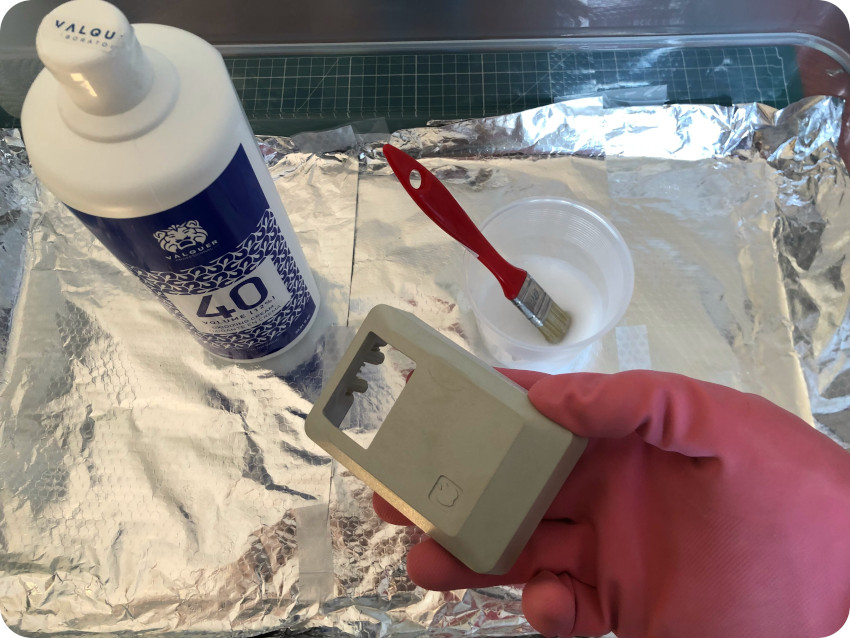
I started with the mouse top cover. Please use gloves, this cream is pretty corrosive !
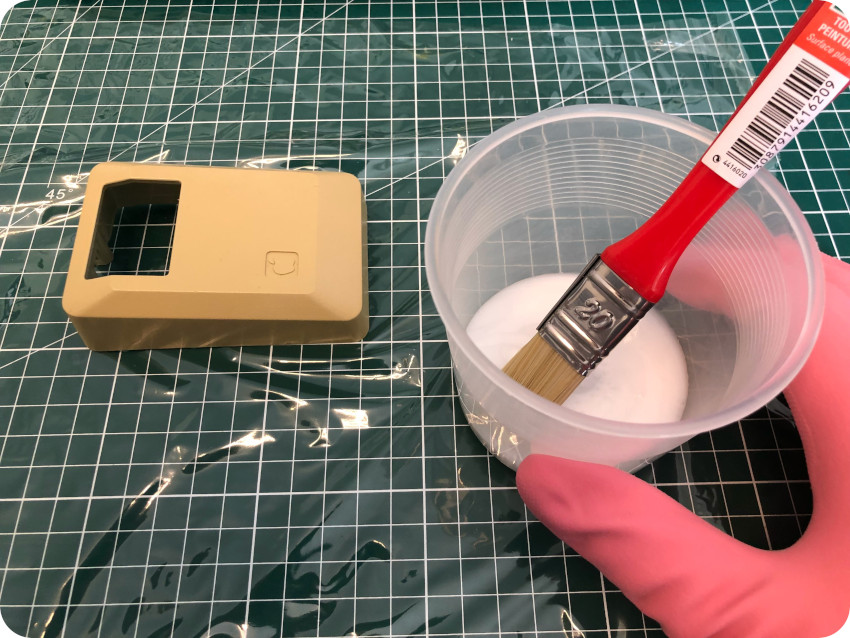
I did the same with the bottom part of the mouse and its button, then both parts of the keyboard case:
Once done, I exposed them to direct noon bright sunlight.
Then … I did a rookie mistake. While the plastics were resting under the sun, I went on walking my beloved puppy dog Tsukiko :

And well … since she (objectively) is the most adorable Shiba Inu puppy in the whole (known and unknown) universe, what was an initially planned as a 30 minutes walk turned into over 3 hours playing at the Tête d’Or park. Huge mistake. Don’t retrobright and play with you puppy dog !
My first retrobrighting attempt turned indeed into this disaster:
The plastic wrap wrinkles, in direct contact with the cases, have left bad marbling effects. Not enough massaging, I guess, and way too much time under the sun. For the mouse button, it was way over-brighted, and have very bad marble stains. It was beyond simple recovery (more on this later).
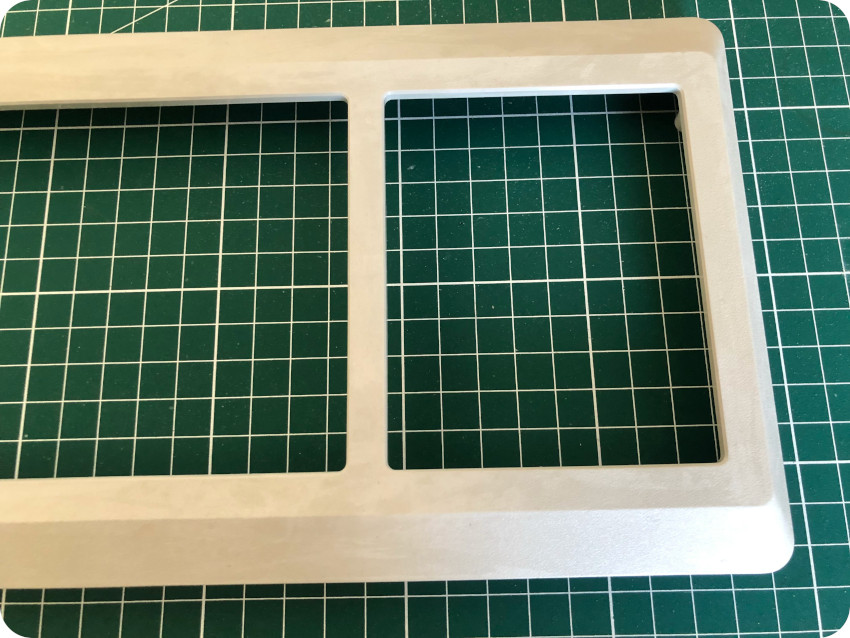
As for the keyboard and mouse cases, I figured I could recover them, using a slightly different process. This time, I used a plastic container, covered with aluminum foils:
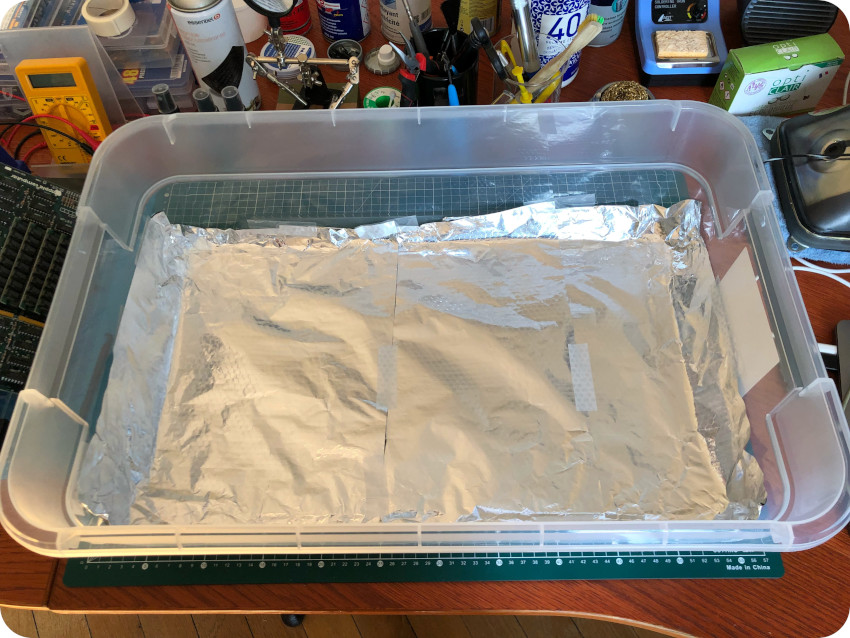
I used the same technique, applying a thin layer of peroxide cream:
But, this time, no direct contact between the cases and the plastic warp. I used it only to cover the top of the container and sealing the contraption:
I left this “retrobright box” under direct sunlight, but checking on the process every 20 minutes:
It turned out much better, but definitively not perfect. It was less yellow. The marbling effect was still there, but on different parts, and much lighter:
Still, the bad effects were very visible, as you can see on the mouse:

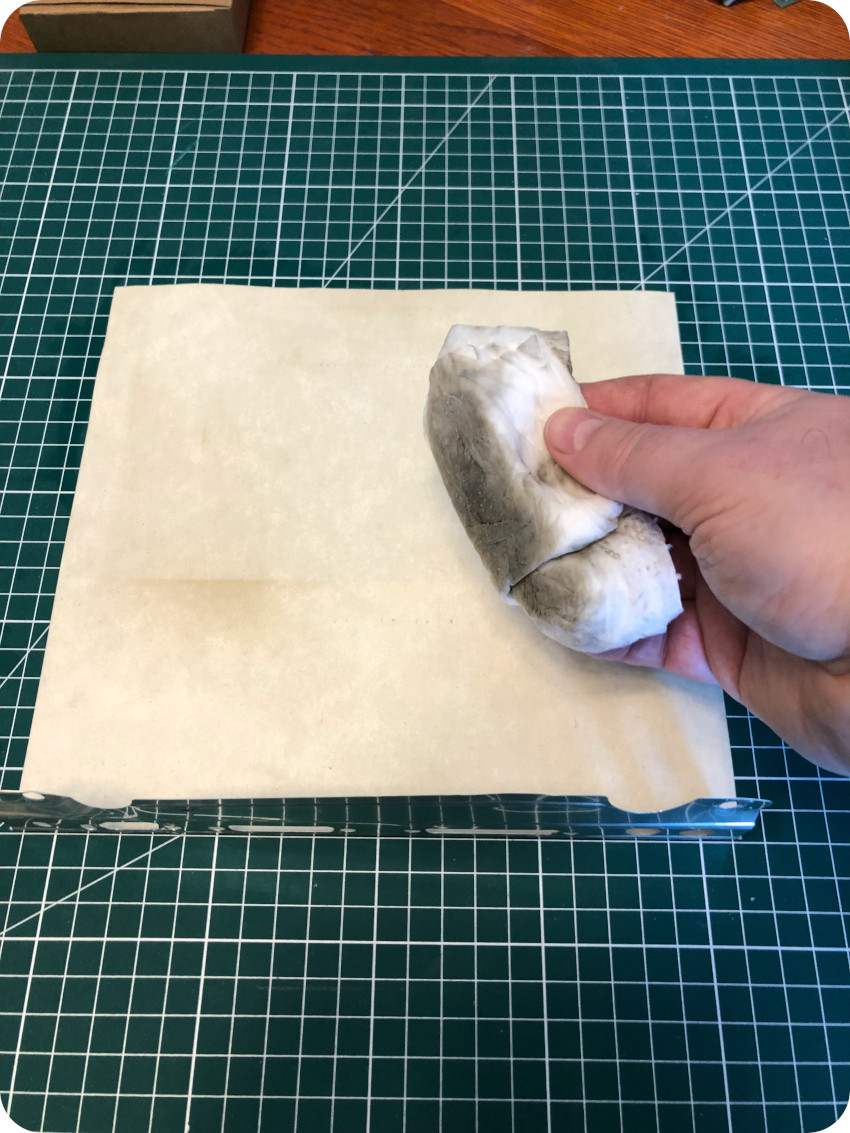
Then, I figured that these bad effects shouldn’t have affected the plastic only on the surface, not very deeply. Maybe I could remove the stains with something very lightly abrasive. I used this popular french cleaning product (“Pierre d’Argent”), based on white clay (kaolinite, I guess). I guess, Cif / Jif / Vim cream would have worked too.
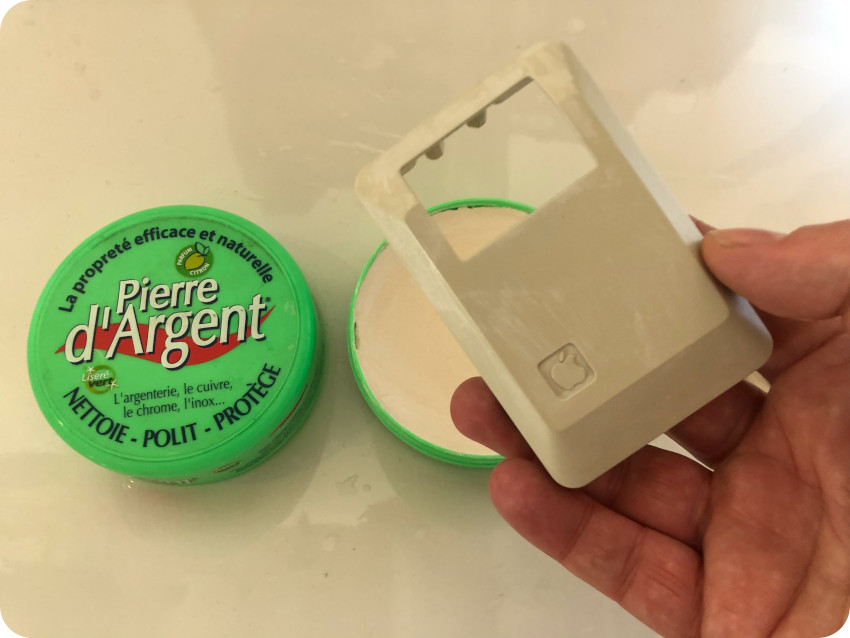
I slowly applied it, with very little water, and scrubbed with the rough side of a sponge for 5 minutes:
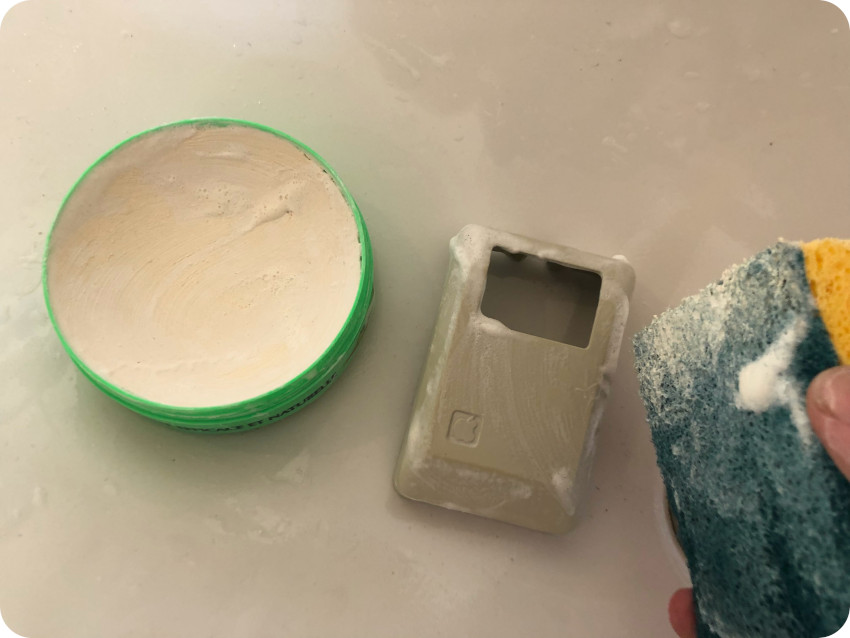
And … it turned out very well ! Almost no more visible stains on the keyboard (you would have to look very very closely). No more stains on the mouse, but the scrubbing process revealed a bit of “yellowness” on the top:
I started another round of retrobrightning, checking on the mouse every 10 minutes:
As a finishing touch, I let all covers under direct sunlight:
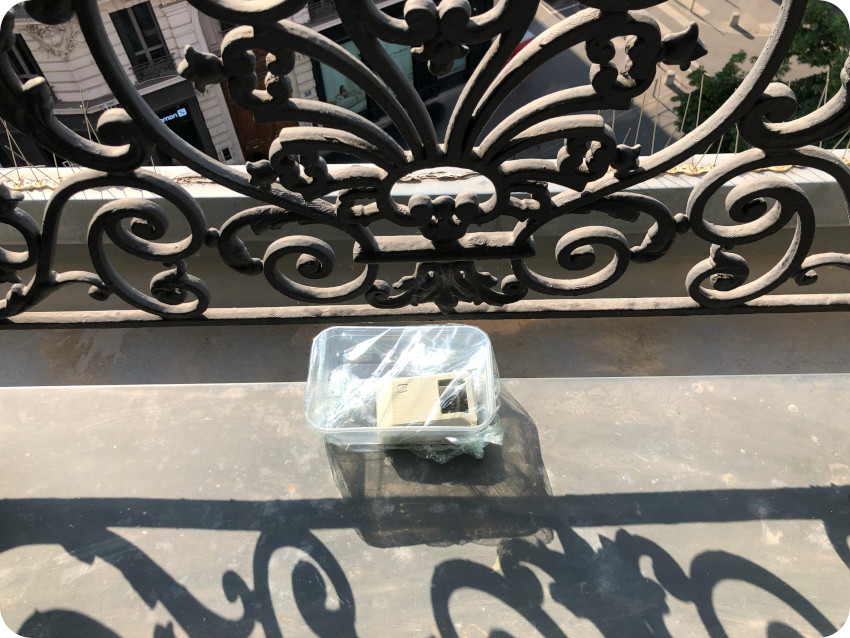
As it turned better and better, I decided not to apply peroxide cream on the Mac Plus enclosure, but just letting it under direct sun, a few hours each day.
As for the mouse button, I tried the “Pierre d’Argent” trick … with no effect. Then a decided to lightly paper-send it … which made things even worse (so bad I didn’t take pictures). What a disaster ! Such a shame. I was about to buy another mouse.
Then I figured, what the hell, let’s try to paint it, as a last resort. I chose this acrylic paint:
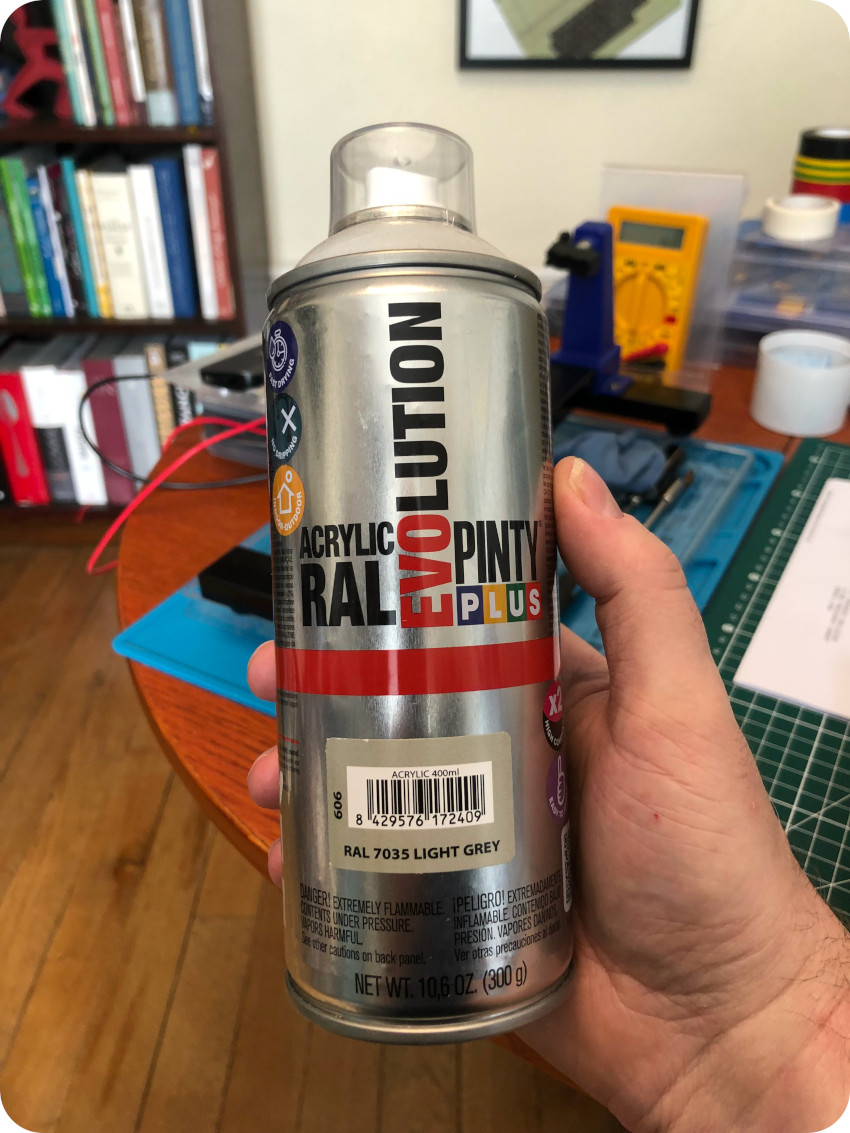
And it turned out … not that bad. The color of the button is a little too bright and too shiny. But paint turned a real disaster into something … decent.
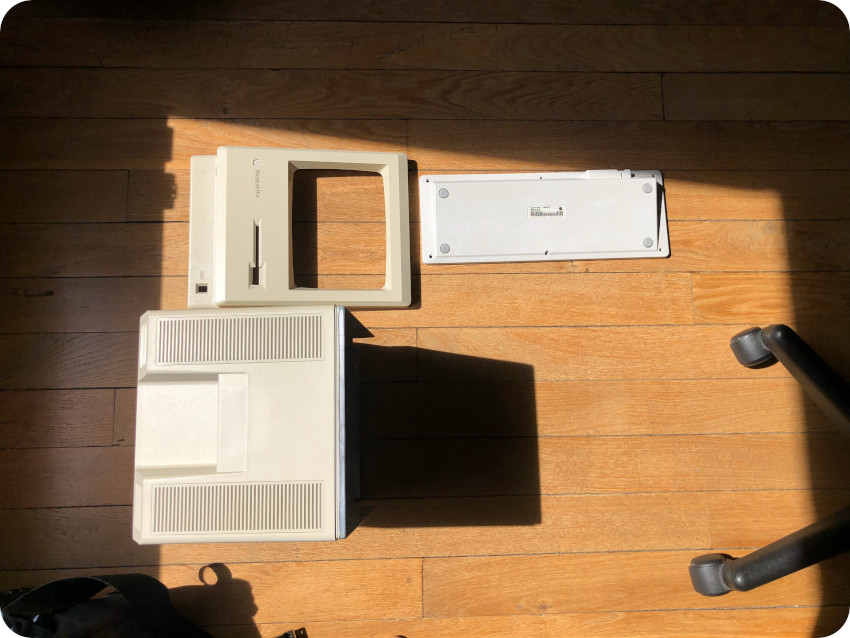
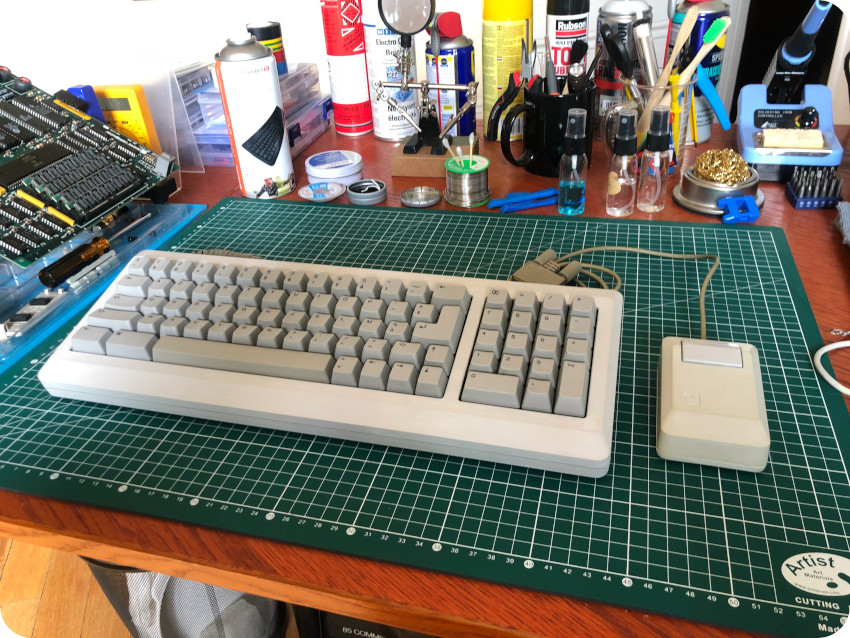
Here is the final result for the keyboard and the mouse. There is still a color difference between them, but remember that the keyboard is Platinum and the mouse is (was) beige.
I kept on letting the cases under sunlight, a few hours a day, for about 4 weeks.
I didn’t touch the cover of the battery compartment to see if there were actual effects. On the above picture, you can see the color difference after 3 weeks:
Not bad a all. I guess, if you have enough time (i.e. about a month), retrobrighting using only direct sunlight is a very decent path !
Putting things back together
So much for retrobrighting, let’s but things back together ! First the chassis, then the disk drive and the CRT:
Then the logic board and its protective shield:
… then the analog board:
There we go. Let’s try to power this thing on !
I was glad to ear again the startup sound. The screen turned gray. No more static noise at all. Very nice. The disk drive made quite a different noise, which was expected since one of the gears is missing now. Then I got the blinking cross right after the blinking question mark :
There is something fishy with the disk drive (on maybe the IWM IC, or the connector). In any case, I didn’t have any diskette to boot the Mac. It is possible to buy online vintage ones, but not at reasonable prices and with a fair chance they would be too old to be readable. It is rather difficult to create a new diskette, because of the difference between usual disk drives and Mac 128/512/Plus drives (variable rotation speed). Nevertheless, it is possible to buy some of these online, at a decent price.
But I suspected something was wrong with the disc drive anyways, so I tried another path.
Note: in the meantime, I opened up once more the Mac to get a viewing access to the analog board. I let the room in the dark and powered one the Mac, while observing the flyback transformer. And there were no discharges. That is a relief !
BlueSCSI
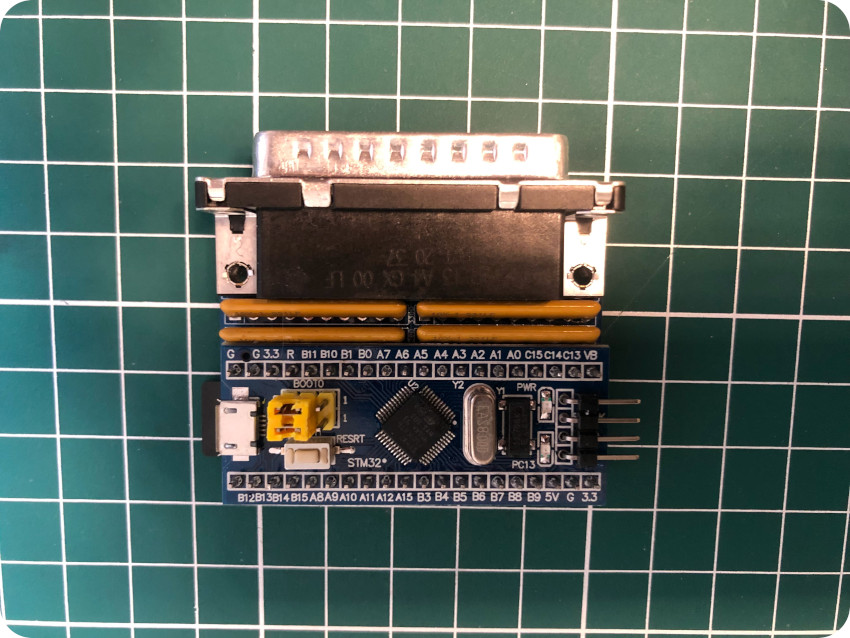
BlueSCSI is a project created by Eric Helgeson. It is a hardware, based on an Arduino STM32F103C (aka Blue Pill), used to replace existing SCSI drives. It stores its data on a microSD card readable by any Mac, Windows or GNU/Linux machine. This makes exchanging data with the modern world a breeze.
There are currently no known incompatible Macintosh’s. Still, there are caveats for Mac Pluses:
- Use only Apple SC HD Setup drivers. You can not use the LIDO, SilverLining, or Drive Setup SCSI Drivers with the Plus
- The Plus does not provide termination power. SCSI termination is the process of preventing the reflection of electrical signals from the ends of SCSI buses in order to ensure reliable operation. This termination is done passively via the use of various resistors connected to the signal lines at the connector end or actively through the application of a small amount of electricity [excerpt from Technopedia on SCSI termination]. In our case, It must be powered via the Berg connector or USB on the BluePill
- You must have BlueSCSI version > 1.0-c (current is 1.1-a at the time of writing)
There are two models of BlueSCSI, corresponding to different SCSI connectors:
- An internal BlueSCSI that would connect to an existing 50-pin SCSI cable inside the Mac (which is not present on Mac Plus PCBs).
- An external BlueSCSI that connects to the external SCSI port on the back of the Mac (DB-25 connector).
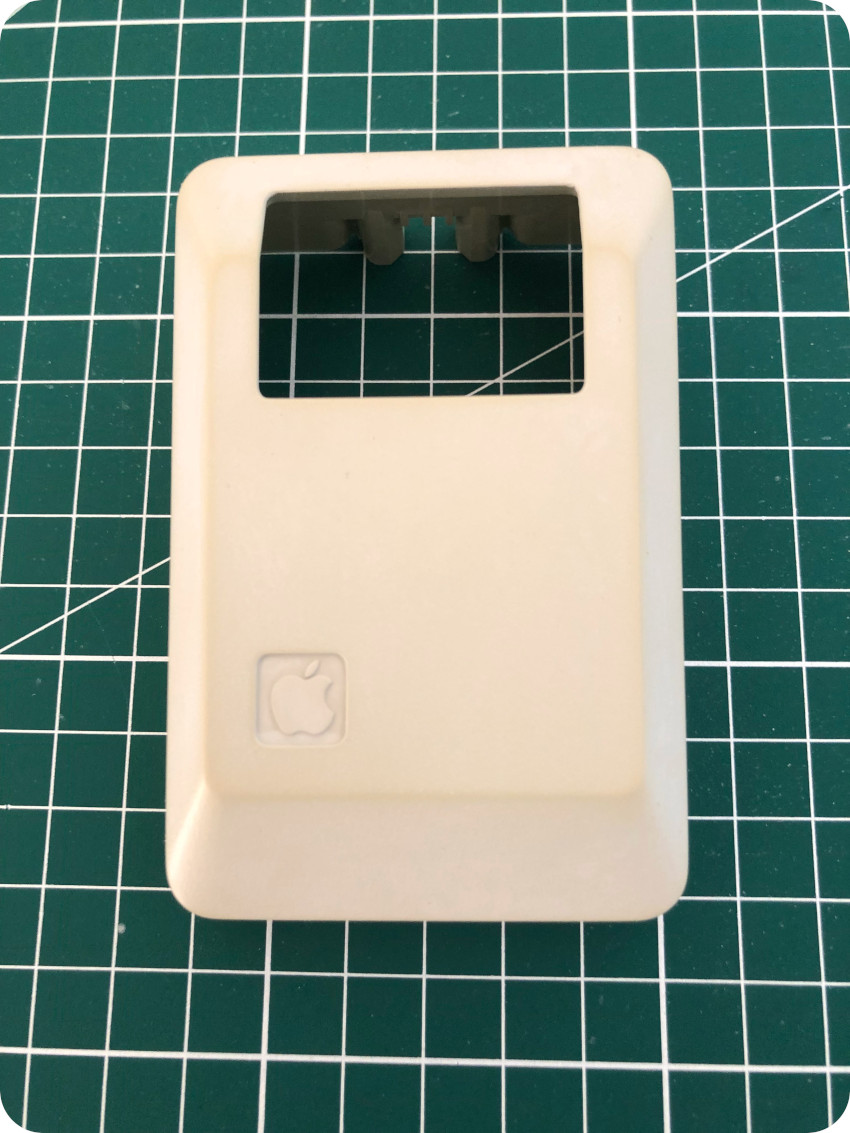
I ordered the second one, fully assembled, from OneGeekArmy (Jean-Michel Durand) and quickly received it, as well as a very nice note from Jean-Michel and a BlueSCSI sticker:
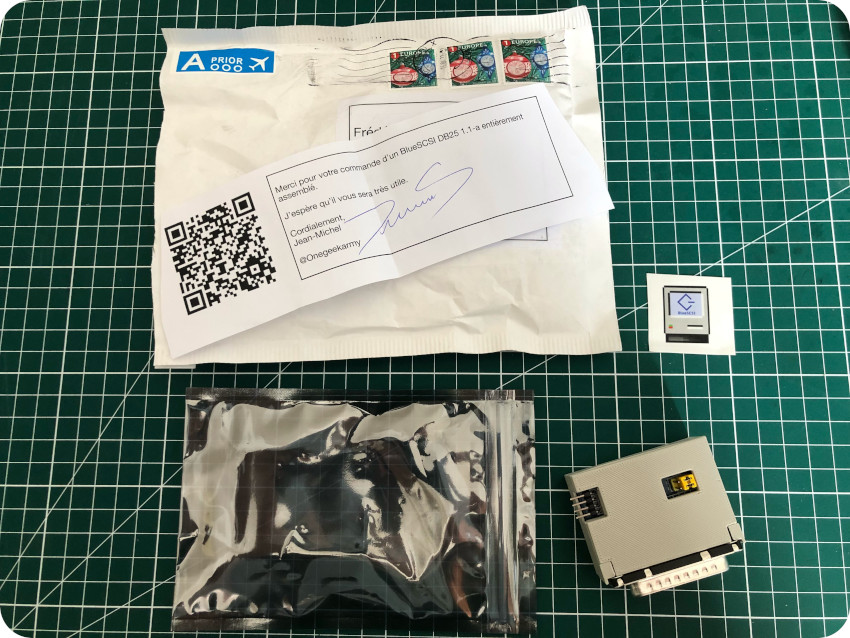
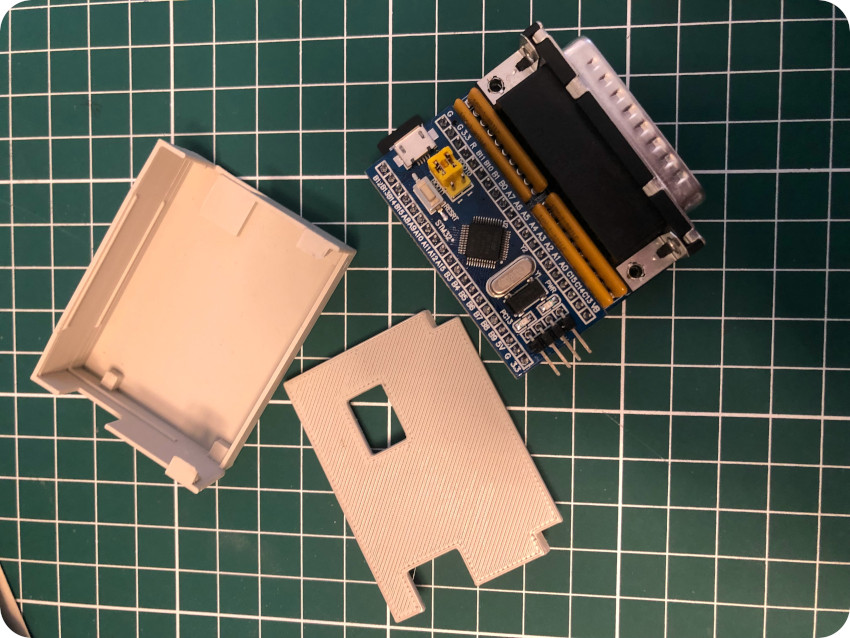
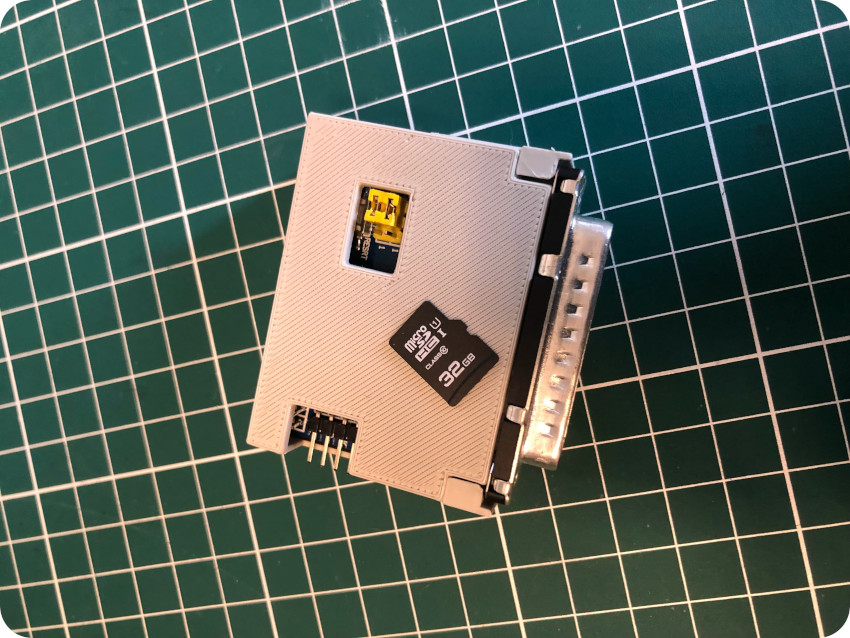
It came with a nice 3D-printed case. Here are a few pictures of the device:
I went on purchasing a new microSD Card (32Gb is way more than needed):
To get BlueSCSI working, I followed instructions from Ron’s Computer videos:
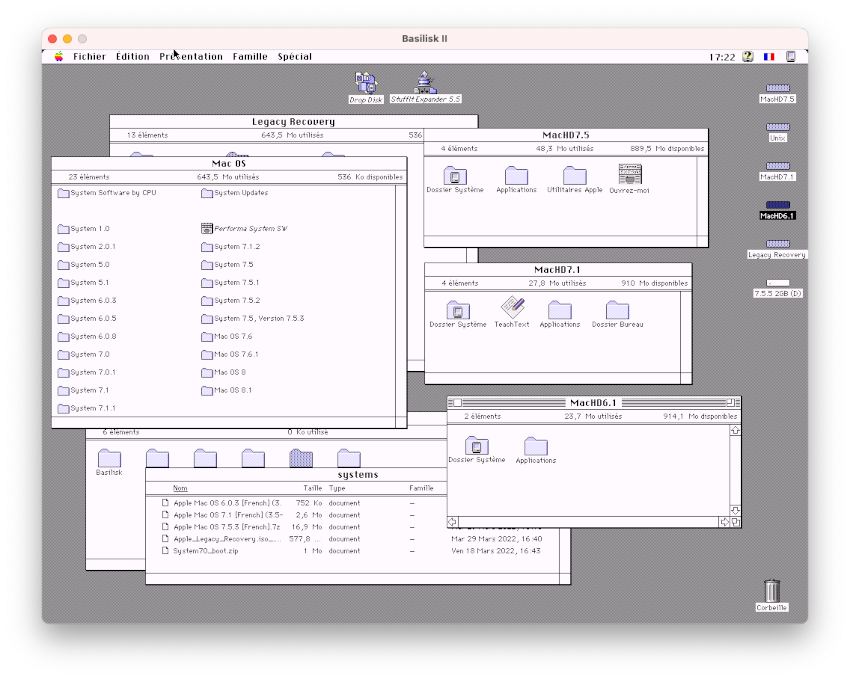
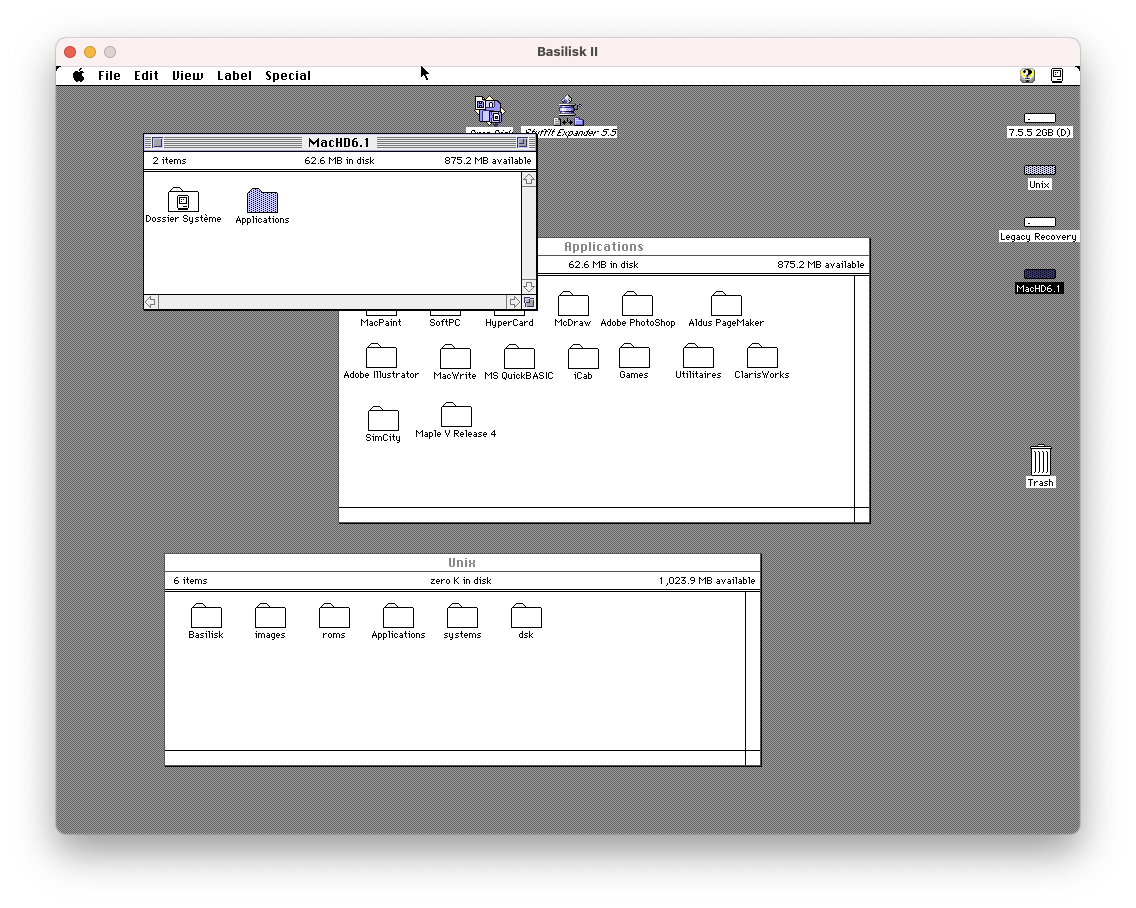
- I downloaded the Basilisk II emulator for macOS and followed setup instruction from Emaculation.com
- I downloaded pre-rolled bootable 2GB Mac system software image from Savage Taylor.
- I downloaded “Apple Legacy Recovery CD” from the Macintosh Garden.
- I downloaded blank HDA images for the BlueSCSI.
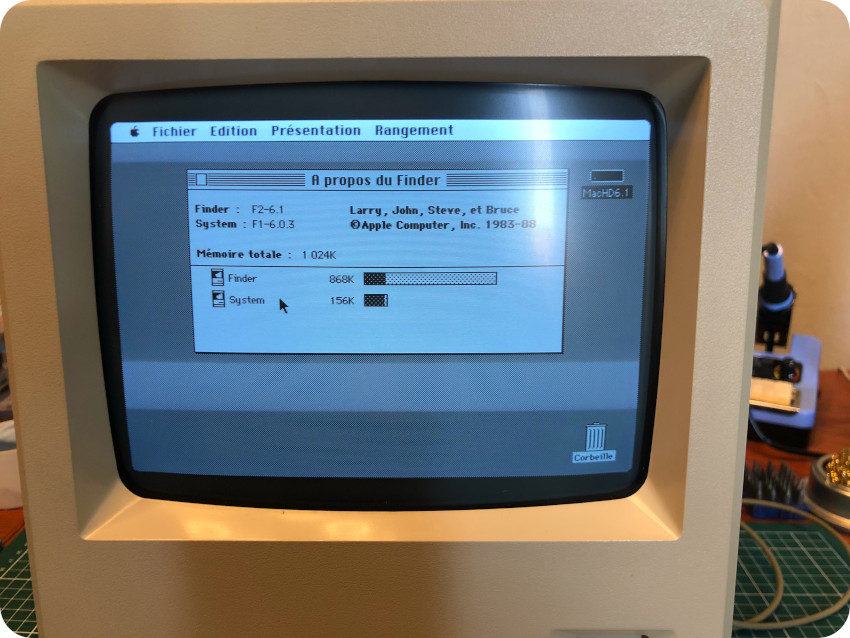
- Since I wanted French versions of MacOS on my Mac, I downloaded versions 6.0.3 (mislabeled MacHD6.1 in the above Basilisk screenshot, 6.1 is actually the Finder’s version), 7.1 and 7.5.3
- I collected a basic set of applications, downloaded from the Macintosh Garden and from the Macintosh Repository. I stored them in Basilisk II’s Unix shared disk to ease transfers.
I prepared three 1Gb blank images (one for each system), then launched Basilisk II, booting from the Apple Legacy Recovery CD. From there, I installed the three desired versions of MacOS (universal versions), added basic utilities from Savage Taylor image, then added a few applications (MacPaint, MacWrite, …)
I restarted the emulator, and booted up from MacOS 7.1 and 7.5.3 images, to check if everything was fine with these installations. Since Basilisk II cannot boot from MacOS 6.X, I could not test it … the 6.0.3 installation was thus a shot in the dark.
Then I named all three images according to BlueSCSI convention: HDxy_512.hda, where
- HD stands Hard Disk
- x – SCSI ID to attach to. 0-7 (though 7 on a Macintosh is the System)
- y – LUN ID – Always set to 0.
- 512 – Sector size. Set to 512 if unsure. 256, 512, & 1024 supported
I formatted the mircoSD Card (using ExFAT) and copied the 7.5.3 image on it. I inserted the microSD card into the BlueSCSI card slot. I plugged it into the external DB-25 connector, then powered it via USB (for SCSI termination). Then I powered on the Mac Plus.
I heard the usual startup sound, and the screen went grey. No LED activity on the BlueSCSI board (apart from the power LED). The Mac Plus tried and failed to boot from a disk drive, instead of BlueSCSI. How disappointing !
I shot down the Mac, pulled the microSD Card to read it. There was a LOG.txt file created, meaning that BlueSCSI had actually seen the SD Card and entered the main loop.
Okay. Let’s try the 7.1 image. Same results. Gosh.
I did the same with the 6.0.3 image. Same results. Damn it !
I figured there might have been something wrong with the blank images. I downloaded Jean-Michel’s Disk Jockey utility to create disk images from scratch:
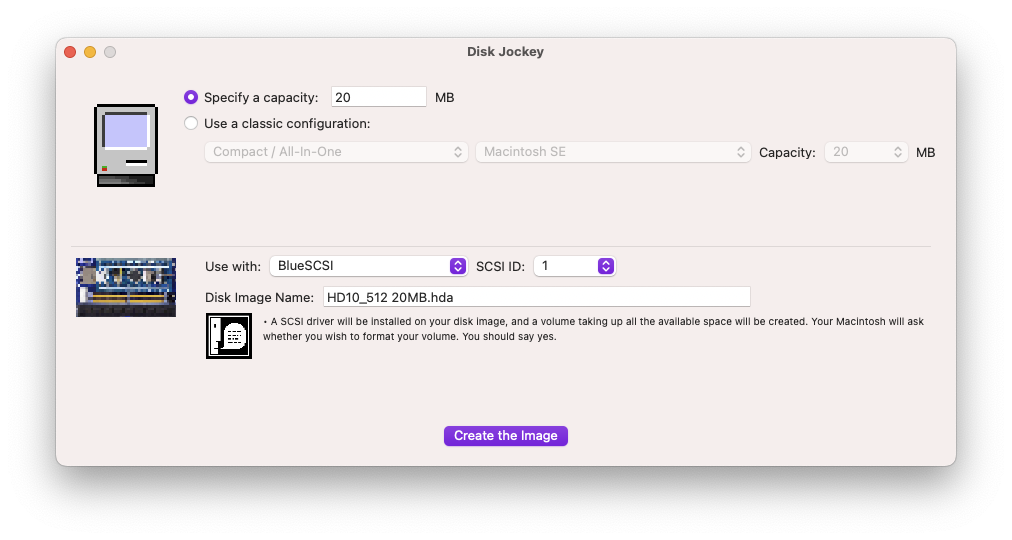
I tried several combinations and prepared a new set blank images. Different sizes, some using a classic configuration (Other / Hard Disk 20SC), some using a specific capacity (and adding a SCSI driver).
For each of them, I did the 3 installations (6.03, 7.1 and 7.5).
Nothing worked. There were two cases, depending on the blank image used for the installation:
- Either the Mac would try to boot from the floppy disk (ending in the crossed floppy disk icon) and not from the BlueSCSI drive
- Or the Mac would enter in a infinite loop where is bongs, starts the gray screen, reboots immediately. Not sad Mac, no floppy icon with a question mark. Curious…
In each and every case, a LOG.txt file was created, ending in “Finished initialization of SCSI Devices – Entering main loop”. Damn.
I thought there must be something wrong with the termination. SCSI on Mac Plus is notoriously buggy and sensitive. In all these tests, I powered the BlueSCSI device via USB, which should have provided termination.
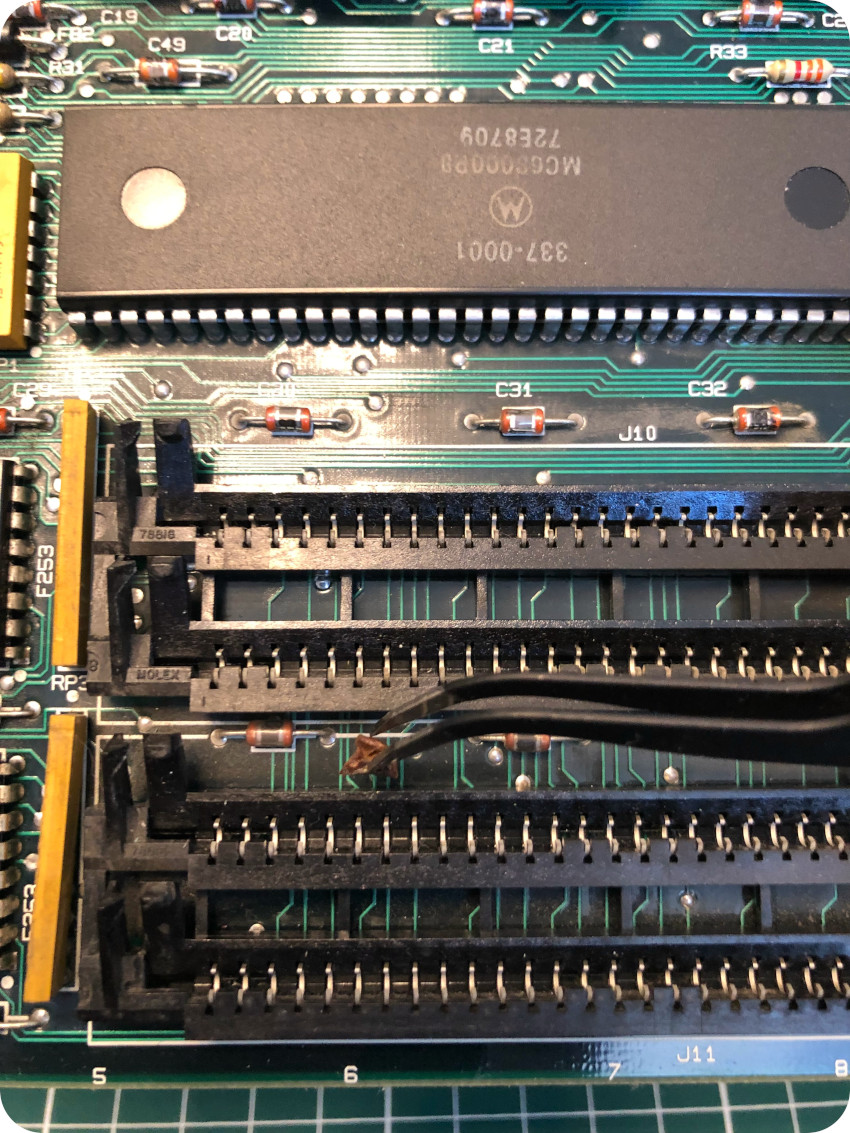
There is an easy mod for the Mac Plus logic board to bring power termination. For this, I opened up the Mac Plus once again, extracting the logic board.
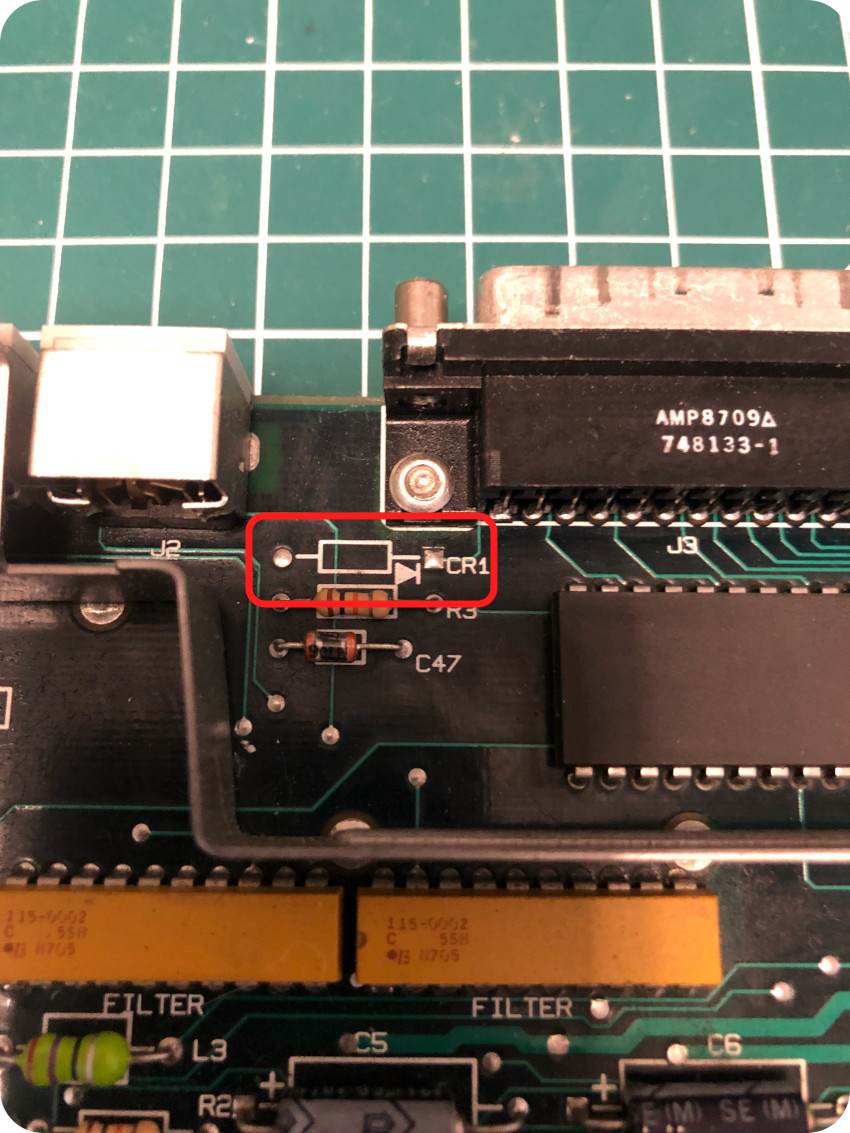
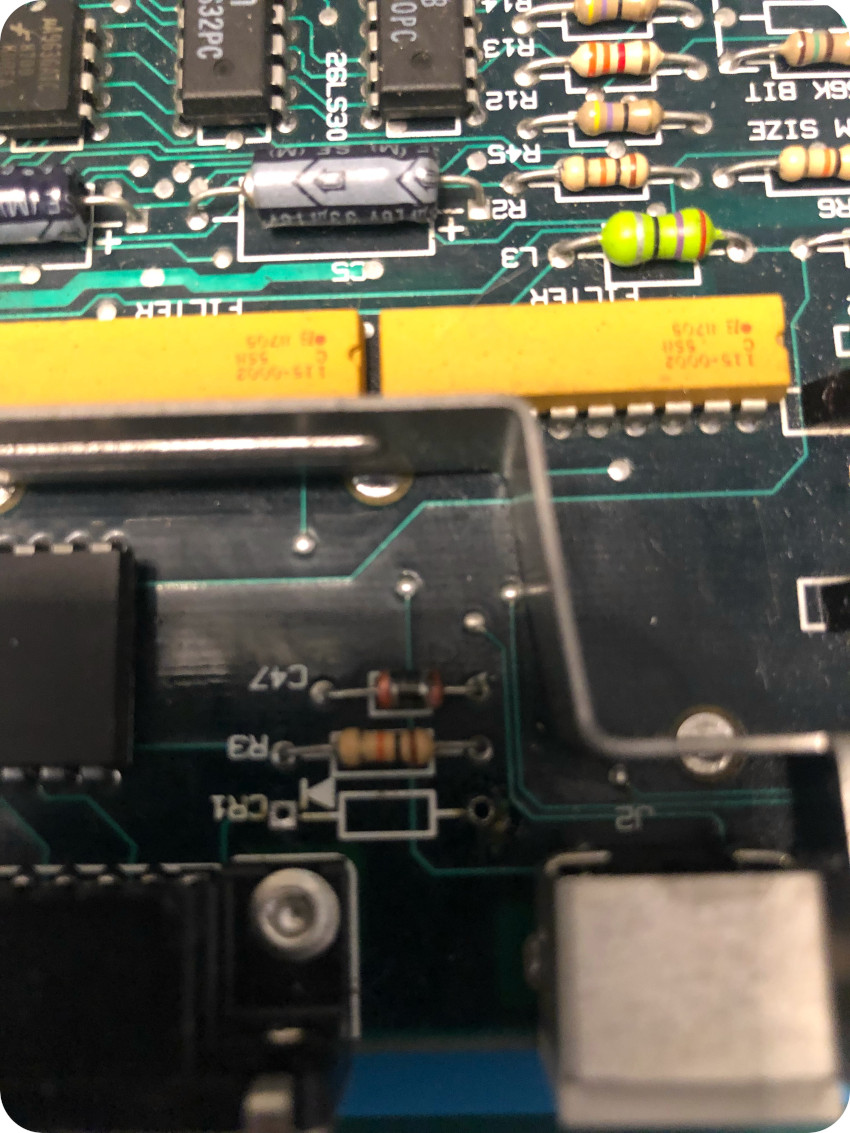
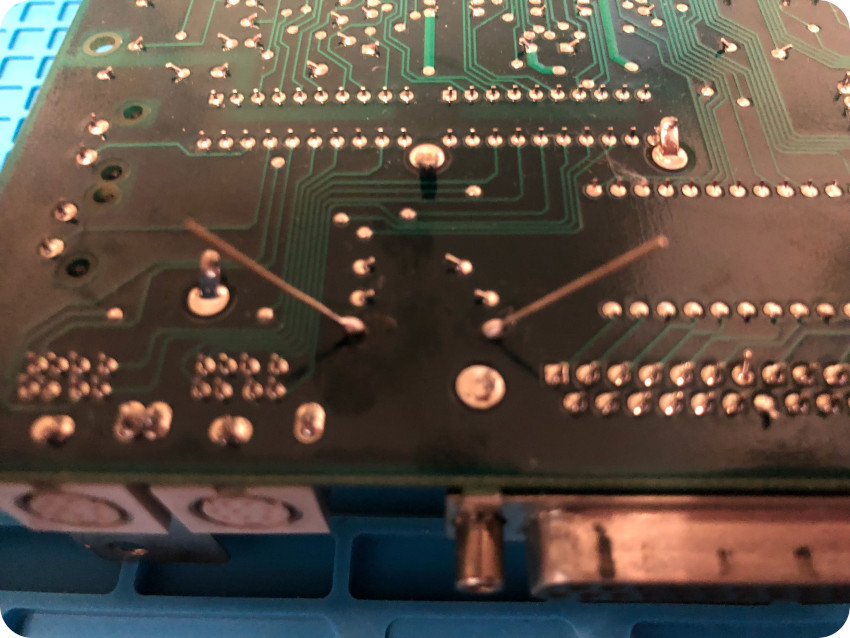
Near the DB-25 connector, there is an empty placeholder where one can add a diode, which then enables SCSI termination:
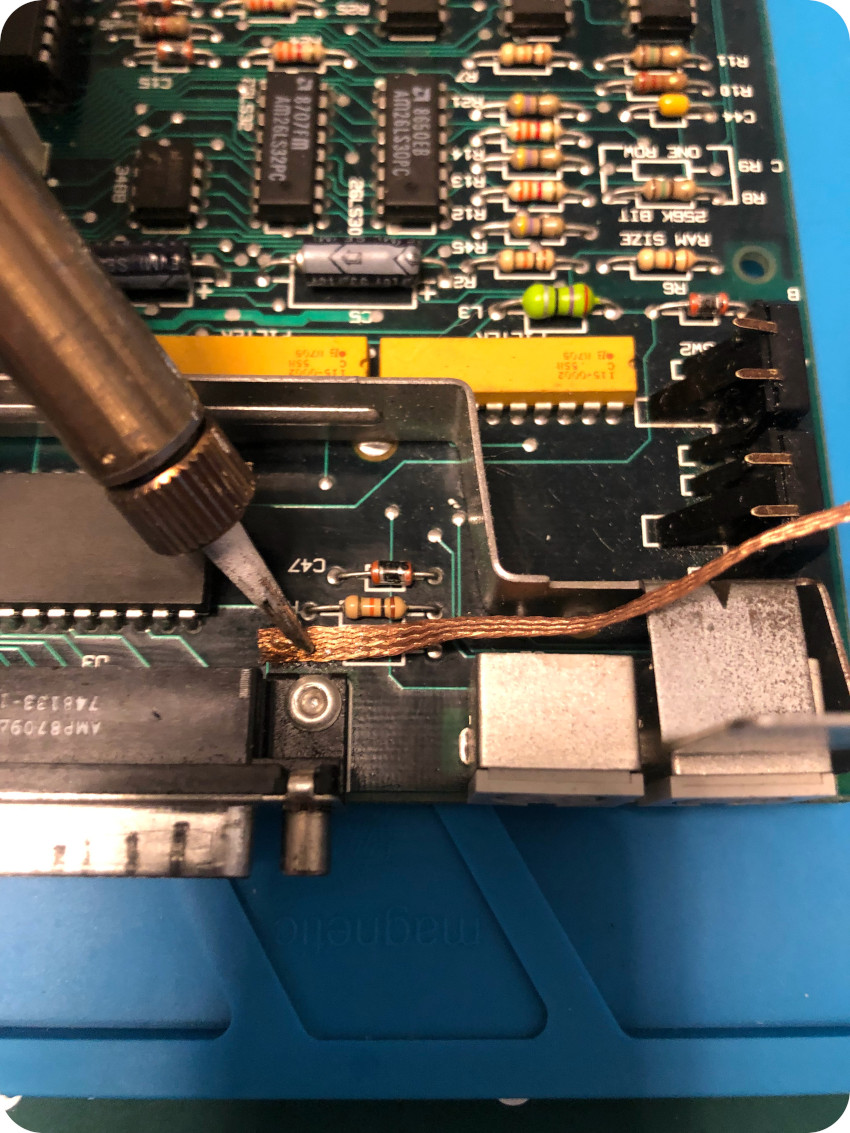
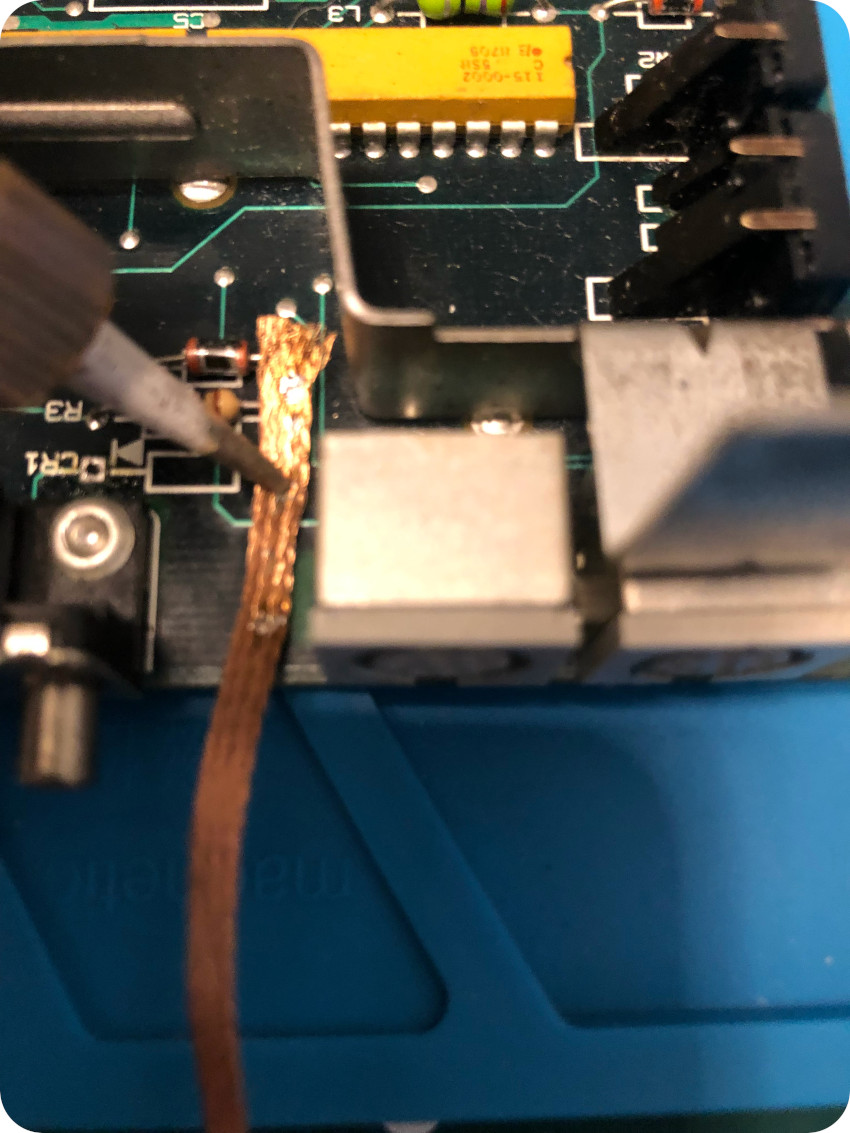
I used a soldering iron, a copper solder wick and solder sucker to remove the solder on both sides of the placeholder:
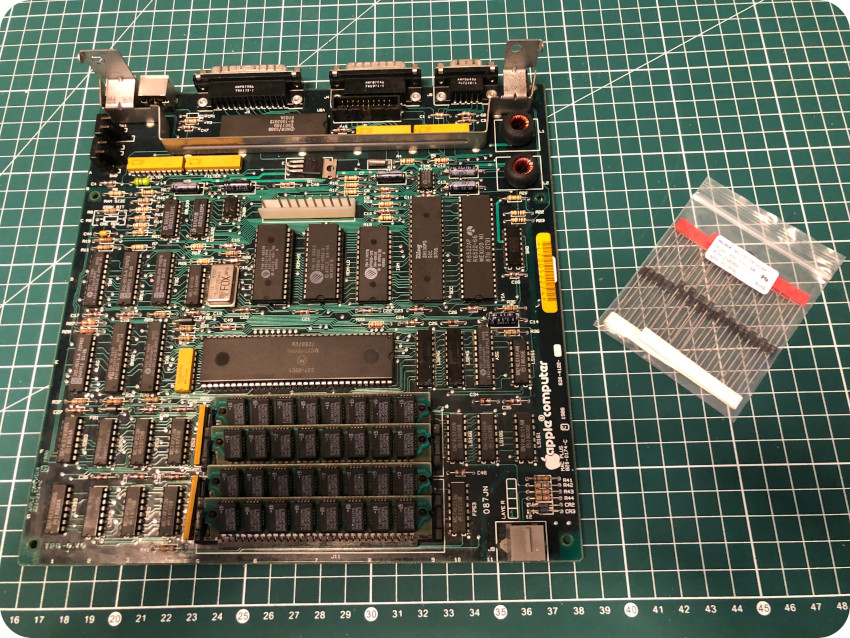
I prepared a 1N4001 diode for the mod:
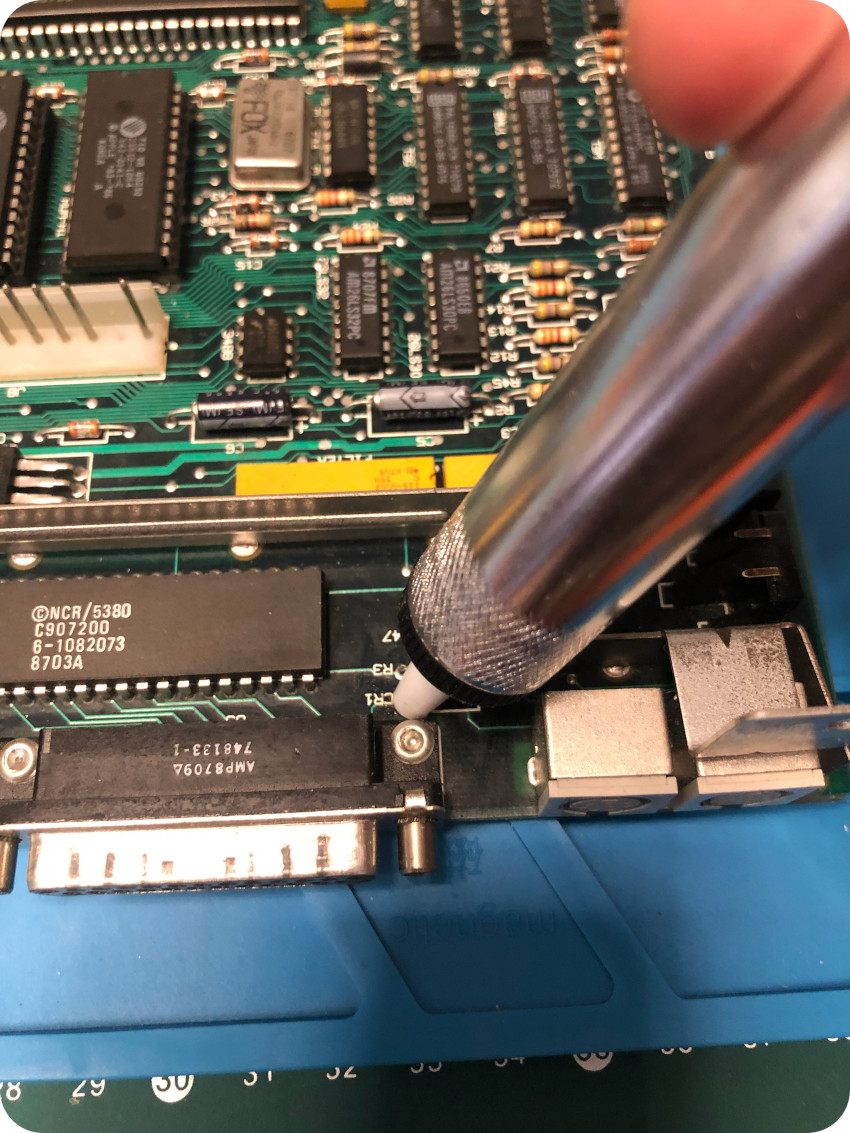
Once the legs of the diode were bent to the correct shape, I inserted it in the placeholder, taking care of respecting the polarity:
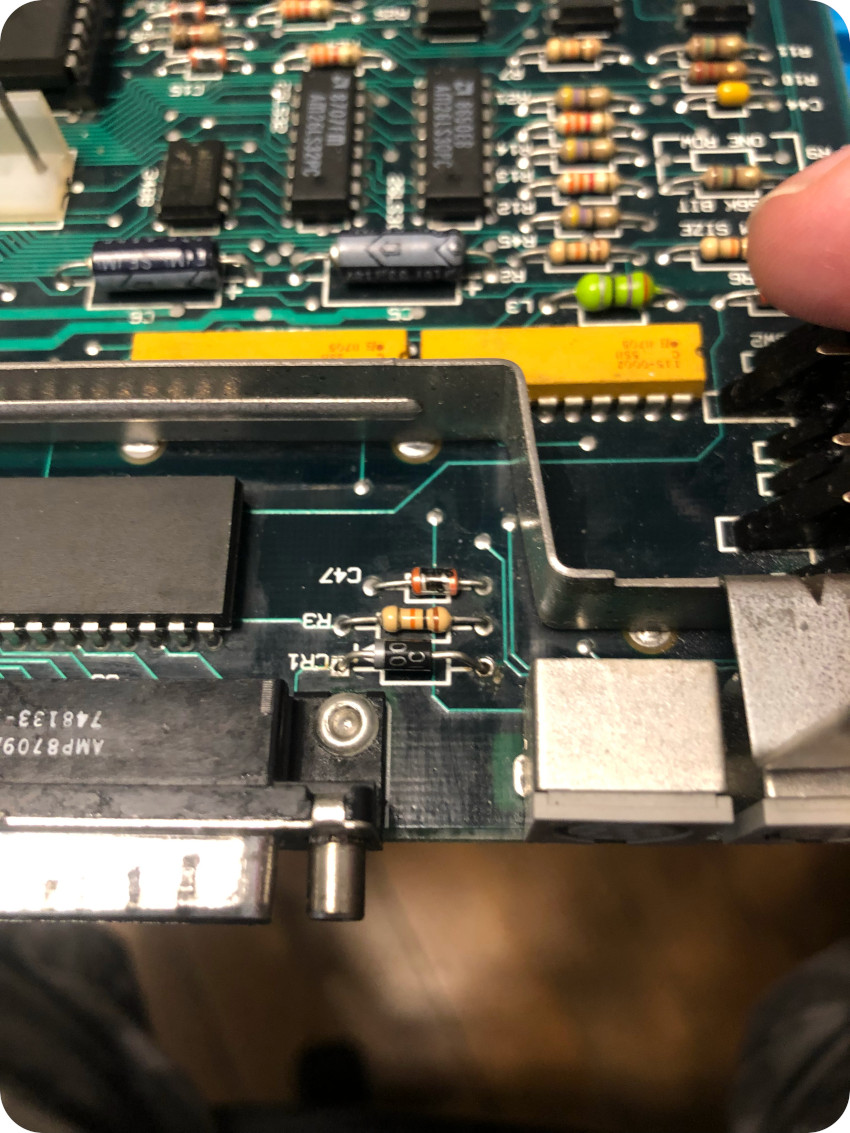
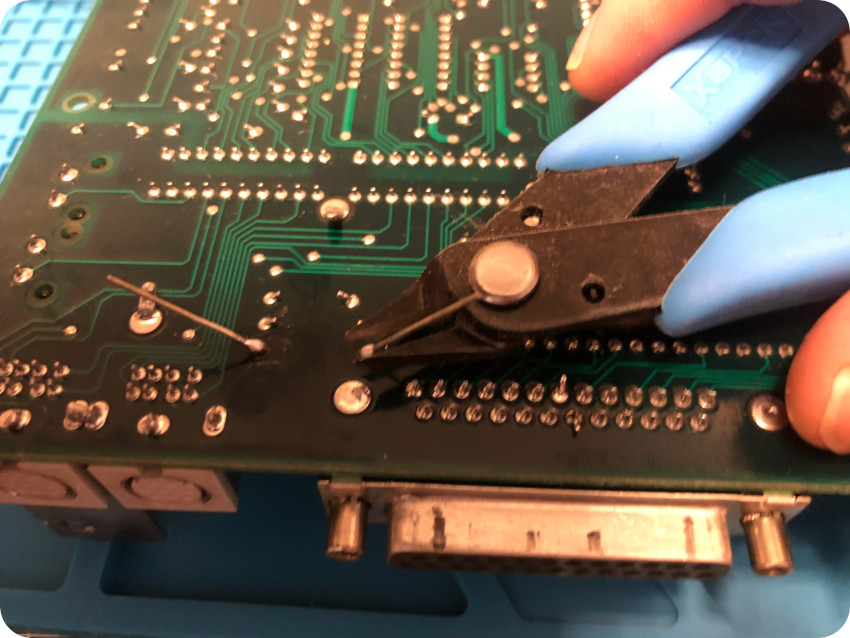
Then, I flipped the PCB, soldered the diode and cut off the legs:

I put back the logic board, closed the case, plugged the BlueSCSI device (without USB power) and powered the Mac on. Even without USB power, the BlueSCSI was now powered by the DB-25 connector, and properly terminated. Good !
I tried each and every images prepared. Nothing. Exactly the same symptoms. Damn.
I figured there might have been a problem with Basilisk II. So … I repeated the same process, this time using the SheepShaver emulator:
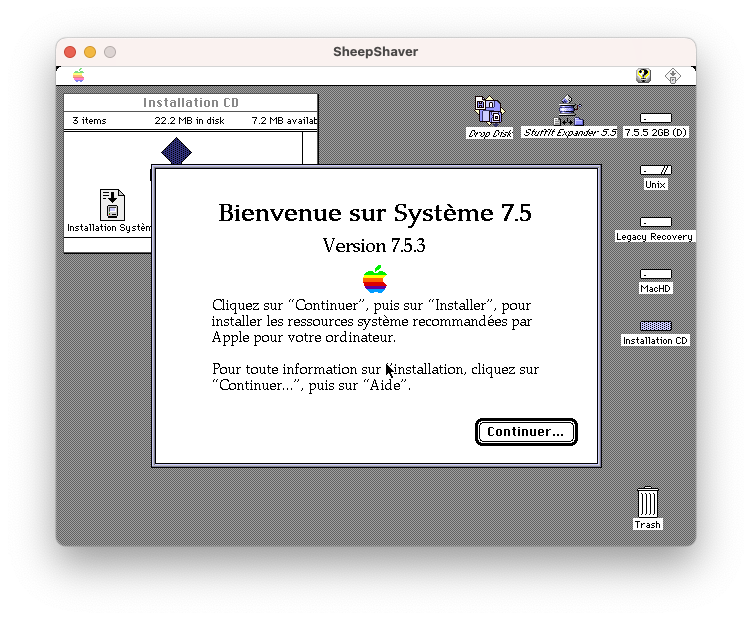
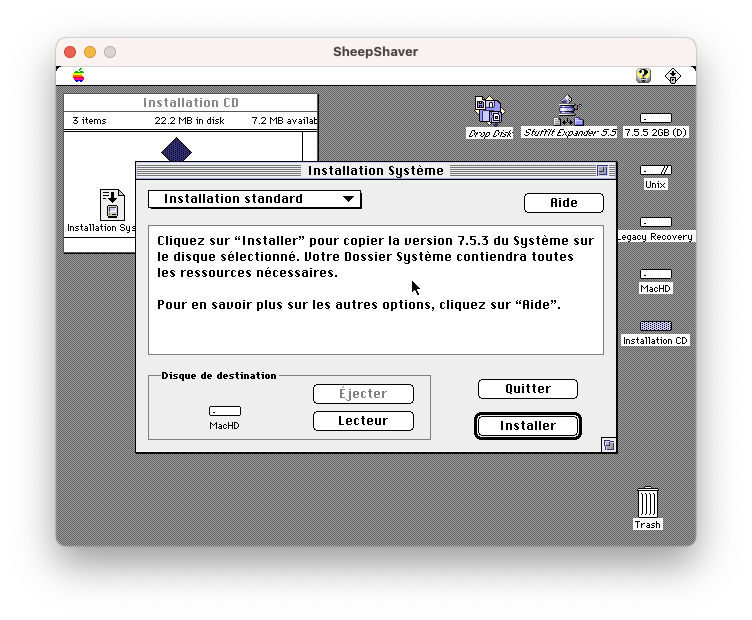
I also tried personalized installations, targeting a Mac Plus hardware only instead of using the universal Installation option. I tried each and every newly prepared images. Nothing. Exactly the same symptoms. Damn !
The … I tried something weird. What if that damned floppy drive was so faulty it was responsible for this behavior ?
I powered off the Mac, opened the case and I disconnected the floppy ribbon from the logic board. I closed the case, added on the microSD Card the very first 7.5.3 image prepared weeks ago with Basilisk II.
I powered on the Mac. After the startup sound, the screen went gray. Then, for the first time, I saw the LEDs from the BlueSCSI device starting to blink. Goosebumps ! A happy Mac was quickly displayed … followed by a message: not enough memory to launch this version of MacOS. Damn it ! So close !!
I replaced the 7.5.3 image by the 7.1 image. I started the Mac. Same message. #@£%§ ! (a lot of swearing occurred)
Then, as a last last resort, I used the 6.0.3 image I couldn’t test with Basilisk or SheepShaver.
And … I was greeted by the Finder 6.1 (French version). It freaking worked !!
I was so so so happy !
Testing software
I was time to celebrate and play with software. I browsed once again the Macintosh Garden and the Macintosh Repository web sites, collecting a bunch of oldies. I downloaded them into the shared Basilisk II Unix root directory. I started the Basilisk II emulator on a 7.5.5 image, then copied the apps to the mounted 6.0.3 image (here, mislabeled as MacHD6.1, 6.1 being the Finder’s version and NOT the OS version):
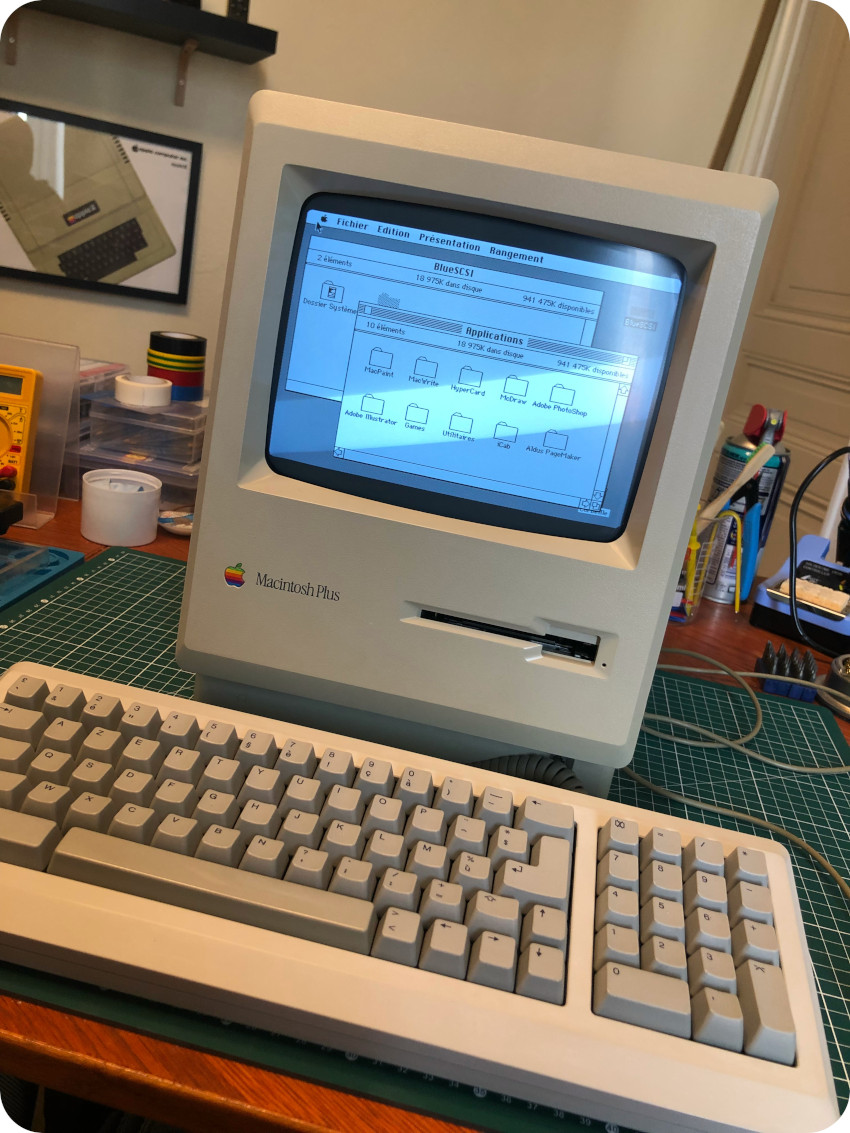
 Once done, I copied the new image to the SD Card, plugged it back into the BlueSCSI device and booted up the Mac (for the picture, I correctly renamed the “MacHD6.1” drive into “BlueSCSI”):
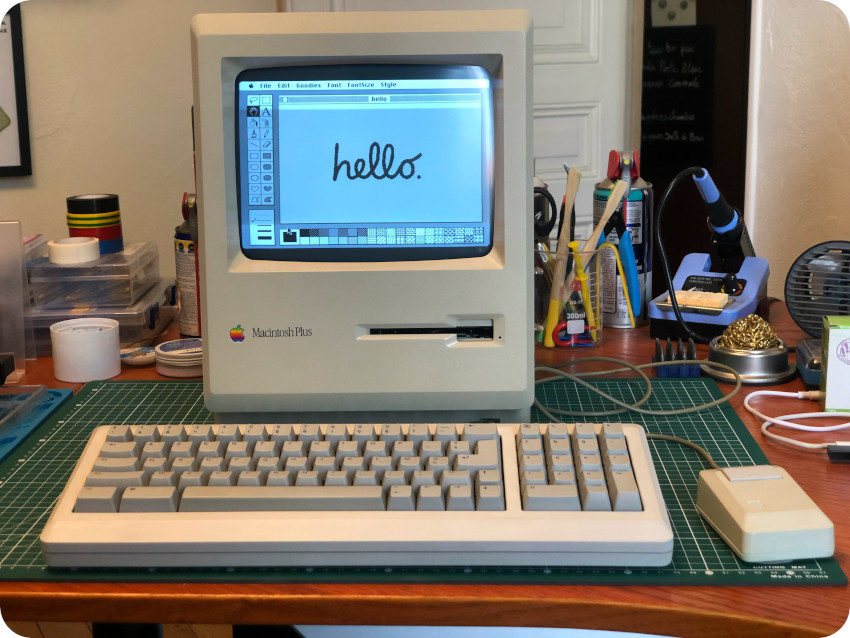
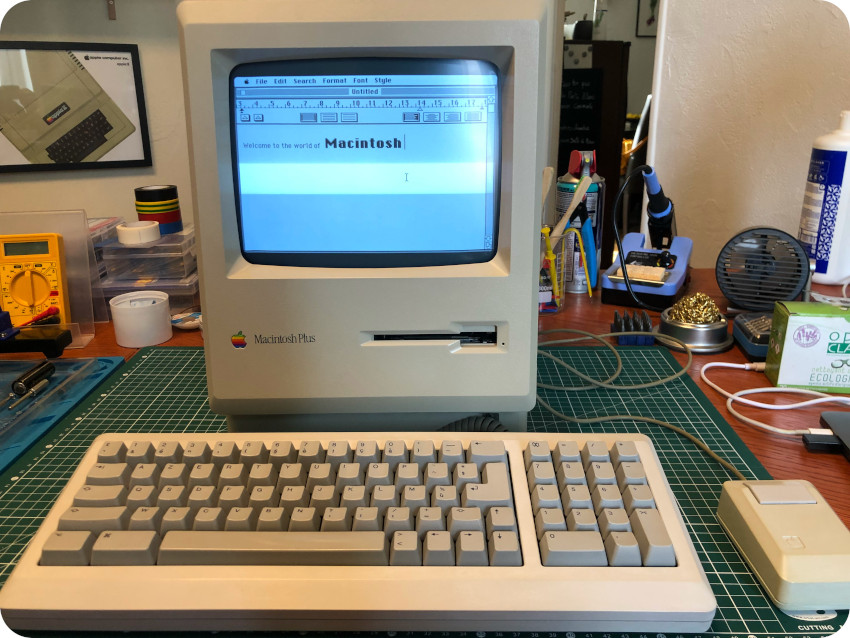
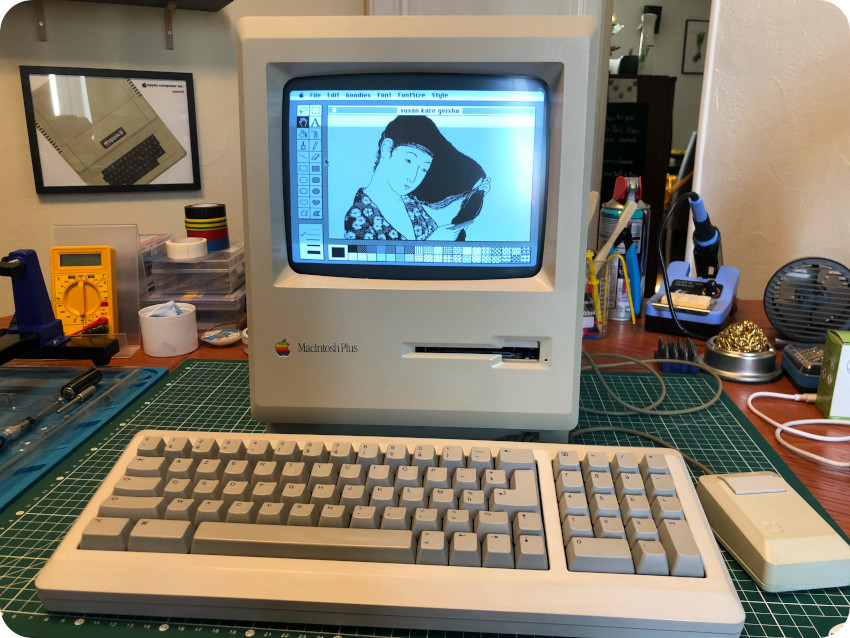
I couldn’t resists re-enacting this iconic MacPaint “Hello” picture:
Then I launched MacWrite, testing the keyboard, with was perfectly working:
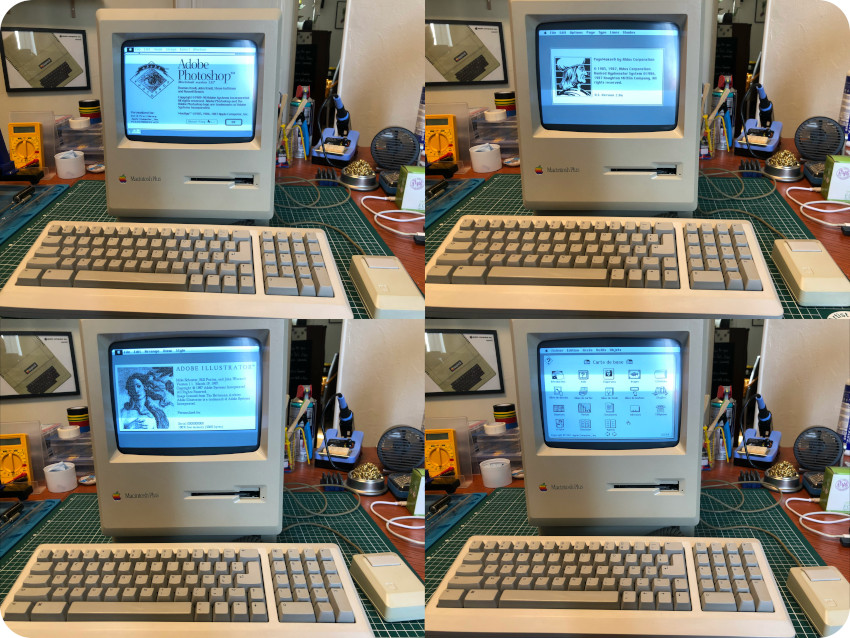
I couldn’t resist testing classics like Adobe PhotoShop 1.0.7, Aldus PageMaker 2.0a, Adobe Illustrator 1.1 and, of course, HyperCard 1.1:
Some of them – like SoftPC, MS Quickbasic or Maple V release 4 – would no run or would even crash the system, mostly for lack of RAM or because of incompatibility with a too early OS version.
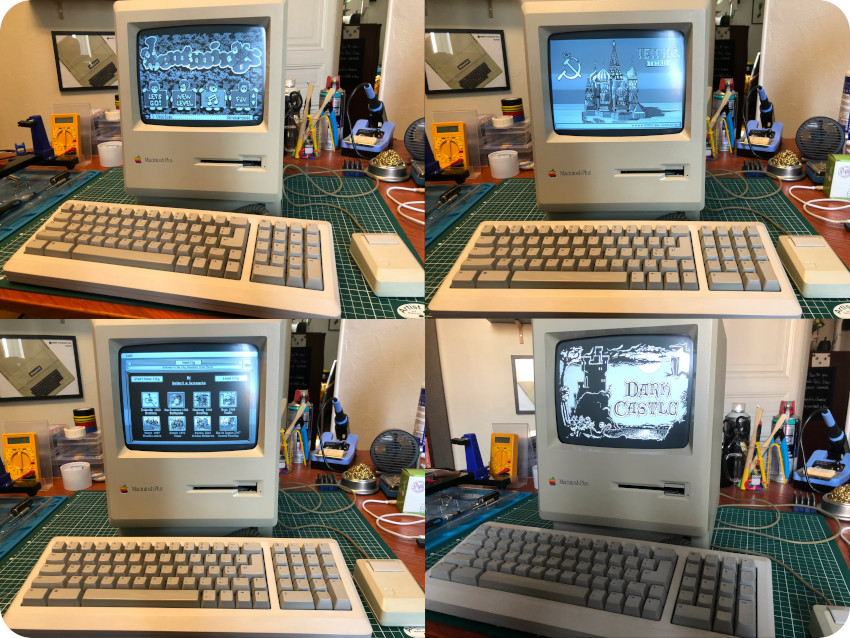
I tried a few games (and this way, also tested the sound, which was fine), such as Lemmings, Tetris, SimCity, Dark Castle … Fun !
By some weird coincidences, there was at the very same time an exposition dedicated to Susan Kare‘s artwork, few blocks away from where I live:
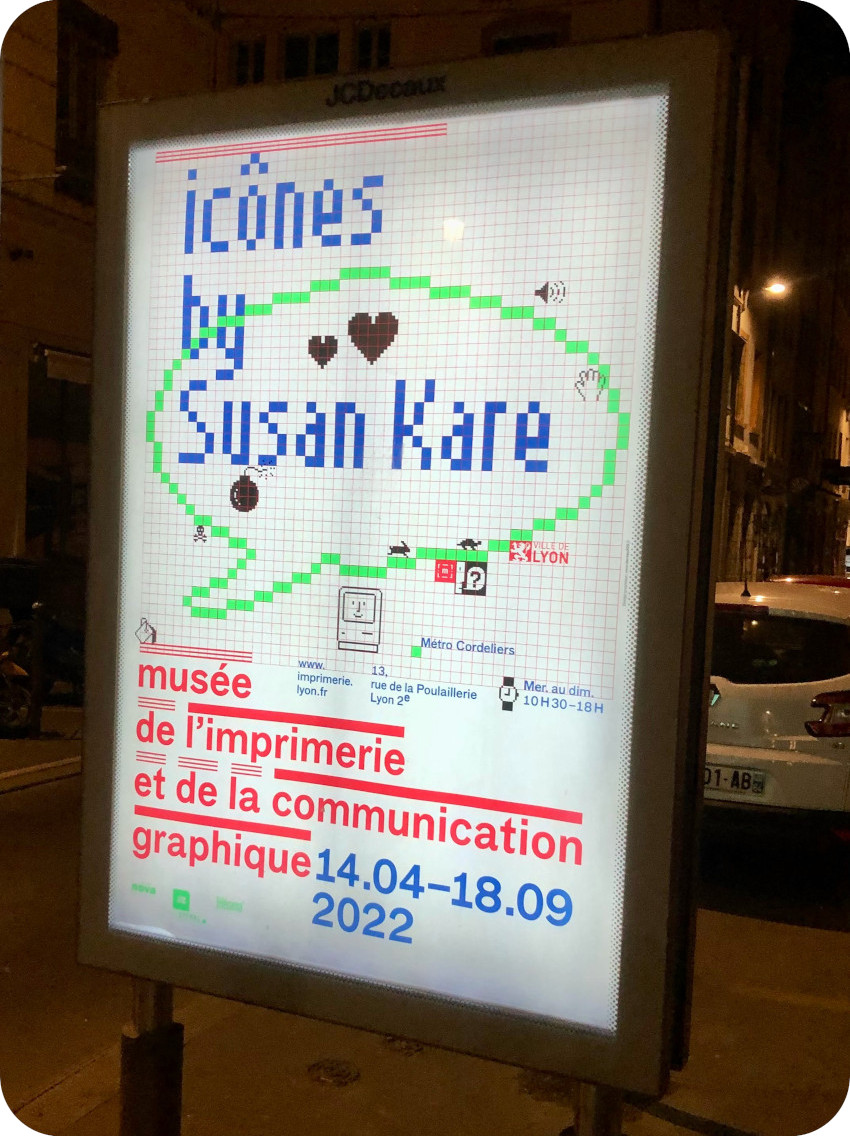
As a tribute to her incredible talent, I had the moral obligation to load one of here famous pixel artwork:
Next steps
Boy, that was a long journey, with many mistakes. I learned a lot. All in all, it took me about 2 months. I am still ashamed of the horrible retrobrighting failure for the mouse and the fact that I had to paint it’s button as a last resort.
In the end, though, I am now the proud owner of a working Mac Plus, in much better shape, running fine the French version of MacOS 6, modded for SCSI power termination and using this very nice BlueSCSI hardware with an microSD Card filled with old times apps and games. I am quite happy !
There is still much work to do. First, there is the floppy disk drive. I should:
- Buy a 3D-printed version of the broken gear. This can be easily found online, and it is not expensive

- Checkout the drive itself, its ribbon and the IWM chip
Then, there is the flyback transformer. In the end, it seems fine (no discharge, no hissing sound, no ozone smell, screen working perfectly). But, still, I am worried about the lack of coating. I’ll may be experimenting with this one, which can by bought online:
 Finally, I will eventually take care of the capacitors, and more specifically, changing the RIFA caps.
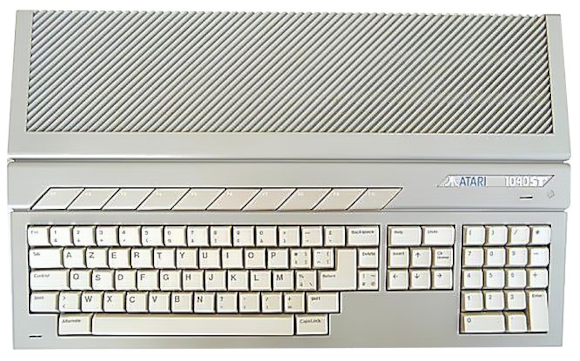
Meanwhile, I am hunting online for an Atari 1040 STF or STE …
Acknowledgements and links
During these months, I learned a lot on classic Macintoshes. I am deeply indebted to the retro-computing community. Here are a few thanks and links:
Emulation:
- Basilisk II: https://basilisk.cebix.net/, https://www.emaculation.com/doku.php/basilisk_ii
- SheepShaver: https://sheepshaver.cebix.net/, https://www.emaculation.com/doku.php/sheepshaver
Hardware:
- BlueSCSI: https://github.com/erichelgeson/BlueSCSI
- OneGeekArmy: https://bluescsi.onegeekarmy.eu/
Communities:
- Open Retro SCSI on Discord: https://discord.com/invite/GKcvtgU7P9
- 68kMLA: https://68kmla.org/bb/index.php
- MARCHintosh: https://marchintosh.com/
- Linux/mac68k: http://www.mac.linux-m68k.org/devel/plushw.php
YouTubers:
- Amateur Vintage Electronics: https://www.youtube.com/c/AmateurVintageElectronics
- JDW: https://www.youtube.com/c/JDW11
- Branchus Creations: https://www.youtube.com/c/BranchusCreations
- Adrian’s Digital Basement: https://www.youtube.com/c/adriansdigitalbasement
- Ron’s Computer Videos: https://www.youtube.com/user/Tyrantulas
- Mr Lurch’s Things: https://www.youtube.com/c/MrLurchsThings
Software:
- Macintosh Garden: https://macintoshgarden.org/
- Macintosh Repository: https://www.macintoshrepository.org/
- WinWorld: https://winworldpc.com/product/mac-os-0-6/twiggy-pre-release
Books:
- Larry Pina‘s Macintosh Repair & Upgrade Secrets
- Larry Pina’s The Dead Mac Scrolls
And many, many others.
Nice read, thanks for posting.
This was an absolute joy to read. I was raised on this and have been planning for a while on restoring a used one and this was the push I needed. Thanks.
System 6 boots so fast !
This post was incredibly helpful.
My father is giving me his original 1987 Mac Plus with many accessories and 4MB RAM installed. It worked when it was put away in a climate-controlled space, quite a few years ago. Still, I’m going to open it up and give it a thorough looking over before I attempt to power it up. Also ordered a BlueSCSI device, rather than think that Dad’s original Apple HD20 will work.
So, thank you for all the photos and description! Also, all the links. I’m certain I will be referring back here again, when I get the Mac home.