Since our previous post, the touchscreen and the stand I ordered at Swag shop were delivered (this morning actually). It is now time for an unboxing and a first setup !
The unboxing
Two packages were sent via Chronopost:
- A first one – a very sober white box with no label – containing the 7″ touchscreen from element14
- A second one – a smaller brown box – with the black stand from Pimoroni
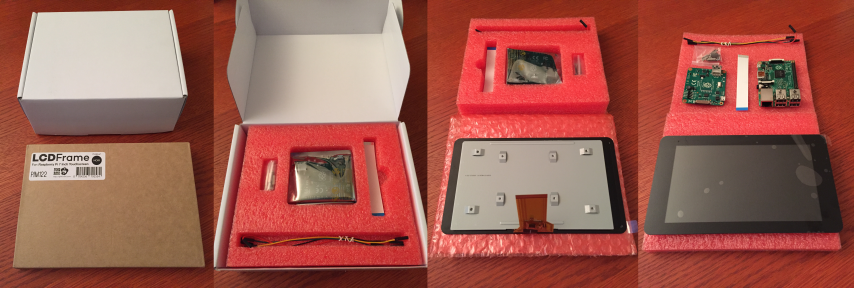
Let’s start with the 7″ touchscreen. The package is composed of :
- a 7″ touchscreen display
- an adapter board
- a white DSI ribbon cable
- a set of 4 jumper wires
- a set of 4 screws and a set of 4 stand-offs
The finishing of the touchscreen seems to be quite good. It feels solid and is a little heavier than I thought it would be (when compared to the weight of a smartphone for example). Yet, fully assembled (including the stand and the raspberry pi itself), it weights about 260g. The screen is protected by a plastic film cover.
There is no instruction provided. You are on your own, with is not unusual for a DIY electronic set. Constructing the kit is actually easy, and one can follow online instructions from Element14.
During all the whole construction process, I kept the plastic film cover on and I sat the screen on a styrofoam to avoid any dammage.
As a first step, one has to connect the wide orange display ribbon cable from the touchscreen to the back of the adapter board. This ribbon seems very fragile, so you’ll have be very gentle with it. First, one has to pull the small clamp, then push the ribbon in and push back the clamp to secure the connection.
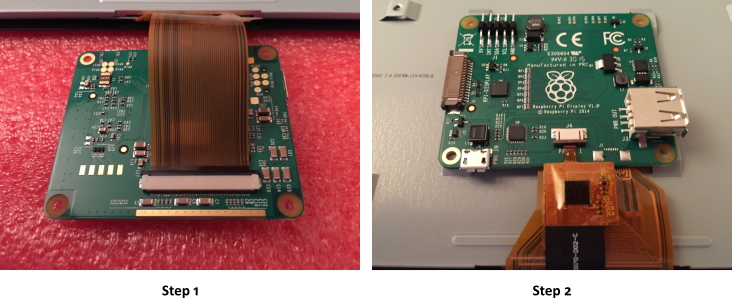
For the second step, one has to flip the board and connect the smaller orange ribbon cable to the connector on the top of the adapter board.
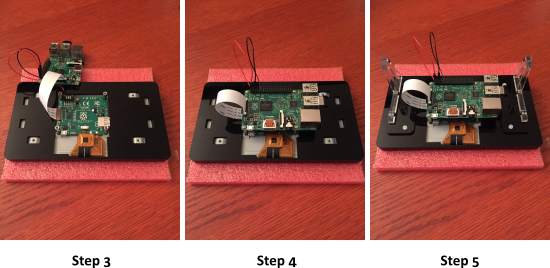
The third step is quite easy: fixing the board to the screen with the four spacers.
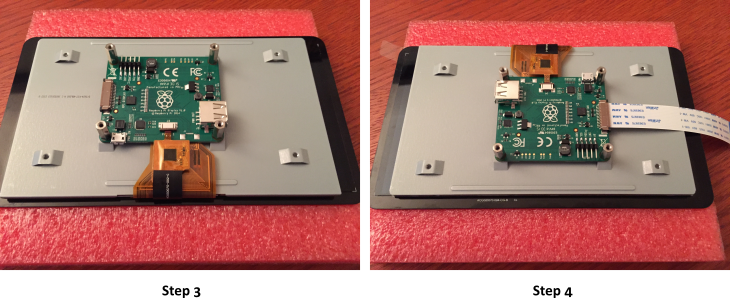
For the fourth step, turn the touchscreen 180° and connect the white DSI ribbon cable to its connector on the side of the board (as shown on the above picture).
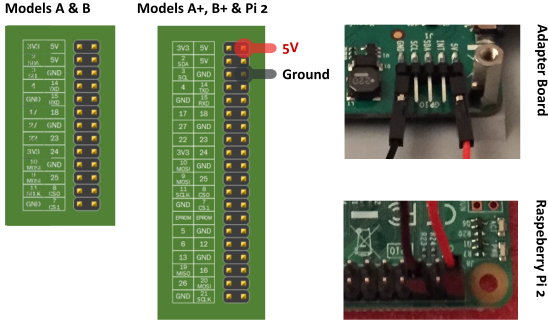
The next step is connecting the jumper wires from the Raspberry Pi’s GPIO to the adapter board. The idea behind this connection is to share a same power supply (one can also power the display and the touchscreen separately). Only two jumper wires are needed to connect 5V and GND from the adapter board to the Raspberry Pi (pins 2 and 6) :
Once the jumper wires are connected, you can sit the Raspberry Pi on top of the adpater board and mount it to the 4 spacers with the provided screws:
The last step is to connect the white DSI ribbon to the display connector on the side of the Raspberry Pi. And … we’re done. A piece of cake^H^H^H^H Pi(e) !
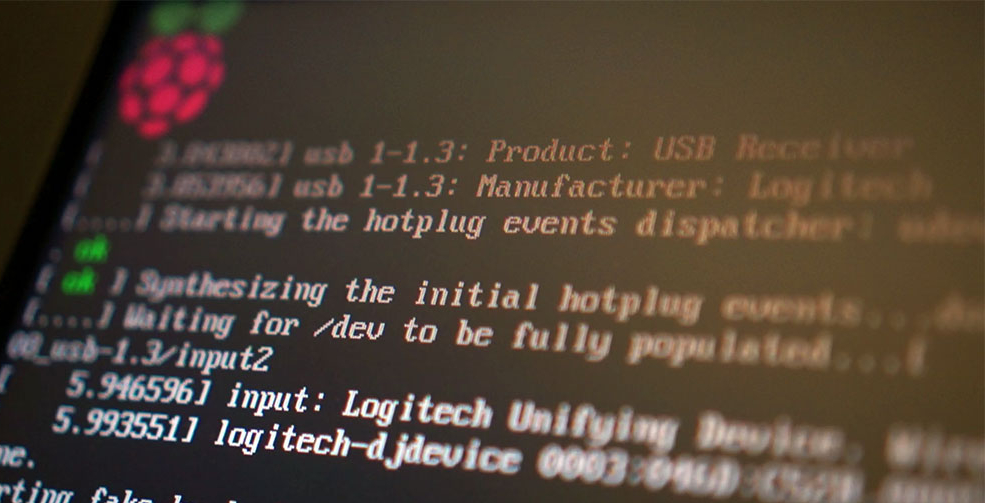
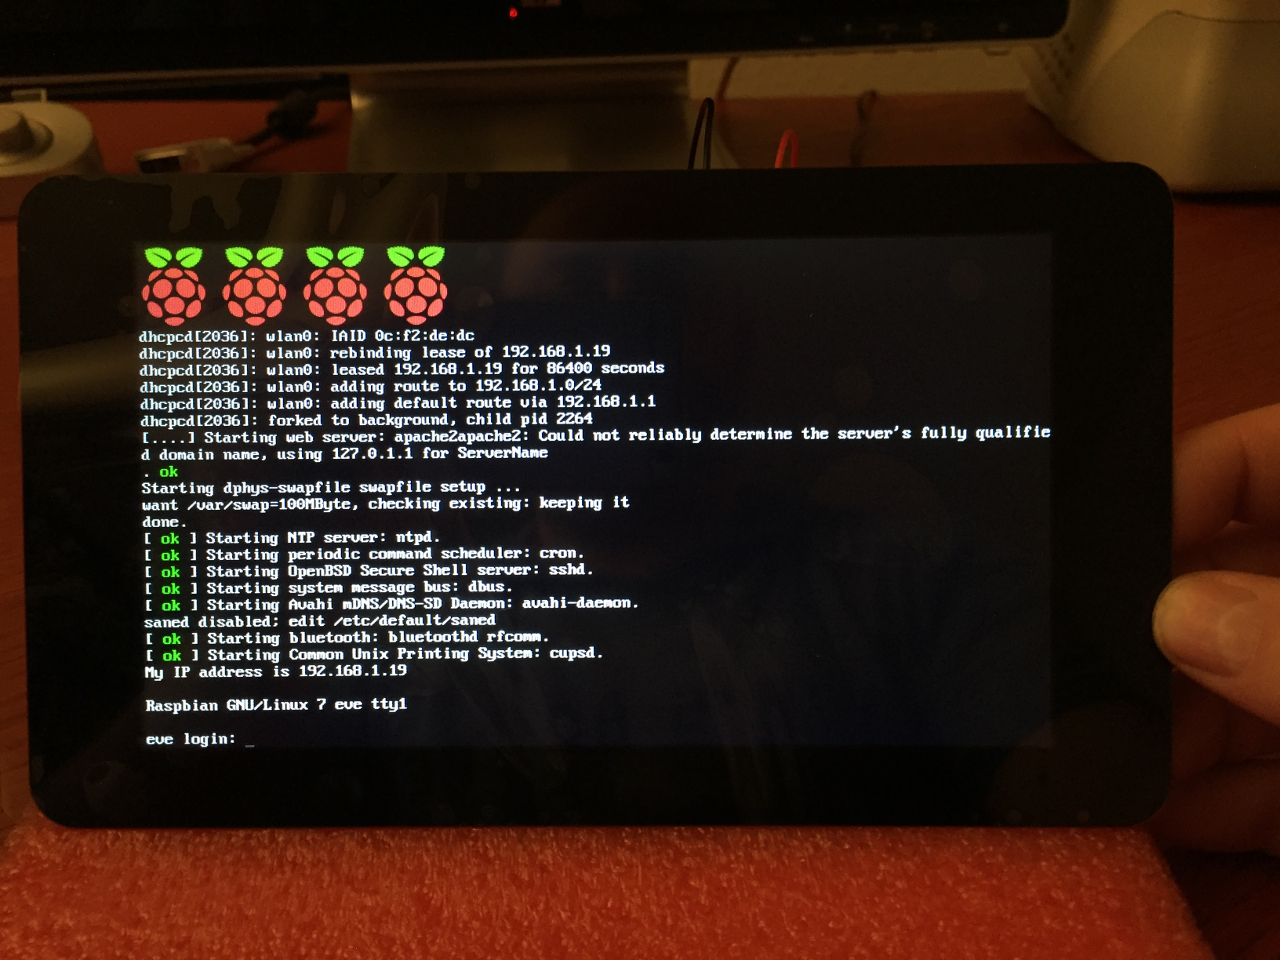
I was at first a little worried about the power supply. I used an ordinary power supply for Raspberry Pi from Element14. I was wondering whether it could draw enough current for both the Pi and its touchscreen. And it turned out, yes :
Good !
The stand
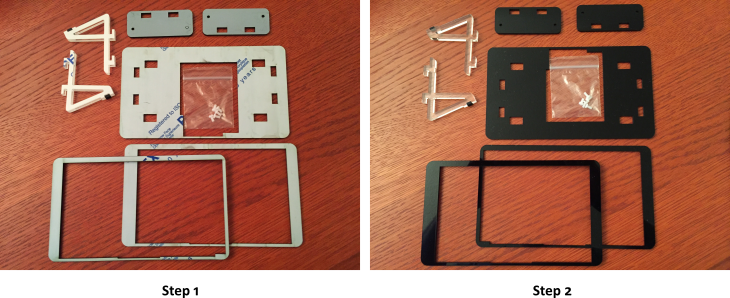
The black stand from Pimoroni came with a nice instruction sheet. The first step is to remove the protective film from both sides of all the pieces:
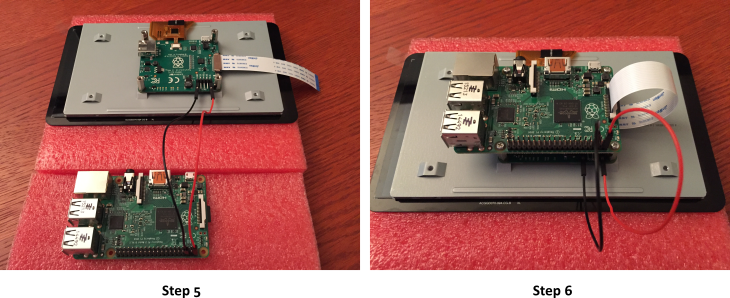
For the next step, place the touchscreen face down on a styrofoam and stack up the frames on top of it. To do this, one has actually to unscrew the Raspberry Pi from the adapter board (step 3), lay the frames and screw the Raspberry Pi back (step 4).
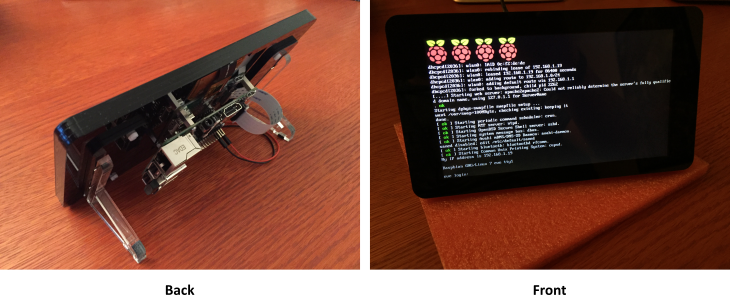
For the fifth step, you’ll have to align the locking stand plates over the rectangular cutouts, insert the stands into these cutouts, slide the locking stand plates upwards and screw in the 4 provided nylon bolt until the stands are secured. And that’s it !
Testing the Touchscreen
Well … actually that wasn’t it ! Because when I powered up the Raspberry Pi, it appeared (unlike the above picture which was taken after I found a solution) the display was … upside down.
So I dug into the documentation and found the DISPLAY_ROTATE=2 option accessible from /boot/config.txt (the BIOS-like options for Raspberry Pi):
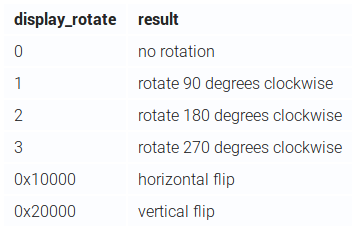
At first, it looked like it did the trick. The screen was rotated 180°, but when I fired up X.org, even if the display wasn’t upside down, the touch events were in fact inverted: a touch on the right top corner was interpreted by a touch on the left bottom corner. Bummer…
I tried to mess up with options from xrandr … with no luck. Then I found the lcd_rotate=2 option in this Raspberry Pi forum thread.
And that did it !
Here is a very short video (sorry it is quite late) showing a crude implementation of E.V.E’s interfaces I sketched up last week:
There is still a long road ahead, but things are coming along nicely.